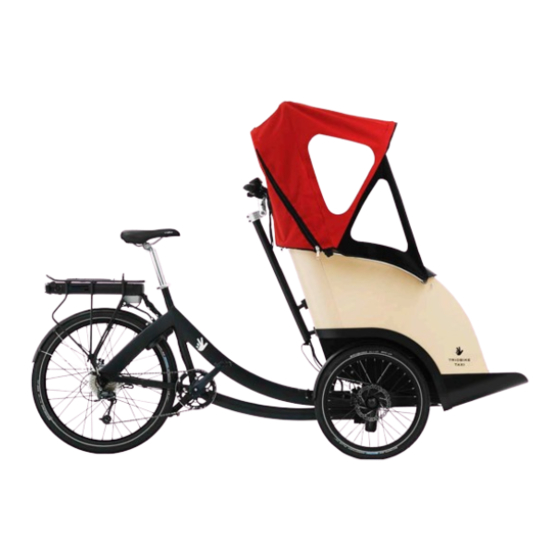
TRIOBIKE Taxi User Manual
Hide thumbs
Also See for Taxi:
- Original instructions manual (22 pages) ,
- Original instructions manual (22 pages)
Table of Contents
Advertisement
Advertisement
Table of Contents

Subscribe to Our Youtube Channel
Related Manuals for TRIOBIKE Taxi


Summary of Contents for TRIOBIKE Taxi
- Page 1 EST. 2004 - COPENHAGEN...
- Page 2 Our customer service department is dedicated to your satisfaction with Triobike and its products. If you have questions or need advice regarding assembly, parts, performance, or returns, please contact the experts at Triobike.
- Page 5 TRIOBIKE is a way of looking at the world where you choose to be free and out-going. You choose to be open to life. Triobike lets you go where cars can not – through green parks and down charming side-streets, breathing healthy air with happy kids.
-
Page 6: Table Of Contents
index ABOUT THIS MANUAL REMINDER WARNINGS WARRANTY GENERAL SAFETY GENERAL BIKE SAFETY PRACTICE WET WEATHER ROAD CONDITIONS NIGHT RIDING HILL TECHNIQUE CORNERING TECHNIQUE FRONT BOX ASSEMBLING THE BIKE INSTRUCTIONS QUICK RELEASE SEAT CLAMP HANDLEBAR ELECTRIC SYSTEM GEARS PARKING LOCK REMOVABLE BOTTOM PLATE SEAT BELT BLANKET HOOD... -
Page 8: About This Manual
about this manual It is important that you understand your new bicycle. By reading this manual before you go out on your first ride, you’ll know how to get better performance, comfort, and enjoyment from your new bicycle. It is also important that your first ride on your new bicycle is in a controlled environment, away from cars, obstacles and other cyclists. -
Page 9: Reminder
reminder All persons assembling, using, and maintaining the bicycle must read and understand the safety warnings and operating instructions in this manual before using the bicycle. It is the responsibility of the user to ensure the bicycle is properly maintained and in proper operating condition. Doing so will reduce the risk of injury. -
Page 10: Warnings
warnings DO NOT INSTALL ANY KIND OF ADDITIONAL ELECTRIC MOTOR OR INTERNAL COMBUSTION ENGINE TO THE BICYCLE. ADAPTING A BICYCLE IN THIS MANNER POSES AN EXTREME SAFETY RISK TO RIDER AND COULD RESULT IN LOSS OF CONTROL. INABILITY TO SAFELY REACH THE HANDLEBARS AND DISMOUNT THE BICYCLE MAY RESULT IN LOSS OF CONTROL OF THE BICYCLE. -
Page 12: General Safety
-Never endanger yourself or others by reckless riding. -The usage of bicycles or any accessories such as lamps, bells etc. is the user’s own responsibility, and TRIOBIKE cannot be held responsible for any damage, accidents, personal injury or fines caused by the usage of... -
Page 13: Warranty
-Familiarize yourself with all the bicycle’s features before riding. -Practice gear shifts, braking, and the use of the electric system. -Always ride defensively in a predictable, straight line. -Never ride against traffic. -Expect the unexpected (e.g., opening car doors or cars backing out of concealed driveways). -
Page 14: Wet Weather
-Obey the traffic laws (e.g., stopping at a red light or stop sign, giving way to pedestrians). -Wear proper riding attire, reflective if possible, and avoid open toeshoes. -Do not use items that may restrict your hearing and vision. -To maximize visibility, we suggest to ride the bike with folded hood. WET WEATHER -When riding in wet weather always use safety lights to enhance visibility. -
Page 15: Road Conditions
ROAD CONDITIONS -This bike is for on-road use only. Do not use the bike off-road or on rough terrain. -Be aware of road conditions. Concentrate on the path ahead. -Avoid pot holes, gravel, wet road markings, oil, curbs, speed bumps, drain grates and other obstacles. -
Page 16: Hill Technique
-Do not exceed a comfortable speed; maintain control and take additional care. -Braking will require additional distance. Initiate braking slowly and earlier than usual. Please consider that a fully loaded taxi bike can reach 250 Kg and this will heavily effect the braking distance. CORNERING TECHNIQUE -Brake slightly before cornering and prepare to lean your body into the corner. -
Page 17: Front Box
FRONT BOX -When loading and unloading passengers on the front box, be sure that the parking lock is activated. -Load and unload only 1 passenger at a time. -Don't step or stand on the front footerst since this will make the bike tip. The footrest is meant only to hold the feet of the passengers when they’re already sitting on the seat. -
Page 18: Assembling The Bike
assembling the bike 1- Unscrew the 6 M8 bolts from the front of the bike frame. - Page 19 2- Place the box on the front metal frame, open the front lid and place 4 M8 bolts. Close the lid and place 2 M8 bolt in the footrest holes. Place the nuts under the base WITHOUT TIGHTING.
- Page 20 3- Mount the front light brackets using the front bolts and the nuts.
- Page 21 4- Tight all the 6 bolts inserted before, starting from the front.
- Page 22 5- Unscrew the 4 M6 bolts-nuts you find on the backrest.
- Page 23 6- Mount the handlebar using the 4 M6 bolts (the ones with washers on the top, the ones without on the bottom) + 4 M6 nuts (bolt outside, nuts inside). Seatbelts brackets have to be placed between the nuts and the metal plate.
- Page 24 7- Firmly tight the 4 M6 bolts. The handlebar has to be stable.
- Page 25 8- Install the Velcro stripes for the cushions and place them in the right position.
-
Page 26: Instructions
instructions QUICK RELEASE SEAT CLAMP -Unlock the quick-release lever and adjust the seat height up or down until the rider feels that he/she has control of the bicycle and are comfortable. IMPORTANT: be sure the minimum insertion marks do not go past the top of the seat clamp and are not visible. - Page 27 -Try to close the quick-release lever. If it closes easily, open it up and tighten the adjustment nut further. If it’s too difficult to close, open the quick release lever up and loosen the adjustment nut a little and try again. DO NOT ATTEMPT TO TIGHTEN BY TURNING THE QUICK-RELEASE LEVER.
-
Page 28: Handlebar
HANDLEBAR -Using a 6 mm Allen wrench loosen the bolt at the front of the stem. IMPORTANT: Do not loosen the bolts on the side of the stem. -Grasp the stem of the handlebar and rotate to the desired angle. -Re-tighten the handlebar bolt at the front of the stem and check the handlebar is securely attached and cannot move. -
Page 29: Electric System
YES! ELECTRIC SYSTEM Triobike taxi features a pedal-assist electric drive system manufactured by Promovec: please carefully read its manual. -Rotate the key on the battery case to the right: the rear light should switch on when the system is active. -
Page 30: Gears
GEARS The rear shifter is placed on the right handlebar and has an indicator that reads either low or high or a series of number from 1 and up. First gears are used for slower riding, hill climbing, or to allow for easier peddling. It is recommended to start off in this gear and move through the gears as speed increases as needed, or comfortable. -
Page 31: Parking Lock
PARKING LOCK LOCK -Press the LEFT brake lever IN. -Rotate the small lever to the left. UNLOCK -Press the LEFT brake lever IN. -Rotate the small lever to the right. -
Page 32: Removable Bottom Plate
REMOVABLE BOTTOM PLATE -Remove the footrest middle part -Drive the bike all the way to the passenger, who easily can sit down on the seat. This gives and easy entry and exit. The idea is the same as in a wheelchair. -
Page 33: Seat Belt
FASTEN THE SEATBELT -Hold the latch and pull the seat belt across the body without twisting the webbing. -Insert the latch into the buckle. Listen for a click. -Tug on the seat belt latch to make sure the belt is securely fastened. RELEASE THE SEATBELT -Press the orange button on the buckle to release the latch. - Page 34 SHORTEN/LENGTHEN THE SEAT BELT -Turn the adjustable latch at a right angle to the webbing and pull away from the latch, using the lower webbing strap. -To shorten, pull the top webbing strap directly away from the adjustable latch. -If needed for only one passenger of larger size, insert the latch from the left seat belt into the buckle of the right seat belt.
-
Page 35: Blanket
BLANKET -Attach the two lower corner elastic straps on the blanket to the nut below each mudguard. Make sure the blanket covers the edge of the bottom plate. -Attach the two upper corner straps on the blanket to the nut, next to the front rail supports. -
Page 36: Hood
HOOD UNFOLDING THE HOOD -Loosen the black screw handles on each rail. -Slide the screw handles on each rail towards the handlebar, while unfolding the hood. The sliders connected to the handles should touch the rear rail supports. -Fasten the screw handles again at the end of the rail, closest to the handlebar. - Page 37 FOLDING THE HOOD -Detach the Velcro strip from the front rail support. -Unzip the zippers on each back corner of the hood. -Loosen the black screw handles on each rail. -Slide the screw handles on each rail towards the opposite end of handlebar, while folding the hood.
-
Page 38: General Specifications
general specifications FRAME: aluminium 7005 RAIN PROTECTION: waterproof blanket and hood BOX: beech plywood + aluminium E-SYSTEM: Promovec 250W - geared BATTERY: Li-Ion cells, 36V - 490 Wh REAR WHEEL: 26” E-SYSTEM WARRANTY: 3 years FRONT WHEELS: 20” OVERALL DIMENSIONS: BRAKES: Tektro hydraulic disc brakes on front, Shimano LENGTH: 225 cm hydraulic disc brake on rear... -
Page 39: Warranty
The bicycles are intended to be used for city biking. TRIOBIKE shall not be held responsible for any accidents, injury, losses or damage caused by use of the bicycle, being that of responsibility of the owner. -
Page 40: Maintenance
maintenance GENERAL ADVISE Please remember to have your first check & fine tune after 3 months. Hereafter we recommend a complete service and fine tuning of your bike every year/2000 km. Please consultant your local dealer or local shop. For specific control point for each service contact your local bike shop - this bike must be serviced only by trained and quilified bike mechanic. - Page 41 operation year/km dealer stamp checklist brakes grears 3 months bearings check spokes brakes grears bearings 1 year battery status 2000 km tires check 1240 miles chain spokes brakes grears 2 years bearings 4000 km battery status 2480 miles tires check chain spokes brakes...
-
Page 42: Safety Checklist
safety checklist Before every ride, it is important to carry out the following safety checks. Do not ride a bicycle that is not in proper working condition! ACCESSORIES -The reflectors are properly placed and not obscured. -All other fittings on the bike are properly and securely fastened, and functioning (e.g.: lights). - Page 43 CHAIN - The chain is oiled, clean and runs smoothly. CRANKS AND PEDALS - The pedals are securely tightened to the crank arms. - The crank arms are secured to the axle and are not bent. FRAME - The frame is not bent or broken. - The quick-release clamps are locked in place.
- Page 44 T R IOB IK E A/ S · NYR O P S G AD E 6 , 16 02 C O PENH AG EN V - DE NMA RK W WW.T RI O B I K E .C O M - I NFO @ TRI O B I KE.C O M...
Need help?
Do you have a question about the Taxi and is the answer not in the manual?
Questions and answers