Table of Contents
Advertisement
Quick Links
Advertisement
Table of Contents

Related Manuals for TRIOBIKE TAXI


Summary of Contents for TRIOBIKE TAXI
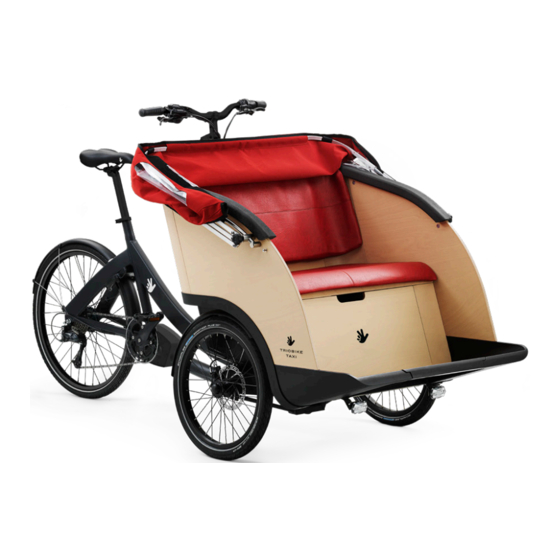
- Page 1 TAXI ORIGINAL INSTRUCTIONS ENGLISH V 2.7...
- Page 2 Our customer service department is dedicated to your satisfaction with Triobike and its products. If you have questions or need advice regarding assembly, parts, performance, or returns, please contact the experts at Triobike.
- Page 3 INDEX TITLE ABOUT THIS MANUAL REMINDER WARNINGS GENERAL SAFETY ASSEMBLING THE BIKE MOUNTING THE BATTERY (MID DRIVE SYSTEM) SAFETY CHECKLIST INSTRUCTIONS QUICK RELEASE SEAT CLAMP HANDLEBAR PARKING LOCK GEARS REAR DRIVE E-SYSTEM MID DRIVE E-SYSTEM REMOVABLE BOTTOM PLATE BLANKET SEAT BELT HOOD GENERAL SPECIFICATIONS WARRANTY...
-
Page 4: About This Manual
ABOUT THIS MANUAL WARNINGS It is important that you understand your new bicycle. By reading this manual before you go DO NOT INSTALL ANY KIND OF ADDITIONAL ELECTRIC MOTOR out on your first ride, you’ll know how to get better performance, comfort, and enjoyment OR INTERNAL COMBUSTION ENGINE TO THE BICYCLE. -
Page 5: General Safety
- The usage of bicycles or any accessories such as lamps, bells etc. is the user’s own - Do not use items that may restrict your hearing and vision. responsibility, and TRIOBIKE cannot be held responsible for any damage, accidents, personal injury or fines caused by the usage of these products. - Page 6 GENERAL SAFETY GENERAL SAFETY WET WEATHER NIGHT RIDING - When riding in wet weather always use safety lights to enhance visibility. - Do not ride the bike at night without lights on, both front and rear. - Exercise extreme caution when riding in wet conditions. - If using battery powered lights, make sure batteries are well charged.
-
Page 7: Cornering Technique
GENERAL SAFETY CORNERING TECHNIQUE - Brake slightly before cornering and prepare to lean your body into the corner. - Decrease your riding speed, avoid sudden braking and sharp turns. FRONT BOX - When loading and unloading passengers on the front box, be sure that the parking lock is activated. -
Page 8: Safety Checklist
SAFETY CHECKLIST Before every ride, it is important to carry out the following safety checks. Do not ride a CRANKS AND PEDALS bicycle that is not in proper working condition! - The pedals are securely tightened to the crank arms. - The crank arms are secured to the axle and are not bent. -
Page 9: Quick Release Seat Clamp
QUICK RELEASE SEAT CLAMP - Unlock the quick-release lever - Try to close the quick-release lever. If it closes easily, open it up and tighten the adjustment nut further. If it’s too difficult to close, open the quick release lever up and - Adjust the seat height up or down until the rider feels that he/she has control of the loosen the adjustment nut a little and try again. -
Page 10: Parking Lock
HANDLEBAR PARKING LOCK ADJUSTING THE STEM ANGLE LOCK - Using a 6 mm Allen wrench loosen the bolt at the front of the stem. - Press the LEFT brake lever IN. - Rotate the small lever to the left. IMPORTANT: do not loosen the bolts on the side of the stem. UNLOCK - Grasp the stem of the handlebar and rotate to the desired angle. - Page 11 GEAR INTERNAL SHIMANO GEARS ENVIOLO TRANSMISSION Shifting with the Enviolo system, while riding: The rear shifter is placed on the right handlebar and has an indicator that shows the - Shifting into low ratios for starting or climbing number of the engaged gear, from 1 to 5. - Using the Nfinity grip, rotate in the direction indicating more of a “hill”...
-
Page 12: Mid Drive E-System
MID DRIVE E-SYSTEM LIGHTS POWER MENU INCREASE SUPPORT LEVEL DECREASE SUPPORT LEVEL WALK ASSIST (PRESS FOR 2 SECS) USING THE SYSTEM (BROSE ALLROUND DISPLAY) FRONT BOX MOUNTED BATTERY - To turn on the system, press the power button. - Open the trunk, insert the battery in the specific dock placed inside the trunk and push it - Choose the desired assist level by pushing the “+/-”... -
Page 13: Removable Bottom Plate
REMOVABLE BOTTOM PLATE BLANKET LOADING PASSENGERS MOUNTING THE BLANKET - Remove the footrest middle part. - Place the blanket over the passengers. - Drive the bike all the way to the passenger, who easily can sit down on the seat. - On the bottom, attach the two lower corner elastic straps on the blanket to the nut below This gives and easy entry and exit. -
Page 14: Seat Belts
SEAT BELTS FASTEN THE SEATBELT SHORTEN/LENGTHEN THE SEAT BELT - Hold the latch and pull the seat belt across the body without twisting the webbing. - Turn the adjustable latch at a right angle to the webbing and pull away from the latch, using the lower webbing strap. - Page 15 HOOD UNFOLDING THE HOOD FOLDING THE HOOD - Loosen the black screw handles on each rail. - Unzip the zippers on each back corner of the hood. - Slide the screw handles on each rail towards the handlebar, while unfolding the hood. - Loosen the black screw handles on each rail.
-
Page 16: Specifications
SPECIFICATIONS Taxi Mid Drive SPECIFICATIONS build up components equipment FRAME: aluminium 7005 BRAKES: Tektro hydraulic disc brakes with parking lock RAIN PROTECTION: hood, waterproof blanket (optional) BOX: beech plywood + aluminium GEARS / TRANSMISSION: SEAT: 2 passengers seat with cushions Shimano Nexus 5 Steps e-bike / chain REAR WHEEL: 26”... - Page 17 DIMENSIONS DIMENSIONS 1257 2255 Hub O.L.D. dimensions in mm TRIOBIKE Taxi Date: 02-03-2021 Copyright© TRIOBIKE A/S 2021...
-
Page 18: Warranty
The bicycles are intended to be used for city biking. TRIOBIKE shall not be held responsible for any accidents, injury, losses or damage caused by use of the bicycle, being that of responsibility of the owner. -
Page 19: Maintenance
MAINTENANCE year/km operation dealer stamp checklist brakes gears 3 months bearings check spokes GENERAL ADVISE brakes gears Please remember to have your first check & fine tune after 3 months. Hereafter we bearings 1 year battery status recommend a complete service and fine tuning of your bike every year/2000 km. Please 2000 km tires check 1240 miles... -
Page 20: Ec Declaration Of Conformity
- meets all the provisions of the Directive 2004 / 108EG (Electromagnetic Compatibility); - meets the associated battery charger complies with all provisions of the Directive 2006/95 / EC (Low Voltage). Triobike A/S Copenhagen, 4 January 2019 Sammy Eisinger (managing director) Copyright© Triobike A/S 2021. All Rights Reserved. - Page 21 TRIOBIKE A/S Gammel Kongevej 80, 1850 Frederiksberg C - Denmark phone: +45 3670 0070 info@triobike.dk | www.triobike.com...
Need help?
Do you have a question about the TAXI and is the answer not in the manual?
Questions and answers