Tenda A301 User Manual
N300 mini wifi repeater
Hide thumbs
Also See for A301:
- User manual (69 pages) ,
- Quick start manual (5 pages) ,
- Quick installation manual (2 pages)
Table of Contents
Advertisement
Advertisement
Table of Contents

Related Manuals for Tenda A301


Summary of Contents for Tenda A301
- Page 1 N300 Mini WiFi Repeater A301 User Guide...
- Page 2 Copyright Statement © 2018 Shenzhen Tenda Technology Co., Ltd. All rights reserved. is a registered trademark legally held by Shenzhen Tenda Technology Co., Ltd. Other brand and product names mentioned herein are trademarks or registered trademarks of their respective holders. Copyright of the whole product as integration, including its accessories and software, belongs to Shenzhen Tenda Technology Co., Ltd.
-
Page 3: Acronyms And Abbreviations
Tenda reserves the right to make changes to the products without obligation to notify any person or organization of such revisions or changes. Tenda does not assume any liability that may occur due to the use or application of the product described herein. Every effort has been made in the preparation of this document to ensure accuracy of the contents, but all statements, information and recommendations in this document do not constitute a warranty of any kind, express or implied. -
Page 4: Technical Support
For more information, search this product model on our website at http://www.tendacn.com. Technical Support If you need more help, contact us by any of the following means. We will be glad to assist you as soon as possible. Canada: 1-888-998-8966 support@tenda.cn Hong Kong: 00852-81931998 Hotline Email http://www.tendacn.com... -
Page 5: Table Of Contents
Contents At a Glance ................................. 1 1.1 Overview ..............................1 1.2 Features ............................... 1 1.3 Know your device ............................2 1.3.1 LED ..............................2 1.3.2 Ports & Buttons ..........................3 1.3.3 Labels ..............................4 Quick Installation Guide ............................. 5 2.1 Extending the current WiFi coverage ......................5 2.2 Turn wired network to WiFi network ...................... -
Page 6: At A Glance
At a Glance Overview As a high-performance WiFi repeater, Tenda A301 operates on 2.4 GHz band and provides large WiFi coverage and strong signal strength. It works well with any WiFi routers and WiFi DSL modems available on the market. -
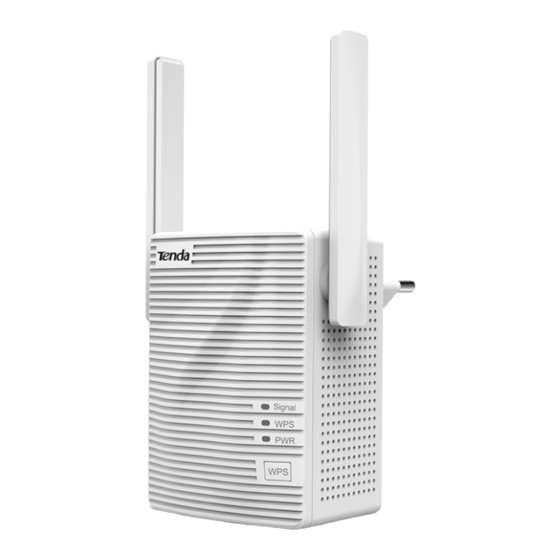
Page 7: Know Your Device
Know your device 1.3.1 LEDs Status Description The repeater has connected to your existing WiFi router/modem, and its position Solid blue is proper. Signal The repeater has connected to your existing WiFi router/modem, but its position Solid red is too far away from your router/modem. The repeater does not connect to your WiFi router/modem. -
Page 8: Ports & Buttons
In Repeater mode, this port allows a wired device, such as a desktop computer, to be connected to A301 to access the internet. − In AP mode, connecting this port to a router or a modem turns A301 into an AP to share your wireless network. -
Page 9: Labels
1.3.3 Labels The labels present SSID, login address and other information of the repeater. Label on the top of A301: Label at the back of A301:... -
Page 10: Quick Installation Guide
Quick Installation Guide Extending the current WiFi coverage Method 1: Extending your WiFi network using web UI (Recommend) Step 1 Plug the repeater into a power outlet near the router in the same room. Wait until the PWR LED turns solid blue. Step 2 Connect your WiFi device, such as a mobile phone or a laptop to the repeater’s WiFi network named Tenda_EXT. - Page 11 Example of configuration using a mobile phone Step 3 Start a web browser, and enter re.tenda.cn to log in to the web UI of the repeater. Step 4 Create a login password (recommend) and tap Next. Step 5 Select the WiFi network you want to extend, which is Tenda_01 in this example.
- Page 12 Step 6 Enter the password of the WiFi network you selected, change the SSID as needed, and tap Extend. Step 7 Wait until the Signal LED turns blue or red. Then, relocate the repeater following the on-screen tips for optimal connection quality.
- Page 13 Step 8 When the Signal LED turns solid blue, A301 is at a proper position. For better performance, keep the repeater away from products with strong interference, such as microwave, − Bluetooth devices, and refrigerator. Place the repeater at a spacious position without obstacles.
- Page 14 − SSID of the extended network: SSID you set, or your original SSID with a suffix _EXT. − WiFi password of the extended network: same as that of the upstream router/modem. You can connect your wired devices to the LAN port of the repeater to access the internet as well.
- Page 15 Method 2: Extending your WiFi network using WPS You can use this method if your router/modem has a WPS button, which may be indicated by . Otherwise, use Method 1: Extending your WiFi network using web UI. Step 1 Plug the repeater into a power outlet within 2 meters of your router/modem in the same room. Wait until the PWR LED turns solid blue.
- Page 16 For better performance, keep the repeater away from products with strong interference, such as microwave, − Bluetooth devices, and refrigerator. Place the repeater at a spacious position without obstacles. − ---End Connect your WiFi devices to the extended network to access the internet. −...
-
Page 17: Turn Wired Network To Wifi Network
A desktop computer can connect to the WiFi network only when it is installed with a wireless adapter. − The following describes the configuration steps using a mobile phone. − Step 4 Start a web browser, access re.tenda.cn. Step 5 Create a login password, and tap Next. - Page 18 Step 6 Tap Switch Mode at the lower-right corner. Step 7 Select AP mode, and tap OK.
- Page 19 Step 8 Change SSID (optional), create your WiFi password (recommend), and tap Done. Wait a moment until the progress bar is complete. ---End...
- Page 20 The Created Successfully! page appears. Connect your WiFi devices to the internet using the SSIDs shown on the page and WiFi password you set.
-
Page 21: More Functions
More Functions For better experience, a computer is recommended to manage your repeater. Status This page allows you to view connection status, attached devices, and blacklist etc. To access the page, choose Status. Internet connection status – Repeater Mode The following figure shows the wireless bridging status between the repeater and your existing WiFi router/modem in Repeater mode. - Page 22 Internet connection status – AP Mode The following figure shows the wired connection status between the repeater and your existing WiFi router/modem in AP mode. Internet connection status between the repeater and the upstream WiFi router/modem is shown using the following figures.
- Page 23 Add to Blacklist allows you to block unauthorized or unknown devices. Devices in the blacklist cannot connect to the WiFi network of the repeater. Blacklist :Clicking Blacklist enables you to view blocked devices. To unblock a device, click Remove. Devices removed from the Blacklist can connect to the repeater again.
-
Page 24: Re-Extend
Re-extend This module allows you to extend other WiFi networks. To access the page, choose Re-extend. This module is only available in Repeater mode. Procedure Step 1 Click Re-extend to enter the configuration page. Step 2 Select the WiFi network you want to re-extend. Step 3 Select the SSID from the list. - Page 25 Step 7 Connect your WiFi devices to the re-extended WiFi network using the SSIDs shown on the page. Step 8 Plug the repeater into an outlet halfway between the router and the WiFi dead zone. The location you choose must be within the range of your existing WiFi network. Wait about 1 minute.
- Page 26 For better performance, keep the repeater away from products with strong interference, such as microwave, − Bluetooth devices, and refrigerator. Place the repeater at a spacious position without obstacles. − ---End Enjoy your broader WiFi coverage.
-
Page 27: Wifi Settings
WiFi Settings This module allows you to change the repeater’s SSID and WiFi password, or to hide the repeater’s SSID. Change SSID & WiFi password Step 1 Choose WiFi Settings. Step 2 Change the SSID and WiFi Password as needed. Step 3 Click Save. -
Page 28: Operating Mode
Operating Mode This repeater can operate in the following two modes: Repeater Mode: to extend WiFi coverage of your existing WiFi network. By default, the repeater works in this mode. AP Mode: to convert a wired network to a WiFi network. To change the repeater’s operating mode, choose Operating Mode. - Page 29 Step 4 Click OK on the page that appears. Step 5 Wait a moment until the progress bar is complete. Step 6 Connect to the internet. Log in to the web UI of the repeater and choose Status. See the following figure:...
- Page 30 Use an Ethenet cable to connect the LAN port of your repeater to a LAN port of your existing WiFi router/modem. The following page appears. ---End Now, A301 works in AP mode.
-
Page 31: Administration
Administration This module allows you to set a login password, reboot or reset the repeater, export system logs, and upgrade the firmware. Set Login Password Step 1 Choose Administration. Step 2 In the Old Password text box, enter the current login password of the repeater. Step 3 In the New Password text box, set a new login password. - Page 32 You are recommended to reboot the repeater when the configured parameters do not take effect, or the repeater does not work properly. To reboot A301, choose Administration, click Reboot, and then click Reboot on the dialogue box that appears. Wait a moment until the progress bar is complete.
-
Page 33: Firmware Upgrade
Option 2: Step 1 Log in to the web UI of the repeater, choose Administration. Step 2 Click Reset and follow the onscreen instructions to perform operations. ---End Wait a moment until the progress bar is complete. Export Syslog System log records events happened since the repeater was started last time. You can export the system log if necessary. - Page 34 ---End Wait until the progress bar is complete. Log in to the web UI of the repeater, choose Administration and verify if the Current Firmware Version is the one you select to upgrade.
- Page 35 − Unplug the Ethernet cable connecting your computer to your existing router/modem. − If re.tenda.cn does not work the first time you set up the repeater, try accessing 192.168.0.254. − Reset the repeater, and try again. Q2: How to reset the repeater? A2: With the PWR LED solid on, press the RESET button down using a paper clip.
- Page 36 Default Parameter Values The following table lists the default parameter values of the repeater. Parameter Default Value Login address re.tenda.cn Login password None Operating mode Repeater mode 192.168.0.254 *After expanding the network of the WiFi router/modem successfully, IP address the repeater obtains an IP address automatically from the DHCP server of the upstream device.
- Page 37 Configure Your Computer (Example: Windows 7) Step 1 Click in the lower-right corner of the desktop and choose Open Network and Sharing Center. Step 2 Click Change adapter settings.
- Page 38 Step 3 Right-click Wireless Network Connection. Step 4 Click Property. Step 5 Double-click Internet Protocol Version 4 (TCP/IPv4).
- Page 39 Step 6 Select Obtain an IP address automatically and Obtain DNS server address automatically, and click Step 7 Click OK in the Internet Protocol Version 4(TCP/IPv4) Properties window. ---End...
- Page 40 Operating temperature: 0°C~40°C Operating humidity: (10-90)% RH, non-condensing RECYCLING This product bears the selective sorting symbol for Waste electrical and electronic equipment (WEEE). This means that this product must be handled pursuant to European directive 2012/19/EU in order to be recycled or dismantled to minimize its impact on the environment.
- Page 41 Declaration of Conformity Hereby, SHENZHEN TENDA TECHNOLOGY CO., LTD. declares that the radio equipment type A301 is in compliance with Directive 2014/53/EU. The full text of the EU declaration of conformity is available at the following internet address: http://www.tendacn.com/en/service/download-cata-101.html. Operate Frequency: 2.4G: EU/2400-2483.5MHz (CH1-CH13)
- Page 42 — Consult the dealer or an experienced radio/TV technician for help. This device is restricted to be used in the indoor. Operation is subject to the following two conditions: (1) this device may not cause harmful interference, and (2) this device must accept any interference received, including interference that may cause undesired operation. Radiation Exposure Statement This device complies with FCC radiation exposure limits set forth for an uncontrolled environment and it also complies with Part 15 of the FCC RF Rules.
Need help?
Do you have a question about the A301 and is the answer not in the manual?
Questions and answers