Table of Contents
Advertisement
Advertisement
Table of Contents

Related Manuals for Tenda A18


Summary of Contents for Tenda A18
- Page 1 Dual Band WiFi Repeater User Guide...
- Page 2 Copyright of the whole product as integration, including its accessories and software, belongs to Shenzhen Tenda Technology Co., Ltd. No part of this publication can be reproduced, transmitted, transcribed, stored in a retrieval system, or translated into any language in any form or by any means without the prior written permission of Shenzhen Tenda Technology Co., Ltd.
- Page 3 Thank you for choosing Tenda! Please read this user guide carefully before you start. Applicable models This user guide is applicable to the following models. A18 is used for illustrations here unless otherwise specified. The contained images and UI screenshots are subject to the actual products.
- Page 4 If you need more help, contact us by any of the following means. We will be glad to assist you as soon as possible. Global: (86) 755-27657180 (China Time Zone) United States: 1-800-570-5892 (Toll Free: 7 x 24 hours) Hotline Canada: 1-888-998-8966 (Toll Free: Mon - Fri 9 am - 6 pm PST) Hong Kong: 00852-81931998 support@tenda.cn Email...
-
Page 5: Table Of Contents
Contents At a glance ............................. 1 1.1 Overview ..........................1 1.2 Features ..........................1 1.3 Getting to know your device ....................2 Quick setup ........................... 5 2.1 Overview ..........................5 2.2 Extending the current WiFi coverage ..................5 2.3 Turning wired network to WiFi network ................14 Status ............................ - Page 6 A.1 Configuring your computer to obtain an IP address automatically (Example: Windows 7) 42 A.2 Default parameter values ....................45...
-
Page 7: At A Glance
At a glance Overview With two external omni-directional antennas, the repeater can provide larger WiFi coverage, as well as ultra-fast data rate. With the upgrade Setup Wizard, it only takes you three steps to configure your repeater, which is easy to use. It works well with mainstream WiFi routers available on the market. -
Page 8: Getting To Know Your Device
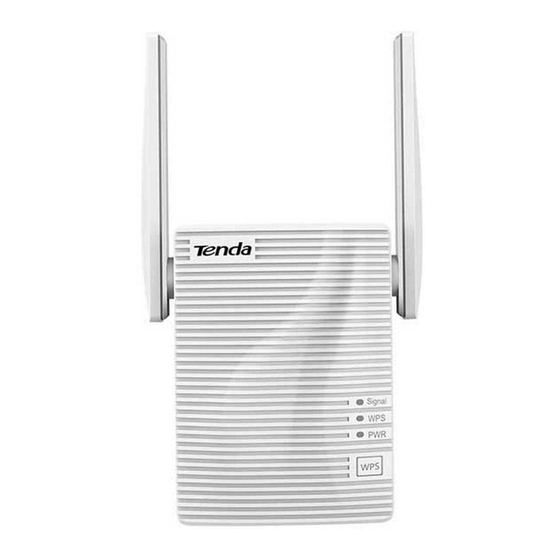
Getting to know your device 1.3.1 LED indicators (A18 is used for illustration) Status Description The repeater is connected to your existing WiFi router, and its position is Solid blue proper. Signal The repeater is connected to your existing WiFi router, but its position is too Solid red far away from your router. - Page 9 1.3.2 Ports & Buttons WPS button RESET LAN port button WPS button Press the WPS button down for 1 second to perform WPS negotiation, the WPS LED indicator blinks, and enable the WPS function of another device within 2 minutes to establish a WPS connection.
- Page 10 The labels present SSID, login address and other information of the repeater. Label on the top: Rear label of A18: WiFi Network Name (SSID)/SSID: It specifies the default wireless network name. Default Access: It is used to log in to the repeater.
-
Page 11: Quick Setup
Quick setup Overview The repeater supports 2 working modes: the Repeater mode and the AP mode. In Repeater mode, you can extend your existing WiFi network for broader WiFi coverage. While in AP mode, you can connect the repeater to a router through an Ethernet cable to convert the wired network to wireless one. - Page 12 Step 2 Connect your mobile phone to the repeater’s WiFi network named Tenda_EXT.
- Page 13 Tenda_EXT, and the Mobile Data (if any) function is disabled. Then manually start a web browser on your WiFi device, and visit re.tenda.cn in the address bar. If a computer is used, ensure that your computer has connected to the repeater’s WiFi network ...
- Page 14 Step 5 Select the WiFi network you want to extend, which is Tenda_01 in this example.
- Page 15 If the repeater cannot find the WiFi network of your router. Try the following solutions: Ensure that the WiFi network of your router is enabled and can be detected by your WiFi device. Tap Rescan, and wait a moment. Change the channel of your router, and try again.
- Page 16 For better performance: Place the repeater within the range of your existing WiFi network. Place it at a spacious position without obstacles. Keep it away from electronics with strong interference, such as microwave ovens, Bluetooth devices, and refrigerators. Adjust the antennas of the repeater upward and vertical to the ground.
- Page 17 You can connect your wired devices to the LAN port of the repeater to access the internet as well. If you want to modify the repeater’s SSID and WiFi password later, refer to Changing SSID & WiFi password. Method 2: Extending your WiFi network using WPS You can use this method if your router has a WPS button, which may be indicated by , or .
- Page 18 Step 2 Press the WPS button on the router, and then press the WPS button on the repeater within 2 minutes. Step 3 Wait until the Signal LED indicator turns on. If the Signal LED indicator does not turn on, use Method 1: Extending your WiFi network using web Step 4 When the repeater expands your existing WiFi network successfully, plug the repeater...
- Page 19 You can connect your wired devices to the LAN port of the repeater, or connect your WiFi devices to the extended network to access the internet. SSID of the extended network: your existing WiFi network with a suffix _EXT or −...
-
Page 20: Turning Wired Network To Wifi Network
Turning wired network to WiFi network Before you start, ensure that your WiFi router can access the internet. For better performance, keep the repeater away from products with strong interference, such as microwave, Bluetooth devices, and refrigerator. Place the repeater at a spacious position without obstacles. ... - Page 21 Step 5 Tap Switch Mode at the lower-right corner.
- Page 22 Step 6 Select AP mode, and tap OK. Step 7 Customize the SSID and WiFi password as needed, and tap Done.
- Page 23 Step 8 Wait a moment until the progress bar is complete. ---End The Created Successfully! page appears. Connect your WiFi devices to the internet using the SSIDs shown on the page and WiFi password you set.
-
Page 24: Status
Status A computer is recommended for management of your repeater. This chapter introduces how to: View internet connection status − View attached device(s) − Modify name(s) of attached device(s) − Block/Unblock unknown device(s) − To access the page, choose Status. -
Page 25: Veiwing Internet Connection Status
Veiwing internet connection status The internet connection status between the repeater and the existing WiFi router is shown as below: 2.4G Hz: Extended successfully both on 2.4 GHz and 5 GHz bands. The signal strength is indicated by percentage. 5GHz: Extended successfully either on 2.4 GHz or 5 GHz band. -
Page 26: Blacklist
Blacklist 3.3.1 Blocking unknown device(s) Configuration procedure Step 1 Choose Status > Attached Device(s) to access the configuration page. Step 2 Click Add to block unauthorized or unknown devices. ---End Devices in the blacklist cannot connect to the repeater’s WiFi network. Click Status > Blacklist to check the blocked devices. -
Page 27: Re-Extend
Re-extend If you need to use the repeater at another place, or if the wireless information (including SSID and/or WiFi password) of your existing router is modified, you can re-extend your repeater. To access the page, choose Re-extend. The repeater supports to re-extend: Only 2.4 GHz WiFi network ... - Page 28 Select the SSID from the list. If the WiFi network you want to extend is not on the list, you can try the following methods Click Ensure that your existing WiFi network is not hidden. Change the encryption type of the router to WPA-PSK or WPA2-PSK, and try again. ...
- Page 29 If the WiFi network you want to extend is not on the list, you can try the following methods Click Ensure that you existing WiFi network is not hidden. Change the encryption type of the router to WPA-PSK or WPA2-PSK, and try again. ...
- Page 30 Step 4 Wait until the Signal LED indicator lights blue or red, and the following page appears. Step 5 Plug the repeater into an outlet halfway between the router and the WiFi dead zone. The location you choose must be within the range of your existing WiFi network. Check the Signal LED indicator to see whether the repeater is at a proper position.
- Page 31 For better performance, keep the repeater away from products with strong interference, such as microwave, Bluetooth devices, and refrigerator. Place the repeater at a spacious position without obstacles. ---End You can connect your WiFi devices to the re-extended WiFi network using the SSIDs you set or the existing WiFi name with a suffix _EXT/_5GEXT.
-
Page 32: Wifi Settings
WiFi settings This module allows you to change the repeater’s SSID and WiFi password, or to hide the repeater’s SSID. To access the page, choose WiFi Settings. Parameter description Parameter Description SSID It specifies the wireless network name of the repeater. Password used for wireless network connection. -
Page 33: Changing Ssid & Wifi Password
Changing SSID & WiFi password Step 1 Choose WiFi Settings to enter the configuration page. Step 2 Change the SSID and WiFi Password of 2.4 GHZ and 5 GHz networks as needed. Step 3 Click Save. ---End To access the internet on a mobile device, you need to connect to the new SSID using the WiFi password you set. - Page 34 Scenario one: Connect mobile WiFi-enabled device to the hidden wireless network (Example: Android) Step 1 Tap Settings > WLAN on the smart phone. Step 2 Scroll down to the bottom, locate the Add network and tap it. Step 3 On the Add network page that appears: Enter the repeater’s SSID, which is W20E_EXT in this example.
- Page 35 Enter the repeater’s WiFi password, and tap ---- End Wait a moment. Your wireless device is connected to the repeater’s WiFi network successfully. Scenario two: Connect laptop or desktop computer installed with a wireless adapter to the hidden wireless network (Example: Windows 7) Step 1 Click the WiFi icon on the lower right corner.
- Page 36 Step 3 Enter the repeater’s SSID, which is W20E_EXT in this example, and click OK. Step 4 Enter the repeater’s WiFi password, which is 12345678 in this example, and click OK. ---- End Wait a moment. The computer is connected to the repeater successfully.
-
Page 37: Operating Mode
Operating mode Overview This repeater can operate in the following two modes: Repeater Mode: to extend WiFi coverage of your existing WiFi network. By default, the repeater works in this mode. AP Mode: to convert a wired network to a WiFi network. ... -
Page 38: Switching The Repeater From Repeater Mode To Ap Mode
Wait a moment until the progress bar is complete, and you will be redirected to the Login page. Step 6 Connect to the internet. Connect your management PC to a SSID of the repeater, start a web browser, and visit re.tenda.cn. The following figure appears. - Page 39 Use an Ethernet cable to connect the LAN port of your repeater to a LAN port of your existing WiFi router. The following page appears. ---End Now, the repeater works in AP mode. You can access the internet on your wireless devices by connecting the SSIDs of the repeater.
-
Page 40: Switching The Repeater From Ap Mode To Repeater Mode
Switching the repeater from AP mode to repeater mode Configurations (except SSID and WiFi password you set) will be cleared when you switch from AP mode to Repeater mode, and you need to configure your repeater again. Configuration procedure: Step 1 Choose Operating Mode to enter the configuration page. - Page 41 After you set it in repeater mode successfully, please remove the Ethernet cable between the repeater and your existing router.
-
Page 42: Administration
Administration This module allows you to set a login password, reboot or reset the repeater, export system logs, and upgrade the repeater. Setting login password To ensure network security, a complicated login password is recommended. A login password consisting of more types of characters, such as uppercase letters, lowercase letters, and special characters, has better security. - Page 43 Step 5 Click Save at the bottom of this page. ---End The system logs you out automatically. Enter the new password to log in to the web UI of the repeater.
-
Page 44: Rebooting The Repeater
Rebooting the repeater You are recommended to reboot the repeater when the configured parameters do not take effect, or the repeater does not work properly. Configuration procedure Step 1 Choose Administration to enter the configuration page. Step 2 Click Reboot. Step 3 Click Reboot on the pop-up window. -
Page 45: Resetting The Repeater
Resetting the repeater You are recommended to reset the repeater if you forget your login password, or you cannot locate the problem that interrupts your repeater’s WiFi network service. Resetting the repeater clears all configurations. You need to configure the repeater again. To reset the repeater, use either of the following methods: Method 1: With the PWR LED indicator solid on, hold the RESET button down using a paper clip, and release... -
Page 46: Exporting Syslog
Exporting syslog System log is used to record events happened when the repeater works. You can export the system log if necessary. Choose Administration to enter the configuration page, click Export Syslog to export system logs. A file named repeater system will be downloaded to your local computer. -
Page 47: Upgrading Firmware
Upgrading firmware To enable your repeater to upgrade successfully, ensure that the firmware used to upgrade is applicable to the repeater. During upgrade, do not power off the repeater. Configuration procedure: Step 1 Go to www.tendacn.com, download the latest firmware package to your local computer, and unzip the package. -
Page 48: Appendixes
Appendixes Configuring your computer to obtain an IP address automatically (Example: Windows 7) Step 1 Click in the lower-right corner of the desktop and choose Open Network and Sharing Center. - Page 49 Step 2 Click Change adapter settings. Step 3 Right-click Wireless Network Connection.
- Page 50 Step 4 Double-click Internet Protocol Version 4 (TCP/IPv4). Step 5 Select Obtain an IP address automatically and Obtain DNS server address automatically, and click OK. Step 6 Click OK in the Local Area Connection Properties window. ---End...
- Page 51 Default parameter values The following table lists the default parameter values of the repeater. Parameter A18&A15 Login address re.tenda.cn/192.168.0.254 Login password None Operating mode Repeater mode 192.168.0.254 IP address After expanding the network of the WiFi router successfully, the repeater obtains an IP address automatically from the DHCP server of the upstream device.
Need help?
Do you have a question about the A18 and is the answer not in the manual?
Questions and answers