Novatel OEM719 Installation And Operation Manual
Hide thumbs
Also See for OEM719:
- Installation and operation manual (235 pages) ,
- Manual (2 pages) ,
- Installation and operation manual (247 pages)
Table of Contents
Advertisement
Quick Links
Advertisement
Chapters
Table of Contents

Related Manuals for Novatel OEM719


Summary of Contents for Novatel OEM719
- Page 1 ® ® OEM7 SPAN Installation and Operation User Manual OM-20000170 v4 February 2018...
-
Page 2: Proprietary Notice
Information in this document is subject to change without notice and does not represent a com- mitment on the part of NovAtel Inc. The software described in this document is furnished under a licence agreement or non-disclosure agreement. The software may be used or copied only in accordance with the terms of the agreement. -
Page 3: Table Of Contents
Table of Contents Figures Tables Notices Receiver Card Customer Support Chapter 1 OEM7 SPAN Overview 1.1 Fundamentals of GNSS+INS 1.2 Models and Features 1.2.1 INS Options 1.2.2 IMU Grade 1.3 Related Documents and Information Chapter 2 SPAN Installation 2.1 OEM7 Receiver Card Installation 2.1.1 Selecting a GNSS Antenna 2.1.2 Choosing a Coaxial Cable 2.1.3 Mounting the GNSS Antenna... - Page 4 3.3.2 GNSS Configuration 3.3.3 INS Profiles 3.3.4 SPAN Configuration 3.4 Real-Time Operation 3.4.1 System Start-Up and Alignment Techniques 3.4.2 INS Seed / Fast INS Initialization 3.4.3 Navigation Mode 3.4.4 Data Collection 3.4.5 Lever Arm Calibration Routine 3.4.6 Body to Vehicle Frame Rotation Calibration Routine 3.4.7 Multi-Line Body to Vehicle Frame Rotation Calibration Routine 3.5 Synchronizing External Equipment 3.5.1 Configuring an Input Strobe...
- Page 5 A.3 IMU-FSAS A.3.1 IMU-FSAS Mechanical Drawings A.3.2 IMU-FSAS Performance A.3.3 IMU-FSAS Electrical and Environmental A.3.4 Interface Cable for IMU-FSAS A.3.5 IMU-FSAS Cable with Wheel Sensor A.4 IMU-HG1900 A.4.1 IMU-HG1900 Mechanical Drawings A.4.2 IMU-HG1900 Sensor Specifications A.4.3 IMU-HG1900 Electrical and Environmental A.4.4 IMU-HG1900 Cables A.5 IMU-IGM A.5.1 IMU-IGM Mechanical Drawings...
- Page 6 A.12.4 OEM-IMU-EG320N Interface Connector A.13 OEM-IMU-ISA-100C A.13.1 OEM-IMU-ISA-100C Mechanical Drawings A.13.2 OEM-IMU-ISA-100C Sensor Specifications A.13.3 OEM-IMU-ISA-100C Electrical and Environmental A.13.4 OEM-IMU-ISA-100C IMU to UIC Cable Assembly A.14 OEM-IMU-STIM300 A.14.1 OEM-IMU-STIM300 Mechanical Drawings A.14.2 OEM-IMU-STIM300 Sensor Specifications A.14.3 OEM-IMU-STIM300 Electrical and Environmental A.14.4 OEM-IMU-STIM300 Direct Connection A.14.5 STIM300 IMU-to-MIC Cable Assembly A.15 OEM-IMU-µIMU...
- Page 7 E.4 Re-Assemble the SPAN IMU Enclosure APPENDIX F Frequently Asked Questions APPENDIX F Importance of Antenna Selection APPENDIX G Replacement Parts for SPAN OEM7 SPAN Installation and Operation User Manual v4...
- Page 8 Figure 5: OEM-IMU-STIM300 Pin Out Figure 6: Basic Set Up – MIC in Stack Up Configuration Figure 7: Mount the MIC on the OEM719 Figure 8: Connect the ADIS IMU to the MIC (OEM Cable Kit: 01019007) Figure 9: Connect the HG1700 IMU to the MIC (OEM Cable Kit: 01018868)
- Page 9 Figures Figure 39: IMU-FSAS Top Dimensions Figure 40: IMU-FSAS Bottom Dimensions Figure 41: IMU-FSAS Side Dimensions Figure 42: IMU-FSAS Center of Navigation Figure 43: IMU-FSAS Interface Cable with Wheel Sensor Figure 44: IMU-HG1900 Dimensions Figure 45: IMU-HG1900 Center of Navigation Figure 46: IMU-IGM-A1 Dimensions Figure 47: IMU-IGM-S1 Dimensions Figure 48: IMU-IGM Interface Cable...
- Page 10 Figures Figure 79: µIMU Coordinate Axis Figure 80: µIMU to UIC Cable Assembly Figure 81: Universal IMU Enclosure Side Dimensions Figure 82: Universal IMU Enclosure Top/Bottom Dimensions Figure 83: Universal IMU Center of Navigation Figure 84: Universal IMU Frame Axis Figure 85: Universal IMU Enclosure Interface Cable Figure 86: MIC Top/Bottom Dimensions Figure 87: MIC Keep-Out Zone...
- Page 11 Figures Figure 119: Required Parts Figure 120: Bolts and Hex Key Figure 121: Lift Top Cover, Tube Body and 3 Ring Spacer Screws Figure 122: SPAN IMU Re-Assembly Figure 123: Attach Flex Cable Figure 124: Incorrect (Bowed) Flex Cable Installation Figure 125: Correct (Flat) Flex Cable Installation Figure 126: HG1700 SPAN IMU Figure 127: Required Parts...
- Page 12 Table 8: COM Port Recommendations Table 9: COM Port Recommendations Table 10: UIC Status LEDs Table 11: Additional IMU to PwrPak7 Connections Table 12: Kistler to NovAtel Wheel Sensor Cable Connections Table 13: IMU-IGM LEDs Table 14: IMU Enclosure LEDs Table 15: INS Profiles...
- Page 13 Tables Table 39: IMU-FSAS Environmental Specifications Table 40: IMU-FSAS Cable with Wheel Sensor Pinout Table 41: Connectors Table 42: Maximum Cable Length Table 43: IMU-HG1900 Physical Specifications Table 44: IMU-HG1900 IMU Performance Table 45: IMU-HG1900 Electrical Specifications Table 46: IMU-HG1900 Environmental Specifications Table 47: IMU-IGM-A1 Physical Specifications Table 48: IMU-IGM-S1 Physical Specifications Table 49: IMU-IGM Main Port Pinout...
- Page 14 Tables Table 79: IMU-ENC-LN200 IMU Performance Table 80: IMU-ENC-LN200C IMU Performance Table 81: IMU-ENC-LN200 Electrical Specifications Table 82: IMU-ENC-LN200 Environmental Specifications Table 83: IMU-µIMU-IC Physical Specifications Table 84: IMU-µIMU-IC IMU Performance Table 85: IMU-µIMU-IC Electrical Specifications Table 86: IMU-µIMU-IC Environmental Specifications Table 87: LN-200 IMU Physical Specifications Table 88: LN-200 IMU Performance Table 89: LN-200 Electrical Specifications...
- Page 15 Tables Table 119: HG1700-AG58 IMU Performance Table 120: HG1700-AG62 IMU Performance Table 121: LN200 IMU Performance Table 122: Universal IMU Enclosure Electrical Specifications Table 123: Universal IMU Enclosure Environmental Specifications Table 124: Universal IMU Enclosure Interface Cable Pinouts Table 125: Connectors Table 126: Maximum Cable Length Table 127: MEMS Interface Card Physical Specifications Table 128: MIC Electrical Specifications...
-
Page 16: Notices Receiver Card
European Union (EU) Hereby, NovAtel Inc. declares that the radio equipment type OEM7 GNSS receiver is in com- pliance with Directive 2014/53/EU The full text of the EU Declaration of Conformity may be obtained from the NovAtel website at: www.novatel.com/products/compliance/eu-declaration-of-conformity/. WEEE If you purchased your OEM7 family product in Europe, please return it to your dealer or supplier at the end of life. -
Page 17: Ethernet Port
Electrical and Electronic Equipment (WEEE) is a regulated area. Where the generation of waste cannot be avoided, it should be reused or recovered for its material or energy. WEEE products may be recognized by their wheeled bin label ( www.novatel.com/products/compliance/environmental-compliance/ for more information. RoHS... - Page 18 1, Safety for Information Technology Equipment, a secondary lightning protection device must be used for in-building equipment installations with external antennas. The following device has been approved by NovAtel Inc.: Polyphaser - Surge Arrestor DGXZ+36NFNF-A If this device is not chosen as the primary lightning protection device, the device chosen...
- Page 19 Notices Receiver Card Ref # Description Primary lightning protection device Secondary lightning protection device External antenna GNSS Receiver To ground Grounding plate or grounding point at the building’s entrance Acceptable choices for earth grounds, for central buildings, are: Grounded interior metal cold water pipe within five feet (1.5 m) of the point where it enters the building Grounded metallic service raceway Grounded electrical service equipment enclosure...
- Page 20 Notices Receiver Card Conventions The following conventions are used in this manual: Information that supplements or clarifies text. A caution that actions, operation or configuration may lead to incorrect or improper use of the hardware. A warning that actions, operation or configuration may result in regulatory non- compliance, safety issues or equipment damage.
-
Page 21: Customer Support
If you are having a hardware problem, send a list of the troubleshooting steps taken and the res- ults. Contact Information Log a support request with NovAtel Customer Support using one of the following methods: Log a Case and Search Knowledge: OEM7 SPAN Installation and Operation User Manual v4... - Page 22 Customer Support Website: www.novatel.com/support Log a Case, Search Knowledge and View Your Case History: (login access required) Web Portal: https://novatelsupport.force.com/community/login E-mail: support@novatel.com Telephone: U.S. and Canada: 1-800-NOVATEL (1-800-668-2835) International: +1-403-295-4900 OEM7 SPAN Installation and Operation User Manual v4...
-
Page 23: Chapter 1 Oem7 Span Overview
GNSS antenna The GNSS receiver is connected to the IMU with an RS-232, RS-422 or SPI link. A NovAtel GNSS antenna must also be connected to the receiver to track GNSS signals. After the IMU enclosure, GNSS antenna and appropriate power supplies are attached, and a few simple configuration com- mands are entered, the SPAN system will be ready to navigate. -
Page 24: Models And Features
Use raw phase observation data (to constrain INS solution drift even when too few satellites are available for a full GNSS solution) For more information about GNSS and INS, refer to www.novatel.com/an-introduction- to-gnss/ 1.2 Models and Features All SPAN system receivers are factory configurable for L1/L2 RTK capability and are compatible with an IMU. -
Page 25: Imu Grade
IMU in grades 1 and 2. Table 2: SPAN-Compatible IMUs below shows the IMU grade classification. Table 2: SPAN-Compatible IMUs Supported IMUs IMU Grade NovAtel Part Name IMU Name IMU-CPT KVH CPT IMU IMU-H1930-CA50 Honeywell HG1930-CA50... -
Page 26: Related Documents And Information
This manual contains sufficient information about the installation and operation of the SPAN sys- tem. It is beyond the scope of this manual to provide details on service or repair. Contact your local NovAtel dealer for any customer service related inquiries, see Customer Support on page 21. -
Page 27: Chapter 2 Span Installation
Chapter 2 SPAN Installation Chapter 2 SPAN Installation A SPAN system consists of an OEM7 receiver, an IMU, a GNSS antenna, power and a com- munication link (if your application requires real time differential operation). The installation pro- cess varies based on the OEM7 receiver. OEM7 Receiver Card Installation below PwrPak7 Installation on page 61 PwrPak7-E1 Installation on page 64... - Page 28 Chapter 2 SPAN Installation Figure 1: Typical Installation of a SPAN System with an OEM7 Receiver Card Complete the following steps to set up your NovAtel SPAN system. 1. Mount the GNSS antenna. See Mounting the GNSS Antenna on page 30 for details.
-
Page 29: Selecting A Gnss Antenna
European Union’s Restriction of Haz- ardous Substances (RoHS) and Waste Electrical and Electronic Equipment (WEEE). If a non-NovAtel GNSS antenna is chosen, a typical antenna LNA gain between 26 dB to 30 dB is recommended in a rover station application. -
Page 30: Mounting The Gnss Antenna
NovAtel antennas and coaxial cables meet receiver RF input gain requirements. NovAtel coaxial cables are designed to introduce no more than 10 dB loss and NovAtel antennas are equipped with built-in LNAs that provide 29 dB of gain to the satellite signal received. - Page 31 Chapter 2 SPAN Installation Also, it is important to measure the distance from the IMU to the antenna (the Antenna Lever Arm), on the first usage, on the axis defined on the IMU enclosure. See Lever Arm Calibration Routine on page 90. See also IMU Technical Specifications on page 114 for dimensional drawings of the IMU enclosures.
-
Page 32: Connect The Imu To The Oem7 Receiver Card
Chapter 2 SPAN Installation 1. Place the mounting plate on the bottom of the IMU Enclosure and align the holes in the mount- ing plate with the threaded holes in the IMU Enclosure base plate. 2. Secure the mounting plate to the IMU Enclosure using the 4 screws (M6 x 8 mm) included with the mounting plate. -
Page 33: Table 3: Imu Connection Method
OEM7 receiver card. IMUs not in an IMU enclosure typically have OEM at the start of their names (for example, OEM-IMU-ISA-100C, OEM-IMU-µIMU or OEM-IMU- STIM300). Table 3: IMU Connection Method Receiver Connection Method OEM719, OEM729, OEM7700, IMU-H58/62 Serial port (RS-422) OEM7720 OEM719, OEM729, OEM7700, IMU-CPT... - Page 34 Chapter 2 SPAN Installation Receiver Connection Method OEM719, OEM729, OEM7700, OEM-IMU-HG1930 OEM7720 OEM719, OEM729, OEM7700, OEM-IMU-ISA-100C OEM7720 OEM719, OEM729, OEM7700, OEM-IMU-STIM300 OEM7720 Serial port (RS-422) OEM719, OEM729, OEM7700, OEM-IMU-µIMU OEM7720 UIMU-HG1700 (H58 & OEM719, OEM729, OEM7700, Serial port (RS-422) H62)
- Page 35 The exception is COM1 on the OEM729 which provides either RS-232 or RS-422 signal levels. If using a KVH1750 IMU not purchased through NovAtel, the baud rate of the IMU must be changed to 460,800 bps. For information about changing the IMU baud rate, see KVH1750 Baud Rate Conversion on page 43.
- Page 36 Chapter 2 SPAN Installation Connect an OEM-IMU-ADIS-16488 Directly to an OEM7 Receiver Card The OEM-IMU-ADIS-16488 can connect directly to SPI capable OEM7 receivers, such as the OEM7700 and OEM7720, using a SPI connection. The SPI connection handles timing and data communication between the receiver and IMU.
-
Page 37: Table 4: Receiver To Adis-16488 Pin Connections
Chapter 2 SPAN Installation Table 4: Receiver to ADIS-16488 Pin Connections ADIS- Receiver 16488 Pin Name Description Name – – Do not connect – – Do not connect SCLK SPI_SCLK SPI Serial Clock SPI_MISO SPI Data Output SPI_MOSI SPI Data Input SPI_nCS SPI Chip Select EVENT_... - Page 38 Chapter 2 SPAN Installation ADIS- Receiver 16488 Pin Name Description Name – – Do not connect – – Do not connect – – Do not connect – – Do not connect – – Do not connect – – Do not connect –...
-
Page 39: Table 5: Receiver To Eg320N Pin Connections
Chapter 2 SPAN Installation Figure 4: OEM-IMU-EG320N Pin Locations Table 5: Receiver to EG320N Pin Connections EG320N Receiver Pin Name Description Name SCLK SPI_SCLK SPI Serial Clock SPI_MISO SPI Data Output – – Digital ground – – Digital ground SPI_MOSI SPI Data Input SPI_nCS SPI Chip Select UART Data Out... - Page 40 Chapter 2 SPAN Installation EG320N Receiver Pin Name Description Name – – 3.3 VDC power supply – – 3.3 VDC power supply DRDY EVENT_ Data Ready (GPIO1) GPIO2 EVENT_ External Trigger (EXT) OUT2 – – Digital ground Reset IMU RST must be high for the IMU to be active. To enable the IMU when the receiver is powered on, connect this pin to Pin 1 or Pin 2 of the receiver connector through a 10 kΩ...
-
Page 41: Table 6: Receiver To Stim300 Pin Connections
Chapter 2 SPAN Installation The OEM-IMU-STIM300 serial port uses RS-422 signal levels. Since the receiver uses LVCMOS signal levels, a RS-422 line driver is needed to convert from LVCMOS to RS-422. The OEM-IMU-STIM300 can also connect to any OEM7 receiver using a MEMS Interface Card (MIC). - Page 42 Chapter 2 SPAN Installation STIM300 RS-422 Line Driver Receiver Pin Name Output Input Pin Name Description Interface Cir- cuit Required The STIM TOV out- put uses 5V logic, but the OEM7 EVENT_ EVENT_IN lines STIM TOV – – are not 5V tol- erant.
- Page 43 Chapter 2 SPAN Installation KVH1750 Baud Rate Conversion The maximum baud rate of the COM ports on an OEM7 receiver is 460,800 bps. If purchased dir- ectly from KVH, the KVH1750 natively communicates at 921,600 bps, so it needs to be modified to use 460,800 bps.
-
Page 44: Connect Power
Option field. IMUCONFIGURATION IMUType [Option] IMU Type Option Configuration Details Configure KVH options for NovAtel communication. IMU_KVH_1750 Change KVH baud rate to 921,600 Change KVH baud rate to 460,800 2.1.6 Connect Power If you are using a MEMS OEM IMU (ADIS-16488, HG1900, HG1930, STIM300) and a MIC, see MIC Installation on the next page for information about connecting and powering the MIC and IMU. -
Page 45: Mic Installation
2.2.1 Install a MIC in a Stack Up Configuration In a stack up configuration, the MIC is connected to an OEM719 receiver using the 20-pin header on the OEM719. Power and communications connections to the receiver are made through the MIC. - Page 46 Description Connects to the MIC power supply. 43650-0313 43645-0300 This connection provides power to the P101 (Molex) (Molex) MIC and the OEM719 receiver. (user supplied cable) Connects to HG1700, HG1900, HG1930 53780-2070 51146-2000 P601 and STIM300 IMUs. (NovAtel supplied (Molex)
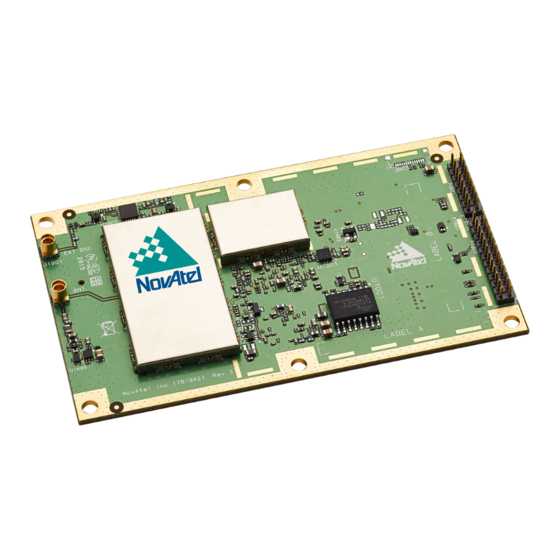
- Page 47 Mount the SPAN System Components 1. Mount the antenna. See Mounting the GNSS Antenna on page 30. 2. Use the standoffs supplied with the MIC card to secure the OEM719 to its mounting location. See Figure 7: Mount the MIC on the OEM719 on page 49.
- Page 48 The height of the MCX connector must not exceed 8.65 4. Align the mating connector (J301) on the MIC with the 20-pin header (P1701) on the OEM719. Make sure all of the pins on the header are aligned with the holes in the mating connector.
- Page 49 Chapter 2 SPAN Installation Figure 7: Mount the MIC on the OEM719 Connect the IMU to the MIC 1. Attach the IMU mounting Printed Circuit Board (PCB) to the IMU. Ensure all the pins on the header are aligned with the holes on the mating connector.
- Page 50 Chapter 2 SPAN Installation 01018869) on the next page or Figure 12: Connect the STIM300 IMU to the MIC (OEM Cable Kit: 01019174) on the next page. Figure 8: Connect the ADIS IMU to the MIC (OEM Cable Kit: 01019007) Figure 9: Connect the HG1700 IMU to the MIC (OEM Cable Kit: 01018868) Figure 10: Connect the HG1900 IMU to the MIC (OEM Cable Kit: 01018871) Figure 11: Connect the HG1930 IMU to the MIC (OEM Cable Kit: 01018869)
-
Page 51: Install A Mic In A Standalone Configuration
This connection provides power to the MIC and the OEM719. Connect the Input and Output Signals All of the communication connections to the MIC and the OEM719 receiver are available on the communications connector (P601) on the MIC. These connections include:... - Page 52 (Molex) (user supplied cable) Connects to HG1700, HG1900, HG1930 and 53780-2070 51146-2000 P601 STIM300 IMUs. (Molex) (Molex) (NovAtel supplied cable) 53780-1070 51146-1000 Connects to ADIS-16488 IMUs. P701 (Molex) (Molex) (NovAtel supplied cable) Connects the MIC serial port to the OEM7...
- Page 53 Chapter 2 SPAN Installation For information about the MIC connectors and pin-outs, see MIC Connectors on page 234. For information about the OEM7 receiver card connectors and pinouts, refer to the OEM7 Installation and Operation User Manual. OEM729 Recommendations Use COM1 for connection to a computer. COM1 uses RS-232 levels and can be connected to a computer without additional interface circuitry.
- Page 54 Chapter 2 SPAN Installation Connect the IMU to the MIC 1. Attach the IMU mounting Printed Circuit Board (PCB) to the IMU. Ensure all the pins on the header are aligned with the holes on the mating connector. An IMU mounting PCB is not used with the STIM300 IMU. 2.
- Page 55 Chapter 2 SPAN Installation Figure 16: Connect the HG1900 IMU to the MIC (OEM Cable Kit: 01018871) Figure 17: Connect the HG1930 IMU to the MIC (OEM Cable Kit: 01018869) Figure 18: Connect the STIM300 IMU to the MIC (OEM Cable Kit: 01019174) Connect the MIC to a Receiver 1.
-
Page 56: Uic Installation
2.3 UIC Installation For IMUs that are not mounted inside a NovAtel IMU enclosure (e.g. OEM-IMU-ISA-100C), an interface card is required to connect an IMU to an OEM7 receiver. The Universal IMU Controller (UIC) provides the connection between OEM7 receiver cards and IMUs. - Page 57 OEM7 receiver (FCI) (FCI) (user supplied cable) LTMM-125-02-L-D SQT-125-01-L-D Connects to the IMU J1401 (Samtec) (Samtec) (NovAtel supplied cable) For information about the UIC connectors and pinouts, see UIC Connectors on page 247. OEM7 SPAN Installation and Operation User Manual v4...
-
Page 58: Mount The Span System Components
Chapter 2 SPAN Installation For information about the OEM7 receiver card connectors and pinouts, refer to the OEM7 Installation and Operation User Manual. Important! Assemble in accordance with applicable industry standards. Ensure all Elec- trostatic Discharge (ESD) measures are in place, in particular, use a ground strap before exposing or handling any electronic items, including the UIC, receiver and IMU. -
Page 59: Connect The Imu To The Uic
LVCMOS COM port on the OEM7 receiver, an interface circuit that converts to and from RS-422 must be used. Table 9: COM Port Recommendations OEM719 All of the COM ports on these receivers use LVCMOS levels. OEM7700 An interface circuit that converts to and from RS-422 levels is required for the port connected to the UIC. -
Page 60: Connect Power To The Uic And Oem7 Receiver
Chapter 2 SPAN Installation Refer to the OEM7 Installation and Operation User Manual for information about connecting data communications equipment to an OEM7 receiver. 2.3.4 Connect Power to the UIC and OEM7 Receiver A separate power supply is required for the OEM7 receiver. For information about the power supply requirements, refer to the Technical Specifications appendix for the receiver card in the OEM7 Installation and Operation User... -
Page 61: Pwrpak7 Installation
Chapter 2 SPAN Installation Flash Fast Flash Slow (Yellow, (Red) (Green) (Yellow, 1 Hz) 3 Hz) UIC is receiving UIC is communication UIC is transmitting data from the transmitting Data between UIC and receiving data receiver, but not data to the and GNSS without errors. - Page 62 Chapter 2 SPAN Installation Figure 21: Typical Installation of a SPAN System with a PwrPak7 Complete the following steps to set up your NovAtel SPAN system. 1. Mount the GNSS antenna. See Mounting the GNSS Antenna on page 30 for details.
-
Page 63: Connect The Imu To The Pwrpak7
Conversion on page 43. NovAtel IMU Interface Cables An interface cable is available from NovAtel for each IMU supported by OEM7 receivers. The interface cables provide access to the IMU power and communication signals. For information about these cables, refer to the applicable IMU in the IMU Technical Specifications on page 114. -
Page 64: Pwrpak7-E1 Installation
Chapter 2 SPAN Installation cabling for the PwrPak7, make sure all of the required input and output signals are accounted for in the HD26 COM PORTS connector cabling design. For information about the DB26 COM PORTS pinout, refer to the PwrPak7 Installation and Oper- ation User Manual. - Page 65 Chapter 2 SPAN Installation Figure 22: Typical Installation of a SPAN System with a PwrPak7-E1 Complete the following steps to set up your NovAtel SPAN system. 1. Mount the GNSS antenna. See Mounting the GNSS Antenna on page 30 for details.
-
Page 66: Wheel Sensor Installation
Chapter 2 SPAN Installation 6. Connect a data communication device, such a computer, to the receiver. A data com- munication device is used to configure and monitor the receiver. See the PwrPak7 Installation and Operation User Manual for information about connecting a data communication device to a PwrPak7. -
Page 67: Wheel Sensor Connection
A+ and A- signals for distance. All four signal inputs are required to measure both distance and direction correctly. See your WPT documentation for cable details. Table 12: Kistler to NovAtel Wheel Sensor Cable Connections Kistler Cable PwrPak7... - Page 68 2. Connect the wheel sensor to the IMU. For IMUs in the NovAtel IMU Enclosure, use the IMU Enclosure Wheel Sensor cable, or a cus- tom cable, to connect the wheel sensor to the Wheel Sensor port on the IMU. See IMU...
-
Page 69: Imu Leds
Chapter 2 SPAN Installation Enclosure Wheel Sensor Cable on page 160 for information about the cable or for information about creating a custom wheel sensor cable. For the IMU-IGM-A1 or IMU-IGM-S1, use a custom cable to connect the wheel sensor to the AUX port on the IMU. -
Page 70: Table 13: Imu-Igm Leds
Chapter 2 SPAN Installation Table 13: IMU-IGM LEDs Flash Fast Flash Slow (1 Hz) (3 Hz) Power No power Programming Unit is powered on UNKNOWN or UNSUPPORTED IMU to unit error (Red) Time status COARSE, GNSS Waiting for Time Status FINE or COARSESTEERING or GPS time FINESTEERING... -
Page 71: Chapter 3 Span Operation
Before operating your SPAN system, ensure that you have followed the installation and setup instructions in SPAN Installation on page 27. You can use the NovAtel Connect software to configure receiver settings and to monitor data in real-time, between a rover SPAN system and base station. -
Page 72: The Imu Body Frame
Chapter 3 SPAN Operation Figure 24: Local-Level Frame (ENU) 3.1.2 The IMU Body Frame The definition of the IMU Body frame is given by the physical axes of the IMU and represents how the sensors are mounted inside the IMU. If your IMU is enclosed, both the IMU Body frame axes and center of navigation are marked on the enclosure. -
Page 73: The User Output Frame
Chapter 3 SPAN Operation Figure 26: Vehicle Frame 3.1.4 The User Output Frame The user output frame is an arbitrary frame, which can be optionally defined to transfer inertial output to a more useful position or reference frame. By default, SPAN position and velocity output is given at the center of navigation of the IMU. To output position and velocity at a different location, specify a user offset translation using the SETINSTRANSLATION command. - Page 74 Chapter 3 SPAN Operation The translational offsets are measured in three directions, X axis, Y axis and Z axis, typically rel- ative to the IMU Body frame. Translational offsets can also be entered relative to the Vehicle frame. The X, Y and Z axes of the IMU Body frame are typically indicated on the IMU enclosure. The X, Y and Z axes of the IMU Body frame are also indicated on the mechanical draw- ings of the IMUs in the IMU Technical Specifications on page 114.
-
Page 75: Rotational Offsets
Chapter 3 SPAN Operation The translational offsets from the IMU to the GNSS antenna are required for all SPAN systems. However, some SPAN systems may have other sensors or devices integrated into the system for which the SPAN needs translational offsets. For example, a gimbal mount or a camera or LiDAR connected to an Event Input line. - Page 76 Chapter 3 SPAN Operation To reach this answer, keep in mind the following rules: The goal is to rotate the IMU Body frame to be coincident with the Vehicle frame (i.e. IMU X equals Vehicle X, IMU Y equals Vehicle Y, IMU Z equals Vehicle Z). You must rotate from the IMU Body frame to the Vehicle frame.
-
Page 77: Software Configuration
Chapter 3 SPAN Operation The rotational offsets are entered using the SETINSROTATION command. For this example, the command to enter the rotations for the previous example is: SETINSROTATION RBV -90 0 90 3.3 Software Configuration On a SPAN system, both the GNSS receiver and the IMU must be configured. 3.3.1 Minimum Recommended Configuration When configuring your OEM7 SPAN system for first time use, the following is the minimum amount of information required to ensure proper operation of a SPAN system. -
Page 78: Table 15: Ins Profiles
Chapter 3 SPAN Operation Table 15: INS Profiles Default Settings Modi- Profile Description fied The default SPAN profile. DEFAULT None This profile has legacy SPAN default settings. Enable direction detection on kinematic Basic profile for fixed axle land vehicles. Enables robust alignment routine LAND_BASIC kinematic alignment routines and configures the update... -
Page 79: Span Configuration
Use the COM port number the IMU is connected to. If you are using the OEM719+MIC board stack, you must use COM1. For SPAN systems with a OEM729 receiver, COM2 is the recommended serial port for the IMU, however you can use any available port for these IMUs When the ADIS16488 is connected using a MIC. - Page 80 Use the COM port number the IMU is connected to. If you are using the OEM719+MIC board stack, you must use COM1. For SPAN systems with a OEM729 receiver, COM2 is the recommended serial port for the IMU, however you can use any available port for these IMUs When the STIM300 is connected using a MIC.
- Page 81 Chapter 3 SPAN Operation This example shows a mounting configuration with a negative X offset, negative Y offset and positive Z offset. A typical RTK GNSS solution is accurate to a few centimetres. For the integrated GNSS+INS system to have this level of accuracy, the offset must be measured to within a centimetre. Any offset error between the two systems shows up directly in the output position.
-
Page 82: Real-Time Operation
Routine on page 91. SPAN Configuration with NovAtel Connect NovAtel Connect provides a wizard that takes you through the steps required to configure a SPAN system. For information about using the SPAN Configuration wizard in NovAtel Connect, refer to the help file available within NovAtel Connect. -
Page 83: Table 17: Inertial Solution Status
Chapter 3 SPAN Operation available from the SPAN system through the GNSS-specific logs, even without SPAN running. The integrated GNSS+INS solution is available through special INS logs documented in the OEM7 Commands and Logs Reference Manual. The IMU raw data is available at the maximum rate of output of the IMU. Because of this high data rate, a shorter header format was created. -
Page 84: System Start-Up And Alignment Techniques
Chapter 3 SPAN Operation Binary ASCII Description The INS filter has determined the IMU orientation, received an initial WAITING_ position and completed initial bias estimates. Azimuth input (from AZIMUTH vehicle motion, dual antenna or command) is required for alignment. INITIALIZING_ The INS filter has determined the IMU orientation, received an initial BIASES position and is conducting an initial IMU bias estimate. - Page 85 Chapter 3 SPAN Operation pitch and heading are computed. Because the coarse alignment uses averaged sensor output, the vehicle must remain stationary for the duration of the alignment, which is approximately 45 seconds. The attitude estimates solved by the alignment are larger than the system specified attitude accuracy and vary upon the characteristics of the sensor and the geographic latitude of the system.
-
Page 86: Ins Seed / Fast Ins Initialization
Chapter 3 SPAN Operation Dual Antenna Alignment SPAN can also use heading information available from a NovAtel Dual Antenna ALIGN solution to rapidly perform an alignment. Refer to SPAN with Dual Antenna on page 108 for details. NVM Seeded Alignment SPAN can use the alignment information from a previous power up to quickly perform an align- ment. - Page 87 Chapter 3 SPAN Operation Seed data from NVM must be valid The system must be stationary The system must not have moved significantly from the seed position: <10 metres position and 5 degrees in roll and pitch INJECT Option (Advanced Users Only) There is an advanced option available to skip the second and third validation steps described in the boot-up section above.
-
Page 88: Navigation Mode
Chapter 3 SPAN Operation NVM Seed Status: Bits 29-31 These bits indicate the current status of the seeding process at start-up, as described in the table below: Table 18: NVM Seed Indication Bit 29-31 Hex Value NVM Seed Type Values 0x00 NVM Seed Inactive 0x01... - Page 89 IMU is attached), GNSS logs can be requested at rates up to 20 Hz. Ensure that all windows, other than the Console, are closed in NovAtel Connect and then use the SAVECONFIG command to save settings in NVM. Otherwise, unnecessary data logging occurs and may overload your system.
-
Page 90: Lever Arm Calibration Routine
Specific logs need to be collected for post-processing. See Data Collection for Post Processing on page 100. To store data from an OEM7 receiver, connect the receiver to a computer running NovAtel Con- nect or other terminal program capable of recording data. On PwrPak7 receivers, you can also collect data on internal memory. -
Page 91: Body To Vehicle Frame Rotation Calibration Routine
Chapter 3 SPAN Operation The steps involved in the calibration are: 1. Apply power to the receiver and the IMU. 2. Configure the SPAN system, see SPAN Configuration on page 79. 3. Perform an initial system alignment using one of the methods described in System Start-Up and Alignment Techniques on page 84. -
Page 92: Multi-Line Body To Vehicle Frame Rotation Calibration Routine
Chapter 3 SPAN Operation 5. Enable calibration using the INSCALIBRATE command with an optional standard deviation target. INSCALIBRATE RBV NEW [target_stdev] 6. To monitor the calibration, log INSCALSTATUS using the ONCHANGED trigger. 7. Start to move the system. As with the lever arm calibration, movement of the system is required for the observation of the angular offsets. - Page 93 Chapter 3 SPAN Operation Figure 28: Multi-Line IMU Body to Vehicle Calibration The steps for the calibration routine are: 1. Apply power to the receiver and IMU. 2. Configure the SPAN system, see SPAN Configuration on page 79. 3. Ensure that an accurate lever arm has been entered into the system either manually or through a lever arm calibration, see Lever Arm Calibration Routine on page 90.
-
Page 94: Synchronizing External Equipment
Chapter 3 SPAN Operation 9. Initiate the second pass of the calibration by issuing the INSCALIBRATE command with the ADD parameter: INSCALIBRATE RBV ADD 10. Drive the vehicle back along the original course, until you reach the starting point for the first pass. -
Page 95: Adding Timed Sensor Triggers
Chapter 3 SPAN Operation Time Guard (t_guard): The time guard specifies the minimum number of milliseconds between pulses. This is used to coarsely filter the input pulses. The time of the input pulses is available from the MARKTIME, MARK2TIME, MARK3TIME and MARK4TIME log. -
Page 96: Configuring The Software
Chapter 3 SPAN Operation Valid Event Outputs Valid Event Inputs MARK3 MARK3 MARK4 MARK4 3.6.2 Configuring the Software Sensor objects are defined by using the SETUPSENSOR command. This command allows the Event_In and Event_Out lines to be specified as well as some parameters for the outgoing and incoming signals. -
Page 97: Wheel Sensor Data Collected On The Pwrpak7
Chapter 3 SPAN Operation For the PwrPak7, the wheel sensor is connected to the HD26 COM PORTS connector For the IMU Enclosure (IMU-HG1900, IMU-ISA-100C, IMU-ENC-LN200 or IMU-µIMU-IC), the wheel sensor is connected to the Wheel Sensor port using the optional Wheel Sensor Cable (60723137) or a custom cable. -
Page 98: Wheel Sensor Data Collected On Imu
Chapter 3 SPAN Operation 3.7.2 Wheel Sensor Data Collected on IMU The SPAN system uses the wheel sensor data passed in and timed through the IMU-CPT, IMU- FSAS, IMU-IGM, IMU-HG1900, IMU-ISA-100C, IMU-ENC-LN200 or IMU-µIMU-IC. This timed data is passed to the GNSS+INS filter to perform the update. The timed data is also available through the TIMEDWHEELDATA log. -
Page 99: Course Over Ground
There is a specific subset of logs that output this azimuth. See Table 21: Logs with Azimuth Data below. Table 21: Logs with Azimuth Data Azimuth Source Format Course Over Ground BESTVEL NovAtel From the best system solution which could be either GNSS or INS GPHDT NMEA ALIGN OEM7 SPAN Installation and Operation User Manual v4... -
Page 100: Data Collection For Post Processing
HEADING2B ONNEW (if using ALIGN dual antenna solution) ® Post processing is performed through the Waypoint Inertial Explorer software package avail- able from the NovAtel Waypoint Products Group. Visit our Web site at www.novatel.com details. OEM7 SPAN Installation and Operation User Manual v4... -
Page 101: Firmware Updates And Model Upgrades
Model upgrades enable features on the receiver and may be purchased through NovAtel author- ized dealers. Contact your local NovAtel dealer first for more information. To locate a dealer in your area visit Where to Buy | Dealer Network on the NovAtel web site at www.novatel.com/where-to-buy/-... - Page 102 Chapter 3 SPAN Operation Frame Description Notation An arbitrary frame, used to define the desired reference for Mark Output Frame attitude output for the MARKxPVA logs, typically matching a (om) gimbal mounted sensor Figure 29: Sample Configuration below and Figure 30: Operating Gimbal on the next page illus- trate a basic scenario for the information in the table above.
-
Page 103: How To Use Variable Lever Arm
Chapter 3 SPAN Operation Figure 30: Operating Gimbal 3.11.2 How to Use Variable Lever Arm The variable lever arm functionality is simple to use in a SPAN system. It requires the input of gimbal angles from the camera mount or platform that the IMU is mounted on. After that is provided, the system will automatically compute the variable lever arm and produce several messages for output. -
Page 104: Table 22: Logs Used With Variable Lever Arm
Chapter 3 SPAN Operation Table 22: Logs used with Variable Lever Arm Description This log displays the calculated variable lever arm. VARIABLELEVERARM The VARIABLELEVERARM log is output in IMU Body frame. This log has the same format as the INSPVA log, but contains the attitude rotated back to the null gimbal position. -
Page 105: Relative Ins
Explorer for post-processing. 3.12 Relative INS NovAtel's Relative INS technology generates a position, velocity and full attitude vector between two SPAN systems. One is the Master receiver and the other is the Rover receiver. Once con- figured, the Master receiver begins transmitting corrections to the Rover receiver. Relative information is created and the system begins filling the RELINSPVA log and SYNCRELINSPVA log on the Rover receiver. -
Page 106: Configure Relative Ins
Chapter 3 SPAN Operation Figure 31: Relative INS Example An important command that can be used with Relative INS to manually change the maximum amount of time to use RTK data is the RTKTIMEOUT command. This command is used to set the maximum age of RTK data to use when operating as a rover station. - Page 107 Chapter 3 SPAN Operation To configure Relative INS using the RELINSAUTOMATION command, the mater and rover receivers must be communicating using a COM port. If the master and rover are communicating via an ICOM port, the RELINSCONFIG command must be used. The Model option must be present on both the rover and master for the Relative INS fea- ture to be enabled.
-
Page 108: Chapter 4 Span With Dual Antenna
For information about connecting the ALIGN master and rover receivers using a port that is not a serial COM port (e.g. Ethernet), contact NovAtel Customer Support. OEM7 SPAN Installation and Operation User Manual v4... - Page 109 Chapter 4 SPAN with Dual Antenna The two receivers need to be set up as shown in the example in Figure 32: SPAN - Two Receiver Dual Antenna Installation below. Dual antenna receivers, such as the OEM7720, contain the hardware necessary to provide an ALIGN solution without an additional receiver.
-
Page 110: Configuring Align With Span
Chapter 4 SPAN with Dual Antenna Figure 33: SPAN - Single Receiver Dual Antenna Installation 4.2 Configuring ALIGN with SPAN Before configuring the ALIGN solution, the two receivers should both be powered on and con- nected directly between COM 2 of the SPAN receiver and COM 2 of the second receiver through either a null modem cable or an appropriate radio connection. -
Page 111: Configuring Span With Align
Chapter 4 SPAN with Dual Antenna The rover receiver must be an ALIGN-capable model. To enable the dual-antenna ALIGN solution to aid the INS alignment and provide heading updates, the offset between the antennas and the IMU must be known. This is achieved by enter- ing lever arms to both antennas, using the SETINSTRANSLATION command. -
Page 112: Alignment On A Moving Vessel - Aided Transfer Alignment
Chapter 4 SPAN with Dual Antenna For optimal SPAN performance when using Dual Antenna with SPAN an ALIGN offset cal- ibration is required for each unique installation. This calibration refines the IMU to antenna baseline angular offset from the initial estimate derived from the input lever arms. -
Page 113: Span Align Attitude Updates
Chapter 4 SPAN with Dual Antenna The first available technique will be used, regardless of its relative quality. If you wish to guar- antee a specific technique is used, or use an aided static alignment, you must select the desired alignment mode manually. -
Page 114: Appendix A Imu Technical Specifications
APPENDIX A IMU Technical Specifications The following appendices detail the technical specifications of the SPAN compatible IMUs. HG1700 IMU (single-connector enclosure) on the next page IMU-CPT on page 120 IMU-FSAS on page 127 IMU-HG1900 on page 135 IMU-IGM on page 140 IMU-ISA-100C on page 149 IMU-KVH1750 on page 162 IMU-ENC-LN200 on page 171 IMU-µIMU-IC on page 176... -
Page 115: Hg1700 Imu (Single-Connector Enclosure)
A.1 HG1700 IMU (single-connector enclosure) Table 24: HG1700 IMU Physical Specifications Physical 193 mm x 167 mm x 100 mm IMU Enclosure Size (7.6” x 6.6” x 3.9”) 160 mm x 160 mm x 100 mm IMU Size (6.3” x 6.3” x 3.9”) IMU + Enclosure Weight 3.4 kg (7.49 lb.) See the following sections for more information about the HG1700 IMU. -
Page 116: Hg1700 Imu Mechanical Drawings
A.1.1 HG1700 IMU Mechanical Drawings The dimensions in the following diagrams are in millimetres. Figure 34: HG1700 Top/Bottom Dimensions OEM7 SPAN Installation and Operation User Manual v4... - Page 117 APPENDIX A IMU Technical Specifications Figure 35: HG1700 Enclosure Side Dimensions The center of Navigation, shown on the HG1700 label, for the internal IMU is the same as the enclosure center. The enclosure center measurements are labeled as IMU Enclos- ure Center in these figures.
-
Page 118: Hg1700 Imu Performance
APPENDIX A IMU Technical Specifications A.1.2 HG1700 IMU Performance Table 25: HG1700-AG58 IMU Performance Gyroscope Performance Gyro Input Range ±1000 degrees/s Gyro Rate Bias 1.0 degree/hr Gyro Rate Scale Factor 150 ppm Angular Random Walk 0.125 degrees/rt hr Accelerometer Performance Accelerometer Range ±50 g Accelerometer Linearity... -
Page 119: Hg1700 Electrical And Environmental
APPENDIX A IMU Technical Specifications A.1.3 HG1700 Electrical and Environmental Table 27: HG17000 Electrical Specifications Electrical IMU-H58: 9 W (max) IMU Power Consumption IMU-H62: 8 W (max) IMU Input Voltage +12 to +28 VDC Receiver Power Consumption 1.8 W (typical) System Power Consumption 13.8 W (typical) Input/Output Connectors... -
Page 120: Imu-Cpt
APPENDIX A IMU Technical Specifications A.2 IMU-CPT Table 29: IMU-CPT Physical Specifications Physical IMU Size 168 mm W X 152 mm L X 89 mm H IMU Weight 2.29 kg See the following sections for more information about the IMU-CPT. IMU-CPT Mechanical Drawings on the next page IMU-CPT Sensor Specifications on page 123 IMU-CPT Electrical and Environmental on page 124 IMU-CPT Cable on page 125... -
Page 121: Imu-Cpt Mechanical Drawings
APPENDIX A IMU Technical Specifications A.2.1 IMU-CPT Mechanical Drawings The dimensions in the following diagrams are in inches and millimetres (in square brack- ets). Figure 36: IMU-CPT Side and Perspective View OEM7 SPAN Installation and Operation User Manual v4... - Page 122 APPENDIX A IMU Technical Specifications Figure 37: IMU-CPT Top, Front and Bottom View OEM7 SPAN Installation and Operation User Manual v4...
-
Page 123: Imu-Cpt Sensor Specifications
APPENDIX A IMU Technical Specifications A.2.2 IMU-CPT Sensor Specifications Table 30: IMU-CPT Performance Gyroscope Performance Bias Offset ±20 °/hr Turn On To Turn On Bias Repeatability (Compensated) ±3 °/hr In Run Bias Variation, At Constant Temperature 1 °/hr @ 1σ Scale Factor Error (Total) 1500 ppm, 1σ... -
Page 124: Imu-Cpt Electrical And Environmental
APPENDIX A IMU Technical Specifications A.2.3 IMU-CPT Electrical and Environmental Table 31: IMU-CPT Electrical Specifications Electrical Input Power 9 - 18 VDC Power Consumption 13 W (max) Power and I/O Connector MIL-DTL-38999 Series 3 Start-Up Time (Valid Data) < 5 seconds Table 32: IMU-CPT Environmental Specifications Environmental Temperature, operational... -
Page 125: Imu-Cpt Cable
APPENDIX A IMU Technical Specifications A.2.4 IMU-CPT Cable The NovAtel part number for the IMU-CPT cable is 01018966. This cable provides power to the IMU from an external power source and enables communication between the receiver and the IMU. Figure 38: IMU-CPT Development Terminated Cable... -
Page 126: Table 34: Connectors
APPENDIX A IMU Technical Specifications Table 34: Connectors Connector Description MIL-DTL 38999, 37 connector, plug DB-9, female Table 35: Maximum Cable Length RS-422 IMU-CPT < 1.5 metres OEM7 SPAN Installation and Operation User Manual v4... -
Page 127: Imu-Fsas
APPENDIX A IMU Technical Specifications A.3 IMU-FSAS Table 36: IMU-FSAS Physical Spe- cifications Physical 128 mm x 128 mm x 104 mm IMU Size (5.04” x 5.04” x 4.09”) IMU Weight 2.1 kg (4.63 lb.) See the following sections for more information about the IMU-FSAS. IMU-FSAS Mechanical Drawings on the next page IMU-FSAS Performance on page 131 IMU-FSAS Electrical and Environmental on page 131... -
Page 128: Imu-Fsas Mechanical Drawings
APPENDIX A IMU Technical Specifications A.3.1 IMU-FSAS Mechanical Drawings The dimensions in the following diagrams are in millimetres. Figure 39: IMU-FSAS Top Dimensions Figure 40: IMU-FSAS Bottom Dimensions OEM7 SPAN Installation and Operation User Manual v4... - Page 129 APPENDIX A IMU Technical Specifications Figure 41: IMU-FSAS Side Dimensions OEM7 SPAN Installation and Operation User Manual v4...
- Page 130 APPENDIX A IMU Technical Specifications Figure 42: IMU-FSAS Center of Navigation OEM7 SPAN Installation and Operation User Manual v4...
-
Page 131: Imu-Fsas Performance
APPENDIX A IMU Technical Specifications A.3.2 IMU-FSAS Performance Table 37: IMU-FSAS Performance Gyroscope Performance Gyro Input Range ±450 °/s Gyro Rate Bias <0.75°/hr Gyro Rate Scale Factor 300 ppm Angular Random Walk 0.1 °/sq rt hr Accelerometer Performance Accelerometer Range ±5 g (±20 g optional) Accelerometer Scale Factor 300 ppm... -
Page 132: Interface Cable For Imu-Fsas
A.3.5 IMU-FSAS Cable with Wheel Sensor The NovAtel part number for the IMU-FSAS cable with Wheel Sensor is 01018388 (see Figure 43: IMU-FSAS Interface Cable with Wheel Sensor below). This cable: provides power to the IMU from an external power source... -
Page 133: Table 40: Imu-Fsas Cable With Wheel Sensor Pinout
APPENDIX A IMU Technical Specifications Table 40: IMU-FSAS Cable with Wheel Sensor Pinout Power MIL-C-38999 III Function 4 mm plugs Female Male Comments Connector Pin Color: black Vin(-) Label: Vin Power ground Vin(-) Wheel sensor input A(-), ODO_AN opto-coupler: +2 to +6 V (RS- 422 compatible) Wheel sensor input A(+), ODO_A... -
Page 134: Table 41: Connectors
APPENDIX A IMU Technical Specifications Power MIL-C-38999 III Function 4 mm plugs Female Male Comments Connector Pin Wheel sensor input B(-), ODO_BN opto-coupler: +2 to +6 V (RS- 422 compatible) Reserved OEM_Tx/ Twisted pair; serial data in / RS-422(+) OEM_ Twisted pair; serial data in / RTS/ RS-422(-) Custom Cable Recommendations... -
Page 135: Imu-Hg1900
APPENDIX A IMU Technical Specifications A.4 IMU-HG1900 The IMU-HG1900 contains a Honeywell HG1900 IMU. Table 43: IMU-HG1900 Physical Specifications Physical IMU Enclosure Size 130 mm x 130 mm x 125 mm IMU Enclosure Weight 2.34 kg See the following sections for more information about the IMU-HG1900. IMU-HG1900 Mechanical Drawings on the next page IMU-HG1900 Sensor Specifications on page 138 IMU-HG1900 Electrical and Environmental on page 139... -
Page 136: Imu-Hg1900 Mechanical Drawings
APPENDIX A IMU Technical Specifications A.4.1 IMU-HG1900 Mechanical Drawings The dimensions in the following diagrams are in millimetres. Figure 44: IMU-HG1900 Dimensions OEM7 SPAN Installation and Operation User Manual v4... - Page 137 APPENDIX A IMU Technical Specifications Figure 45: IMU-HG1900 Center of Navigation OEM7 SPAN Installation and Operation User Manual v4...
-
Page 138: Imu-Hg1900 Sensor Specifications
APPENDIX A IMU Technical Specifications A.4.2 IMU-HG1900 Sensor Specifications Table 44: IMU-HG1900 IMU Per- formance Gyroscope Performance Input range ±1000 deg/sec Rate bias 5 deg/hr In-run bias stability 1 deg/hr Rate Scale factor 150 ppm Angular random walk 0.09 deg/√hr Accelerometer Performance Range ±30 g... -
Page 139: Imu-Hg1900 Electrical And Environmental
APPENDIX A IMU Technical Specifications A.4.3 IMU-HG1900 Electrical and Environmental Table 45: IMU-HG1900 Electrical Spe- cifications Electrical IMU Power Consumption 7.5 W (typical) IMU Input Voltage +10 to +34 VDC IMU Interface RS-422 Connectors Power SAL M12, 5 pin, male Data SAL M12, 5 pin, female Wheel Sensor... -
Page 140: Imu-Igm
APPENDIX A IMU Technical Specifications A.5 IMU-IGM This section contains the specifications for both the IMU-IGM-A1 and IMU-IGM-S1. Table 47: IMU-IGM-A1 Physical Specifications Physical Enclosure Size 152.0 mm x 137.0 mm x 50.5 mm Weight 475 g Connectors MAIN DB-15HD Female DB-15HD Male Table 48: IMU-IGM-S1 Physical Specifications Physical... -
Page 141: Imu-Igm Mechanical Drawings
APPENDIX A IMU Technical Specifications A.5.1 IMU-IGM Mechanical Drawings Figure 46: IMU-IGM-A1 Dimensions The center of navigation is at the location marked by the axis labels on the enclosure and indicated on the drawing above. It is not at the depression in the enclosure cover. The dimensions in the drawing are in millimetres. - Page 142 APPENDIX A IMU Technical Specifications Figure 47: IMU-IGM-S1 Dimensions The center of navigation is at the location marked by the axis labels on the enclosure and indicated on the drawing above. It is not at the depression in the enclosure cover. The dimensions in the drawing are in millimetres.
-
Page 143: Imu-Igm Ports
APPENDIX A IMU Technical Specifications A.5.2 IMU-IGM Ports Table 49: IMU-IGM Main Port Pinout Pin # Label Description MODE2 high or open: MIC port transmit (RS-232) MIC_TX/MIC_TX+ MODE2 low: MIC port transmit positive (RS-422) MODE2 high or open: No connection MIC_TX- MODE2 low: MIC port transmit negative (RS-422) DGND... - Page 144 APPENDIX A IMU Technical Specifications Pin # Label Description DGND Digital ground ODM_A- Wheel sensor input A negative Wheel sensor input B negative ODM_B- (No connection on IMU-IGM-S1) Reserved Reserved DGND Digital ground Reserved Reserved Reserved Reserved Reserved Reserved Reserved Reserved Reserved Reserved...
-
Page 145: Imu-Igm Sensor Specifications
APPENDIX A IMU Technical Specifications A.5.3 IMU-IGM Sensor Specifications Table 51: IMU-IGM-A1 IMU Performance Gyroscope Performance Gyro Input Range ± 450 °/second In Run Gyro Rate Bias Stability 6.25 °/hour Angular Random Walk 0.3 °/√hour Accelerometer Performance Accelerometer Range ± 18 g In Run Accelerometer Bias Stability 0.1 mg Velocity Random Walk... -
Page 146: Imu-Igm Electrical And Environmental
APPENDIX A IMU Technical Specifications A.5.4 IMU-IGM Electrical and Environmental Table 53: IMU-IGM-A1 Electrical Specifications Electrical Input Voltage 10 - 30 VDC Power consumption 2.5 W (typical) Table 54: IMU-IGM-A1 Environmental Spe- cifications Environmental Temperature, operational -40°C to +65°C Temperature, storage -50°C to +80°C Humidity 95% Non-condensing... -
Page 147: Imu-Igm Interface Cable
APPENDIX A IMU Technical Specifications A.5.5 IMU-IGM Interface Cable The NovAtel part number for the IMU-IGM interface cable is 01019016. This cable provides power to the IMU-IGM and communication signals between the IMU-IGM and the OEM7 family receiver. Figure 48: IMU-IGM Interface Cable The dimensions in this drawing are in millimetres. -
Page 148: Table 58: Connectors
APPENDIX A IMU Technical Specifications MAIN Function Wire Bundle MIC Port Pin # Label Pin # Reserved Digital Ground Reserved MODE 2 MODE 2 Reserved Reserved The MIC port can operate as either an RS-232 or RS-422 serial port. When the MODE 2 pin is left open or tied high, the MIC port operates as an RS-232 serial port. -
Page 149: Imu-Isa-100C
APPENDIX A IMU Technical Specifications A.6 IMU-ISA-100C The IMU-ISA-100C contains an ISA-100C IMU. Table 60: IMU-ISA-100C Physical Specifications Physical IMU Enclosure Size 180 mm x 150 mm x 137 mm IMU Enclosure Weight 5.0 kg See the following sections for more information about the IMU-ISA-100C IMU. IMU-ISA-100C Mechanical Drawings on the next page Optional Side Mounting Holes on page 152 IMU-ISA-100C Performance on page 154... -
Page 150: Imu-Isa-100C Mechanical Drawings
APPENDIX A IMU Technical Specifications A.6.1 IMU-ISA-100C Mechanical Drawings The dimensions in the following diagrams are in millimetres. Figure 49: IMU-ISA-100C Dimensions OEM7 SPAN Installation and Operation User Manual v4... - Page 151 APPENDIX A IMU Technical Specifications Figure 50: IMU-ISA-100C Center of Navigation OEM7 SPAN Installation and Operation User Manual v4...
-
Page 152: Optional Side Mounting Holes
IMU enclosure. To access these holes, the NovAtel label must be removed from the side of the enclosure. A small notch on the side of enclosure allows you to insert a small flat blade screw under the label to start lifting the label. - Page 153 APPENDIX A IMU Technical Specifications Figure 51: Optional Side Mounting Holes OEM7 SPAN Installation and Operation User Manual v4...
-
Page 154: Imu-Isa-100C Performance
APPENDIX A IMU Technical Specifications A.6.3 IMU-ISA-100C Performance Table 61: IMU-ISA-100C IMU Performance Gyroscope Performance Input range ±495 deg/sec In-run bias stability ≤0.05 deg/hr Scale factor repeatability ≤100 ppm Scale factor non-linearity ≤100 ppm Angular random walk 0.012 deg/√hr Accelerometer Performance Range ±10 g In-run bias stability... -
Page 155: Imu-Isa-100C Electrical And Environmental
APPENDIX A IMU Technical Specifications A.6.4 IMU-ISA-100C Electrical and Environmental Table 62: IMU-ISA-100C Electrical Spe- cifications Electrical IMU Power Consumption 18 W (typical) IMU Input Voltage +10 to +34 VDC IMU Interface RS-422 Connectors Power SAL M12, 5 pin, male Data SAL M12, 5 pin, female Wheel Sensor... -
Page 156: Imu Enclosure Interface Cable
APPENDIX A IMU Technical Specifications A.6.5 IMU Enclosure Interface Cable The NovAtel part number for the IMU Enclosure interface cable is 01019319 (see Figure 52: IMU Enclosure Interface Cable below). This cable enables communication between the receiver and the IMU. -
Page 157: Table 65: Connectors
APPENDIX A IMU Technical Specifications Custom Cable Recommendations The tables below provide recommendations for creating custom cables to replace the IMU Enclos- ure interface cable (01019319). Table 65: Connectors Connector Description M12x1, 5 position, male DB-9, female Table 66: Maximum Cable Length RS-422 IMU-ISA-100C... -
Page 158: Imu Enclosure Power Cable
APPENDIX A IMU Technical Specifications A.6.6 IMU Enclosure Power Cable The NovAtel part number for the IMU Enclosure power cable is 60723136 (see Figure 53: IMU Enclosure Power Cable below). This cable provides power to the IMU from an external power source. - Page 159 APPENDIX A IMU Technical Specifications This cable uses a M12x1, 5 position, female connector. OEM7 SPAN Installation and Operation User Manual v4...
-
Page 160: Imu Enclosure Wheel Sensor Cable
APPENDIX A IMU Technical Specifications A.6.7 IMU Enclosure Wheel Sensor Cable The NovAtel part number for the IMU Enclosure wheel sensor cable is 60723137 (see Figure 54: IMU Enclosure Wheel Sensor Cable below). This cable enables communication between the IMU and the wheel sensor. -
Page 161: Table 69: Connectors
APPENDIX A IMU Technical Specifications P1 Pinout Function Bare Wire Color (M12) Grey Chassis Ground Pink Reserved Blue Reserved Custom Cable Recommendations The tables below provide recommendations for creating custom cables to replace the IMU Enclos- ure Wheel Sensor cable (60723137). Table 69: Connectors Connector Description... -
Page 162: Imu-Kvh1750
APPENDIX A IMU Technical Specifications A.7 IMU-KVH1750 Table 71: IMU-KVH1750 Physical Spe- cifications Physical Enclosure Size (Ø x H) 88.9 mm X 73.7 mm Weight <0.7 kg See the following sections for more information about the IMU-KVH-1750. IMU-KVH1750 Mechanical Drawings on the next page IMU-KVH1750 Sensor Specifications on page 167 IMU-KVH1750 Electrical and Environmental on page 168 IMU-KVH1750 Cable on page 169... -
Page 163: Imu-Kvh1750 Mechanical Drawings
APPENDIX A IMU Technical Specifications A.7.1 IMU-KVH1750 Mechanical Drawings The dimensions in the following diagrams are in millimetres. Figure 55: IMU-KVH1750 Bottom view OEM7 SPAN Installation and Operation User Manual v4... - Page 164 APPENDIX A IMU Technical Specifications Figure 56: IMU-KVH1750 Top View OEM7 SPAN Installation and Operation User Manual v4...
- Page 165 APPENDIX A IMU Technical Specifications Figure 57: IMU-KVH1750 Side View OEM7 SPAN Installation and Operation User Manual v4...
- Page 166 APPENDIX A IMU Technical Specifications Figure 58: IMU-KVH1750 Gyro Axes OEM7 SPAN Installation and Operation User Manual v4...
-
Page 167: Imu-Kvh1750 Sensor Specifications
APPENDIX A IMU Technical Specifications A.7.2 IMU-KVH1750 Sensor Specifications Table 72: IMU-KVH1750 Performance Gyroscope Performance Maximum Input Rate ±490 °/second 0.05°/hr (typical) Bias Stability (constant temperature) 0.1°/hr (max) 0.7°/hr (typical) Bias Temperature Sensitivity (full temp.) 1°/hr (max) Bias Offset (at 25° C) ±2°/hr Scale Factor (nominal) 1 ±0.2%... -
Page 168: Imu-Kvh1750 Electrical And Environmental
APPENDIX A IMU Technical Specifications A.7.3 IMU-KVH1750 Electrical and Environmental Table 73: IMU-KVH1750 Electrical Specifications Electrical Input Voltage 9 - 36 VDC 5W (typical), Power Consumption 8W (max) Turn-On Time (room temp.) ≤1.25 seconds Full Performance Time (room temp.) ≤60 seconds IMU Interface RS-422 Connectors... -
Page 169: Imu-Kvh1750 Cable
APPENDIX A IMU Technical Specifications A.7.4 IMU-KVH1750 Cable The NovAtel part number for the IMU-KVH1750 cable is 01019211. This cable provides power to the IMU from an external power source and enables communication between the receiver and the IMU. Figure 59: IMU-KVH1750 Cable Dimensions are in millimetres. -
Page 170: Table 76: Connectors
Pin 11 MSync+, Pin 7 MSync-). This was previously a single ended input signal on Pin 11 only. The NovAtel VARF signal used to provide the MSYNC to the IMU remains single ended, however significant testing has been completed with the existing IMU-KVH1750 Cable (01019211) in safe environments (no interference sources). -
Page 171: Imu-Enc-Ln200
APPENDIX A IMU Technical Specifications A.8 IMU-ENC-LN200 The IMU-ENC-LN200 contains an LN200 or LN200C IMU. Table 78: IMU-ENC-LN200 Physical Specifications Physical IMU Enclosure Size 150 mm x 134 mm x 134 mm IMU Enclosure Weight <3.4 kg See the following sections for more information about the IMU-ENC-LN200. IMU-ENC-LN200 Mechanical Drawings on the next page IMU-ENC-LN200 Sensor Specifications on page 174 IMU-ENC-LN200 Electrical and Environmental on page 175... -
Page 172: Imu-Enc-Ln200 Mechanical Drawings
APPENDIX A IMU Technical Specifications A.8.1 IMU-ENC-LN200 Mechanical Drawings The dimensions in the following diagrams are in millimetres. Figure 60: IMU-ENC-LN200 Dimensions OEM7 SPAN Installation and Operation User Manual v4... - Page 173 APPENDIX A IMU Technical Specifications Figure 61: IMU-ENC-LN200 Center of Navigation OEM7 SPAN Installation and Operation User Manual v4...
-
Page 174: Imu-Enc-Ln200 Sensor Specifications
APPENDIX A IMU Technical Specifications A.8.2 IMU-ENC-LN200 Sensor Specifications Table 79: IMU-ENC-LN200 IMU Per- formance Gyroscope Performance Input range ±1000 deg/sec Rate bias 1.0 deg/hr Scale factor error 100 ppm Angular random walk 0.07 deg/√hr Accelerometer Performance Input range ±40 g Scale factor asymmetry 150 ppm Scale factor error... -
Page 175: Imu-Enc-Ln200 Electrical And Environmental
APPENDIX A IMU Technical Specifications A.8.3 IMU-ENC-LN200 Electrical and Environmental Table 81: IMU-ENC-LN200 Electrical Spe- cifications Electrical IMU Power Consumption 14 W (typical) IMU Input Voltage +10 to +34 VDC IMU Interface RS-422 Connectors Power SAL M12, 5 pin, male Data SAL M12, 5 pin, female Wheel Sensor... -
Page 176: Imu-Μimu-Ic
APPENDIX A IMU Technical Specifications A.9 IMU-µIMU-IC The IMU-µIMU-IC contains a Litef µIMU. Table 83: IMU-µIMU-IC Physical Specifications Physical IMU Enclosure Size 130 mm x 130 mm x 115 mm IMU Enclosure Weight 2.57 kg See the following sections for more information about the IMU-µIMU. IMU-µIMU-IC Mechanical Drawings on the next page IMU-µIMU-IC Sensor Specifications on page 179 IMU-µIMU-IC Electrical and Environmental on page 180... -
Page 177: Imu-Μimu-Ic Mechanical Drawings
APPENDIX A IMU Technical Specifications A.9.1 IMU-µIMU-IC Mechanical Drawings The dimensions in the following diagrams are in millimetres. Figure 62: IMU-µIMU-IC Dimensions OEM7 SPAN Installation and Operation User Manual v4... - Page 178 APPENDIX A IMU Technical Specifications Figure 63: IMU-µIMU-IC Center of Navigation OEM7 SPAN Installation and Operation User Manual v4...
-
Page 179: Imu-Μimu-Ic Sensor Specifications
APPENDIX A IMU Technical Specifications A.9.2 IMU-µIMU-IC Sensor Specifications Table 84: IMU-µIMU-IC IMU Per- formance Gyroscope Performance Input range ±499 deg/sec Bias stability ≤6 deg/hr Scale factor error ≤1400 ppm Angular random walk ≤0.3 deg/√hr Accelerometer Performance Input range ±15 g Bias repeatability ≤3 mg Scale factor error... -
Page 180: Imu-Μimu-Ic Electrical And Environmental
APPENDIX A IMU Technical Specifications A.9.3 IMU-µIMU-IC Electrical and Environmental Table 85: IMU-µIMU-IC Electrical Spe- cifications Electrical IMU Power Consumption 11 W (typical) IMU Input Voltage +10 to +34 VDC IMU Interface RS-422 Connectors Power SAL M12, 5 pin, male Data SAL M12, 5 pin, female Wheel Sensor... -
Page 181: Imu (Single-Connector Enclosure)
APPENDIX A IMU Technical Specifications A.10 LN-200 IMU (single-connector enclosure) Table 87: LN-200 IMU Physical Specifications Physical 135 mm x 153 mm x 130 mm IMU Enclosure Size (5.315” x 6.024” x 5.118”) 89 mm D x 85 mm H IMU Size (3.504” D x 3.346” H) 3.19 kg IMU Weight (7.02 lb.) -
Page 182: Imu Mechanical Drawings
APPENDIX A IMU Technical Specifications A.10.1 LN-200 IMU Mechanical Drawings The dimensions in the following diagrams are in millimetres. Figure 64: LN-200 IMU Enclosure Top/Bottom Dimensions and Center of Navigation OEM7 SPAN Installation and Operation User Manual v4... - Page 183 APPENDIX A IMU Technical Specifications Figure 65: LN-200 Enclosure Side Dimensions The Center of Navigation offsets, shown on the LN-200 label, are for the internal IMU and are different than for the enclosure center. The enclosure center is labelled as IMU Center in these figures.
-
Page 184: Imu Performance
APPENDIX A IMU Technical Specifications A.10.2 LN-200 IMU Performance Table 88: LN-200 IMU Performance Gyroscope Performance Gyro Input Range ±1000 degrees/s Gyro Rate Bias 1°/hr Gyro Rate Scale Factor 100 ppm Angular Random Walk 0.07 degrees/rt-hr Accelerometer Performance Accelerometer Range ±40 g Accelerometer Linearity 150 ppm... -
Page 185: Interface Cable For The Ln-200 Imu
APPENDIX A IMU Technical Specifications A.10.4 Interface Cable for the LN-200 IMU The IMU interface cable provides power to the IMU from an external power source and enables communication between the receiver and IMU. The LN-200 IMU uses the Universal IMU Enclos- ure Interface cable (see Universal IMU Enclosure Interface Cable on page 228). -
Page 186: Oem-Imu-Adis-16488
A.11 OEM-IMU-ADIS-16488 The OEM-IMU-ADIS-16488 requires a MEMS Interface Card (MIC) to connect to an OEM719 or OEM729 receiver. See MIC - MEMS Interface Card on page 230. To connect the OEM-IMU-ADIS-16488 to an OEM7700 or OEM7720 receiver, you can use either a MIC or a direct connection via the SPI port. -
Page 187: Oem-Imu-Adis-16488 Mechanical Drawings
APPENDIX A IMU Technical Specifications A.11.1 OEM-IMU-ADIS-16488 Mechanical Drawings The dimensions in these drawings are in millimetres. The following two drawings include the ADIS-16488 interface board. The ADIS-16488 with inter- face board is intended for use with a MIC. Figure 66: ADIS-16488 Dimensions OEM7 SPAN Installation and Operation User Manual v4... - Page 188 APPENDIX A IMU Technical Specifications Figure 67: ADIS-16488 Center of Navigation The following diagram shows the ADIS-16488 without the interface board. The ADIS-16488 without interface board is for applications where the IMU connects directly to the OEM7 receiver using a SPI port. OEM7 SPAN Installation and Operation User Manual v4...
- Page 189 APPENDIX A IMU Technical Specifications Figure 68: OEM ADIS-16488 Dimensions OEM7 SPAN Installation and Operation User Manual v4...
-
Page 190: Oem-Imu-Adis-16488 Sensor Specifications
APPENDIX A IMU Technical Specifications A.11.2 OEM-IMU-ADIS-16488 Sensor Specifications Table 92: OEM-IMU-ADIS-16488 Performance Gyroscope Performance Gyro Input Range ±450°/second In-run Gyro Rate Bias Stability 6.25°/hour Angular Random Walk 0.30°/√hour Accelerometer Performance Accelerometer Range ±18 g In-run Accelerometer Bias Stability 0.1 mg Velocity Random Walk 0.029 m/s√hour Data Rate... -
Page 191: Oem-Imu-Adis-16488 Spi Connection
APPENDIX A IMU Technical Specifications A.11.4 OEM-IMU-ADIS-16488 SPI Connection The following table shows the connections required when connecting the OEM-IMU-ADIS-16488 IMU to a SPI compatible OEM7 receiver, such as the OEM7700 or OEM7720. Table 95: Receiver to ADIS-16488 Pin Connections ADIS- Receiver 16488... - Page 192 APPENDIX A IMU Technical Specifications ADIS- Receiver 16488 Pin Name Description Name – – Digital ground – – Do not connect – – Do not connect – – Do not connect – – Do not connect – – Do not connect –...
-
Page 193: Adis-16488 Imu-To-Mic Cable Assembly
APPENDIX A IMU Technical Specifications A.11.5 ADIS-16488 IMU-to-MIC Cable Assembly The NovAtel part number for the ADIS-16488 IMU-to-MIC interface cable is 01019008 (Figure 69: ADIS-16488 IMU-to-MIC Cable Assembly below). This cable provides power to the IMU and enables communication between the MIC and the IMU. -
Page 194: Oem-Imu-Eg320N
APPENDIX A IMU Technical Specifications A.12 OEM-IMU-EG320N Table 97: OEM-IMU-EG320N Physical Specifications Physical IMU Size 24 mm x 24 mm x 10 mm IMU Weight 10 g See the following sections for more information about the OEM-IMU-EG320N IMU. OEM-IMU-EG320N Mechanical Drawings on the next page OEM-IMU-EG320N Sensor Specifications on page 196 OEM-IMU-EG320N Electrical Environmental on page 196 OEM-IMU-EG320N Interface Connector on page 197... -
Page 195: Oem-Imu-Eg320N Mechanical Drawings
APPENDIX A IMU Technical Specifications A.12.1 OEM-IMU-EG320N Mechanical Drawings The following graphics are courtesy of Seiko Epson Corporation. In the following graphics, the dimensions are in millimetres. Figure 70: EG320N Dimensions OEM7 SPAN Installation and Operation User Manual v4... -
Page 196: Oem-Imu-Eg320N Sensor Specifications
APPENDIX A IMU Technical Specifications A.12.2 OEM-IMU-EG320N Sensor Specifications Table 98: OEM-IMU-EG320N Per- formance Gyroscope Performance Input Rate (max) ±150°/second Bias Repeatability 0.5°/second Bias Instability 3.5°/hour Angular Random Walk 0.1°/√hour Accelerometer Performance Accelerometer Range ±5 g Bias Repeatability 15 mg Bias Instability 0.1 mg Velocity Random Walk... -
Page 197: Oem-Imu-Eg320N Interface Connector
APPENDIX A IMU Technical Specifications A.12.4 OEM-IMU-EG320N Interface Connector This graphic is courtesy of Seiko Epson Corporation. Figure 71: OEM-IMU-EG320N Pin Locations Table 101: OEM-IMU-EG320N Connector Pin Name Description SCLK SPI Serial Clock SPI Data Output Digital ground Digital ground SPI Data Input SPI Chip Select SOUT... - Page 198 APPENDIX A IMU Technical Specifications Pin Name Description 3.3 VDC power supply DRDY(GPIO1) Data Ready GPIO2(EXT) External Trigger Digital ground Reset IMU /RST RST must be high for the IMU to be active. Do not connect Do not connect Do not connect Do not connect The IMU-OEM-EG320N requires a Samtec CLM-110-02-H-D mating connector.
-
Page 199: Oem-Imu-Isa-100C
APPENDIX A IMU Technical Specifications A.13 OEM-IMU-ISA-100C The OEM-IMU-ISA-100C requires a Universal IMU Controller Card to connect to a NovAtel receiver. See UIC - Universal IMU Controller on page 243. Table 102: OEM-IMU-ISA-100C Physical Specifications Physical IMU Size 100 mm x 130 mm x 125 mm... -
Page 200: Oem-Imu-Isa-100C Mechanical Drawings
APPENDIX A IMU Technical Specifications A.13.1 OEM-IMU-ISA-100C Mechanical Drawings The following graphics are courtesy of Northrop Grumman LITEF GmbH. The dimensions in the following graphics are in millimetres. Figure 72: ISA-100C Dimensions OEM7 SPAN Installation and Operation User Manual v4... - Page 201 APPENDIX A IMU Technical Specifications Figure 73: ISA-100C Coordinate Axis OEM7 SPAN Installation and Operation User Manual v4...
-
Page 202: Oem-Imu-Isa-100C Sensor Specifications
APPENDIX A IMU Technical Specifications A.13.2 OEM-IMU-ISA-100C Sensor Specifications Table 103: OEM-IMU-ISA-100C IMU Per- formance Gyroscope Performance Input range ±495 deg/sec In-run bias stability ≤0.05 deg/hr Scale factor repeatability ≤100 ppm Scale factor non-linearity ≤100 ppm Angular random walk 0.012 deg/√hr Accelerometer Performance Range ±10 g... -
Page 203: Oem-Imu-Isa-100C Imu To Uic Cable Assembly
APPENDIX A IMU Technical Specifications A.13.4 OEM-IMU-ISA-100C IMU to UIC Cable Assembly The NovAtel part number for the OEM-IMU-ISA-100C IMU to UIC interface cable is 01019393 (Figure 74: OEM-IMU-ISA-100C IMU to UIC Cable Assembly below). This cable provides power to the IMU and enables communication between the UIC and the IMU. - Page 204 APPENDIX A IMU Technical Specifications J2 Pin J1 Pin Signal (ISA-100C) (UIC) 5.25 V -5.25 V -5.25 V -5.25 V 15 V 3.3 V – – – – NOGOx – – TXC+ SYNC- TXD+ – – 5.25 V 3.3 V 3.3 V OEM7 SPAN Installation and Operation User Manual v4...
- Page 205 APPENDIX A IMU Technical Specifications J2 Pin J1 Pin Signal (ISA-100C) (UIC) PWRDOWNx RESETIMUx – – – – TXC- SYNC+ TXD- – – 5.25 V OEM7 SPAN Installation and Operation User Manual v4...
-
Page 206: Oem-Imu-Stim300
APPENDIX A IMU Technical Specifications A.14 OEM-IMU-STIM300 The OEM-IMU-STIM300 can use a MEMS Interface Card (MIC) or a direct RS-422 link to connect to an OEM7 receiver. For information about using a MIC, see MIC - MEMS Interface Card on page 230. For information about using a direct RS-422 link, see Connect an OEM-IMU- STIM300 Directly to an OEM7 Receiver Card on page 40. -
Page 207: Oem-Imu-Stim300 Mechanical Drawings
APPENDIX A IMU Technical Specifications A.14.1 OEM-IMU-STIM300 Mechanical Drawings The following graphics are courtesy of Sensonor AS. In the following graphics, the dimensions are in millimetres. Figure 75: STIM300 Dimensions Figure 76: STIM300 Center of Navigation OEM7 SPAN Installation and Operation User Manual v4... -
Page 208: Oem-Imu-Stim300 Sensor Specifications
APPENDIX A IMU Technical Specifications A.14.2 OEM-IMU-STIM300 Sensor Specifications Table 108: OEM-IMU-STIM300 Performance Gyroscope Performance Gyro Input Range ±400°/second In-run Gyro Rate Bias Stability 0.5°/hour Angular Random Walk 0.15°/√hour Accelerometer Performance Accelerometer Range ±10 g In-run Accelerometer Bias Stability 0.05 mg Velocity Random Walk 0.07 m/s/√hour Data rate... -
Page 209: Oem-Imu-Stim300 Direct Connection
APPENDIX A IMU Technical Specifications A.14.4 OEM-IMU-STIM300 Direct Connection The following table shows the connections required when connecting the OEM-STIM300 to an OEM7700 or OEM7720 receiver using a RS-422 link. Table 111: Receiver to STIM300 Pin Connections STIM300 RS-422 Line Driver Receiver Pin Name Output... - Page 210 APPENDIX A IMU Technical Specifications STIM300 RS-422 Line Driver Receiver Pin Name Output Input Pin Name Description – – – – Do not connect – – – – Any receiver ground pin COMx_ – – – LVCMOS A IN Any receiver COM port transmit and receive pair COMx_ –...
-
Page 211: Stim300 Imu-To-Mic Cable Assembly
APPENDIX A IMU Technical Specifications A.14.5 STIM300 IMU-to-MIC Cable Assembly The NovAtel part number for the STIM300 IMU-to-MIC interface cable is 01019161 (Figure 77: STIM300 IMU-to-MIC Cable Assembly below). This cable provides power to the IMU and enables communication between the MIC and the IMU. - Page 212 APPENDIX A IMU Technical Specifications P2 Pin (MIC) Signal P1 Pin (STIM300) No connection – No connection – IMU DAS No connection – IMUTYPE1 No connection – OEM7 SPAN Installation and Operation User Manual v4...
-
Page 213: Oem-Imu-Μimu
APPENDIX A IMU Technical Specifications A.15 OEM-IMU-µIMU The OEM-IMU-µIMU requires a Universal IMU Controller to connect to a NovAtel receiver. See UIC - Universal IMU Controller on page 243. Table 113: OEM-IMU-µIMU Phys- ical Specifications Physical IMU Size (Ø x H) -
Page 214: Oem-Imu-Μimu Mechanical Drawings
APPENDIX A IMU Technical Specifications A.15.1 OEM-IMU-µIMU Mechanical Drawings The following graphics are courtesy of Northrop Grumman LITEF GmbH. The dimensions in the following graphics are in millimetres. OEM7 SPAN Installation and Operation User Manual v4... - Page 215 APPENDIX A IMU Technical Specifications Figure 78: µIMU Dimensions OEM7 SPAN Installation and Operation User Manual v4...
- Page 216 APPENDIX A IMU Technical Specifications Figure 79: µIMU Coordinate Axis OEM7 SPAN Installation and Operation User Manual v4...
-
Page 217: Oem-Imu-Μimu Sensor Specifications
APPENDIX A IMU Technical Specifications A.15.2 OEM-IMU-µIMU Sensor Specifications Table 114: OEM-IMU-µIMU IMU Per- formance Gyroscope Performance Input range ±499 deg/sec Bias stability ≤6 deg/hr Scale factor error ≤1400 ppm Angular random walk ≤0.3 deg/√hr Accelerometer Performance Input range ±15 g Bias repeatability ≤3 mg Scale factor error... -
Page 218: Μimu To Uic Cable Assembly
APPENDIX A IMU Technical Specifications A.15.4 µIMU to UIC Cable Assembly The NovAtel part number for the µIMU to UIC interface cable is 01019760 (Figure 80: µIMU to UIC Cable Assembly below). This cable provides power to the IMU and enables communication between the UIC and the IMU. - Page 219 APPENDIX A IMU Technical Specifications P1 Pin J2 Pin Signal (µIMU) (UIC) IMU_5V25 Ground Ground Ground Lug Ring IMU_PDWARN IMU_RESET SYNC+ IMU_TYPE_3 A15 to A18 IMU_TYPE_1 A13 to A11 OEM7 SPAN Installation and Operation User Manual v4...
-
Page 220: Universal Imu Enclosure (Hg1700, Ln200)
APPENDIX A IMU Technical Specifications A.16 Universal IMU Enclosure (HG1700, LN200) The Universal IMU Enclosure is available with the HG1700 and LN-200 IMUs. Table 118: Universal IMU Enclosure Physical Spe- cifications PHYSICAL IMU Enclosure Size 168 mm x 195 mm x 146 mm IMU Enclosure Weight 4.25 kg See the following sections for more information about the IMUs available in the Universal IMU Enclosure. -
Page 221: Universal Imu Enclosure Mechanical Drawings
APPENDIX A IMU Technical Specifications A.16.1 Universal IMU Enclosure Mechanical Drawings The dimensions for the drawing in this section are in mm [inches]. Figure 81: Universal IMU Enclosure Side Dimensions OEM7 SPAN Installation and Operation User Manual v4... - Page 222 APPENDIX A IMU Technical Specifications Figure 82: Universal IMU Enclosure Top/Bottom Dimensions OEM7 SPAN Installation and Operation User Manual v4...
- Page 223 APPENDIX A IMU Technical Specifications Figure 83: Universal IMU Center of Navigation OEM7 SPAN Installation and Operation User Manual v4...
- Page 224 APPENDIX A IMU Technical Specifications Figure 84: Universal IMU Frame Axis OEM7 SPAN Installation and Operation User Manual v4...
-
Page 225: Imu Performance
APPENDIX A IMU Technical Specifications A.16.2 IMU Performance Table 119: HG1700-AG58 IMU Per- formance Gyroscope Performance ±1000 deg/sec Gyro Input Range Gyro Rate Bias 1.0 deg/hr Gyro Rate Scale Factor 150 ppm Angular Random Walk 0.125 deg/rt-hr Accelerometer Performance Accelerometer Range ±50 g Accelerometer Linearity 500 ppm... -
Page 226: Table 121: Ln200 Imu Performance
APPENDIX A IMU Technical Specifications Table 121: LN200 IMU Performance Gyroscope Performance Gyro Input Range ±1000 deg/sec Gyro Rate Bias 1.0 deg/hr Gyro Rate Scale Factor 100 ppm Angular Random Walk 0.07 deg/rt-hr Accelerometer Performance Accelerometer Range ±40 g Accelerometer Linearity 150 ppm Accelerometer Scale Factor 300 ppm... -
Page 227: Electrical And Environmental
APPENDIX A IMU Technical Specifications A.16.3 Electrical and Environmental Table 122: Universal IMU Enclosure Electrical Spe- cifications Electrical HG1700-AG58: 9 W (max) IMU Power Consumption HG1700-AG62: 8 W (max) LN-200: 16 W (typical) IMU Input Voltage +12 to +28 VDC (all IMUs) Receiver Power Consumption 1.8 W (typical, for all IMUs) Input/Output Connectors... -
Page 228: Universal Imu Enclosure Interface Cable
APPENDIX A IMU Technical Specifications A.16.4 Universal IMU Enclosure Interface Cable The NovAtel part number for the Universal IMU Enclosure interface cable is 01018977 (see Fig- ure 85: Universal IMU Enclosure Interface Cable below). This cable provides power to the IMU from an external power source and enables communication between the receiver and the IMU. -
Page 229: Table 125: Connectors
APPENDIX A IMU Technical Specifications J2 Pinout Function Connector Pin/Label OEM_CTS/Rx- OEM_Rx/Rx+ Not used DGND DGND Not used Not used Not used OEM_Tx/Tx+ OEM_RTS/Tx- Shield Shield Custom Cable Recommendations The tables below provide recommendations for creating custom cables to replace the Universal IMU Enclosure interface cable (01018977). -
Page 230: Mic - Mems Interface Card
APPENDIX A IMU Technical Specifications A.17 MIC - MEMS Interface Card Table 127: MEMS Interface Card Physical Specifications Physical 74.9 mm x 45.7 mm x 19.5 mm MIC Size (2.94” x 1.80” x 0.76”) 31 g MIC Weight (0.0683 lb) See the following sections for more information about the MIC. MIC Mechanical Drawings on the next page MIC Electrical and Environmental on page 233 MIC Connectors on page 234... -
Page 231: Mic Mechanical Drawings
APPENDIX A IMU Technical Specifications A.17.1 MIC Mechanical Drawings The dimensions in the following drawings are in millimetres. Figure 86: MIC Top/Bottom Dimensions OEM7 SPAN Installation and Operation User Manual v4... - Page 232 APPENDIX A IMU Technical Specifications Figure 87: MIC Keep-Out Zone Cross hatched areas indicate “keepout” areas intended for NovAtel circuitry. NovAtel reserves the right to modify components and component placements inside cross hatched keepout zones, while maintaining design, form, fit and function.
-
Page 233: Mic Electrical And Environmental
Bump IEC 68-2-29 (25 g) Shock MIL-STD-810G (40 g) Sample system power consumption: 5.7 W when powering an HG1900 IMU and OEM719 receiver, in board stack configuration, from VIN=15 VDC at +25°C. OEM7 SPAN Installation and Operation User Manual v4... -
Page 234: Mic Connectors
APPENDIX A IMU Technical Specifications A.17.3 MIC Connectors Table 130: MIC Connectors Part Num- Mating Connector Connector Description Part number 501189-3010 Connects only to J301 20-pin OEM719 mating connector Molex OEM719 receiver. Electronics 43650-0313 43645-0300 P101 3-pin locking power connector Molex Molex Electronics Electronics... - Page 235 Power Digital ground Leave as no Reserved connect Leave as no Reserved connect Only available in board stackup with OEM719 USB interface USB D- Bidirectional data (-) In standalone, no connect Only available in board stackup with OEM719 USB interface...
- Page 236 COM3 port is disabled by default. If you enable the COM3 port, the Event1 input is disabled. DGND Power Digital ground In board stackup with OEM719, this pin is for firmware download MIC TX Output In standalone use, this pin can be used for either...
-
Page 237: Table 133: Pinouts For Imu Connector (P601)
APPENDIX A IMU Technical Specifications Table 133: Pinouts for IMU Connector (P601) Signal Type Description Comments Chassis ground Chassis ground Output Enabled/disabled depending on the IMU Positive 15 VDC supply Power type detected Output Enabled/disabled depending on the IMU Positive 15 VDC supply Power type detected Output... -
Page 238: Table 134: Pinouts For Imu Connector (P701)
APPENDIX A IMU Technical Specifications Table 134: Pinouts for IMU Connector (P701) Signal Type Description Comments IMU_ Output Positive voltage supply for IMU logic Power circuits IMU_VDD must be +3.3 IMU_ Output Positive voltage supply for IMU logic Power circuits LVCMOS level, not 5V SPI_NSS Slave Select... -
Page 239: Hg1930 Imu-To-Mic Cable Assembly
APPENDIX A IMU Technical Specifications A.17.4 HG1930 IMU-to-MIC Cable Assembly The NovAtel part number for the HG1930 IMU-to-MIC interface cable is 01018827 (Figure 88: HG1930 IMU-to-MIC Cable Assembly below). This cable provides power to the IMU and enables communication between the MIC and the IMU. - Page 240 APPENDIX A IMU Technical Specifications For more information, refer to the IMU documentation provided by Honeywell. OEM7 SPAN Installation and Operation User Manual v4...
-
Page 241: Hg1700 And Hg1900 Imu-To-Mic Cable Assembly
APPENDIX A IMU Technical Specifications A.17.5 HG1700 and HG1900 IMU-to-MIC Cable Assembly The NovAtel part number for the HG1700 and HG1900 IMU-to-MIC interface cable is 01018828 (Figure 89: HG1700 and HG1900 IMU-to-MIC Cable Assembly below). This cable provides power to the IMU and enables communication between the MIC and the IMU. - Page 242 APPENDIX A IMU Technical Specifications For more information, refer to the IMU documentation provided by Honeywell. OEM7 SPAN Installation and Operation User Manual v4...
-
Page 243: Uic - Universal Imu Controller
APPENDIX A IMU Technical Specifications A.18 UIC - Universal IMU Controller Table 138: UIC Physical Specifications Physical 100 mm x 113 mm x 17.54 mm UIC Size (3.94” x 4.45” x 0.69”) 125 g UIC Weight (0.28 lb) See the following sections for more information about the UIC. UIC Mechanical Drawings on the next page UIC Electrical and Environmental on page 246 UIC Connectors on page 247... -
Page 244: Uic Mechanical Drawings
APPENDIX A IMU Technical Specifications A.18.1 UIC Mechanical Drawings The dimensions in the following drawings are in millimetres. Figure 90: UIC Dimensions and Keep Out Zones OEM7 SPAN Installation and Operation User Manual v4... - Page 245 APPENDIX A IMU Technical Specifications Figure 91: UIC Connectors, LEDs and Heat Sink Details OEM7 SPAN Installation and Operation User Manual v4...
-
Page 246: Uic Electrical And Environmental
APPENDIX A IMU Technical Specifications A.18.2 UIC Electrical and Environmental Table 139: UIC Electrical Specifications Electrical UIC Input Voltage 10 VDC-34 VDC Power Consumption IMU Data Interfaces UART and SDLC over RS-422 Table 140: UIC Environmental Specifications Environmental Operating Temperature -40°C to +75°C (-40°F to 167°F) Storage Temperature -55°C to +90°C (-67°F to 194°F) -
Page 247: Uic Connectors
APPENDIX A IMU Technical Specifications A.18.3 UIC Connectors Table 141: UIC Connectors Mating Con- Connector Description Part Number nector Part number 43650-0513 43645-0500 J101 5-pin UIC power connector Molex Electronics Molex Electronics 16-pin UIC to receiver communication 98464-G61-16LF 90311-016LF J102 connector FCI Electronics FCI Electronics... -
Page 248: Table 144: Pinouts For Uic To Imu Communications Connector (J1401)
APPENDIX A IMU Technical Specifications Signal Type Description Comments Input Wheel sensor input A (-) Connects to the wheel sensor. Reserved Reserved Reserved Reserved EVENT_OUT+ Output Event output (+) EVENT_OUT- Output Event output (-) Input Wheel sensor input B (+) Connects to the wheel sensor. - Page 249 APPENDIX A IMU Technical Specifications Signal Type Description Output SPI Serial Clock RESETIMUx Output Reset IMU Power Digital ground Power Digital ground MISO Input SPI Master Input / Slave Output NOGOx MOSI Output SPI Master Output / Slave Input DIO2 Power Digital ground Power...
- Page 250 APPENDIX A IMU Technical Specifications Signal Type Description TXD+ Power Digital ground Power Digital ground 5.25V Output Power Positive 5.25 VDC supply 5.25V Output Power Positive 5.25 VDC supply Power Digital ground 5.25V Output Power Positive 5.25 VDC supply Power Digital ground Power Digital ground...
-
Page 251: Hg1900 Imu To Uic Cable Assembly
APPENDIX A IMU Technical Specifications A.18.4 HG1900 IMU to UIC Cable Assembly The NovAtel part number for the HG1900 IMU to UIC interface cable is 01019762 (Figure 92: OEM-IMU-HG1900 IMU to UIC Cable Assembly below). This cable provides power to the IMU and enables communication between the MIC and the IMU. -
Page 252: Ln200 Imu To Uic Cable Assembly
APPENDIX A IMU Technical Specifications A.18.5 LN200 IMU to UIC Cable Assembly The NovAtel part number for the LN200 IMU to UIC interface cable is 01019763 (Figure 93: OEM- IMU-LN200 IMU to UIC Cable Assembly below). This cable provides power to the IMU and enables communication between the MIC and the IMU. - Page 253 APPENDIX A IMU Technical Specifications J1 Pins (to LN200) J2 Pins (to UIC) Lug Fork A8 to A13 A11 to 12 A15 to A18 OEM7 SPAN Installation and Operation User Manual v4...
-
Page 254: Appendix B Hg1700 Imu In Universal Enclosure
O-rings, sealing surfaces and the IMU. The following procedure provides the necessary information to install the HG1700 sensor into the Universal Enclosure (NovAtel part number 01018589), both illustrated below. The steps required for this procedure are: Disassemble the Universal Enclosure... -
Page 255: Disassemble The Universal Enclosure
APPENDIX B HG1700 IMU in Universal Enclosure B.1 Disassemble the Universal Enclosure Disassemble the Universal Enclosure as follows: 1. Using a 3 mm hex bit, remove the M4 screws (they will be reused) and the base, as shown in Figure 95: Remove Base below. Ensure the O-rings come with the base when it is removed, and that they are not damaged. - Page 256 APPENDIX B HG1700 IMU in Universal Enclosure Figure 96: Disconnect Wiring Harness from Enclosure Body 3. Using a 2.5 mm hex bit, unscrew the M4 screws and remove the IMU mounting plate, bracket and cable harness, as shown in Figure 97: Remove IMU Mounting Plate and Bracket on the next page: OEM7 SPAN Installation and Operation User Manual v4...
-
Page 257: Install The Hg1700 Sensor Unit
APPENDIX B HG1700 IMU in Universal Enclosure Figure 97: Remove IMU Mounting Plate and Bracket B.2 Install the HG1700 Sensor Unit To install the HG1700 sensor unit in the Universal Enclosure: 1. Using a Phillips screwdriver, remove the 8-32 IMU mounting screws from the IMU mounting plate, as shown in Figure 98: Remove IMU Mounting Screws on the next page. - Page 258 APPENDIX B HG1700 IMU in Universal Enclosure Figure 98: Remove IMU Mounting Screws 2. Check the connection of the internal cable harness to the board assembly and route as shown in Figure 99: Connect IMU to IMU Mounting Plate below. Before you connect the IMU cable harness, make sure the connector on the board assembly is clicked open.
- Page 259 APPENDIX B HG1700 IMU in Universal Enclosure pilot pins of the mounting plate. Gently place the IMU and mounting plate together, being careful not to pinch the cable harness. Screw the IMU and mounting plate together, using thread-locking fluid on the 8-32 screws, as shown in Figure 100: Installing IMU to Mounting Plate below.
- Page 260 APPENDIX B HG1700 IMU in Universal Enclosure Figure 101: Assemble Into Enclosure Body 5. Connect the internal cable harness to the enclosure body, as shown in Figure 102: Fasten Internal Cable Harness on the next page. During this step, ensure the connector O-ring (sup- plied with the connector of the internal cable harness) remains flat within the connector’s groove, and make sure the groove is clean and free of debris.
- Page 261 APPENDIX B HG1700 IMU in Universal Enclosure Figure 102: Fasten Internal Cable Harness 6. Ensure the O-rings are in place. If they are not, as necessary, make sure the grooves of the enclosure base are clean and free of debris, using isopropyl alcohol. As shown in Figure 103: Install O-rings below, install the outer environmental and inner EMI O-rings in the enclosure base, being careful not to stretch or twist them.
- Page 262 APPENDIX B HG1700 IMU in Universal Enclosure Figure 104: Install Enclosure Body on the Base 8. While squeezing and holding the enclosure body and base together to maintain tight contact, carefully turn the assembly over and place it on its top, as shown in Figure 105: Screw Enclosure Base to Body below.
- Page 263 APPENDIX B HG1700 IMU in Universal Enclosure Figure 106: Final Assembly OEM7 SPAN Installation and Operation User Manual v4...
-
Page 264: Appendix C Ln-200 Imu In Universal Enclosure
O-rings, sealing surfaces, and the IMU. The following procedure provides the necessary information to install the LN-200 sensor into the Universal Enclosure (NovAtel part number 01018590), both illustrated below. The steps required for this procedure are: Disassemble the Universal Enclosure... -
Page 265: Disassemble The Universal Enclosure
APPENDIX C LN-200 IMU in Universal Enclosure C.1 Disassemble the Universal Enclosure Disassemble the Universal Enclosure as follows: 1. Using a 3 mm hex bit, remove the M4 screws (they will be reused) and the base, as shown in Figure 108: Remove Base below. Figure 108: Remove Base 2. -
Page 266: Install The Ln-200 Sensor Unit
APPENDIX C LN-200 IMU in Universal Enclosure 3. Lift the enclosure lid off the assembly to expose the IMU bracket, shown in Figure 110: IMU Bracket below. Disconnect the harness at the SDLC card and remove. Figure 110: IMU Bracket 4. - Page 267 APPENDIX C LN-200 IMU in Universal Enclosure Figure 112: Install LN-200 IMU to Base 2. Using a long 3 mm hex bit, install the IMU bracket/SDLC to the base, as shown in Figure 113: Install Bracket to Base below. Use thread-locking fluid on each M4 screw. Figure 113: Install Bracket to Base 3.
- Page 268 APPENDIX C LN-200 IMU in Universal Enclosure Figure 114: Making Connections Make sure the tape of the harness is positioned for maximum protection. 4. While carefully holding the body over the bracket, connect the internal cable harness to the board assembly, as shown in Figure 115: Connect Internal Cable Harness below. Figure 115: Connect Internal Cable Harness 5.
- Page 269 APPENDIX C LN-200 IMU in Universal Enclosure alcohol. While ensuring all wires will fit inside the bracket without being pinched, align the reference markers and pilot holes/screws of the enclosure body and base, and carefully lower the body onto the base, observing the O-rings and the alignment of corners. Start with the round pilot hole indicated in Figure 116: Installing the Enclosure Body to the Base below, then press the assembly into place.
- Page 270 APPENDIX C LN-200 IMU in Universal Enclosure Figure 117: Screw Enclosure Base to Body 7. Ensure the product identification label, the logo plate and the center of navigation labels are properly affixed and contain the correct information. The final assembled unit is shown in Fig- ure 118: Final Assembly below.
-
Page 271: Appendix D Hg1700 Imu In Span Hg Enclosure
APPENDIX D HG1700 IMU in SPAN HG Enclosure The following procedure provides the necessary information to install the HG1700 sensor into the SPAN HG Enclosure (NovAtel part number 01017898). The steps required for this procedure are: Disassemble the SPAN HG Enclosure... - Page 272 APPENDIX D HG1700 IMU in SPAN HG Enclosure Figure 120: Bolts and Hex Key 2. Set aside the bolts with their sealing washers. 3. Lift the top cover off the tube body and set it aside, as shown in Figure 121: Lift Top Cover, Tube Body and 3 Ring Spacer Screws on the next page.
-
Page 273: Install The Hg1700 Sensor Unit
APPENDIX D HG1700 IMU in SPAN HG Enclosure Figure 121: Lift Top Cover, Tube Body and 3 Ring Spacer Screws D.2 Install the HG1700 Sensor Unit To re-assemble the SPAN IMU with the HG1700 sensor, see Figure 122: SPAN IMU Re-Assembly on the next page and follow these steps: 1. -
Page 274: Make The Electrical Connections
APPENDIX D HG1700 IMU in SPAN HG Enclosure Figure 122: SPAN IMU Re-Assembly D.3 Make the Electrical Connections To make the electrical connections you need a 3/32” hex key, the flex cable and the partially assembled SPAN IMU from Install the HG1700 Sensor Unit on the previous page. Now follow these steps: 1. - Page 275 APPENDIX D HG1700 IMU in SPAN HG Enclosure Figure 123: Attach Flex Cable 2. Tighten the screws to 4 in-lbs. 3. Connect the opposite end of the flex cable to the corresponding connector on the IMU card ensuring that the contacts on the flex cable mate with the contacts on the connector, as shown in Figure 123: Attach Flex Cable above.
-
Page 276: Re-Assemble The Span Imu Enclosure
APPENDIX D HG1700 IMU in SPAN HG Enclosure Figure 124: Incorrect (Bowed) Flex Cable Installation below shows an incorrect installation of the flex cable where it is bowed in the middle. It will not operate properly in this position. Figure 125: Correct (Flat) Flex Cable Installation below shows the proper installation of the flex cable. - Page 277 APPENDIX D HG1700 IMU in SPAN HG Enclosure Figure 126: HG1700 SPAN IMU OEM7 SPAN Installation and Operation User Manual v4...
-
Page 278: Appendix E Ln-200 Imu In Span Imu Enclosure
The following procedure provides the necessary information to install the LN-200 sensor (NovAtel part number 80023515) into the SPAN IMU enclosure (NovAtel part number 01017656) using the LN-200 wiring harness (NovAtel part number 01017655). The steps required for this procedure are:... - Page 279 APPENDIX E LN-200 IMU in SPAN IMU Enclosure 1. Remove the six bolts from the top cover using a hex key, as shown in Figure 128: Bolts and Hex Key below: Figure 128: Bolts and Hex Key 2. Set aside the bolts with their sealing washers. 3.
-
Page 280: Install The Ln-200 Sensor Unit
APPENDIX E LN-200 IMU in SPAN IMU Enclosure Figure 129: Lift Top Cover and Tube Body E.2 Install the LN-200 Sensor Unit To install the LN-200 sensor, follow these steps: 1. Mount the LN-200 sensor with the attached M4 screws. Apply threadlock to the screw threads. -
Page 281: Make The Electrical Connections
APPENDIX E LN-200 IMU in SPAN IMU Enclosure Figure 130: SPAN IMU Re-Assembly E.3 Make the Electrical Connections To make the electrical connections you will need a 3/32” a hex key, the wiring harness and the partially assembled SPAN IMU from Install the LN-200 Sensor Unit on the previous page. Now follow these steps: 1. - Page 282 APPENDIX E LN-200 IMU in SPAN IMU Enclosure Figure 131: Attach Wiring Harness 2. Connect the Samtec connector at the other end of the wiring harness to the corresponding connector on the internal IMU card, as shown in Figure 132: Attach Samtec Connector on the next page.
- Page 283 APPENDIX E LN-200 IMU in SPAN IMU Enclosure Figure 132: Attach Samtec Connector E.4 Re-Assemble the SPAN IMU Enclosure Use a hex key to align the long bolts with the threaded holes in the base, as shown in Figure 128: Bolts and Hex Key on page 279. Apply threadlock to threads. Finger tighten the 6 bolts then torque them in a cross pattern to 12 in-lbs.
- Page 284 APPENDIX E LN-200 IMU in SPAN IMU Enclosure Figure 133: LN-200 SPAN IMU OEM7 SPAN Installation and Operation User Manual v4...
- Page 285 APPENDIX F Frequently Asked Questions 1. How do I know if my IMU is connected properly? a. Refer to the VERSION log. If your IMU is communicating with a SPAN enabled receiver, the IMU details will be included in the log. b.
- Page 286 APPENDIX F Frequently Asked Questions b. If the INSCOMMAND command has been set to START_FINE_TIME, the RAWIMU logs are not available until the system has solved for time. This requires that an antenna is attached and satellites are visible to the system. You can verify that time is solved by checking the time status in the header of any standard header SPAN log such as BESTPOS.
- Page 287 APPENDIX F Importance of Antenna Selection APPENDIX F Importance of Antenna Selection An antenna behaves both as a spatial and frequency filter, therefore, selecting the right GNSS antenna is critical for optimizing performance. An antenna must match the receiver’s cap- abilities and specifications, as well as meet size, weight, environmental and mechanical spe- cifications for the intended application.
- Page 288 APPENDIX F Importance of Antenna Selection Figure 134: Plot of Good and Poor Antenna Phase Center Variation over Elevation Angle 0-90° Many users can accept accuracies of less than a metre so these small phase center vari- ations cause a negligible amount of position error. But if you require high precision, Real Time Kinematic (RTK) receivers can achieve position accuracies of 2-4 cm and a few mil- limetres of phase center error translates to a 10-15% error in reported position.
- Page 289 APPENDIX F Importance of Antenna Selection temperatures and vibration profiles. Survey rover antennas should be able to survive rough handling by surveyors including a pole drop. The table below highlights some of the important desirable features needed for a GNSS antenna based upon the user’s application.
- Page 290 APPENDIX G Replacement Parts for SPAN The following are a list of the replacement parts available. Should you require assistance, or need to order additional components, contact your local NovAtel dealer or Customer Support. NovAtel Part Part Description IMU-CPT IMU-FSAS-EI...
- Page 291 APPENDIX G Replacement Parts for SPAN NovAtel Part Part Description OEM-IMU-ISA-UIC Universal IMU Controller (UIC) for OEM-IMU-ISA-100C IMU Interface Cables 01018388 iIMU-FSAS IMU with Wheel Sensor Interface cable 01018966 IMU-CPT IMU interface cable 01018977 Universal IMU Enclosure Interface cable 01019007...
- Page 292 OEM7 SPAN Installation and Operation User Manual v4...
Need help?
Do you have a question about the OEM719 and is the answer not in the manual?
Questions and answers