Table of Contents
Advertisement
Quick Links
Download this manual
See also:
Owner's Manual
by
A s s e m b l y
O W N E R ' S
by
&
®
Table of Contents
Before You Begin. . . . . . . . . . . . . . . . . . . . . . p. 2
Important Safety Instructions. . . . . . . . . . . p. 3
Safety Guidelines. . . . . . . . . . . . . . . . . . . . . p. 4-5
®
Preparations. . . . . . . . . . . . . . . . . . . . . . . . . . p. 6
Assembly Instructions. . . . . . . . . . . . . . . . . p. 7-21
Hardware List. . . . . . . . . . . . . . . . . . . . . . . . . p. 26-27
Hardware (To Scale). . . . . . . . . . . . . . . . . . . p. 28-30
Exploded View Diagram. . . . . . . . . . . . . . . . p. 31
I n s t r u c t i o n s
M A N U A L
by
GAB300
®
v. 122017
Advertisement
Table of Contents

Related Manuals for Body Solid GAB300


Summary of Contents for Body Solid GAB300
-
Page 1: Table Of Contents
® GAB300 ® Table of Contents Before You Begin..... . p. 2 Important Safety Instructions... p. 3 Safety Guidelines. -
Page 2: Before You Begin
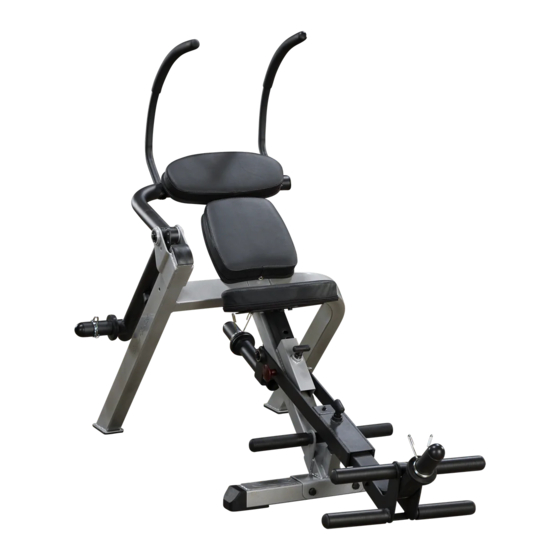
B e f o r e Y o u B e g i n Thank you for purchasing the GAB300. This gym is part of the Body-Solid line of quality strength training machines, which let you target specific muscle groups to achieve better muscle tone and overall body conditioning. -
Page 3: Important Safety Instructions
If you skip ahead, you may learn later that you have to disassemble components and that you may have damaged the equipment. m Assemble and operate the GAB300 on a solid, level surface. Locate the unit a few feet from the walls or furniture to provide easy access. -
Page 4: Safety Guidelines
S a f e t y G u i d e l i n e s Successful resistance training programs have one prominent feature in common... safety. Resistance training has some inherent dangers, as do all physical activities. The chance of injury can be greatly reduced or completely removed by using correct lifting techniques, proper breathing, maintaining equipment in good working condition, and by wearing the appropriate clothing. -
Page 5: Safety Guidelines
S a f e t y G u i d e l i n e s WARNING Weight Horn Collars To avoid serious injury, Weight Horn Collars must be must be used to lock the weight plates WARNING used to lock the weight plates onto the weight posts. onto the Weight Horn. -
Page 6: Preparations
CAUTION: To set up this unit, you will need assistance. Do not attempt assembly by yourself. You must review and follow the instructions in this Owner’s Manual. If you do not assemble and use the GAB300 according to these guidelines, you could void the Body-Solid warranty. -
Page 7: Assembly Instructions
A s s e m b l y I n s t r u c t i o n s Assembly of the GAB300 takes professional installers about 1 hour to complete. If this is the first time you have assembled this type of equipment, plan on significantly more time. - Page 8 S T E P Be careful to assemble all components in the sequence they are presented. NOTE: Finger tighten all hardware in this step unless otherwise noted. Slide Main Frame (A) into Pivoting Frame (B) and connect to Shaft (12) as shown using: Two 22 (M8x16mm hex head bolt) Two 28 (M8, OD 24mm washer)
- Page 9 S T E P Above shows Step 1 assembled and completed.
- Page 10 S T E P Be careful to assemble all components in the sequence they are presented. NOTE: Finger tighten all hardware in this step unless otherwise noted. Attach Left Leg (C) and Right Leg (D) onto Main Frame (A) using: Two 21 (M12x100mm hex head bolt) Four 29 (M12 washer) Two 26 (M12 nylon nut)
- Page 11 S T E P Above shows Step 2 assembled and completed.
- Page 12 S T E P Be careful to assemble all components in the sequence they are presented. NOTE: Finger tighten all hardware in this step unless otherwise noted. Attach Top Pivot (F) to Right Leg (D) and connect Shaft (11) as shown using: Two 22 (M8x16mm hex head bolt) Two 28 (M8 washer) Secure Shaft (11) in Top Pivot (F) using:...
- Page 13 S T E P Above shows Step 3 assembled and completed.
- Page 14 S T E P Be careful to assemble all components in the sequence they are presented. NOTE: Finger tighten all hardware in this step unless otherwise noted. Attach two Crunch Handles (G) to Top Pivot (F) using: Two 19 (M10x25mm round allen head bolt) Two 30 (M10 washer) Attach Seat Pad (I) to Seat Frame (H) using: Two 24 (M8x25mm hex head bolt) M8x25mm...
- Page 15 S T E P Above shows Step 4 assembled and completed.
- Page 16 S T E P Be careful to assemble all components in the sequence they are presented. Attach Head Pad (J) to Pivot (F) as shown using: Two 23 (M8x70mm hex head bolt) Two 51 (M8 spring lock washer) Two 31 (M8 washer) NOTE: Do not re-tighten any of the pad bolts;...
- Page 17 S T E P Above shows Step 5 assembled and completed.
- Page 18 S T E P Be careful to assemble all components in the sequence they are presented. NOTE: Finger tighten all hardware in this step unless otherwise noted. Attach Pivoting Foot Brace (N) to Adjust Arm (P) as shown in the diagram using: One 20 (M12x90mm hex head bolt) Two 29 (M12 washer)
- Page 19 S T E P Above shows Step 6 assembled and completed.
- Page 20 Slide Leg Hold Down (R) into the opening on Main Frame (A) and hold in place by installing Rubber Sleeves (37). Insert Round End Cap (50) into both sides of Leg Hold Down (R). You may now tighten all hardware on the unit. Congratulations!! The installation of your GAB300 is complete.
- Page 21 S T E P Above shows Step 7 assembled and completed.
-
Page 22: Warning, Safety & Maintenance
W a r n i n g , S a f e t y & M a i n t e n a n c e W a r n i n g , S a f e t y &... - Page 23 W a r n i n g , S a f e t y & M a i n t e n a n c e Warning Safety and Maintenance of Cables Although Body-Solid provides the highest quality of materials and workmanship in its products, the fact remains that component parts eventually wear out over time and with use.
- Page 24 W a r n i n g , S a f e t y & M a i n t e n a n c e Precision craftsmanship assures Body-Solid’s ability to CABLES: consistently deliver products of the highest standards. m While the machine is not in use, carefully run your Our products have been carefully designed to ensure fingers along the cable to feel for thinning or bulging...
-
Page 25: Warning, Safety & Maintenance
W a r n i n g , S a f e t y & M a i n t e n a n c e MAINTENANCE DAILY WEEKLY LATEST DATE ENTRY SCHEDULE CABLES: CHECK TENSION, END FITTINGS, AND COATING. CHECK THAT JAM NUTON THE SELECTOR ROD TOP BOLT IS TIGHT. -
Page 26: Hardware List
H a r d w a r e L i s t Part# Description MAIN FRAME PIVOTING FRAME LEFT LEG RIGHT LEG FRONT FOOT FRAME TOP PIVOT HANDLE SEAT FRAME SEAT PAD HEAD PAD BACK PAD PIVOTING FOOT BRACE ADJUSTABLE ARM LEG HOLD DOWN Part numbers are required when ordering parts. -
Page 27: Hardware List
H a r d w a r e L i s t Part# Description SHAFT Ø17x86 SHAFT Ø12x114 SOCKET HEAD BOLT M6x10 SET SCREW M8x10 ROUND ALLEN HEAD BOLT M10x25 FULL THREAD HEX HEAD BOLT M12x90 PARTIAL THREAD HEX HEAD BOLT M12x100 PARTIAL THREAD HEX HEAD BOLT... -
Page 28: Hardware (To Scale)
H a r d w a r e ( T o S c a l e ) Part# 22 M8x16 Hex Head Bolt (Full Thread) Qty. 4 Part# 23 M8x70 Hex Head Bolt (Partial Thread) Qty. 2 Part# 25 M8x75 Hex Head Bolt (Partial Thread) Qty. - Page 29 H a r d w a r e ( T o S c a l e ) Part# 18 M8x10 Set Screw Qty. 4 Part# 24 M8x25 Hex Head Bolt (Full Thread) Qty. 2 Part# 19 M10x25 Round Allen Head Bolt (Full Thread) Qty.
- Page 30 H a r d w a r e ( T o S c a l e ) Part# 29 Washer Qty. 10 Part# 28 M8x24 Washer Qty. 4 Part# 51 Spring Washer Qty. 6 Part# 31 M8x16 Washer Qty. 6 Part# 30 Washer Qty.
-
Page 31: Exploded View Diagram
E x p l o d e d V i e w... - Page 32 ® 1900 S. Des Plaines Ave. Forest Park, Il 60130 1 (800) 556-3113 Hours: M-F 8:30 - 5:00 www.bodysolid.com Copyright 2010. Body-Solid. All rights reserved. Body-Solid reserves the right to change design and specifications when we feel it will improve the product. Body-Solid machines maintain several patented and patent pending features and designs.
Need help?
Do you have a question about the GAB300 and is the answer not in the manual?
Questions and answers