Volvo 31285547 Installation Instructions Manual
Usb/ipod music player, bluetooth handsfree
Hide thumbs
Also See for 31285547:
- Installation instructions manual (54 pages) ,
- Installation instructions, accessories (44 pages)
Advertisement
Quick Links
Instruction No
Instruction No
Version
Version
31310093
31310093
1.3
1.3
© Volvo Car Corporation
Installation instructions, accessories
Volvo Car Corporation Gothenburg, Sweden
Part. No.
Part. No.
31285547
31285547
USB/Ipod Music Player, Bluetooth handsfree
USB/Ipod Music Player, Bluetooth handsfree
USB/Ipod Music Player, Bluetooth handsfree- 31310093 - V1.3
Side 1 / 56
Advertisement

Related Manuals for Volvo 31285547


Summary of Contents for Volvo 31285547
- Page 1 Installation instructions, accessories Volvo Car Corporation Gothenburg, Sweden Instruction No Instruction No Version Version Part. No. Part. No. 31310093 31310093 31285547 31285547 USB/Ipod Music Player, Bluetooth handsfree USB/Ipod Music Player, Bluetooth handsfree © Volvo Car Corporation USB/Ipod Music Player, Bluetooth handsfree- 31310093 - V1.3...
- Page 2 Installation instructions, accessories Volvo Car Corporation Gothenburg, Sweden Equipment IMG-242205 A0000162 IMG-239664 IMG-332314 IMG-246925 IMG-333125 © Volvo Car Corporation USB/Ipod Music Player, Bluetooth handsfree- 31310093 - V1.3 Side 2 / 56...
- Page 3 Installation instructions, accessories Volvo Car Corporation Gothenburg, Sweden IMG-331666 © Volvo Car Corporation USB/Ipod Music Player, Bluetooth handsfree- 31310093 - V1.3 Side 3 / 56...
- Page 4 Installation instructions, accessories Volvo Car Corporation Gothenburg, Sweden IMG-333126 © Volvo Car Corporation USB/Ipod Music Player, Bluetooth handsfree- 31310093 - V1.3 Side 4 / 56...
- Page 5 Explanatory text is also given for more complicated steps. In the event of any problems with the instructions or the accessory, contact your local Volvo dealer. Note! This installation instruction shows the installation of the USB/iPod adapter and Handsfree with Bluetooth on left-hand drive vehicles.
- Page 6 Installation instructions, accessories Volvo Car Corporation Gothenburg, Sweden Preparations Turn the ignition key to position 0. Note! Wait at least three minutes before unplugging the connectors or removing other electrical equipment. IMG-245980 Open the glovebox. Carefully pry off the panel at the rear of the centre console. Use a plastic weatherstrip tool.
- Page 7 Installation instructions, accessories Volvo Car Corporation Gothenburg, Sweden Apply tape to the center console to protect it during removal and installation of the glove compartment. IMG-239762 Remove the panel. IMG-240082 © Volvo Car Corporation USB/Ipod Music Player, Bluetooth handsfree- 31310093 - V1.3...
- Page 8 Installation instructions, accessories Volvo Car Corporation Gothenburg, Sweden Detach the clip holding the vent from the glove compartment. IMG-244221 Remove the rubber mat from the glovebox. Remove the 5 x screws from the opening. Pull the glovebox straight back in the vehicle in order to release the hidden clips, 2 pcs, in the top edge.
- Page 9 Installation instructions, accessories Volvo Car Corporation Gothenburg, Sweden Unplug the connectors on the top. IMG-222669 Remove the screws for the vent. Pull off the vent to the right and place to one side. IMG-239763 © Volvo Car Corporation USB/Ipod Music Player, Bluetooth handsfree- 31310093 - V1.3...
- Page 10 Installation instructions, accessories Volvo Car Corporation Gothenburg, Sweden Remove the clips at the rear edge of the soundproofing panel and remove it. J8504871 Remove the surround around the display and media player: Press in the catch at one of the surround's upper corners. Use a small screwdriver.
- Page 11 Installation instructions, accessories Volvo Car Corporation Gothenburg, Sweden Remove the ignition control module (ICM). It is secured by hidden clips, 2 pcs. Hint Grip with both hands and pull. Disconnect the two connectors. Put the display to one side. J8504534 Detach the hand brake panel by pulling it carefully sideways.
- Page 12 Installation instructions, accessories Volvo Car Corporation Gothenburg, Sweden Fold up the tunnel console's armrest and remove the cover at the bottom. IMG-273610 Loosen the rear edge of the panel, it should not be completely removed. IMG-273611 © Volvo Car Corporation USB/Ipod Music Player, Bluetooth handsfree- 31310093 - V1.3...
- Page 13 Installation instructions, accessories Volvo Car Corporation Gothenburg, Sweden Remove the two screws. IMG-273630 Applies to all models Remove the two screws along the front edge of the tunnel console. IMG-270744 © Volvo Car Corporation USB/Ipod Music Player, Bluetooth handsfree- 31310093 - V1.3...
- Page 14 Installation instructions, accessories Volvo Car Corporation Gothenburg, Sweden Remove the front storage compartment by prying it off at the front edge using a weatherstrip tool and lifting it out. IMG-263505 Carefully lift the catches at the front edge of the tunnel console.
- Page 15 Installation instructions, accessories Volvo Car Corporation Gothenburg, Sweden Hold up the lock catch and at the same time slide the entire tunnel console back 20 mm, so that the two rear screws in the centre console are accessible. IMG-263587 Remove the two screws.
- Page 16 Installation instructions, accessories Volvo Car Corporation Gothenburg, Sweden Applies to cars with manual gearbox Remove the gear selector lever boot from the center console. First pry it off at the front edge using a weatherstrip tool and then unhook it at the rear edge.
- Page 17 Installation instructions, accessories Volvo Car Corporation Gothenburg, Sweden Lift up the tunnel console and pull it back slightly. Unplug the big gray connector at the front. IMG-268148 Lift out the console and turn it upside down Note! Protect hand brake and gear lever when removing and installing the tunnel console.
- Page 18 Installation instructions, accessories Volvo Car Corporation Gothenburg, Sweden Unplug the connector of the 12V socket. IMG-263592 Carefully bend loose the tunnel console's rear panel using a weatherstrip tool. IMG-263593 Installing the USB / iPOD cable © Volvo Car Corporation USB/Ipod Music Player, Bluetooth handsfree- 31310093 - V1.3...
- Page 19 Installation instructions, accessories Volvo Car Corporation Gothenburg, Sweden Installing the USB / iPOD cable Get the USB/iPod cable from the kit, insert the straight contact in the trailing edge of the tunnel console and into the storage compartment. IMG-263595 Measure the length of the cable that is to be protrude from the bottom of the storage compartment.
- Page 20 Installation instructions, accessories Volvo Car Corporation Gothenburg, Sweden Clamp in the cable harness to the existing cable harness using cable ties. IMG-263598 Push on the panel, ensuring the cable is not pinched. IMG-263599 © Volvo Car Corporation USB/Ipod Music Player, Bluetooth handsfree- 31310093 - V1.3...
- Page 21 Installation instructions, accessories Volvo Car Corporation Gothenburg, Sweden Reinstall the panel. IMG-263600 Connect the connector to the 12V socket. IMG-263601 © Volvo Car Corporation USB/Ipod Music Player, Bluetooth handsfree- 31310093 - V1.3 Side 21 / 56...
- Page 22 Installation instructions, accessories Volvo Car Corporation Gothenburg, Sweden Fold the carpet to the right of the center console. IMG-263604 Applies to cars with internal amplifier Remove cable harness (A) from the kit. Applies to cars with external amplifier Remove cable harness (B) from the kit.
- Page 23 Installation instructions, accessories Volvo Car Corporation Gothenburg, Sweden Applies to cars with internal amplifier Take the relay and two thick pieces of foam tape from the kit. Connect the connectors from cable harness A to the mute relay. Tape the foam tape pieces around the relay.
- Page 24 Installation instructions, accessories Volvo Car Corporation Gothenburg, Sweden Take the adapter and 2 pieces of foam tape from the kit. Bend in the bracket at each end. IMG-333128 Illustration A Illustration B Remove the protective film on the foam tape and attach as illustrated.
- Page 25 Installation instructions, accessories Volvo Car Corporation Gothenburg, Sweden Connect the USB/iPod connector and the fibre optic cable's connector to the adapter. Clamp the USB/iPod cable at the eyelet on the adapter using a tie- strap. IMG-263611 Place the adapter between the carpet and the climate control unit as illustrated.
- Page 26 Installation instructions, accessories Volvo Car Corporation Gothenburg, Sweden Connect the gray connector (1) in the new cable harness to the corresponding socket in the media player. Connect the gray connector (2) in the new cable harness to the gray connector (3) which was detached from the media player.
- Page 27 Installation instructions, accessories Volvo Car Corporation Gothenburg, Sweden Installing the microphone Unhook the sun shield from the bracket. Do this on both sides. IMG-253963 Remove the locking plug and bracket. Do this on both sides. IMG-274304 © Volvo Car Corporation USB/Ipod Music Player, Bluetooth handsfree- 31310093 - V1.3...
- Page 28 Installation instructions, accessories Volvo Car Corporation Gothenburg, Sweden Pull off the driver's weather strip at the A-post and dashboard. Pull off the panel from the A-pillar. The panel is secured by three clips. Unhook the safety clip. Lift the panel upwards and inwards in the vehicle.
- Page 29 Installation instructions, accessories Volvo Car Corporation Gothenburg, Sweden Remove the three screws. IMG-253984 Take two 700 mm (27 9/16") pieces of foam tape from the kit. Cut one piece of the foam tape in half. Tape one long and one short piece of foam tape on the microphone cable starting 70 mm (2 3/4") from the microphone.
- Page 30 Installation instructions, accessories Volvo Car Corporation Gothenburg, Sweden Pull down the headlining with the interior lighting frame slightly. Route the microphone cable along the top of the existing cable harness as illustrated. IMG-253986 Route the microphone cable to the front edge of the headlining as illustrated.
- Page 31 Installation instructions, accessories Volvo Car Corporation Gothenburg, Sweden Make a mark on the foam tape which is attached to the cable, 230 mm (9 1/16") from the microphone. Use a cable tie to fasten the cable at the mark at the existing connector.
- Page 32 Installation instructions, accessories Volvo Car Corporation Gothenburg, Sweden Clean the area on the microphone and headlining panel as illustrated, which corresponds to the size of the double-sided adhesive tape. Use a solution of 25% isopropanol and 75% water, as well as a lint free cloth.
- Page 33 Installation instructions, accessories Volvo Car Corporation Gothenburg, Sweden Route the cable to the A-pillar and onwards to the glove compartment. Take three small tie straps from the kit and secure the cable at the A-pillar as illustrated. Refit the sun visor mountings.
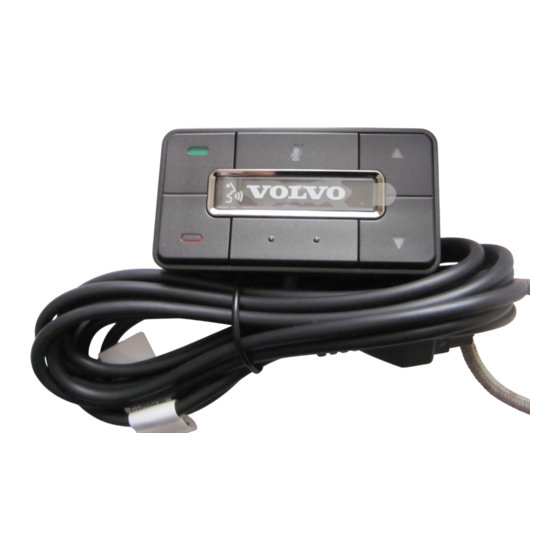
- Page 34 Installation instructions, accessories Volvo Car Corporation Gothenburg, Sweden Place the control panel cable in the groove as illustrated. IMG-331669 IMG-331670 Remove the protective film from the tape and secure the control panel edge to edge against the climate panel and according to the dimensions illustrated.
- Page 35 Installation instructions, accessories Volvo Car Corporation Gothenburg, Sweden Press the cable securely into the compartment that is in the joint between the front and rear side of the center console. Stop level with the lower edge of the display opening.
- Page 36 Installation instructions, accessories Volvo Car Corporation Gothenburg, Sweden Reinstall the tunnel console, but do not slide it forward so far that it covers the rear screw holes for the centre console's panel. Plug in the connectors at the leading edge.
- Page 37 Installation instructions, accessories Volvo Car Corporation Gothenburg, Sweden slide the tunnel console forward so that the locking lug secures it. At the same time, guide in the floor carpet on the left-hand side. Reinstall: the two screws at the front edge of the tunnel console.
- Page 38 Installation instructions, accessories Volvo Car Corporation Gothenburg, Sweden File a slot at the rear of the storage compartment's bottom cover for the USB/iPod cable in the position as shown. IMG-263635 Place the USB/iPod cable in the bottom cover's slot and pres it into place.
- Page 39 Installation instructions, accessories Volvo Car Corporation Gothenburg, Sweden Reinstall: the ignition control module (ICM) with the connectors, screws and frame. front storage compartment inside of the center console. IMG-263636 Installing the control module Installing the control module Take the cable harness and control module from the kit. Connect the cable harness to the control module (1).
- Page 40 Installation instructions, accessories Volvo Car Corporation Gothenburg, Sweden Get a thick foam tape from the kit and fasten it on the front of the control module. Fold up the foam tape around the corners and edges of the control module.
- Page 41 Installation instructions, accessories Volvo Car Corporation Gothenburg, Sweden Detach the front sill molding by first pulling it backwards at the front edge and then straight up so that the clips release. IMG-250923 Unscrew the clips holding the floor carpet. Fold aside the floor mat to access the bulkhead panel inside.
- Page 42 Installation instructions, accessories Volvo Car Corporation Gothenburg, Sweden Place the control module with the thick foam tape forward, against the bulkhead. IMG-256726 Fold aside the cable harnesses (1) so that they do not end up between the control module and floor mat.
- Page 43 Installation instructions, accessories Volvo Car Corporation Gothenburg, Sweden Connect the connectors for the Bluetooth system as illustrated: Applies to cars with internal amplifier 1. Connect cable harness A to the cable from the control module. Applies to cars with external amplifier 1.
- Page 44 Installation instructions, accessories Volvo Car Corporation Gothenburg, Sweden Take two large tie straps from the kit and secure the cable from the microphone on top of the collision pipe. Applies to cars with external amplifier Also secure the cable harness B, that is to be later routed back to the external amplifier.
- Page 45 Installation instructions, accessories Volvo Car Corporation Gothenburg, Sweden Pull off the rubber strip at the rear of the opening for the right- hand rear door. Carefully pry off the lower panel on the C-post on the right-hand side. Carefully pry at the top edge. Use a plastic weatherstrip tool.
- Page 46 Installation instructions, accessories Volvo Car Corporation Gothenburg, Sweden Pull off the rubber mouldings at the rear edge of the right-hand front door and at the front edge of the right-hand rear door. This releases the lower panel on the B-pillar.
- Page 47 Installation instructions, accessories Volvo Car Corporation Gothenburg, Sweden Applies to the V50 Remove the cargo compartment carpet. J8504575 Use a weatherstrip tool and pry up one corner of the sill trim panel so that the two clips on the short side release.
- Page 48 Installation instructions, accessories Volvo Car Corporation Gothenburg, Sweden Remove the screw. Pull the panel upwards so that the four clips on the inside release. Remove the panel. This must be carried out on the left-hand side on right-hand drive vehicles.
- Page 49 Installation instructions, accessories Volvo Car Corporation Gothenburg, Sweden Applies to S40 (04-) Remove the cargo compartment carpet. J8504553 Remove the upper floor support on the left and right-hand sides if applicable. J8504552 © Volvo Car Corporation USB/Ipod Music Player, Bluetooth handsfree- 31310093 - V1.3...
- Page 50 Installation instructions, accessories Volvo Car Corporation Gothenburg, Sweden Unscrew the two external clips at the front edge/bottom edge of the sill trim panel on the tailgate. Use a weatherstrip tool and pry up one corner of the sill trim panel so that the two clips in that end release.
- Page 51 Installation instructions, accessories Volvo Car Corporation Gothenburg, Sweden Applies to the S40 and V50 Route the cable (B) inside the floor carpets, the lower B-post panel and the insulation panels, back to the rear edge of the right -hand rear wheel arch. Route the cable along the existing cable harnesses in the cargo compartment.
- Page 52 Installation instructions, accessories Volvo Car Corporation Gothenburg, Sweden Applies to the V50 Remove the clips and the insulation panel. J8504639 Disconnect the rear connector (1) on the amplifier. IMG-240930 © Volvo Car Corporation USB/Ipod Music Player, Bluetooth handsfree- 31310093 - V1.3...
- Page 53 Installation instructions, accessories Volvo Car Corporation Gothenburg, Sweden Remove cable harness (C) from the kit. Connect the cable harness to the amplifier as follows: Connector (1) which is disconnected from the amplifier is connected to the female connector (2) on the cable harness. Connector (3) on the cable harness is connected to the amplifier.
- Page 54 Installation instructions, accessories Volvo Car Corporation Gothenburg, Sweden Place the relay behind the existing cable harness. IMG-240932 Reinstall the connectors to the rear section of the glove box. Note the color marking on the cable for the right-hand connector. IMG-231504 Reinstall: ©...
- Page 55 Installation instructions, accessories Volvo Car Corporation Gothenburg, Sweden Reinstall: Dashboard the lower vent. the sound proofing. the rear section of the glovebox by guiding it in diagonally inside the center console. Then straight forward. The rear section must be positioned on the outside of the remaining inner section.
- Page 56 Installation instructions, accessories Volvo Car Corporation Gothenburg, Sweden Download software (application) for the accessory's function according to service information in VIDA. See VIDA or accessories catalogue for article number on software. IMG-242268 Turn the ignition key to position I. Turn on the radio.
Need help?
Do you have a question about the 31285547 and is the answer not in the manual?
Questions and answers