Table of Contents
Advertisement
INSTRUCTION
MANUAL
Product Operational Information
[Specifications]
Lever Start
DLV30A06L-SP
Model
DLV30A06L-SPC
Push to Start
DLV30A06P-SP
Model
DLV30A06P-SPC
Torque [Nm]
Free Speed
650
[min
]
-1
•
Please refer to p. 6 for details.
Please read manual carefully before you attempt to use your tool so that you may use it properly and safely.
Keep the manual handy - so you can use it whenever necessary.
• Due to continuous product development/improvement the specifications and configurations in
this document are subject to change without prior notice.
Manufactured by.
NITTO KOHKI CO., LTD.
SP Type
Indoor Use Only
DLV30A12L-SP
DLV30A20L-SP
DLV30A12L-SPC
DLV30A20L-SPC
DLV30A12P-SP
DLV30A20P-SP
DLV30A12P-SPC
DLV30A20P-SPC
Low torque spring: 0.4 to 1.6
High torque spring: 1.2 to 3.0
1200
9-4, Nakaikegami 2-chome, Ohta-ku, Tokyo, 146-8555, Japan
Tel : +81-3-3755-1111 Fax : +81-3-3753-8791
Professional tool
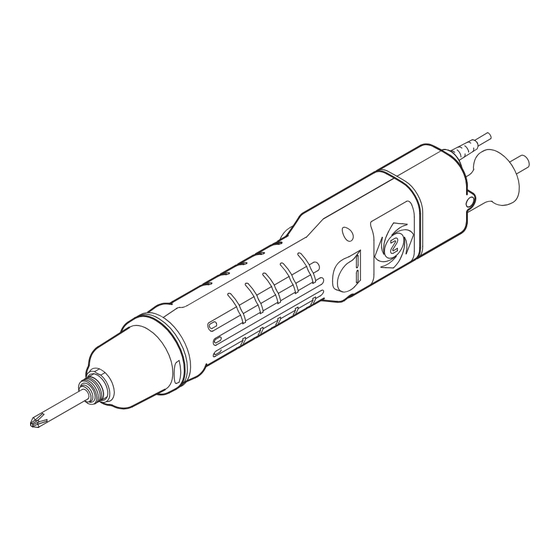
ELECTRIC SCREWDRIVER
Model: DLV30A/DLV45A/DLV70A-SP/SPC Series
Brushless Motor
DLV45A06L-SP
DLV45A06L-SPC
DLV45A06P-SP
DLV45A06P-SPC
2.0 to 4.5
2000
650
SPC Type
Grounded bit function
DLV45A12L-SP
DLV70A06L-SP
DLV45A12L-SPC
DLV70A06L-SPC
DLV45A12P-SP
DLV70A06P-SP
DLV45A12P-SPC
DLV70A06P-SPC
3.8 to 7.0
1200
650
(Original Instructions)
TV07927-0 02/2018
Advertisement
Table of Contents

Related Manuals for Nitto Kohki DLV30A06L-SP


Summary of Contents for Nitto Kohki DLV30A06L-SP
-
Page 1: Specifications
• Due to continuous product development/improvement the specifications and configurations in this document are subject to change without prior notice. Manufactured by. 9-4, Nakaikegami 2-chome, Ohta-ku, Tokyo, 146-8555, Japan NITTO KOHKI CO., LTD. Tel : +81-3-3755-1111 Fax : +81-3-3753-8791 (Original Instructions) TV07927-0 02/2018... -
Page 2: Table Of Contents
Thank you very much for your purchase of this NITTO KOHKI product. Before using your tool, please read this manual carefully so that you may use it properly to get the most out of it. Please keep the manual handy - so you can use it whenever necessary. -
Page 3: Product Specific Safety Rules
Product Specific Safety Rules CAUTION This tool is not an impact type electric screwdriver. Do not tighten twice (extra tightening). Also, it cannot be used for screw tightening of such things as wood or drywall. Depending on fastening conditions, screws may become loose. Improper impacts could decrease product life or cause product failure. -
Page 4: Application
1 Application This is a hand-held electric screwdriver used to tighten screws. The tool is equipped with an environmentally-friendly brushless motor. Features differ depending on the model type. For identification of model, see p. 1. Features of the SP type This type is a signal output driver with an addition of start signal, torque-up signal, and reverse rotation signal (photo coupler output) that can be available for security against forgetting to tighten screws. -
Page 5: Identifying Bits That Can Be Attached
Suspension Bail Pistol Grip DLW2300 Identifying Bits that Can Be Attached You can identify bits that can be attached based on the alphabet character written to the right of the serial number of the electric screwdriver. Attachable bit shape NK35 (HEX 6.35 mm) Serial No. -
Page 6: Part Names
6 Rubber Ring (the color varies by model) b Torque Adjustment Ring 7 Coupling Model Rubber ring Torque adjustment ring cover Lever start type Push start type DLV30A06P-SP(AJ) Yellow DLV30A06L-SP(AJ Resin/transparent DLV30A12L-SP(AJ) DLV30A12P-SP(AJ) Blue DLV30A20L-SP(AJ) DLV30A20P-SP(AJ) DLV45A06L-SP(AJ) DLV45A06P-SP(AJ) DLV45A12L-SP(AJ) DLV45A12P-SP(AJ) -
Page 7: Spc Type
SPC type Lever start type Push start type 1 Connection plug 6 Torque Adjustment Ring Cover 2 Connection cable (the material varies by model) 3 Lever Switch 7 Frame Handle (exterior resin part of main unit) 4 Rubber Ring (the color varies by model) 8 Changeover Switch 5 Coupling 9 Torque Scale (standard) -
Page 8: Specifications
When the output torque is measured by some other measuring device or combination, the value may be different. The output torque and torque that occurs in screws do not match. Use a torque wrench to check the torque generated on screws. DLV30A06L-SP(AJ) DLV30A12L-SP(AJ) DLV30A20L-SP(AJ) Lever Start DLV30A06L-SPC(AJ) -
Page 9: Torque Scale And Output Torque
Torque scale and output torque CAUTION The torque scale is for reference. The output torque range is not guaranteed. Make sure to measure torque. Use the tool within the specified range. When the torque decreases, increase the torque based on the measured value. ... - Page 10 Specifications Internal circuit Electric screwdriver internal circuit Output Signal Output signal Signal cable wiring color Start Green Torque-up White Reverse Yellow Ground Signal cable wiring color Ground Black Example wiring of output signals WARNING Do not directly connect the relay, motor, lamp, etc. to control. ...
- Page 11 Output signal timing chart CAUTION The start signal is output even when the start switch is turned ON while the changeover switch of forward and reverse rotation is at the neutral position. When torque-up occurs in the reverse rotation, the torque-up signal is also output. ...
-
Page 12: Preparation
5 Preparation Attaching a bit WARNING Before attaching or detaching a bit, always turn OFF the power. Pull the sleeve Insert a bit while pulling the sleeve Sleeve Release the sleeve and make sure the bit does not come off To remove the bit, pull out the bit while pulling the sleeve. -
Page 13: Replacing A Torque Spring
Replacing a torque spring WARNING Before attaching or detaching the torque spring, always turn OFF the power. CAUTION The spring plate assembly must be oriented correctly. The ball goes into the recess of the torque adjustment ring. When it is attached in the opposite orientation, the torque adjustment ring easily gets loose. -
Page 14: Attaching The Pistol Grip
Preparation Attaching the Pistol Grip WARNING Before attaching or detaching the Pistol Grip, always turn OFF the power. After fixing the Pistol Grip with the screw, check for looseness, slip, and displacement of the screw. CAUTION ... -
Page 15: Notes On Attaching A Commercially Available Fixing Jig
Notes on attaching a commercially available fixing jig CAUTION Do not block the hole on the frame handle, as doing so could cause a failure due to heating. Hole Fixing position of fixing jig 6 Basic Operation Start WARNING ... -
Page 16: Changeover Switch
Basic Operation SPC type WARNING Before using the electric screwdriver, lock the connector securely for a connection between the electric screwdriver and the screw fastening counter. Since there is a danger of malfunction or electric shock, connect the electric screwdriver to the power supply ... -
Page 17: Start And Stop
Start and stop WARNING Never touch the bit while it is rotating. Do not direct the bit toward people or animals. CAUTION Make sure to properly press the start switch. With the SP type, if the start switch of the electric screwdriver is turned OFF immediately before torque-up, ... -
Page 18: Screw Tightening
Basic Operation Screw tightening WARNING Firmly hold the main body to avoid losing your grip. CAUTION Properly apply the bit end to the screw head. Check that the bit is not worn. Slide the changeover switch to the “R” side Apply the bit end to the screw head and press the start switch When the electric driver stops, release the start switch Adjusting the output torque... -
Page 19: Appendix
Is the changeover switch set to Slide the changeover switch to the R or L side. neutral? Are you using a combination of Use a combination of NITTO KOHKI's measuring NITTO KOHKI measuring devices for devices for measurement. (p. 6) measurement? Are you turning the torque adjustment The output torque decreases as the tool is used. -
Page 20: Maintenance And Inspection
Appendix Symptoms Location to investigate Solution Is the ON time of the electric Review the operation time. screwdriver too long? The rated operating time is 0.5 sec. ON and 3.5 sec. Alternatively, is the OFF time too OFF. short? Aim at 15 screws per minute. (p. 6) Check the power source voltage, and input the rated The electric screwdriver Is the rated voltage input? -
Page 21: Disposal
Check the screws on the main unit (including accessory Pistol Grip). If screws are loose, tighten them. Use a combination of NITTO KOHKI's measuring devices to measure the output torque. Output torque If the output torque value has decreased, turn the torque adjustment ring to adjust the torque. -
Page 22: Separately-Sold Products
Appendix Separately-sold products The following products are sold separately. To purchase these items, please contact your dealer where you purchased your electric screwdriver. Product name (model) Appearance Specification, etc. Screw fastening [Dedicated to SPC type] counter Counter for prevention of human error and (DLR5040A-WE/ for management of fastening DLR5340-WE) -
Page 23: External Dimensions
External dimensions * Differs depending on the model. (Refer to p. 4, p. 5.) 273.5 46.5 Front view DLV30A06L-SP(AJ)/-SPC(AJ) DLV30A12L-SP(AJ)/-SPC(AJ) DLV30A20L-SP(AJ)/-SPC(AJ) Front view DLV30A06P-SP(AJ)/-SPC(AJ) DLV30A12P-SP(AJ)/-SPC(AJ) DLV30A20P-SP(AJ)/-SPC(AJ) 48.5 275.5 Side view Common to DLV30A 273.5 46.5 Front view DLV45A06L-SP(AJ)/-SPC(AJ) DLV45A12L-SP(AJ)/-SPC(AJ) DLV70A06L-SP(AJ)/-SPC(AJ)
Need help?
Do you have a question about the DLV30A06L-SP and is the answer not in the manual?
Questions and answers