Table of Contents
Advertisement
Quick Links
INSTRUCTION
MANUAL
Product Operational Information
This instruction manual is written in English.
EN
Instruction manuals in other languages can be downloaded from the URL below.
Ce manuel d'instructions est rédigé en anglais.
FR
Les manuels d'instructions dans d'autres langues peuvent être téléchargés à partir de l'URL
ci-dessous.
Diese Bedienungsanleitung ist auf Englisch verfasst.
DE
Bedienungsanleitungen in anderen Sprachen können von der unten genannten URL
heruntergeladen werden.
Il presente manuale di istruzioni è redatto in lingua inglese.
IT
I manuali di istruzioni in altre lingue possono essere scaricati dal seguente URL.
Este manual de instrucciones está escrito en inglés.
ES
En la dirección URL indicada abajo se pueden descargar los manuales de instrucciones en otros
idiomas.
Este manual de instruções está escrito em inglês.
PT
Pode descarregar os manuais de instruções nos outros idiomas a partir do URL indicado abaixo.
[Specifications]
Lever Start
DLV30A06L-
Model
ASL(AB)
Push to Start
DLV30A06P-
Model
ASL(AB)
Low torque spring: 0.4 to 1.6 (3.5 to 14.2)
Torque
[Nm(Lb-in)]
High torque spring: 1.2 to 3.0 (10.6 to 26.6)
Free Speed
650
[min
]
-1
•
Please refer to p. 4 for details.
Please read manual carefully before you attempt to use your tool so that you may use it properly and safely.
Keep the manual handy - so you can use it whenever necessary.
• Due to continuous product development/improvement the specifications and configurations in
this document are subject to change without prior notice.
Manufactured by.
NITTO KOHKI CO., LTD.
Professional tool
Model: DLV30A/DLV45A/DLV70A-ASL Series
http://www.nitto-kohki.co.jp/e/
DLV30A12L-
DLV30A20L-
ASL(AB)
ASL(AB)
DLV30A12P-
DLV30A20P-
ASL(AB)
ASL(AB)
1200
2000
9-4, Nakaikegami 2-chome, Ohta-ku, Tokyo, 146-8555, Japan
Tel : +81-3-3755-1111 Fax : +81-3-3753-8791
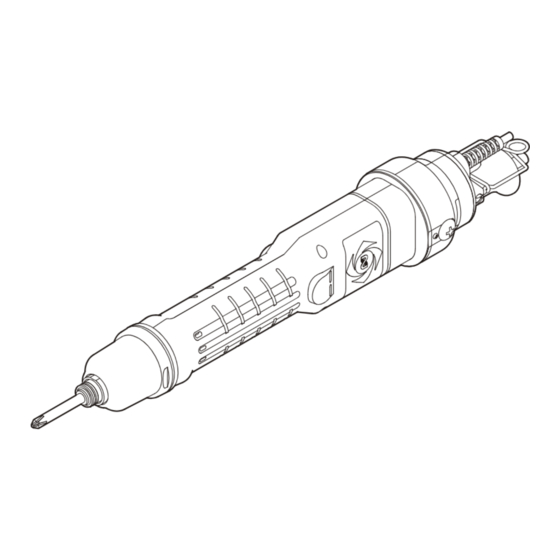
ELECTRIC SCREWDRIVER
Indoor Use Only
Brushless Motor
Grounded bit function
DLV45A06L-
DLV45A12L-
ASL(AB)
ASL(AB)
DLV45A06P-
DLV45A12P-
ASL(AB)
ASL(AB)
2.0 to 4.5
(17.7 to 39.8)
650
1200
DLV70A06L-
ASL(AB)
DLV70A06P-
ASL(AB)
3.8 to 7.0
(33.6 to 61.9)
650
(Original Instructions)
TV07878-1 06/2017
Advertisement
Table of Contents

Subscribe to Our Youtube Channel
Related Manuals for Nitto Kohki Delvo DLV70A-ASL Series


Summary of Contents for Nitto Kohki Delvo DLV70A-ASL Series
- Page 1 • Due to continuous product development/improvement the specifications and configurations in this document are subject to change without prior notice. Manufactured by. 9-4, Nakaikegami 2-chome, Ohta-ku, Tokyo, 146-8555, Japan NITTO KOHKI CO., LTD. Tel : +81-3-3755-1111 Fax : +81-3-3753-8791 (Original Instructions) TV07878-1 06/2017...
-
Page 2: Table Of Contents
Thank you very much for your purchase of this NITTO KOHKI product. Before using your tool, please read this manual carefully so that you may use it properly to get the most out of it. Please keep the manual handy - so you can use it whenever necessary. -
Page 3: Product Specific Safety Rules
Product Specific Safety Rules WARNING This product is for domestic use. This unit complies with the domestic safety standards only. The product cannot be used overseas. When using an extension cord, select the wire diameter according to the extended length. ... -
Page 4: Application
1 Application This is a hand-held electric screwdriver used to tighten screws. The tool is equipped with an environmentally-friendly brushless motor. AnyWireASLINK system of Anywire Corporation and LED are built in and this specification specializes in linkage with FA equipment. 2 Checking Inside the Package When you open the package box, check the content of the package and also check for any damage caused by incidents during transportation. -
Page 5: Part Names
3 Part Names Lever start type Push start type 1 Power plug 9 Power cord 2 Link Connector (LP4-WW-10P, Anywire 0 Suspension Bail Corporation) a Address receiving/sending light unit 3 Signal line b Coupling 4 Spiral tube c Frame Handle (exterior resin part of main unit) 5 LED lighting part d Changeover Switch 6 Lever Switch... -
Page 6: Specifications
4 Specifications CAUTION The output torque is the value measured in combination with the output torque measurement device. When the output torque is measured by some other measuring device or combination, the value may be different. The output torque and torque that occurs in screws do not match. ... -
Page 7: Torque Scale And Output Torque
DLV30A/45A/70A Series common specifications 75 (uncertainty :K=3dB) Noise emission (dB) (According to EN60745) Vibration level (m/s Less than 2.5 (According to EN60745) Operating -5 to +50 (+23 to +122) Temperature Range (°C (°F)) Storage -20 to +70 (-4 to +158) Relative Humidity Free of Dew (include time of the Storage) Operating Environment... -
Page 8: Signal Specification
Specifications Signal specification Signal line (link connector) details Pin No. Wiring color Signal name Black Yellow White Green 24 V I/O allocation Address Input Start signal Torque-up signal Reverse rotation signal Space Output Green Blue Space LED display Status Color Details Set LED colors in the program 7 colors (red/green/... -
Page 9: Preparation
5 Preparation Setting the address CAUTION Always connect to the AnyWireASLINK master unit when using the tool. To set the address of the tool, an address writer is required. For details, refer to the instruction manual for the ... -
Page 10: Attaching A Bit
Preparation CAUTION From the 0 to 252 address numbers, set the starting number of the transmission frame of the electric screw driver to be occupied. By default, the address number is "255", which indicates no setting is set. If "255" is set, input and output ... -
Page 11: Attaching The Suspension Bail
Attaching the suspension bail CAUTION If the suspension bail is pulled forcefully, it may not return to original status. Use an appropriate strength necessary for attachment or removal. Hole Lightly pull both sides of the suspension bail and fit it into the hole Hook the U-shape part in the recess of the metal fitting... -
Page 12: Replacing A Torque Spring
Preparation Replacing a torque spring WARNING Before attaching or detaching the torque spring, always turn OFF the power. CAUTION The spring plate assembly must be oriented correctly. The ball goes into the recess of the torque adjustment ring. When it is attached in the opposite orientation, the torque adjustment ring easily gets loose. -
Page 13: Attaching The Pistol Grip
Attaching the Pistol Grip WARNING Before attaching or detaching the Pistol Grip, always turn OFF the power. After fixing the Pistol Grip with the screw, check for looseness, slip, and displacement of the screw. CAUTION Use care not to lose parts. ... -
Page 14: Notes On Attaching A Commercially Available Fixing Jig
Notes on attaching a commercially available fixing jig CAUTION Do not block the hole on the frame handle, as doing so could cause a failure due to heating. Hole Fixing position of fixing jig 6 Basic Operation Start WARNING ... -
Page 15: Start And Stop
Start and stop WARNING Never touch the bit while it is rotating. Do not direct the bit toward people or animals. CAUTION Make sure to properly press the start switch. Slide the changeover switch to the direction in which you want the tool to rotate and press the start switch to start. Releasing the start switch stops rotation. -
Page 16: Adjusting The Output Torque
Basic Operation Adjusting the output torque WARNING Before adjusting the output torque, always turn OFF the power. CAUTION The torque scale is a standard. The output torque range is not guaranteed. Turn the torque adjustment ring cover counterclockwise to remove it To increase the output torque, turn the torque adjustment ring clockwise To decrease the output torque, turn the torque adjustment ring counterclockwise White paint... -
Page 17: Appendix
Is the changeover switch set to Slide the changeover switch to the R or L side. neutral? Are you using a combination of Use a combination of NITTO KOHKI's measuring NITTO KOHKI measuring devices for devices for measurement. (p. 4) measurement? Are you turning the torque adjustment The output torque decreases as the tool is used. -
Page 18: Maintenance And Inspection
Appendix Symptoms Location to investigate Solution Is the ON time of the electric Review the operation time. screwdriver too long? The rated operating time is 0.5 sec. ON and 3.5 sec. Alternatively, is the OFF time too OFF. short? Aim at 15 screws per minute. (p. 4) The electric screwdriver Is the input voltage 230 V AC? Check the input voltage. -
Page 19: Disposal
Check the screws on the main unit (including accessory Pistol Grip). If screws are loose, tighten them. Use a combination of NITTO KOHKI's measuring devices to measure the output torque. Output torque If the output torque value has decreased, turn the torque adjustment ring to adjust the torque. -
Page 20: Inquiry Contact Regarding Anywireaslink
Appendix Inquiry contact regarding AnyWireASLINK Anywire Corporation 1 Babazusho, Nagaokakyo-shi, Kyoto 617-8550 JAPAN Inquiry by email info@anywire.jp Inquiry from the website www.anywire.jp... -
Page 21: External Dimensions
External dimensions 317 (12.5") 46.5 (1.8") Front view DLV30A06L-ASL(AB) DLV30A12L-ASL(AB) DLV30A20L-ASL(AB) Front view DLV30A06P-ASL(AB) DLV30A12P-ASL(AB) DLV30A20P-ASL(AB) 48.5 (1.9") 319 (12.6") Side view Common to DLV30A 317 (12.5") 46.5 (1.8") Front view DLV45A06L-ASL(AB) DLV45A12L-ASL(AB) DLV70A06L-ASL(AB) Front view DLV45A06P-ASL(AB) DLV45A12P-ASL(AB) DLV70A06P-ASL(AB) 48.5 (1.9") 319 (12.6") Side view Common to DLV45A...
Need help?
Do you have a question about the Delvo DLV70A-ASL Series and is the answer not in the manual?
Questions and answers