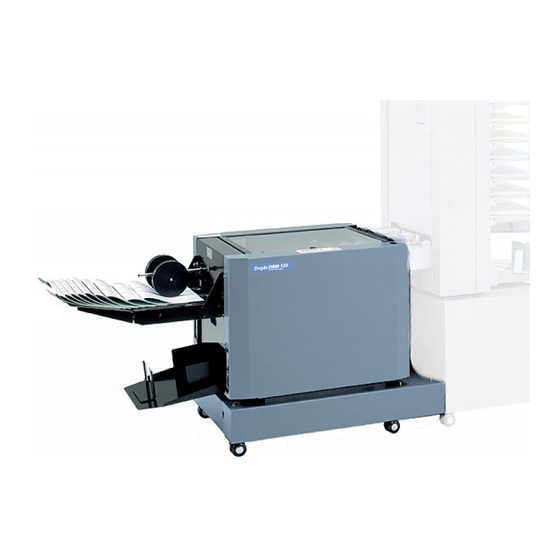
Duplo DBM-120 Instruction Manual
Stapler folder
Hide thumbs
Also See for DBM-120:
- Instruction manual (47 pages) ,
- Maintenance manual (44 pages) ,
- Installation manual (13 pages)

Related Manuals for Duplo DBM-120


Summary of Contents for Duplo DBM-120
- Page 1 Duplo DBM-120 Stapler Folder Instruction Manual Provided By http://www.MyBinding.com http://www.MyBindingBlog.com...
- Page 2 STAPLER FOLDER DBM-120 Sheet by Sheet INSTRUCTION MANUAL Please store this manual in a safe place for future reference.
- Page 3 (1993) + A1 (1997) + A2 (1999), EN55014-2 (1997), EN61000-3-2 (1995) + A1/A2 (1998), EN61000-3-3 (1995) ÜBEREINSTIMMUNGSERKLÄRUNG Die DUPLO CORPORATION mit Sitz in 7-6, Izumi honcho 1-chome, Komae-shi, Tokyo 201-8666, Japan, versichert, daß das folgende produkt, Bezeidhnung des Produkts : Heft-Faltmaschine : DBM-120 Sheet by Sheet 220–240 V 50/60 Hz...
- Page 4 INTRODUCTION Thank you for purchasing this Duplo equipment. To ensure correct usage, please read this instruction manual thoroughly, especially the section Safety Precautions. After reading, please store this instruction manual in a safe place for future reference. TABLE OF CONTENTS Safety Precautions ...........
-
Page 5: Safety Precautions
1. SAFETY PRECAUTIONS Always observe the cautions and warnings given below to prevent personal injury or property damage. The degree of danger and damage that could occur is indicated on two levels by the following marks. WARNING : Ignoring this mark could result in the possibility of serious injury or even death. - Page 6 Do not use flammable sprays inside or near the unit (e.g. when cleaning the unit). Such flammable gas may ignite and cause a fire or combustion. Make sure that the combined power consumption of the appliances to be connected does not exceed the capacity rating of the power outlets or plug receptacles.
-
Page 7: Warning Label Locations
SAFETY PRECAUTIONS (continued) Warning Label Locations WARNING Do not spray inflammable gas inside unit. It could cause fire or combustion. -
Page 8: Usage Precautions
2. USAGE PRECAUTIONS 2-1. About This Equipment This unit can be connected to the sheet feeder. 2-2. Power Supply This equipment shall be installed near the socket-outlet where the plug on the power supply cord is easily accessible. Make sure the power supply used is always within the following range. 220 to 240 V AC, 50/60 Hz (120 V AC, 60 Hz) -
Page 9: Names And Operation Of Parts
3. NAMES AND OPERATION OF PARTS 3-1. External Parts... - Page 10 3. NAMES AND OPERATION OF PARTS Name Operation Top cover When opened during operations, the unit will make an emergency stop. Control panel Refer to “6. OPERATING”. Side-stapled paper Stocks side-stapled paper and corner-stapled paper. Also stocks rejected stacker paper. Paper holder Holds the paper sets ejected.
-
Page 11: Internal Parts
3. NAMES AND OPERATION OF PARTS 3-2. Internal Parts... - Page 12 3. NAMES AND OPERATION OF PARTS Name Operation Side jogger Aligns the width of the paper. Back jogger Aligns the length of the paper. Conveyance roller unit 1 Holds and aligns the paper in conveyance. Can be removed to remove jammed paper.
-
Page 13: Check This Before Use
4. CHECK THIS BEFORE USE 4-1. What is Stapling, Stapling & Folding, Folding? Side-stapling Corner-stapling Stapling Side-staples or corner- staples the paper with staplers. Stapling & folding Folding Saddle-staples the paper Center-folds the paper with staplers and folds it without stapling. along the center line. -
Page 14: Binding
5. BINDING This chapter describes binding operations in the on-line mode and off-line (manual feed) mode. To bind another new set, bind one set, check that each page has been bound properly, and that the stapled and folded positions are correct first before beginning continuous binding operations. NOTE : Setting the wrong paper size with the stapler head, clincher, side jogger, etc., and the wrong stapling/folding method (saddle-stapling, center-folding, side-stapling, corner-stapling) will not only lead to poor finish but... - Page 15 5. BINDING Setting saddle-stapling position The position to be stapled is determined after setting the center of the paper on the unit. Direction Settable Staple Pitch (mm (inch)) moved in 108 (4.25) 160 (6.30) Paper Width Staples Above 210 (8.27) Above 252 (9.92) Paper width (mm (inch))
- Page 16 5. BINDING Setting corner-stapling position A4 and LTR size paper can be corner-stapling only if fed in wide edge leading. Staples the paper on the right corner as seen from direction in which the paper is moving within 6 mm (0.24") from the tip of the paper. NOTE : To staple the paper on the left corner as seen from direction in which the paper is moving, the optional corner-stapling side jogger (left) is required.
-
Page 17: Adjusting The Roller Clearance
5. BINDING 5-2. Adjusting the Roller Clearance If folding operations are to be performed, roller clearance adjustment is required. This is to prevent the cover of the booklet from damages in binding operations and to prevent paper jamming during conveyance at the folding section. Set the clearance adjusting lever to an appropriate position shown in the following table according to the thickness of the booklet. -
Page 18: Using The Guide Unit
5. BINDING 5-4. Using the Guide Unit When side-stapling is performed, set the guide units and paper holding guide unit on the side- stapled paper stacker. Place the paper to be stapled on the stacker. And set the guide units about 20 mm (0.79") away from the left and right sides of the paper. -
Page 19: Operating
6. OPERATING Display Stop button Start button Power ON indicator Lights up when the stapler folder is turned ON. Clear Escape button button Jog dial Function button Stapler folder control panel 6-1. Basic Operation First bind one set, then use it to fine-adjust the following. Fine-adjusting the paper guide roller unit position. - Page 20 6. OPERATING e Turn the jog dial to select “Booklet”. The selected output mode shifts to the beginning of the line and NOTE starts blinking. Even when you have selected “Booklet”, the paper will only be Select Mode folded (not stapled) if you select “1” Booklet Side ST in step 3.
- Page 21 6. OPERATING e Turn the jog dial to select the size. The selected paper size shifts to If the paper size to be set is not a standard size, select the beginning of the line and starts blinking. “Custom”. Select P. Size A4 A5 B4 B5 11X To cancel the setting Instead of going on to step r, press the...
- Page 22 6. OPERATING Set the number of sheets. q Turn the jog dial to display “Number of Sheets” in the display. Number of Sheets w Press the center of the jog dial to enter the selection mode, then turn it to select the desired number of sheets (1 to 25). Select Number Select Number NOTE...
- Page 23 6. OPERATING Presetting the custom size This setting is used for processing nonstandard size paper. With this feature it is possible to preset customized paper sizes in the unit memory. Three custom sizes (Custom 1, Custom 2, Custom 3) can be memorized. NOTE : The LCD messages in the brackets <...
- Page 24 6. OPERATING Press the center of the jog dial to enter the selection mode, then turn it to select the desired paper length in millimeters (inches) (146 to 450 mm (5.75" to 17.72")). Select Length Select Length Select Length Select Length 11.81 14.33 To change the value in units of 100...
- Page 25 6. OPERATING Press the center of the jog dial to enter the selection mode, then turn it to select the desired paper width in millimeters (inches) (210 to 320 mm (8.27" to 12.60")). Select Width Select Width Select Width Select Width 8.66 10.12 To change the value in units of 100...
-
Page 26: Mode
6. OPERATING 6-2. Using in the Off-line (Manual Feed) Mode When the paper sets are already printed or copied on both sides, it is possible to set them manually on the stapler folder for stapling & folding or center-folding. One set is completed at a time. -
Page 27: And Folding Positions
7. FINE-ADJUSTING PAPER ALIGNMENT, STAPLING AND FOLDING POSITIONS 7-1. Check the Binding Condition Fine adjustment is required when the paper is not aligned, or the stapling or folding position is unsatisfactory. Is the paper aligned? If not, refer to “7-2. Fine-adjusting the Paper Alignment”. The sheets of paper are not The sheets of paper are The sheets of paper are not... -
Page 28: Fine-Adjusting The Paper Alignment
7. FINE-ADJUSTING PAPER ALIGNMENT, STAPLING AND FOLDING POSITIONS Is the stapled/folded line at the center of the paper? If not, refer to “7-3. Fine-adjusting the Stapling and Folding Positions”. Correct example The stapled/folded line is The stapled/folded line is out out of position and the top of position and the bottom The stapled/folded line is at... - Page 29 7. FINE-ADJUSTING PAPER ALIGNMENT, STAPLING AND FOLDING POSITIONS Turn the jog dial to display “Fine Adjustment”. Fine Adjustment The second line shows the currently set paper size. Press the center of the jog dial to enter the adjustment item selection mode. Whichever of the four items is selected here, the operation will not be affected.
- Page 30 7. FINE-ADJUSTING PAPER ALIGNMENT, STAPLING AND FOLDING POSITIONS Press the button again. All the side joggers and the back joggers move so that they are open. Turn the jog dial to select the adjustment item. <When adjusting the side jogger position> <When adjusting the back jogger position>...
-
Page 31: 7-3. Fine-Adjusting The Stapling And Folding
7. FINE-ADJUSTING PAPER ALIGNMENT, STAPLING AND FOLDING POSITIONS Press the button. Back joggers All the side joggers and the back joggers move to a Side jogger position where they align the paper. When the adjustment is completed, check that all the joggers lightly touch the paper edges. -
Page 32: Positions
7. FINE-ADJUSTING PAPER ALIGNMENT, STAPLING AND FOLDING POSITIONS 7-3. Fine-adjusting the Stapling and Folding Positions Before fine-adjusting If the paper is not properly aligned, first perform the instructions of “7-2. Fine-adjusting the Paper Alignment”. When the adjustment of the stapling and folding positions is to directly follow step 11 in “7-2. Fine-adjusting the Paper Alignment”, continue from step 6 below. - Page 33 7. FINE-ADJUSTING PAPER ALIGNMENT, STAPLING AND FOLDING POSITIONS Neatly align and insert paper of the size selected and for the number of sheets selected in step 1 into the manual feed slot. (Refer to step 2 in “6-2. Using in the Off-line (Manual Feed) Mode”.) NOTE If the number of sheets set and the number actually inserted differ, the paper will not be bound...
- Page 34 7. FINE-ADJUSTING PAPER ALIGNMENT, STAPLING AND FOLDING POSITIONS Press the center of the jog dial to enter the value selection mode, then turn the jog dial to select the adjustment value (–9 to 9). Align the folding line with the stapling position. The value for “1”...
- Page 35 7. FINE-ADJUSTING PAPER ALIGNMENT, STAPLING AND FOLDING POSITIONS Turn the jog dial to select “Staple”. Adjustment of the fore edge is done by shifting the stapling position. However, this will not affect the position of the folding line against the stapling position (the adjustment completed in steps 8 to 11).
-
Page 36: Preference Settings For Easier Use
8. PREFERENCE SETTINGS FOR EASIER USE It is possible to change the following settings. “Staple Sensor on/off” setting Each (left and right) stapler holds 5,000 staples. When “Staple Sensor” is set to “on” and there are only 20 staples left in the cartridge, the message “Stapler L Nearly Empty” or “Stapler R Nearly Empty”... - Page 37 8. PREFERENCE SETTINGS FOR EASIER USE Press the center of the jog dial to enter the item selection mode. Turn the jog dial to select one of the following items to be changed: “Staple Sensor” “Tone” “LCD Setting” (Select this item at the time of changing the shift speed or blink speed.) “mm/In Setting”...
-
Page 38: Dealing With The Error Message
9. DEALING WITH THE ERROR MESSAGE If an error has occurred, the appropriate message appears in the display on the control panel. The messages and how to deal with them are described below. Messages appearing in the first line “Paper Jam” ............Refer to “9-1. Removing Any Jammed Paper”. “Malfunction”... - Page 39 9. DEALING WITH THE ERROR MESSAGE Compare the jam code (J1 to J12) and the following figures, and remove the jammed paper. J2, J3, J7, J8, J9 J4, J5 J9, J10 J2, J3, J12 J2, J3, J4, J5, J6, J7 When “Recover Valid Papers Remove From Stapler”...
-
Page 40: Replacing The Staple Cartridge
9. DEALING WITH THE ERROR MESSAGE When not performing the recovery processing Press the stop button of this unit. The message on display turns to “Ready”. 9-2. Replacing the Staple Cartridge Lift up the lock lever. Lock lever Cartridge Shake the cartridge sideways gently, and pull out from the stapler head. -
Page 41: Removing Any Jammed Staples
Open and close the top cover. Turn off the power and then turn it on again. If the error message does not go away by above method, contact your nearest Duplo dealer. Please let the service personnel have the following information: Your name (or the name of the company and <Product number and total counter>... -
Page 42: Troubleshooting
10. TROUBLESHOOTING Symptom Cause Remedy Paper has jammed at the The set position of the paper holder is Refer to “5-5. Setting the Position of stapler section. inappropriate. the Paper Holder”. The paper is not aligned Side joggers not adjusted properly. Fine-adjust the joggers. -
Page 43: Cleaning The Unit
Never use a detergent other than a neutral detergent, and do not use nor aerosol detergent. The entry of any liquid into the unit could result in fire or electrical shock. If you have spilt any liquid over the unit, be sure to contact your nearest Duplo dealer before use. -
Page 44: Specifications
Current consumption 1 A (220 to 240 V AC)/2 A (120 V AC) DBM-120 Sheet by Sheet: W × D × H = 702 × 550 × 571 mm (27.64" × 21.65" × 22.48") Dimensions DBM-120 Sheet by Sheet + Stacker: W ×... - Page 45 11C-99110-00110000M-0 This manual is printed on recycled paper to help protect the environment.
Need help?
Do you have a question about the DBM-120 and is the answer not in the manual?
Questions and answers