Stryker Secure 3000 Operation Manual
Medical bed
Hide thumbs
Also See for Secure 3000:
- Maintenance manual (249 pages) ,
- Maintenance manual (203 pages) ,
- Operation manual (22 pages)
Table of Contents
Advertisement
Quick Links
Download this manual
See also:
Maintenance Manual
Advertisement
Table of Contents

Related Manuals for Stryker Secure 3000


Summary of Contents for Stryker Secure 3000
- Page 1 Secure 3000 Bed OPERATIONS MANUAL For Parts or Technical Assistance 1–800–327–0770...
- Page 2 Table of Contents D INTRODUCTION ............... . . D SPECIFICATIONS .
- Page 3 Introduction INTRODUCTION This manual is designed to assist you with the operation of the Secure 3000 Bed. Read it thoroughly before using the equipment. SPECIFICATIONS Maximum Weight Capacity 500 pounds (227 kilograms) Overall Bed Length/Width 93” x 42–1/2” (with siderails up) – 36” (with siderails down) 238 cm.
- Page 4 WARNING The Secure 3000 Bed is not intended for use with patients less than two years of age. Powered bed mechanisms can cause serious injury. Operate bed only when all persons are clear of the mechanisms.
- Page 5 CAUTION Do not steam clean or hose off the Secure 3000 Bed. Do not immerse any part of the bed. Some of the internal parts of the bed are electric and may be damaged by exposure to water.
- Page 6 Preventative Maintenance CHECKLIST All fasteners secure (reference all assembly prints) Engage brake pedal and push on the bed to ensure all casters lock securely ”Brake Not Set” LED (on foot board) blinks when brakes are not engaged Locking steer caster engages and disengages properly Siderails move, latch and stow properly CPR release working properly Foot prop intact and working properly...
- Page 7 Set–Up Procedures SET–UP PROCEDURES It is important that the Secure 3000 Bed is working properly before it is put into service. The following list will help ensure that each part of the bed is tested. Plug the bed into a properly grounded, hospital grade wall receptacle and ensure the ”Power” LED light at the foot end of the bed comes on.
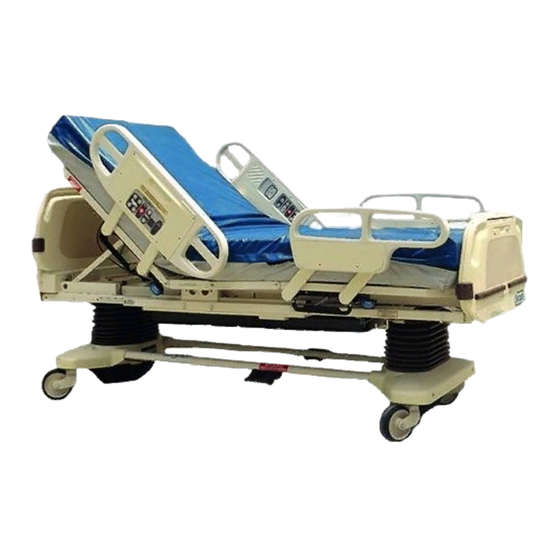
- Page 8 Bed Illustration CPR Release Handle HEAD END PATIENT’S LEFT PATIENT’S RIGHT DMS Port Connector (Under Seat Section) Footboard Control Panel Siderail Release Handle Steer Pedal Chart Rack (Optional Equip.) Motion Interrupt Brake Pedal I.V. and Fracture Frame Mount FOOT END Night Foley Bag Hook Light...
-
Page 9: Steer Pedal Operation
Base Operation Guide BRAKE PEDAL OPERATION WARNING Always apply the caster brakes when a patient is getting on or off the bed. Push on the bed to ensure the brakes are securely locked. Always engage the brakes unless the bed is being moved. Injury could result if the bed moves while a patient is getting on or off the bed. -
Page 10: Foley Bag Hooks Usage, Standard And Isolated (Isolated Optional Equipment)
Litter Operation Guide CPR EMERGENCY RELEASE USAGE When quick access to the patient is needed, and the Fowler is raised, squeeze one of the two red release handles (see illustration, page 7) and the Fowler can be guided down to a flat position. NOTE The handle can be released at any time to stop the Fowler from lowering. -
Page 11: I.v. Poles
Litter Operation Guide I.V. POLES To use the Permanently Attached I.V. pole (optional equipment): 1. Lift and pivot the pole from the storage position and push down until it is locked into receptacle (A). 2. To raise the height of the pole, turn the lock actuator (B) counter– clockwise and pull up on the telescoping portion (C) of the pole to raise it to the desired height. -
Page 12: Night Light Usage (Optional Equipment)
Litter Operation Guide NIGHT LIGHT USAGE (Optional Equipment) The bed may be equipped with two optional night lights (A) to illuminate the floor area around the bed. There is a master switch at the foot end of the bed on the right side that turns both lights on and off. Each light also has a switch to control the individu- al light. -
Page 13: Cpr Board Usage (Optional Equipment)
Head Board/Foot Board Operation Guide CHART RACK USAGE (Optional Equipment) If the bed is equipped with the optional chart rack, it is located on the foot board. To use, pull handle rod (A) downward. To store, push the handle back to its storage position until it locks in place. -
Page 14: Control Panel Lights
Siderail Operation Guide POSITIONING SIDERAILS NOTE The siderails can be locked at two heights (intermediate & full). The siderails can be tucked away under the bed when not in use. To remove the rail from the tucked position, grasp the top of the rail and pull outward. To engage the head end siderail, grasp the rail and swing it upward toward the head end of the bed until it rests in the ”intermediate”... -
Page 15: Inside Siderail Function Guide
Siderail Operation Guide INSIDE SIDERAIL FUNCTION GUIDE (Patient’s Right Rail) 1. Push to raise Knee Gatch. 2. Push to lower Knee Gatch. 3. Push to raise Fowler. 4. Push to lower Fowler. (Patient’s Left Rail) 1. Push to raise Fowler. 2. -
Page 16: Outside Siderail Function Guide
Siderail Operation Guide INSIDE SIDERAIL FUNCTION GUIDE (CONTINUED) 1. Push to turn TV on or off. 2. Push to raise the TV volume. 3. Push to lower the TV volume. 1. Push to change the TV channel up. 2. Push to change the TV channel down. 3. -
Page 17: Outside Siderail Function Guide
Siderail Operation Guide OUTSIDE SIDERAIL FUNCTION GUIDE (CONTINUED) Push to activate Nurse Call. " This panel is optional equipment. LED will blink when the brakes are not set. Push to activate auto or manual mode of the Dynamic Mattress System. LED will light to indicate selected mode and/or possible air leak. - Page 18 Foot Board Operation Guide FOOT BOARD CONTROL PANEL GUIDE 1. Push repeatedly for low, medium and high settings for siderail control lights. Pushing a fourth and fifth time will turn off the siderail control lights and the red nurse call light respectively (see page 13). CAUTION The intent of the red nurse call light on the siderails is to ensure the patient has immediate understanding of which button to push to contact the nurse station.
- Page 19 Foot Board Operation Guide FOOT BOARD CONTROL PANEL GUIDE (CONTINUED) 1. Push to raise Fowler. 2. Push to raise Knee Gatch. 3. Push to lower Fowler. 4. Push to lower Knee Gatch. " This panel is optional equipment. LED DISPLAY PANEL GUIDE The LED Display Panel is located at the foot end of the bed, under the Control Panel.
- Page 20 Foot Board Operation Guide CENTER OF GRAVITY BED EXIT (OPTIONAL EQUIPMENT) 1. Push to activate Bed Exit function. 2. Push to deactivate Bed Exit function. NOTE If the scale system is in use, it will switch to ”off” when Bed Exit is armed. Bed Exit will be temporarily disarmed when the scale system is activated and will re–arm when the scale system shuts off.
- Page 21 Foot Board Operation Guide WEIGH SYSTEM CONTROL PANEL GUIDE 1. LCD – displays patient weight. 2. Push to zero bed. 3. Push when changing equipment on the bed. 4. Push to change weight from pounds to kilograms or back. 5. Push to turn weight system on. 6.
- Page 22 Foot Board Operation Guide WEIGH SYSTEM CONTROL PANEL GUIDE (CONTINUED) SYMBOL ACTION DISPLAY To add or remove equipment during patient stay without affecting registered patient weight: Press and release ”SCALE ON” ”WEIGHING...” ”XXX.X LB” Press ”HOLD TO START” ”RELEASE TO START” Release ”DO NOT TOUCH BED”...
- Page 23 Weigh System Usage OPERATING THE SCALE BEFORE PUTTING A NEW PATIENT IN BED Prepare bed for patient stay (linens, pillows, etc.). Press and hold ”SCALE ON”. Release the button after the display reads ”LET GO FOR SCALE”. (This will turn off the Trend. angle display and activate the scale). The scale monitor will read: ”LET GO FOR SCALE”...
- Page 24 Weigh System Usage CONVERTING THE PATIENT’S WEIGHT To convert the patient’s weight from pounds to kilograms, press and release ”SCALE ON” to activate the weigh system. After the scale monitor reads ”XXX.X LB”, press and release the ”LBS/KGS” but- ton. The scale monitor will read: ”WEIGHT NOW KGS”...
- Page 25 Optional Pendant Operation...
-
Page 26: Extended Warranty Coverage
Stryker, found to be defective. Stryker warrants to the original purchaser that the frame and welds on its beds will be free from structural defects for as long as the original purchaser owns the bed. If requested by Stryker, products or parts for which a warranty claim is made shall be returned prepaid to Stryker’s factory. -
Page 27: Return Authorization
Claim will be limited in amount to the actual replacement cost. In the event that this information is not received by Stryker within the fifteen (15) day period following the delivery of the merchandise, or the damage was not noted on the delivery receipt at the time of receipt, the customer will be responsible for pay- ment of the original invoice in full. - Page 28 European Representative Stryker France Phone: 33148632290 BP 50040–95946 Roissy Ch. de Gaulle Fax: 33148632175 Cedex–France 6300 Sprinkle Road, Kalamazoo, MI 49001–9799 (800) 327–0770 DH 10/99 3001–000–021 REV G...
Need help?
Do you have a question about the Secure 3000 and is the answer not in the manual?
Questions and answers