Table of Contents
Advertisement
Quick Links
OPERATOR'S
MANUAL
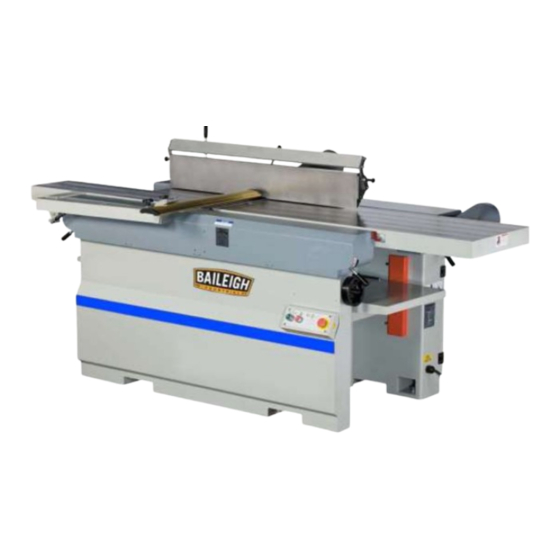
JOINTER / PLANER
MODEL: JP-1898-NC
Baileigh Industrial, Inc.
P.O. Box 531
Manitowoc, WI 54221-0531
Phone: 920.684.4990
Fax: 920.684.3944
sales@baileighindustrial.com
REPRODUCTION OF THIS MANUAL IN ANY FORM WITHOUT WRITTEN APPROVAL OF BAILEIGH INDUSTRIAL, INC.
IS PROHIBITED. Baileigh Industrial, Inc. does not assume and hereby disclaims any liability for any damage or loss
caused by an omission or error in this Operator's Manual, resulting from accident, negligence, or other occurrence.
Rev. 12/2012
© 2012 Baileigh Industrial, Inc.
Advertisement
Table of Contents

Subscribe to Our Youtube Channel
Related Manuals for Baileigh JP-1898-NC


Summary of Contents for Baileigh JP-1898-NC
- Page 1 REPRODUCTION OF THIS MANUAL IN ANY FORM WITHOUT WRITTEN APPROVAL OF BAILEIGH INDUSTRIAL, INC. IS PROHIBITED. Baileigh Industrial, Inc. does not assume and hereby disclaims any liability for any damage or loss caused by an omission or error in this Operator’s Manual, resulting from accident, negligence, or other occurrence.
- Page 2 Table of Contents THANK YOU & WARRANTY ..................1 INTRODUCTION ......................3 GENERAL NOTES......................3 SAFETY INSTRUCTIONS ....................4 Cleaning ........................9 ELECTRICAL ........................9 SPECIFICATIONS ......................10 Working Zone and Hazard Zone ................11 Technical Features ....................12 Machine operating conditions ..................16 Dismantling and scrapping ..................
-
Page 3: Thank You & Warranty
THANK YOU & WARRANTY Thank you for your purchase of a machine from Baileigh Industrial. We hope that you find it productive and useful to you for a long time to come. Inspection & Acceptance. Buyer shall inspect all Goods within ten (10) days after receipt thereof. Buyer’s payment shall constitute final acceptance of the Goods and shall act as a waiver of the Buyer’s rights to inspect or... - Page 4 Baileigh Industrial makes every effort to ensure that our posted specifications, images, pricing and product availability are as correct and timely as possible. We apologize for any discrepancies that may occur. Baileigh Industrial reserves the right to make any and all changes deemed necessary in the course of business including but not limited to pricing, product specifications, quantities, and product availability.
-
Page 5: Introduction
After receiving your equipment remove the protective container. Do a complete visual inspection, and if damage is noted, photograph it for insurance claims and contact your carrier at once, requesting inspection. Also contact Baileigh Industrial and inform them of the unexpected occurrence. Temporarily suspend installation. -
Page 6: Safety Instructions
IMPORTANT PLEASE READ THIS OPERATORS MANUAL CAREFULLY It contains important safety information, instructions, and necessary operating procedures. The continual observance of these procedures will help increase your production and extend the life of the equipment. SAFETY INSTRUCTIONS LEARN TO RECOGNIZE SAFETY INFORMATION This is the safety alert symbol. - Page 7 SAVE THESE INSTRUCTIONS. Refer to them often and use them to instruct others. PROTECT EYES Wear safety glasses or suitable eye protection when working on or around machinery. BLADE HAZARD Keep hands and fingers away from the rotating knife blades. These rotating knives can be extremely dangerous if you do not follow proper safety procedures.
- Page 8 HIGH VOLTAGE USE CAUTION IN HIGH VOLTAGE AREAS. DO NOT assume the power to be off. (FOLLOW PROPER LOCKOUT PROCEDURES) SAFETY PRECAUTIONS Wood working can be dangerous if safe and proper operating procedures are not followed. As with all machinery, there are certain hazards involved with the operation of the product. Using the machine with respect and caution will considerably lessen the possibility of personal injury.
- Page 9 7. Dull / Damaged Knives. Use only sharp, undamaged knives to avoid unnecessary kickback of the piece part. Dull and damaged knives will also affect cut quality. 8. Maximum Cutting Depth. The maximum cutting depth for one pass is 1/8” (3.2mm). Never set the machine to cut deeper than this in one pass.
- Page 10 25. Keep children away. Children must never be allowed in the work area. DO NOT let them handle machines, tools, or extension cords. 26. DO NOT operate machine if under the influence of alcohol or drugs. Read warning labels on prescriptions. If there is any doubt, DO NOT operate the machine. 27.
-
Page 11: Cleaning
Cleaning Your machine may be shipped with a rustproof waxy oil coating and grease on the exposed unpainted metal surfaces. To remove this protective coating, use a degreaser or solvent cleaner. For a more thorough cleaning, some parts will occasionally have to be removed. DO NOT USE acetone or brake cleaner as they may damage painted surfaces. -
Page 12: Specifications
SPECIFICATIONS Cutting Capacity (W x H) 18" x 9.5" (457 x 241mm) 5/16” (8mm) Maximum Depth of Cut 1/8” (3.2mm) Minimum Material Thickness Cutterhead Speed 5700 RPM .18”- 9.8” (5-250mm) Min/Max Operating Height 18” x 63” (460mm x 1600mm) Table Size Variable Feed Drive 18-49.2 fpm (5.5-15m/min 4.72”... -
Page 13: Working Zone And Hazard Zone
Working Zone and Hazard Zone... -
Page 14: Technical Features
Technical Features... -
Page 18: Machine Operating Conditions
Machine operating conditions In a dry environment, at a temperature between 5°C and 40°C Relative humidity: 30% ~ 95% RH. Dismantling and scrapping Before dismantling the machine, disconnect all energy sources carefully. 1. Dismantling of Electrical Systems Before disconnecting the cables from the power cabinet, please confirm first that all switches have been closed. -
Page 19: Carrying And Installation
CARRYING AND INSTALLATION The machine's weight is about 2420 lbs (1100kgs) USE LIFT TRUCK TO TRANSPORT MACHINE WARNING: Make sure the machine is balanced. While transporting, avoid any unnecessary vibration. USE GANTRY OR CRANE TO REMOVE MACHINE FROM PALLET WARNING: Before the machine is put on the floor, install the level adjusting bases and adjust the level of the machine’s working table. -
Page 20: Electrical
Electrical CAUTION: HAVE ELECTRICAL UTILITIES CONNECTED TO MACHINE BY A CERTIFIED ELECTRICIAN! Check if the available power supply is the same as listed on the machine nameplate. WARNING: Make sure the grounding wire (green) is properly connected to avoid electric shock. DO NOT switch the position of the green grounding wire if any electrical plug wires are switched during hookup. - Page 21 A separate electrical circuit should be used for your tools. If an extension cord is used, use only 3-wire extension cords, which have grounding type plugs and receptacles, which accept the tool’s plug. Before connecting the motor to the power line, make sure the switch is in the “OFF”...
-
Page 22: Extension Cord Safety
Check with a qualified electrician or service personnel if the grounding instructions are not completely understood, or if in doubt as to whether the tool is properly grounded. Use only 3-wire extension cords that have grounding type plugs and receptacles that accept the tool’s plug. -
Page 23: Adjusting
ADJUSTING WARNING: Make sure the electrical disconnect is OFF before working on the machine. Maintenance should be performed on a regular basis by qualified personnel.Always follow proper safety precautions when working on or around any machinery. CAUTION: Always wear proper eye protection with side shields, safety footwear, and leather gloves to protect from , chips, dust, burrs, and slivers. -
Page 24: Adjusting The Tension And Replacing The Belts For Feed
Adjusting the Tension and Replacing the Belts for Feed... -
Page 25: Adjusting The Chains
Adjusting the Chains The drive chains stretch naturally due to play which occurs after a certain working period and must be tightened in order to ensure perfect operation and maximum torque drive to the movement. -
Page 27: Safety Inspections
SAFETY INSPECTIONS WARNING: Do a safety inspection twice weekly of the safety switch Check of emergency stop switch 1. Connect to power, start the Cutterhead to make the machine run. 2. Push each emergency stop on machine and check if the Cutterhead completely stops within 5 seconds. -
Page 28: Control Panel
CONTROL PANEL Description of the Panel... -
Page 29: Operating The Vfd-E
Operating the VFD-E Description of the digital keypad 1. Status Display Display the driver's current status. 2. LED Display Indicates frequency, voltage, current, user defined units, and etc. 3. Potentiometer For master frequency setting. 4. RUN Key Start AC drive operation. 5. -
Page 30: Operation Steps For The Digital Keypad
Operation Steps for the Digital Keypad... - Page 31 Starting and Stopping the Machine...
- Page 34 Thicknessing...
-
Page 37: Maintenance
MAINTENANCE WARNING: Make sure the electrical disconnect is OFF before working on the machine. Maintenance should be performed on a regular basis by qualified personnel. Always follow proper safety precautions when working on or around any machinery. Maintenance on your planer should be done at periodic intervals to ensure that the machine is in good working order. -
Page 41: Anti-Reject Arms
Anti-Reject Arms The machine is equipped with a series of anti-reject arms which run continually as they pivot idly in relation to the supporting pin and operate with any thickness of wood, thus preventing the workpiece from being rejected in the direction of the operator and ensuring efficient active protection. -
Page 42: Troubleshooting
TROUBLESHOOTING WARNING: Disconnect machine from the power source before attempting any troubleshooting Problem Probable Cause Remedy 1. No voltage in line. Check voltage in line with instrument. 2. Fuses broken. Check fuses and replace if necessary 3. Emergency stop button Reset emergency button. - Page 43 NOTES...
- Page 44 , WI 54220 UFEK RIVE ANITOWOC : 920. 684. 4990 F : 920. 684. 3944 HONE BAILEIGHINDUSTRIAL BAILEIGH INDUSTRIAL, INC. 1455 S. C , CA 91761 AMPUS VENUE NTARIO : 920. 684. 4990 F : 920. 684. 3944 HONE BAILEIGH INDUSTRIAL LTD. U...
Need help?
Do you have a question about the JP-1898-NC and is the answer not in the manual?
Questions and answers