Advertisement
Quick Links
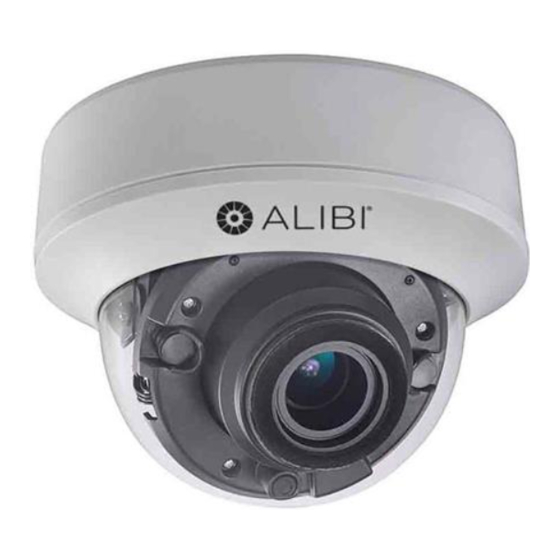
ALI-TS2025R 5MP HD-TVI
Dome Camera Quick Installation Guide
The ALIBI ALI-TS2025R dome camera include a high resolution CMOS array sensor with and advanced
circuit design technology. The camera features high resolution, low image distortion and low noise features
which makes them suitable for surveillance and image processing systems. Features include:
5 MP high performance CMOS array with resolution up to 2560 (H) × 1944 (V) pixels
•
Low illumination: Color: 0.008 Lux @ (F1.2, AGC ON), 0 Lux with IR
•
2.8 mm ~ 12 mm motorized lens
•
OSD menu up-the-coax
•
100 ft Full Frame SMART IR
•
IP65 rated weatherproof
•
Requires 5 MP HD-TVI compatible recorder (HD-TVI DVR)
•
Optional installation with wall mount bracket ALI-AB2 and flange adapter ALI-AF3
•
Camera
back
box
Camera
dome
assembly
Lens
Back Box internal features
Camera drop cable connectors
Lens
OSD
joystick
Back
box
Camera module internal features
www.observint.com
1
Terminal polarity
indicators
Power
Connector
HD-TVI video
BNC connector
NOTE: The black liner
surrounding the
gimbal is not shown
here
IR LED
(2)
Gimbal
pivot
point
CVBS
video
test port
Base
plate
What's in the box
Camera assembly
•
Mounting hardware
•
Video test adapter cable
•
Drill template
•
This instruction guide
•
Tools you need
To install the camera, you will need:
12 Vdc or 24 Vac power source. See Specifications for requirements.
•
Tools and additional fasteners (may be required) for mounting the camera
•
Video and power extension cable
•
Step 1.
Install the camera
The camera includes hardware to install it directly to a mounting surface. You can also easily install the
camera onto a single- or double-gang electrical box. Camera drop cables can be routed through the
conduit port on the side of the camera back box, through the mounting surface or into an electrical box, if
used.
Before installation:
Make sure that the device is in good condition and all the assembly parts are included.
•
IR Reflection Prevention: Avoid mounting the camera near reflective surfaces. The IR light from
•
the camera can reflect back into the lens. Do not remove the plastic cover until the cover is installation
is complete.
Check the specification of the products for the installation environment.
•
Make sure that the wall or the ceiling is strong enough to withstand 3 times the weight of the camera.
•
To avoid fire or shock hazard, use only UL listed power supplies. Verify that the power supply will
•
provide the rated voltage and wattage for the camera. See the Specifications section.
During installation:
Monitor impedance: You can attach the video test cable to a CVBS setup monitor. Ensure that the
•
monitor input impedance is set to 75 Ω.
Camera drop cable: The camera drop cable includes three connectors:
•
Video BNC connector: Provides the HD-TVI video signal for transmission across a coax (75 Ω)
—
extension cable.
Power connector: The camera can be powered 12 Vdc or 24 Vac voltage. When connecting
—
power to the drop cable, observe the polarity marked on the terminals.
The following procedure outlines an installation of the camera to a ceiling. Your installation steps may
differ, depending on how the camera is mounted and how the drop cable connects to video and power
extension cables. The camera can also be mounted to a wall. To install the camera onto a surface:
Base plate
ALI-TS2025R_CQ
170706
Advertisement

Summary of Contents for ALIBI ALI-TS2025R
- Page 1 ALI-TS2025R 5MP HD-TVI Dome Camera Quick Installation Guide The ALIBI ALI-TS2025R dome camera include a high resolution CMOS array sensor with and advanced circuit design technology. The camera features high resolution, low image distortion and low noise features which makes them suitable for surveillance and image processing systems. Features include: 5 MP high performance CMOS array with resolution up to 2560 (H) ×...
- Page 2 You can open the OSD menu system using the built-in joystick on the camera, from either the HD-TVI DVR Route the video/power extension cables from your HD-TVI compatible recorder to the mounting Live View display or through remote login to the ALIBI recorder. location.
- Page 3 For remote access to the ALIBI HD-TVI DVR: Navigation and settings in the OSD are made through After logging into the HD-TVI DVR, open the camera in a single Live View window. direction keys and the Iris + and Iris - buttons in the ALIBI HD-TVI DVR PTZ control panel. See above. www.observint.com...
- Page 4 The function of the directional keys and Iris buttons are defined in the table below. NTSC: (National Television System Committee) is the analog television system that is used in — most of North America, parts of South America, Myanmar, South Korea, etc. Keys Function FOCUS (and ZOOM) menu...
-
Page 5: Cleaning Instructions
Menu Support D/N Mode Auto / Color / BW (Black and White) White Balance ATW / MWB Support Digital Wide Dynamic Range (DWDR) Support INFRARED: Select this option to turn on/off the IR LED in response to the light level in the field —...


Need help?
Do you have a question about the ALI-TS2025R and is the answer not in the manual?
Questions and answers