Advertisement
OWNER'S
MANUAL
Model No. GZFI8093.5
Serial No.
Write the serial number in the
space above for future reference.
Serial Number
(inside tower)
QUESTIONS?
At FreeMotion Fitness, we are
committed to providing com-
plete customer satisfaction. If
you have questions, see HOW
TO CONTACT CUSTOMER
CARE on the back cover of this
manual.
CAUTION
Read all precautions and instruc-
tions in this manual before using
this equipment. Save this manual
for future reference.
Decal
Visit our website at
www.freemotionfitness.com
Advertisement
Table of Contents

Related Manuals for Freemotion EPIC HIP AB


Summary of Contents for Freemotion EPIC HIP AB
- Page 1 Write the serial number in the space above for future reference. Serial Number Decal (inside tower) QUESTIONS? At FreeMotion Fitness, we are committed to providing com- plete customer satisfaction. If you have questions, see HOW TO CONTACT CUSTOMER CARE on the back cover of this manual.
- Page 2 HOW TO CONTACT CUSTOMER CARE ..........Back Cover FREEMOTION is a registered trademark of ICON IP, Inc.
-
Page 3: Important Precautions
35 or persons with pre-existing health problems. Read all instructions before using. FreeMotion Fitness assumes no responsibility for personal injury or property damage sustained by or through the use of this product. -
Page 4: Warning Decal Placement
WARNING DECAL PLACEMENT The decals shown below have been placed on the strength equipment in the indicated locations. If a decal is missing or illegible, see HOW TO CONTACT CUSTOMER CARE on the back cover of this manual and order a free replacement decal. -
Page 5: Before You Begin
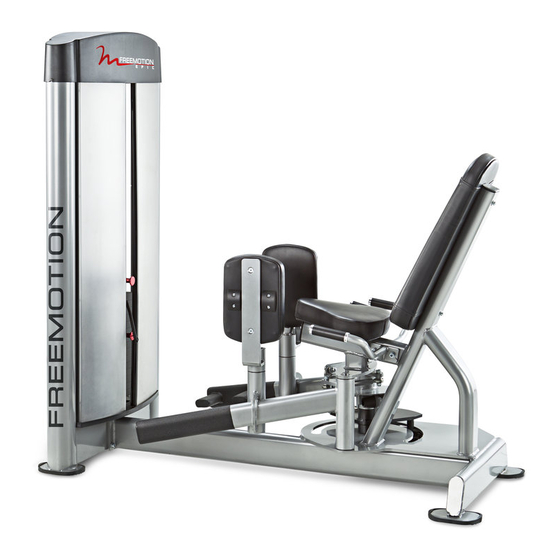
BEFORE YOU BEGIN Thank you for selecting the FREEMOTION ® EPIC™ after reading this manual, see HOW TO CONTACT HIP AB/AD strength equipment. The strength equip- CUSTOMER CARE on the back cover of this manual. To ment’s stylish ergonomic design and never-before-... -
Page 6: Adjustment
ADJUSTMENT This section explains how to adjust the strength equipment. Make sure that all parts are properly tightened each time the strength equipment is used. Replace any worn parts immediately. ADJUSTING THE RESISTANCE To change the amount of resistance of the strength equipment, insert the weight pin into the desired weight. -
Page 7: Maintenance And Troubleshooting
Personnel must also record and report any accident. To maintain the strength equipment’s warran- ty, use only FREEMOTION EPIC parts for repair or replacement. If there are any questions or concerns, see HOW TO CONTACT CUSTOMER CARE on the back cover of this manual. - Page 8 Cable Guards plates. If there is not enough tension on the cables, Check the cable guards to ensure that they are not the top weight will not be lifted immediately when the rubbing against the cables and that they are holding repetition is begun.
- Page 9 Top Weight Adjustment Pulley Adjustment Tools required: 5/32” hex key Tools required: 9/16" open or box-end wrench/span- ner, 5/16" hex key 1. If the cable needs to be shortened 3/4 in. (2 cm) or more, follow the instructions in steps 1 and 2 1.
- Page 10 WEIGHT STACK SERVICING 9. Reattach the cable to the top weight coupler. Retighten the four set screws into the threaded Servicing the weight stack involves replacing the two holes. Tighten the set screws equally until they guide bushings and weight insert in the top weight. To contact the cable.
-
Page 11: Cable Diagram
CABLE DIAGRAM The cable diagram shows the proper route of the cables. Use the diagram to make sure that the cables and the cable guards have been assembled correctly. If the cables have not been correctly routed, the strength equipment will not function properly and damage may occur. - Page 12 NOTES...
-
Page 13: Part List
PART LIST—Model No. GZFI8093.5 R1106A Key No. Qty. Description Key No. Qty. Description Base 3/8" Nylon Locknut Right Arm Large Set Screw Left Arm 3/8" x 6 1/2" Non-patch Bolt Weight Guide 3/8" x 1" Non-patch Screw Tower 3/8" x 2" Bolt Long Panel Wingnut Short Panel... - Page 14 Key No. Qty. Description Key No. Qty. Description Frame Plate Black Endcap Access Panel Black Collar Access Panel Gasket Backrest Cover 1/4" x 3/4" Bolt Owner’s Manual 1/4" Cage Nut Note: “#” indicates a non-illustrated part. Specifications are subject to change without notice. If replacement parts are needed, or if parts are missing or damaged, see HOW TO CONTACT CUSTOMER CARE on the back cover of this manual.
-
Page 15: Exploded Drawing
EXPLODED DRAWING—Model No. GZFI8093.5 R1106A 101 102 51 96... - Page 16 PART LIST and the EXPLODED DRAWING on pages 13 to 15). Customer Care: 1-800-201-2109, Monday–Friday, 8 a.m.–5 p.m. Mountain Time FreeMotion Fitness, Inc. • 1096 Elkton Dr., Suite 600 • Colorado Springs, CO 80907 Part No. GZ7419 R1106A Printed in USA © 2006 ICON IP, Inc.
Need help?
Do you have a question about the EPIC HIP AB and is the answer not in the manual?
Questions and answers