Table of Contents
Advertisement
Quick Links
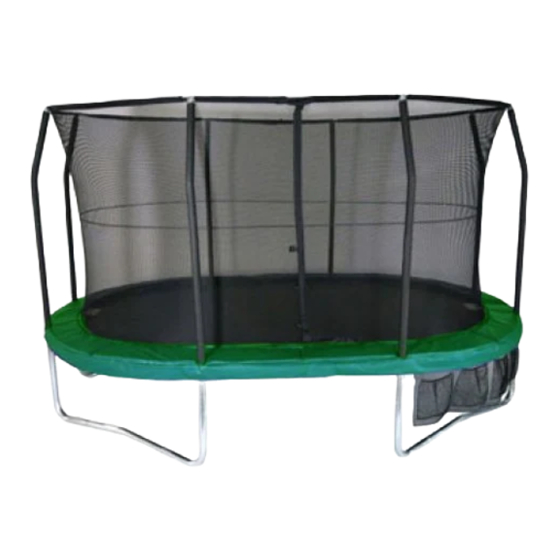
12' / 14' Ultra JumpPOD
WARNING
Read the assembly, installation,
care, maintenance, and use
instructions in this manual prior
to assembling and using this
trampoline/enclosure. Save this
manual for future reference.
WARNING: The trampoline/enclosure is designed for users weighing 120 kg(264 lbs.)
or less.
USER'S MANUAL . . . . . . . . . . . . . 3
Assembly, Installation, Care,
Maintenance, and Use Instructions.
Advertisement
Table of Contents

Related Manuals for Jumpking Ultra JumpPOD


Summary of Contents for Jumpking Ultra JumpPOD
- Page 1 12’ / 14’ Ultra JumpPOD WARNING USER’S MANUAL ... . . 3 Read the assembly, installation, care, maintenance, and use Assembly, Installation, Care, instructions in this manual prior to assembling and using this Maintenance, and Use Instructions.
-
Page 3: Table Of Contents
If you have questions after reading this manual, please call our toll-free Customer Hot Line. The trained technicians on our Customer Hot Line 12’ / 14’ Ultra JumpPOD will provide immediate assistance. Please call our customer hot line: 01276-855600 REPLACEMENT... -
Page 4: Important Precautions
IMPORTANT INFORMATION . WARNING! ADULT SUPERVISION & GUIDANCE REQUIRED AT ALL TIMES. . Recommended age 6+ years. . No somersaults or flips - can cause serious injury. WARNINGS! . Only for domestic use. . Maximum user weight limit 120 kg. . -
Page 5: Warning Label Placement
WARNINGS Label 1 No somersaults. Adult supervision required. WARNING Read the instruction. English Francais Italy Spain Dutch German Label 2 Warning. No somersaults. Attenzion. Défendu de saut Achtung. Keine Purzelbӓ Attenzione. Non effettuare Advertencia. No deben Waarschuwing. Geen salto’s Only one user. Collision Warning. -
Page 6: Before You Begin
BEFORE YOU BEGIN Thank you for selecting a jumpPOD trampoline/ If you have questions after reading this manual, enclosure. “jumpPOD” are designed and crafted to please call our Customer Hot Line at 01276-855600, n t i T . s Monday - Friday, 8 a.m. until 5 p.m. Central Time line/enclosure come equipped with warnings and (excluding holidays). -
Page 7: Trampoline/Enclosure Safety Information
TRAMPOLINE SAFETY INFORMATION In trampoline use, as in all active recreational sports, Loss of Control: Jumpers who lose control of their participants can be injured. However, there are steps jump may land on the bed incorrectly, land on the that can be taken to reduce the risk of injury. In this frame or springs, or fall off the trampoline. - Page 8 METHODS OF ACCIDENT PREVENTION Inspect the trampoline before using it. Do not use the trampoline without the frame pad securely in place to The Supervisor’s Role in Preventing Accidents cover the frame. Do not use the trampoline when it is wet or in a windy condition.
- Page 9 TRAMPOLINE ENCLOSURE SAFETY INFORMATION NEED FOR TRAMPOLINE ENCLOSURE SAFETY electricity. Lights, electric heaters, extension cords, and household electrical appliances are not permitted A trampoline enclosure is a recreational product. in or on the trampoline or enclosure. The information on this page and on page 11 identifies Hazards Associated with Entering and Exiting the important safety precautions.
- Page 10 Hazards Associated with High Winds This trampoline enclosure is not recommended for use by children under 6 years of age or by anyone A trampoline with an enclosure can be moved or weighing more than 120 kg (264 lbs.). blown over by high winds, potentially injuring anyone in its path or anyone inside of the enclosure.
-
Page 11: Use And Instructional Material
USE AND INSTRUCTIONAL MATERIAL OVERVIEW OF TRAMPOLINE USE should not be worn on the trampoline. Beginning jumpers may wish to wear loose-fitting protective The first periods of trampoline use should focus on clothes, such as a long-sleeve shirt and pants, until learning fundamental body positions and practicing... - Page 12 INSTRUCTIONAL PROGRAM AND MODEL leg is brought forward from the standing (not LESSONS bouncing) position, and the drop to the back with the chin held forward to the chest and the eyes for- The following lessons are examples of an instructional ward on the frame pad.
- Page 13 BASIC TRAMPOLINE SKILLS Fundamental Bounce Knee Drop 1. Start from a standing position with your head 1. Start bouncing from a standing position, erect and your eyes on the frame pad. keeping your eyes on the frame pad. 2. Swing your arms forward and up in a circular 2.
- Page 14 Seat Drop Front Drop 1. Land in a sitting position with your legs 1. Start from a low bounce and land on the bed parallel to the bed. in a prone position. 2. Place your hands on the bed beside your 2.
-
Page 15: Assembly
ASSEMBLY IMPORTANT ASSEMBLY INFORMATION recommended. Provide clearance for wires, tree limbs, and other possible hazards. • No tools are required for assembly. However, a Lateral clearance is also essential. Place the rubber mallet may make assembly easier. trampoline away from walls, structures, fences, and other play areas. - Page 16 3. Lay the Bed (5) on the ground inside of the Holes assembled frame. Make sure that the two warn- Frame V-rings ing decals (not shown) are on top of the Bed. Note: There are V-rings around the edge of the Bed (5) and holes around the top of the frame.
- Page 17 4. Lay the Frame Pad (6) on the frame. Adjust the position of the Frame Pad so the notches are aligned with the Legs (3) as shown. Be sure 8 Enclosure Frame Opening are fit to the Enclosure Socket position. Enclosure Frame Opening Do not use the trampoline without the Frame Pad (6), which is designed to reduce the likeli-...
- Page 18 7. The trampoline is now fully assembled. Make sure that all parts are securely attached. Familiarize yourself and all users of the tram- poline with the safety precautions, use and instructional materials, and care and mainte- nance instructions in this manual before using the trampoline.
- Page 19 10. Spread out Top FRP Pole (12) joint each section Connector Top FRP Pole (11) to a straight line. Assemble the remaining Top FRP Pole (12) in the same way . Spread the Netting (16) on the trampoline bed, insert a Top FRP Pole (12) into the opening of Spread out FRP Pole and Joint each section Top Sleeve on the Netting (16).
- Page 20 Note: During steps 11 and 12, you will “sew”the lower eyelets of the Netting(16) to the V-rings on the bed using the Cords(19). Locate the V-ring closest to the door. Thread one end of a Cord(19) through the lower eyelet of the Netting(16) above the V-ring and then thread the Cord through the V-ring.
-
Page 21: Care And Maintenance
CARE AND MAINTENANCE REMOVE AND STORING THE TRAMPOLINE/ Care ENCLOSURE Do not allow pets or animals on the trampoline or Make sure that the trampoline/enclosure is dry before inside the enclosure, as claws may snag and pull removing and storing it. Use caution while removing the bed material or damage the frame pad or netting. -
Page 22: Exploded Drawing And Part List
EXPLODED DRAWING AND PART LIST 17(User’s Manual) Qty. Description Qty. Description Enclosure Socket Cap Top Tube Foam Sleeve Enclosure Socket 4 pcs A marking, 4 pcs B marking Self-tapping Screw Leg Extension Netting with attached Hardware Center User’s Manual Stitched Bed with V-rings Plastic Cap (This part has been attached Frame Pad to the top of the Top Curve Pole(11).)
Need help?
Do you have a question about the Ultra JumpPOD and is the answer not in the manual?
Questions and answers