
Related Manuals for Ingersoll-Rand R Series


Summary of Contents for Ingersoll-Rand R Series
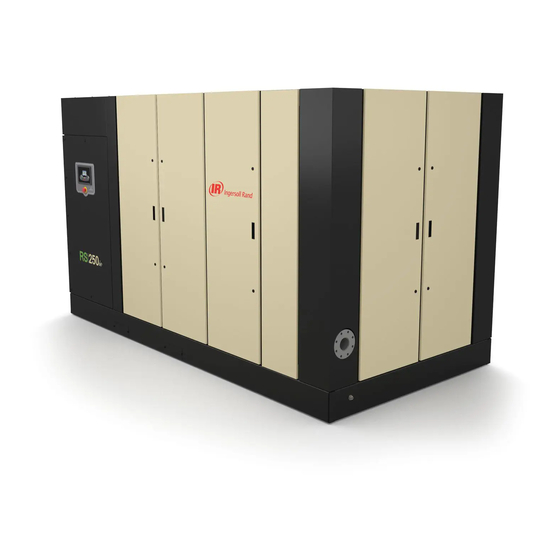
- Page 1 REFRIGERATED AIR DRYERS R Series VCD Dryer INSTALLATION, OPERATION & MAINTENANCE MANUAL Service Department 1-800-526-3615...
-
Page 2: Specifications
StarWatch ID: REV:1203 SPECIFICATIONS Serial No. Model ITEM DESCRIPTION VALUE UNIT -------------------Dryer Design Max Air Flow @ PSI SCFM/PSI Comments: --------------------------------Dryer Design Max Air PSI 3 ------------------Dryer Design Max Inlet Temperature °F REFRIGERANT 4 ------------------------------------------------Supply Voltage VOLT CHARGE: LBS. -------------------------------------------------------------Cycle ------------------------------------------------------------Phase REPLACEMENT 8 -----------------------------------Number of Compressors... -
Page 3: Table Of Contents
TABLE OF CONTENTS Page Page 7. Trouble Shooting Guide..12-13 1. Pre-Installation....• Inspection, Handling and Setup 8. Warranty......14-15 • Cautions and Operating Warnings • Warranty procedure 2. Dryer Installation....• Maintenance records • Coverage • Location of Dryer •... -
Page 4: Pre-Installation
1. PRE-INSTALLATION NOTE: Use two wrenches when connecting to dryer piping so as to prevent damage to internal air or water lines. Inspection, Handling and Setup Water Line Piping (Water Cooled Units) Inspect the dryer carefully upon arrival and note any On water cooled units, install a strainer ahead of the water damage on the freight bill. -
Page 5: Refrigeration System
opened prior to start up. reheating the outgoing air, it serves to eliminate sweating of • Locate TAGGED service valves. pipes in the plant air system. Most important, it increases • Remove protective cap from valve stem. (see figure the temperature dew point split, preventing moisture from below) condensing out of the compressed air when the air is •... -
Page 10: Routine Maintenance And Service
Never: Additional oil is added at the factory to compensate for the • Turn off main power disconnect except when migration with the freon. If a compressor is replaced, servicing. remove the drain plug from the evaporator shell (on steel •... -
Page 11: Drains
The valves can Factory Assistance usually be restored by installing a diaphragm repair kit Please do not hesitate to call the Ingersoll-Rand factory for available from IR. technical information and assistance. We have skilled... -
Page 12: Trouble Shooting Guide
7. Trouble Shooting Guide COMPRESSOR WILL NOT START. NO HUM: • Line disconnect switch open. Close switch. • Fuse removed or blown. Replace fuse. • Overload tripped. Wait 5 to 20 minutes to reset. Check ambient and inlet air temperatures, operating pressure and air flow rates against rated capacities listed, to determine cause of overload. - Page 13 WATER DOWNSTREAM OF DRYER: • Test drain. Check the output for power from relay marked “drain” on control board. If no output, then replace board. If power is present check wiring to solenoid and status of coil. If energized and valve is not open clean valve or replace if needed.
-
Page 14: Warranty
All orders for parts should be placed with your local invoice for the part. This is for memo billing only. The Ingersoll-Rand Service Provider. Should you not know the invoice will also contain a Return Authorization Number dealer in your area, contact IR at (800) 526-3615. -
Page 15: Chargeable Service Calls
• Freight Damage – Freight damage is not covered In Conclusion under warranty. Should your dryer incur freight damage, file a claim with the carrier immediately. At Our philosophy is clear. We will stand behind it and uphold the option of the claimant, you may contact a local the most professional and expedient service to our distribu- contractor to do a thorough investigation and repair the tors and ultimately our customers. -
Page 16: Operational Controls
CONTROL PANEL... - Page 17 DISPLAYS and ALARMS DEW POINT CONTROLLER AND DISPLAY. DRAIN CONTROL. Will operate by either a ‘LEVEL FLOAT’ or ‘TIMED’ interval. If the dryer is equipped Directly controls dew point and provides constant digital display of dew point. Factory set at 36ºF. with a Level Float (electrical connections to terminal During ACTUAL display mode, displays the dew J9), the drain will respond to the float signal on...
- Page 18 Optional Electronic Panel MANUAL...
-
Page 19: Menu Tree
PREFACE: This document is intended to make familiar, the Control Center functionality. The ‘manual’, can serve as a handy guide to quickly move through the operations of the dryer it is controlling. It is not intended to replace the more comprehensive, specific ‘dryer manual’ that will show all other aspects of operation and safety. - Page 20 #2 DEMAND or TIMED OPERATIONS #2 INTERVAL (Timed) #2 DURATION #2 AUTOTEST • COMMUNICATIONS MENU (‘F’ & ‘G’ Series Menus) ----------------------------------------- [ 28 ] ADJUST CLOCK STAR WATCH -Host to Control: YES MODEM SETUP MODEM ENABLE MODEM TEST MODEM RESET (Reprogram) VIEW MODEM SETTINGS 3.
- Page 21 KEY FUNCTIONS 1. UP ARROW Scroll Menu Up or Increment Value 2. DOWN ARROW Scroll Menu Down or Decrement Value 3. SET Enter Menu Selection, Enter Program Mode or Save to Memory 4. RESET ALARM Back-up Menu Level or Clear ‘Resetable’ Alarm 5.
- Page 22 Upon initialization, the display shows the ‘type’ of dryer the Control Center is configured to control. • VCD - VARIABLE SPEED DRYER INGERSOLL-RAND REFRIGE DRYER (R404A) S/N 00000 V 1.00 This is a fixed configuration. Once assigned to a dryer the Control Center will never be changed to any of the other configurations.
- Page 23 TYPICAL SCREEN DISPLAYS ------------------------------------------------------------------------------------------------------------ Below are a sampling of typical display screens; showing some of the possible system operations. ALL SYSTEMS OK AUTO RUN MODE POWERSAVE ACTIVE DEWPOINT 34°F MOTOR OVERLOAD ALARM SHUT DOWN DEWPOINT 39°F ALL SYSTEMS OK LOAD/UNLOAD MODE DEWPOINT 35°F ALL SYSTEMS OK SYSTEM OFF...
- Page 24 ID. The CONTROL CENTER will display these ID’s as any given screen is selected within the menu tree. Please make note of any particular screen ID when communicating with Ingersoll-Rand Service Providers, which may be in question. d. REVIEW ALARM LOG ------------------------------------------------------------------------------------------------------------------------ When the Review Alarm Log pushbutton is depressed, the ‘1’...
- Page 25 LOW REFRIGERANT/OIL PRESSURE J8 ALARM LOG E6: LOW PRESSURE DAYS SINCE LAST: 0 ALARM OUT: ENABLED HIGH REFRIGERANT PRESSURE J9 ALARM LOG E7: HIGH PRESSURE DAYS SINCE LAST: - - - ALARM OUT: ENABLED JI0 ALARM LOG W1: LOW AIR-IN PSI DAYS SINCE LAST: 54 ALARM OUT: ENABLED J11 ALARM LOG...
- Page 26 FLOW ENABLE in the SETUP screens. The loop may be powered by the Control Center or powered externally. The FLOW measurement is displayed in the ‘K6’ screen only if enabled. Refer to schematic for configuring panel to ‘current/voltage’ and wiring. Call Ingersoll-Rand Service Support for details or questions.
- Page 27 Screen series ‘E’, ‘F’, ‘G’, ‘R’ and ‘I’ are within the set-up selections. SYSTEM - E & H SERIES SCREENS SETUP MENU Press SET to select COMPANY INFORMATION Press SET to select Ingersoll-Rand (1-800-526-3615) Copyright( c )2001 PRODUCT INFORMATION Press SET to select E2 VCD - Variable Speed AIR DRYER Serial # 00000 Firmware Rev.
- Page 28 DRAIN SETUP MENU Press SET to select I1 DRAIN 1 Type: DEMAND Interval: 10:00 m:s Duration: 2 sec I2 DRAIN 1 Type: DEMAND Interval: 10:00 m:s Duration: 2 sec DRAIN 1 Type: DEMAND Interval: 10:00 m:s Duration: 2 sec DRAIN 1 On Delay: 0:05 m:s AutoTest:...
- Page 29 CAUTION! The Factory Default will change all process values and set points back to their original factory settings. PROCEED WITH CAUTION... RESET SETTINGS TO FACTORY DEFAULTS PROCEED WITH CAUTION Press SET to select ______________________________________________________________________________________________________ NULL STATE - When the Null State is selected, all operations will cease. The dryer display will go to one of the three possible initialization screens as shown in section 1.0 (see STARTUP NULL SCREEN).
- Page 30 H2 Inlet Pres Value: 100 psi Offset: 0 psi Scale: 200 psi H3 Outlet Pres Value: 100 psi Offset: 0 psi Scale: 200 psi H4 Outlet Pres Value: 100 psi Offset: 0 psi Scale: 200 psi H5 Discharge Pres Value: 300 psi Offset: 0 psi...
- Page 31 SYSTEM DRAINS - E & I SERIES - Each of the two (2) drain controls can be programmed to be either a ‘TIMED’ or ‘DEMAND’ drains. • If Timed is selected, the drain will activate to the ‘Interval’ time setting for the period of time indicated in the ‘Duration’...
- Page 32 I9 DRAIN 2 On Delay: 0:05 m:s AutoTest: 12:00 h:m I10 DRAIN 2 On Delay: 0:05 m:s AutoTest: 12:00 h:m SYSTEM COMMUNICATIONS - F & G SERIES COMMUNICATIONS MENU Press SET to select ADJUST CLOCK Time: 12:15 New Time: 12:20 STARWATCH Host To Control: YES MODEM...
- Page 33 PI: HIGH INLET Value: 100 psi Alarm Set: 101 psi P4: DISCHARGE Value: 290 psi Alarm Set: 350 psi P5: SUCTION Value: 100 psi Alarm Set: 20 psi FLOW INPUT ENABLE: YES If “Yes” : gives flow data FLOW SENSOR If “No”...
- Page 34 5 . VIEW ALARMS ----------------------------------------------------------------------------------------------------------------------------------------------- VIEW ACTIVE ALARMS Press SET to select ACTIVE ALARMS Press UP/DOWN to view active alarms Press RESET to Exit ACTIVE ALARMS HIGH DEWPOINT (Self Resetting) Press RESET to Exit ACTIVE ALARMS LOW FLOW (Self Resetting) Press RESET to Exit A3a SYSTEM SHUTDOWN - Requires a manual reset.
- Page 35 A5b SYSTEM SHUTDOWN ..Requires a manual reset. ACTIVE ALARMS E3: SUPERHEAT-LOW Press RESET to Clear A6 SYSTEM SHUTDOWN - Requires a manual reset. ACTIVE ALARMS E4: LOW DEWPOINT Press RESET to Clear A7 SYSTEM SHUTDOWN - Requires a manual reset. ACTIVE ALARM S E5: DRYER OVERLOAD Press RESET to Clear...
- Page 36 A15a DRAIN #1 FAILURE A15 ACTIVE ALARMS DRAIN FAULT-l (Self Resetting) Press RESET to EXIT A15b DRAIN #2 FAILURE A15 ACTIVE ALARMS W6 DRAIN FAULT-2 (Self Resetting) Press RESET to EXIT A16 Requires a manual reset. A16 ACTIVE ALARMS MODEM FAILURE Press RESET to Clear ACTIVE ALARMS No Active Alarms...
- Page 76 Ingersoll-Rand ® Fold and Seal and your Service Warranty will be registered immediately. We are here to help. For more information on Service or Installation call IR Customer Service at (1-800-526-3615).
Need help?
Do you have a question about the R Series and is the answer not in the manual?
Questions and answers