Table of Contents
Advertisement
U
s
e
r
M
U
s
e
r
M
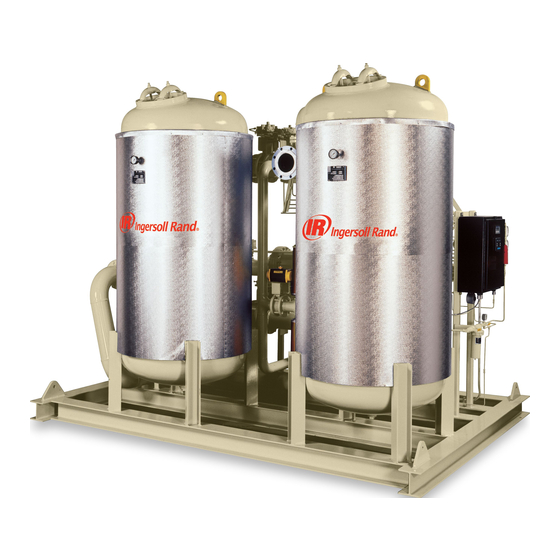
SERIES HC
Heat-of-Compression
Compressed Air Dryer
Models HC-3 – HC-239
IMPORTANT! BEFORE INSTALLING AND
OPERATING THE DRYER, IT IS
RECOMMENDED THAT THIS
MANUAL BE STUDIED AND
CLEARLY UNDERSTOOD.
THIS DRYER IS DESIGNED TO BE
USED ONLY WITH A NON-
LUBRICATED COMPRESSOR.
USE WITH A LUBRICATED
COMPRESSOR WILL VOID ALL
WARRANTIES AND MAY CAUSE
SEVERE DAMAGE.
a
n
u
a
l
a
n
u
a
l
Information
When making inquiries,
please provide the following
information:
1) Equipment Model Number
2) Equipment Serial Number
3) Equipment Operating
Pressure
4) Equipment Operating
Temperature
5) Approximate time in
service
6) Nature of Problem
For information, parts,
or service, contact your
I
n
g
e
r
s
o
l
l
-
R
a
n
d
I
n
g
e
r
s
o
l
l
-
R
a
n
d
local
Service provider or
reach us at
www.air.irco.com
Advertisement
Table of Contents

Related Manuals for Ingersoll-Rand HC-3


Summary of Contents for Ingersoll-Rand HC-3
- Page 1 2) Equipment Serial Number 3) Equipment Operating Pressure 4) Equipment Operating Temperature 5) Approximate time in Models HC-3 – HC-239 service 6) Nature of Problem IMPORTANT! BEFORE INSTALLING AND OPERATING THE DRYER, IT IS RECOMMENDED THAT THIS MANUAL BE STUDIED AND CLEARLY UNDERSTOOD.
- Page 2 USER MANUAL Series HC Reference IR - 222 Rev 3 Page 2 10/17/2013...
-
Page 3: Table Of Contents
USER MANUAL Series HC INDEX PREFACE SECTION 1: INTRODUCTION General Information Safety Instructions 1.2.1 Identification of signs and symbols in this manual 1.2.2 Safety tips for maintenance, inspection & assembly work Personnel Qualification Product Information 1.4.1 Theory of operation 1.4.2 Pressure vessel regulations 1.4.3 Airtightness test... - Page 4 USER MANUAL Series HC SECTION 3: START UP AND OPERATION Start-up 3.1.1 Pressurizing dryer Operator interface SECTION 4: MAINTENANCE Suggested preventive maintenance schedule 4.1.1 Introduction 4.1.2 Periodic maintenance schedule Replacement / Disposal of the desiccant 4.2.1 For first time fill-up 4.2.2 To replace used desiccant Dew point meter maintenance (DPDS Option only)
- Page 5 USER MANUAL Series HC SECTION 5: TROUBLESHOOTING AND FAULTS Introduction High Dew Point 5.2.1 Changed operating conditions 5.2.2 Old desiccant 5.2.3 Towers not reversing 5.2.4 Cooler discharge air temperature too high 5.2.5 Dew point indication in error 5.2.6 Two-way valve leakage Fail-to-shift 5.3.1 Solenoid valve failed to operate...
- Page 6 USER MANUAL Series HC PREFACE: ® ® is an aid in getting to know the adsorption This technical manual from dryer better and in utilizing its possibilities for application in accordance with its intended use. Furthermore, this manual contains important information for safe, proper and economic operation.
- Page 7 USER MANUAL Series HC Prior to installation and start-up of this dryer, please read and implement this section. SECTION 1 INTRODUCTION Reference IR - 222 Rev 3 Page 7 10/17/2013...
- Page 8 INTRODUCTION GENERAL INFORMATION The adsorption dryer of the HC-3 – HC-239 series is built according to the latest technological developments and recognized safety rules. Its use, however, can endanger life and limb of the user or of third parties and can lead to considerable damage to the adsorption dryer and other material assets if: ...
- Page 9 USER MANUAL Series HC SECTION 1: (Continued) 1.2.1 Identification of signs and symbols in this technical manual The safety tips contained in this technical manual, whose disregard could endanger people and machines, are indicated by a general danger sign and the additional markings Danger! or Attention! Danger! / Attention! Warning against electrical voltage!
- Page 10 Attention! Never make structural changes to the adsorption dryer that are not specifically authorized by Ingersoll-Rand! Only use original spare and accessory parts! Carry out maintenance work only when the adsorption dryer is...
- Page 11 USER MANUAL Series HC SECTION 1: (Continued) PERSONNEL QUALIFICATION The personnel involved in operation, maintenance, inspection, and assembly must have the corresponding qualifications to do this work. Areas of responsibility and supervision of the personnel must be precisely established by the operator. Should the personnel not possess the necessary knowledge, then they must be trained and instructed.
- Page 12 USER MANUAL Series HC SECTION 1: (Continued) A. Regeneration Cycles 1. Heating. Hot air directly from the compressor enters the inlet of the HC and is directed by the inlet 2-way valves into the regenerating tower. This hot, thirsty air regenerates the bulk of the water from the desiccant. The air is then directed into the aftercooler where it is cooled, the coalescing separator where liquid water is removed through the drain trap system, then into the drying tower where the air is actually dried to its final low...
- Page 13 USER MANUAL Series HC SECTION 1: (Continued) 2. Stripping. At the end of heating, the inlet valves shift position, directing the hot inlet air directly into the aftercooler, separator, and drying tower. We now begin stripping. The stripping phase of regeneration lasts 90 minutes.
- Page 14 USER MANUAL Series HC SECTION 1: (Continued) 3. Cooling. At the end of stripping, the regenerating tower is repressurized. The cooling cycle valves open and cooling begins. The cooling cycle lasts 60 minutes. During cooling, a portion of the dry outlet air is directed into the regenerating tower to reduce the temperature of the bed prior to tower shift.
- Page 15 The pressure vessels are designed according to the standard technical requirements. They fulfill the test of the certifying procedure and carry the “U”, “UM” ASME Symbol. Range of Application: Type HC-3 – HC-239 Max. 150 PSIG Operating overpressure 10.34 Bar(g) Max.
- Page 16 USER MANUAL Series HC SECTION 1: (Continued) 1.4.5 Technical data sheet MODEL HC-3 HC-6 HC-7 HC-9 Flow: (SCFM) @ 100 PSIG 100°F Drying Temperature (m3/hr) @ 6.89Bar(g) 1150 1420 37.8°C Drying Temperature Vessel OD 12” 16” 18” 20” 30.48 cm 40.64 cm...
- Page 17 USER MANUAL Series HC SECTION 1: (Continued) 1.4.5 Technical data sheet MODEL HC-14 HC-21 HC-30 HC-41 Flow: (SCFM) @ 100 PSIG 1204 1880 2708 3686 100°F Drying Temperature (m3/hr) @ 6.89Bar(g) 2046 3194 4601 6263 37.8°C Drying Temperature Vessel OD 24”...
- Page 18 USER MANUAL Series HC SECTION 1: (Continued) 1.4.5 Technical data sheet MODEL HC-54 HC-69 HC-85 HC-103 Flow: (SCFM) @ 100 PSIG 4814 6093 7522 9101 100°F Drying Temperature (m3/hr) @ 6.89Bar(g) 8179 10352 12780 15463 37.8°C Drying Temperature Vessel OD 48”...
- Page 19 USER MANUAL Series HC SECTION 1: (Continued) 1.4.5 Technical data sheet MODEL HC-122 HC-143 HC-166 Flow: (SCFM) @ 100 PSIG 10832 12712 14742 100°F Drying Temperature (m3/hr) @ 6.89Bar(g) 18404 21598 25047 37.8°C Drying Temperature Vessel OD 72” 78” 84” 182.9 cm 198.12 cm 213.36 cm...
- Page 20 USER MANUAL Series HC SECTION 1: (Continued) 1.4.6 Dryer Flow Capacities Model Selection Chart: PSI: MODEL Bar: 5.86 6.55 7.24 7.58 7.93 SCFM: HC-3 Nm3/h: SCFM: HC-6 Nm3/h: SCFM: HC-7 Nm3/h: 1037 1088 1133 1182 1236 SCFM: HC-9 Nm3/h: 1167...
- Page 21 USER MANUAL Series HC SECTION 1: (Continued) 1.4.7 Transport After the adsorption dryer has been delivered, it must be checked for damage that may have occurred during transport. The Transport Company must be informed to register any damage. Shipping damage is not covered by any warranty. 1.4.8 Storage If the adsorption dryer is to be stored for a prolonged period of time, it should be stored in a dry place, preferably indoors;...
- Page 22 USER MANUAL Series HC Prior to installation and start-up of this dryer, please read and implement this section. SECTION 2 INSTALLATION Reference IR - 222 Rev 3 Page 22 10/17/2013...
-
Page 23: Set-Up And Installation
INSTALLATION SET-UP AND INSTALLATION Once at the installation location, the adsorption dryers of the series HC-3 – HC-239, which are supplied with a base frame, must be positioned so that all sides are easily accessible. Should vibrations occur on the installation location, the adsorption dryer is to be placed onto vibration dampeners. -
Page 24: Mechanical Installation
USER MANUAL Series HC SECTION 2: (Continued) 2.1.1 Mechanical installation The equipment should be located in an area as practically possible with adequate clearances for service. An overhead clearance of not less than three feet above each adsorber tower is required for loading of the desiccant. Access clearance of three feet in front of the control panel should be provided. -
Page 25: Preventative Maintenance Prior To Start-Up
USER MANUAL Series HC SECTION 2: (Continued) 2.1.2 Preventative Maintenance Prior to Start-up 2.1.2.1 All air dryers are tested at the factory for leak-tight joints and tightness of bolts; however, during shipment, some bolts may vibrate loose. We have no control over the handling our compressed air systems receive after leaving our factory. - Page 26 Based on 1/16" gasket material. If other than 150# flange rating, consult Ingersoll-Rand. NOTE: We regret any inconvenience this may cause; however, we feel this preventative procedure will save time and money in the long run. Failure to follow this procedure may result in premature gasket failure which is not covered by warranty.
-
Page 27: Filter Installation
USER MANUAL Series HC SECTION 2: (Continued) 2.1.3 Filter installation Series HC dryers are shipped with the afterfilter loose or with the filter skid mounted on a separate steel frame. The following installation applies to all models that are shipped with filters loose. 2.1.3.1 Afterfilter Installation ... - Page 28 USER MANUAL Series HC Prior to installation and start-up of this dryer, please read and implement this section. SECTION 3 START-UP & OPERATION Reference IR - 222 Rev 3 Page 28 10/17/2013...
- Page 29 Any leaks should be repaired and retested prior to placing the equipment in service. If some gas other than the process air will be used for leak testing, consult Ingersoll-Rand for its compatibility with system components before proceeding. Fully open the inlet isolation valve.
- Page 30 USER MANUAL Series HC SECTION 3: (Continued) 3.1.1 Pressurizing dryer (Continued) When pressurizing is complete then fully open the system outlet valve to place the equipment in service. Verify the system inlet pressure and temperature are at the design operating levels.
- Page 31 USER MANUAL Series HC SECTION 4 MAINTENANCE Reference IR - 222 Rev 3 Page 31 10/17/2013...
- Page 32 USER MANUAL Series HC SECTION 4: MAINTENANCE Advice: In order to ensure continuous and trouble-free operation, a maintenance contract with d is recommended. SUGGESTED PREVENTIVE MAINTENANCE SCHEDULE 4.1.1 Introduction The Series HC compressed air dryer requires a minimum of maintenance as most components are "maintenance-free".
- Page 33 USER MANUAL Series HC SECTION 4: (Continued) B. EVERY 4000 HOURS OR 6 MONTHS 1. Perform steps 1 through 4 as outlined in "Every 2000 Hours or 3 Months". 2. Isolate and depressurize the dryer. 3. Disconnect power to the dryer. 4.
- Page 34 3. Refill both vessels with the proper amount of desiccant as noted in the specifications at the front of this manual. NOTE: Desiccant can be purchased only through Ingersoll-Rand distributors authorized to sell Series HC dryers and related products.
- Page 35 USER MANUAL Series HC SECTION 4: (Continued) E. ADJUSTMENTS The inlet air temperature (as indicated on the Instrument Panel) should be adjusted to obtain the desired temperature/dew point performance (reference the Regenerative Dryer Specification Sheet in Section 6). This can be accomplished through manipulation of the inlet piping insulation and/or the compressor intercooling.
- Page 36 USER MANUAL Series HC SECTION 4: (Continued) 4.2.2 To replace used desiccant To replace used desiccant, do not attempt any maintenance while dryer is pressurized. First, isolate the dryer (if bypass valving has been installed), or shut off compressor, turn off dryer, then slowly depressurize the dryer.
- Page 37 USER MANUAL Series HC SECTION 4: (Continued) AFTERFILTER 4.4.1 General comments and use Filters of the series AF (or optional series HAF) are suitable for filtering solids out of compressed air and other neutral, compressed gases. This new filtration concept is characterized by high flows at low differential pressure.
- Page 38 USER MANUAL Series HC SECTION 4: (Continued) The afterfilter elements are to be changed according to the following steps: 4.4.5.1 AF-350 and below (or optional AFH-350) Isolate the filter by closing the manual valves before and after the filter. ...
- Page 39 USER MANUAL Series HC SECTION 4: (Continued) 4.4.5.3 AF-1400 and above (or optional HAF-1400) Isolate the filter by closing the manual valves before and after the filter. Completely depressurize the filter. Open the handhole; be sure to have hold of the manway cover so as not to lose it into the filter.
- Page 40 USER MANUAL Series HC SECTION 5 TROUBLESHOOTING & FAULTS Reference IR - 222 Rev 3 Page 40 10/17/2013...
- Page 41 USER MANUAL Series HC SECTION 5: TROUBLESHOOTING & FAULTS INTRODUCTION Following proper preventive maintenance procedures will go far toward assuring trouble-free dryer performance; however, failures will still occur. This troubleshooting part will help to identify the source of the problem and to effect a remedy.
- Page 42 USER MANUAL Series HC SECTION 5: (Continued) 5.2.6 Two-way Valve Leakage Valve leakage here will allow relatively wet inlet air to leak into the dry outlet air stream, thereby raising the dew point of the composite air. Compare the dew point of the air at the dryer outlet to the dew point measured at the top (outlet) of the drying tower (i.e., at the relief valve location).
- Page 43 USER MANUAL Series HC SECTION 5: (Continued) SECONDARY DRAIN FAILURE 5.5.1 Solenoid Valve Failure When the liquid level rises above the primary float valve elevation and contacts the liquid level probe, a circuit is completed energizing the 3-way normally open solenoid valve depressurizing the secondary drain valve actuator.
- Page 44 USER MANUAL Series HC SECTION 6 SPECIFICATIONS, PARTS LIST(S) & DATA REPORTS Reference IR - 222 Rev 3 Page 44 10/17/2013...
- Page 45 Date 10/31/14 HEAT-OF-COMPRESSION REGENERATIVE AIR DRYER SPECIFICATION SHEET Model No.: HC-41 N4 ABDIRUX Customer: Ingersoll-Rand Company Serial No.: 65157 Customer P.O. No.: 339355-236 Job Order No.: 3297 Customer Tag No.: Project Reference: Samuel Adams Brewery DESIGN OPERATING CONDITIONS: Gas Composition:...
- Page 46 HEAT-OF-COMPRESSION REGENERATIVE AIR DRYER SPECIFICATION SHEET (CONTINUED) UTILITIES: Elect. Construction NEMA Class: Input Conduit Type: Rigid Aluminum Heater Size: Average Power Consumption: KW Hrs. per 24 Hrs. Average Control Consumption: Watts @ Control Transformer: Included Not Required Steam PPH: PSIG Cooling Water: 73.5 GPM @...
- Page 47 INGERSOLL-RAND Air Dryer Spare Parts List with Stock Recommendations Model No.: HC-41 Serial No.: 65157 January 2015 The following is a complete spare parts list. Items with quantities in the “Recommended Spare Qty.” column are the minimum we advise that you place in your stock to have on hand in case of an emergency.
- Page 48 Air Dryer Spare Parts List Model No.: HC-41 Serial No.: 65157 Rec. Qty. Description Spare CCN # Qty. Gasket, grafoil, 3", 150#-600# ring, 1/16" 38338851 Gasket, grafoil, 6”, 150#-600# ring, 1/16” 38338869 Gasket, grafoil, 6”, 150#, FF, 1/16” 38338885 Separator, #16, 6”FLG, 46”TL (SEP) 38059598 Power supply, 24V DC, 1.25A isol, 30W 38059531...
- Page 49 65157 Ingersoll-Rand Co., P.O. Box 1987, Midland MI 48641-1987 Samuel Adams Brewery, c/o Boston Beer Co., 7880 Penn Drive, Breinigsville PA 18031...
- Page 51 65157 Ingersoll-Rand Co., P.O. Box 1987, Midland MI 48641-1987 Samuel Adams Brewery, c/o Boston Beer Co., 7880 Penn Drive, Breinigsville PA 18031...
- Page 53 65157 Ingersoll-Rand Co., P.O. Box 1987, Midland MI 48641-1987 Samuel Adams Brewery, c/o Boston Beer Co., 7880 Penn Drive, Breinigsville PA 18031...
- Page 55 65157 Ingersoll-Rand Co., P.O. Box 1987, Midland MI 48641-1987 Samuel Adams Brewery, c/o Boston Beer Co., 7880 Penn Drive, Breinigsville PA 18031...
- Page 57 USER MANUAL Series HC SECTION 7 AUXILIARY MANUALS (IF APPLICABLE) Reference IR - 222 Rev 3 Page 45 10/17/2013...
- Page 58 ALLEN-BRADLEY PANELVIEW PLUS 400 OPERATIONAL GUIDE For Use With INGERSOLL-RAND MODEL HC HEAT-OF-COMPRESSION REGENERATIVE AIR DRYER...
- Page 59 ALLEN-BRADLEY PANELVIEW PLUS 400 OPERATIONAL GUIDE TABLE OF CONTENTS Operator Interface A. Main Screen B. Status C. Settings D. Control E. Alarms F. Temperatures G. Hourmeter Reference IR - 196 – I-R Allen-Bradley PanelView Plus 400 – for I-R HC w/HL or HC Mode Rev 4 Page 2 of 11 01/20/2015...
- Page 60 ALLEN-BRADLEY PANELVIEW PLUS 400 OPERATIONAL GUIDE OPERATOR INTERFACE NOTE: If further information is required, please reference the Allen-Bradley literature library at http://literature.rockwellautomation.com/idc/groups/public/documents/webassets/browse _category.hcst. Function keys F1 through F8 perform the function displayed on the screen. ARROWS ALLOW USER TO SCROLL UP OR DOWN INSIDE OF THE SCREEN LIST SELECTOR.
- Page 61 ALLEN-BRADLEY PANELVIEW PLUS 400 OPERATIONAL GUIDE Main Screen This is the Main screen. This screen will be displayed upon initial startup or after an alarm has been cleared. Using the up or down arrow keys and the enter key, you may select a screen to view.
- Page 62 ALLEN-BRADLEY PANELVIEW PLUS 400 OPERATIONAL GUIDE Status (Continued) When HL Mode is enabled, this will toggle from REGENERATION (for 210 seconds) to REPRESSURIZATION (for 30 seconds). If the optional Dew Point Demand System (DPDS) is installed, the status will also indicate STANDBY at the end of the regeneration cycle.
- Page 63 ALLEN-BRADLEY PANELVIEW PLUS 400 OPERATIONAL GUIDE Settings (Continued) After pressing the F7 key, the first Settings screen displays. This first screen will allow you to change the half cycle counter or advance the dryer through a cycle for troubleshooting purposes. This half cycle counter counts up, so the numbers are easier to remember.
- Page 64 Pressing the F1 or F2 key will bring up a numeric input display to change these values. These times are set for optimum conditions by the manufacturer. If a change needs to occur, please consult Ingersoll-Rand. The times displayed should indicate 180 and 90 for Stripping and Heating respectively.
- Page 65 Settings screens. Note: CONTACT INGERSOLL-RAND BEFORE CHANGES ARE MADE! Note: If changes are made without Ingersoll-Rand notification, this may void your warranty. Reference IR - 196 – I-R Allen-Bradley PanelView Plus 400 – for I-R HC w/HL or HC Mode...
- Page 66 ALLEN-BRADLEY PANELVIEW PLUS 400 OPERATIONAL GUIDE Control The Control screen allows you to toggle between Dewpoint Cycle and Time Cycle. While in Time Cycle, the dryer will shift towers every four hours in HC mode and every 4 minutes in HL mode. When utilizing the optional DPDS, the dryer will complete its regeneration and go into a standby mode until the outlet dew point has reached the dew point monitor’s set point.
- Page 67 ALLEN-BRADLEY PANELVIEW PLUS 400 OPERATIONAL GUIDE Alarms The Alarms screen will display any and all alarms. Alarms are displayed in the order in which they occur, for instance the top alarm is always the most recent one. When an alarm situation occurs, this screen will automatically be displayed. When an alarm clears, the operator interface will automatically return to the MAIN screen.
- Page 68 ALLEN-BRADLEY PANELVIEW PLUS 400 OPERATIONAL GUIDE Hourmeter The Hourmeter screen will show how long the dryer has been in Service and the amount of time the dryer has been running in Standby. Note: The hourmeter will still run when the dryer is in Standby. Reference IR - 196 –...
- Page 69 Instruction Manual SAHARA MOISTURE TRANSMITTER...
- Page 70 INSTRUCTION MANUAL Sahara Moisture Transmitter SAHARA MOISTURE TRANSMITTER (SMT) INSTRUCTION MANUAL TABLE OF CONTENTS Introduction to the Sahara Moisture Transmitter ............3 Making Wiring Connections...................4 III. Installation ........................5 IV. Operating the Transmitter .....................6 A. Powering Up ......................6 B. Error Handling......................6 Specifications ........................7 VI.
-
Page 71: Introduction To The Sahara Moisture Transmitter
INSTRUCTION MANUAL Sahara Moisture Transmitter Introduction to the Sahara Moisture Transmitter The Sahara Moisture Transmitter (SMT) is a low-cost, loop-powered transmitter that provides accurate dew/frost point measurements. The SMT is supplied with one 4 to 20 mA analog output that is factory-configured for a specified range. ... -
Page 72: Making Wiring Connections
INSTRUCTION MANUAL Sahara Moisture Transmitter Making Wiring Connections You must wire the transmitter using the factory-supplied cable which is available in a variety of lengths. Note: If you need to lengthen cables, refer to Table 1 below to splice an extension onto the existing cable. -
Page 73: Installation
INSTRUCTION MANUAL Sahara Moisture Transmitter Making Wiring Connections (continued) Table 1: Cable Lead Descriptions Lead Color* Connection Description Blue (+) 7 to 28 VDC Brown (-) 7 to 28 VDC Connect the shield to ground if desired. *The blue and brown leads also produce a current output equivalent to 4 to 20 mA. 3. -
Page 74: Operating The Transmitter
INSTRUCTION MANUAL Sahara Moisture Transmitter IV. Operating the Transmitter After proper installation, the SMT is very easy to use; simply power the unit up and you are ready to begin taking measurements. Since the SMT stores moisture calibration data in non-volatile FLASH memory, you do not have to enter data manually or worry about losing data during a power loss. -
Page 75: Specifications
INSTRUCTION MANUAL Sahara Moisture Transmitter Specifications Moisture Range Curve B: -148 to 86F (-100 to 30C) Curve A: -112° to 86°F (-80° to 30°C) Operating Temperature -40 to 140F (-40 to 60C) Storage Temperature 158F (70C) maximum. The probe should be stored with the plastic cover and desiccant packet threaded onto the probe. - Page 76 INSTRUCTION MANUAL Sahara Moisture Transmitter Specifications (continued) Electronics Power Supply voltage: 7 to 28 VDC (loop-powered, customer supplied) Output: 4 to 20 mA Output Resolution: mA Max. Loop R = 50 Ω x (PSV-7), where PSV = Power Supply Voltage Example: Given a 24 VDC Power Supply, Max.
- Page 77 INSTRUCTION MANUAL Sahara Moisture Transmitter Specifications (continued) Dimensions Overall: 6.76 x 1.13 in. (17.17 x 2.87 cm) Electronics with cable: 4.08 x 1.13 in. diameter (10.36 x 2.87 cm) Weight: 5 oz. (140 grams) Moisture Sensor Sensor Type Thin-film aluminum oxide moisture sensor probe Calibration Each sensor is individually computer-calibrated against known moisture...
-
Page 78: Warranty
Sahara Moisture Transmitter VI. Warranty Ingersoll-Rand warrants the transmitter to be free from defects in material and workmanship. Our liability under this warranty is limited to servicing or calibrating any instrument returned to the factory for that purpose and to replace or repair any defective parts thereof, free of charge, as our inspection deems warranted. -
Page 79: Helpful Information
INSTRUCTION MANUAL Sahara Moisture Transmitter VIII. Helpful Information A. Ten Things to Consider When Making Moisture Measurements in Gases 1. The sampling system should be allowed to equilibrate for up to (typically) 24 hours. 2. A purge flow meter aids in determining equilibration point and will indicate integrity of seals. -
Page 80: Measuring Dew Points: Pressure Vs. Atmospheric
INSTRUCTION MANUAL Sahara Moisture Transmitter VIII. Helpful Information (continued) 5. Any cross checking between two or more similar instruments should be done at identical times and conditions. This is even more important when dissimilar instruments are checked, one against another. It’s not possible to use some makes of moisture meters under flowing conditions (in situ) on stream or at line pressures. -
Page 81: Moisture Monitor Hints
INSTRUCTION MANUAL Sahara Moisture Transmitter VIII. Helpful Information (continued) C. Moisture Monitor Hints 1. The water vapor pressure at the measurement location is the result of not only the moisture content of the fluid entering the system, but also is due to desorption of moisture from associated piping, leaks in the piping system, and moisture trapped in fittings, valves, filters, etc. - Page 82 INSTRUCTION MANUAL Sahara Moisture Transmitter VIII. Helpful Information (continued) 4. The probe is very rapid, is insensitive to temperature and flow rate and measures the vapor pressure of water only. If the above effects are noted, then they are almost always the result of the system itself and not the sensor. a.
-
Page 83: Contaminants
On rare occasions, non-conductive particulate material may become lodged under the contact arm of the sensor, creating an open circuit. If any of the above occurs, Ingersoll-Rand recommends return of the probe to the factory for cleaning. Reference IR-085... -
Page 84: Aluminum Oxide Probe Maintenance
1. If for some reason an electrically conductive liquid or any other temporary contaminant is on the aluminum oxide sensor, the ambient moisture will be incorrect. Ingersoll-Rand recommends return of the probe to the factory for analysis and cleaning. 2. For optimum performance, Ingersoll-Rand recommends having the probe calibrated annually. - Page 85 USER MANUAL Series HC SECTION 8 CUT SHEETS Reference IR - 222 Rev 3 Page 46 10/17/2013...
- Page 86 Material Safety Data Sheet ACTIVATED ALUMINA (Activated and Amorphous) Chemical Product Product Name aSorb®, Activated Alumina (Activated and Amorphous) Other Designations Active bed supports, CG-20, CPA series, CPN, CSS series, DD-2, D-410, DD-420, DD-422, DD-431, DD-440, DD-447, DD-450, DD-460, DD-470, DD-6, DD-PG, DF Series, F-2xx Series, F-200, F-220, HF-200, LA Series, LD-5, LD-350, PSD-350, S-100, S-400, S-431, SAS Gamma Spheres, Selexsorb, Si, SRU, and TG-431 Use of product...
- Page 87 Material Safety Data Sheet ACTIVATED ALUMINA (Activated and Amorphous) First Aid Measures General advice Show this safety data sheet to the doctor in attendance. After eye contact Immediately flush eyes with plenty of water. After initial flushing, remove any contact lenses and continue flushing for at least 15 minutes.
- Page 88 Material Safety Data Sheet ACTIVATED ALUMINA (Activated and Amorphous) Exposure Controls and Personal Protection Components with limit values that require monitoring at the workplace: 1344-28-1 Aluminum oxide (non fibrous) 1333-84-2 Aluminum oxide (non fibrous) ACGIH TLV 10 mg/m³ OSHA PEL 15 total, 5 respirable mg/m³...
- Page 89 Material Safety Data Sheet ACTIVATED ALUMINA (Activated and Amorphous) 10 Stability and Reactivity Stability Stable under normal conditions. Hazardous polymerization does not occur. Conditions to avoid No decomposition if stored and applied as directed. Materials to avoid No information available. Hazardous decomposition products Not applicable.
- Page 90 Material Safety Data Sheet ACTIVATED ALUMINA (Activated and Amorphous) 15 Regulatory Information U.S. Federal Regulations: TSCA Status All components of this product are listed on the TSCA inventory. For TSCA inventory reporting purposes, CAS No. 1344-28-1 was assigned for all forms of aluminum oxide instead of the CAS No. 1333-84-2 as indicated in Item 2.
- Page 91 Material Safety Data Sheet ACTIVATED ALUMINA (Activated and Amorphous) 16 Other Information (continued) Legend ACGIH American Conference of Governmental Industrial Hygienists AICS Australian Inventory of Chemical Substances CAS Chemical Abstract Services CERCLA Comprehensive Environmental Response, Compensation, and Liability Act CFR Code of Federal Regulations CPR Cardio-pulmonary Resuscitation DOT Department of Transportation DSL Domestic Substances List (Canada)
- Page 92 Material Safety Data Sheet ACTIVATED ALUMINA (Activated and Amorphous) ACTIVATED ALUMINA CAUTION Hazards: Can cause mild irritation of eyes, skin, and upper respiratory tract. Precautions: Avoid inhalation of dust. Use with adequate ventilation. Use appropriate personal protective equipment (safety glasses/gloves) to avoid contact. Use appropriate respiratory protection if concentrations exceed the permissible limits.
- Page 93 INSTALLATION GUIDE Model 1700 The patented Model 1700 designed for removing condensate from compressed air systems. Since it is totally pneumatic, it does not require any electricity and can be easily installed using simple piping connections at any point in a system including remote loca- tions.
- Page 94 MODEL 1700 DIMENSIONAL PRINT Page 4 050205 Model 1700-IG...
- Page 95 MINIATURE INLINE FILTER for Dew Point Demand System Filter Element CCN 38335600 OPERATION MATERIALS System fluid passes from the upstream housing Body Parts: 316 stainless steel area through the filtration element. The 7 micron Retainer Screens: 316 stainless steel size has a pleated mesh element supported by Pleated Element: 316 stainless steel retainer screens.
- Page 96 FILTER ELEMENT SPECIFICATION DATA SHEET CCN: 38335592 Description: 812-1B Filter Element Media: Cellulose 99.99% @ 1 m Filtration Rating: Center Tube and Body Material: Electro-tin Plated Steel End Caps: Molded Plastisol Foam Initial Differential Pressure: Application Dependent Maximum Temperature: 250F Rated Collapse Pressure: 35 PSID End Cap I.D.:...
- Page 97 INGERSOLL-RAND FILTER ELEMENT SPECIFICATION DATA SHEET CCN: 38335584 Description: 16D33 Filter Element Uniform media composed of borosilicate glass Media: microfibers secured in a fixed pore construction with an acrylic binder End Caps: Cast Aluminum Seal: Buna Other Components: Proprietary high temperature epoxy adhesive...
- Page 98 PRESSURE GAUGE FEATURES Accuracy: ASME Grade B- ±3/2/3% Case Material: Black finish steel (±2% of range across middle half of scale) Pointer Material: Black finish aluminum Dial Standard: Dual scale PSI and kPa Window Material: Plastic/Acrylic Center Back Mount Lower Mount SPECIFICATIONS &...
- Page 99 SOLENOID MUFFLER FEATURES Reduces noise levels Prevents open line exhaust dangers Corrosion resistant Brass mesh screen and aluminum construction provide improved flow, longer life, and cleanable element High flow capacity with low back pressure Prevent metal chips, abrasive grits, dust, and other contaminants from entering open exhaust ports...
- Page 100 MUFFLER SINGLE CHAMBER Constructed entirely of corrosion resistant aluminum. FOUR CHAMBER Constructed entirely of corrosion resistant aluminum. SPECIFICATIONS & DIMENSIONS Diameter Length Flow SCFM Weight MNPT (in.) (in.) (in.) (in.) (in.) @ 90 PSI (lbs.) SINGLE CHAMBER 38390829 ¾” 3.40 7.18 1.42 46794657...
- Page 101 GENERAL PURPOSE RELAY Side View Bottom View FEATURES DIMENSIONS (mm) Non-polarized LED indicator No internal wires, lead-free construction Cadmium-free contacts Mechanical flag indicator Manual latching lever with color coding for AC or DC coil UL Recognized, CSA Certified, EN Compliant SPECIFICATIONS 38338844...
- Page 102 PRESSURE SWITCH FEATURES Open frame (skeleton) construction Set point repeatability is ±1% of adjustable Compact size range Electrical rating is 15A 125/250/480 VAC One SPDT output Hex adjustment (no reference dial) resistive Weight is approximately 12 oz. ...
- Page 103 TEMPERATURE TRANSMITTER 32-662°F CCN 23815426 FEATURES Variety of sensors can be used High accuracy in total ambient temperature range Upscale burnout ≥ 21.0 mA Fault signal on sensor break or short circuit Universally PC programmable for various ...
- Page 104 BALL VALVE Bronze with Lever FEATURES 316 SS ball and stem RPTFE seats and stuffing box ring Blow-out-proof stem design Adjustable packing gland MATERIALS 1. Lever and Grip: Steel, zinc plated w/vinyl 2. Stem packing: RPTFE 3.
- Page 105 MAINTENANCE Normal stem packing wear can be compensated for by tightening the packing gland screw clockwise. If all of the adjustment to the packing gland screw has been made, remove the lever and packing gland nut and add one or two replacement bearings on top of the old packing.
- Page 106 BUTTERFLY VALVE with Pneumatic Actuator CCN’s Complete Valve Actuator Size Valve Assy. Repair Kit Repair Kit DOUBLE ACTING ACTUATOR 150# Wafer 3” 38059416 38454476 38451977 4” 38457693 38058913 38451977 6” 38059424 38454492 38454500 8” 38058954 38058962 38454500 10” 23806342 23806458 23806565 12"...
- Page 107 VALVE SPECIFICATIONS Size (Lbs.) 3” (80 mm) 5.25 1.88 2.86 4.09 6.63 4.36 0.63 0.43 1.25 2.50 0.77 4” 100 mm) 6.75 2.03 3.72 4.71 7.50 4.36 0.63 0.43 1.25 2.50 0.75 6” (150 mm) 8.62 2.23 5.88 5.57 8.00 5.12 0.75 0.51...
- Page 108 VALVE MAINTENANCE 1. Reasonable precautions should be taken before beginning work on the valve. Protective clothing, as required, should be worn. 2. WARNING: Before removing actuator from the valve, or before removing seat retainer from a valve in dead end service, close the valve and depressurize the line. The eccentric design of the valve may allow line pressure to open the valve if the actuator is not in place while the valve is under pressure.
- Page 109 VALVE SEAT REPLACEMENT Refer to the component drawing on page 2 of this cut sheet for parts identification. With the disc in the closed position, remove the valve from the line. 1. Lay the valve down with the disc in the closed position and the seat retainer side facing up. 2.
- Page 110 PNEUMATIC ACTUATOR FEATURES STANDARD MATERIALS Body: Extruded aluminum alloy, Rack and pinion, opposed-piston anodized Maximum pressure of 140 psig (10 bar) End caps: Die cast aluminum alloy with cor- Temperature ranges of -40°F (-40°C) to +200°F rosion resistant polyester coating (+95°C) ...
- Page 111 PNEUMATIC ACTUATOR Spring Return unit shown above. *Spring Cartridges not included in Double Acting. COMPONENTS Item No. Qty. Description Body Piston Pinion End cap 12 max. Spring cartridge assemly Upper bearing * Lower bearing * Retaining ring * Nylon washer * Acetal bearing pad * Acetal guide ring Stop nut...
- Page 112 BUTTERFLY VALVE with Lever PART NUMBERS Valve Valve Valve Size Repair Kit Weight (Lbs.) 150# Wafer 3” 38059556 38454476 4” 23815871 38058913 6” 38059440 38454492 8” 38058996 38058962 300# Wafer 3” 23815897 23806466 4” 23815905 23806474 150# Lug Style 6” 23815848 38454492 300# Lug Style...
- Page 113 VALVE SPECIFICATIONS Size ANSI 150 3” (80 mm) 5.25 1.88 2.86 4.09 6.63 4.36 0.63 0.43 1.25 2.50 0.77 4” 100 mm) 6.75 2.03 3.72 4.71 7.50 4.36 0.63 0.43 1.25 2.50 0.75 6” (150 mm) 8.62 2.23 5.88 5.57 8.00 5.12 0.75...
- Page 114 VALVE MAINTENANCE 1. Reasonable precautions should be taken before beginning work on the valve. Protective clothing, as required, should be worn. 2. WARNING: Before removing handle from the valve, or before removing seat retainer from a valve in dead end service, close the valve and depressurize the line. The eccentric design of the valve may allow line pressure to open the valve if the handle is not in place while the valve is under pressure.
- Page 115 VALVE SEAT REPLACEMENT Refer to the component drawing on page 2 of this cut sheet for parts identification. With the disc in the closed position, remove the valve from the line. 1. Lay the valve down with the disc in the closed position and the seat retainer side facing up. 2.
- Page 116 WAFER STYLE CHECK VALVE FEATURES Class 125# Cast Iron Body with Aluminum Internals Silicone Seals with Temperature Range of -100°F to 500°F 304 Stainless Steel Springs * BOLTING CONFORMS TO ANSI B16.1 AND B16.5 SPECIFICATIONS SIZE WEIGHT-LBS.
-
Page 117: Technical Data
4-WAY INDIVIDUAL INLINE SOLENOID VALVE FEATURES VOLTAGE SINGLE COIL Balanced spool, immune to variations of pressure. Short stroke with high flow. 120V/60Hz 38338943 Large spool area provides maximum shifting forces. 24 VDC (2.5 W) 23816028 Powerful return force thanks to the combination of 220V/50Hz 23858004 mechanical and air springs. - Page 118 Pressure Relief Valve FEATURES ASME Code (UV) National Board Certified Top outlet Full nozzle design Maximum Inlet Approx. Wt. Set Pressure Trim Flow Rate (inches / mm) (inches / mm) (lb / kg) (PSIG) (SCFM) 23816051 Stainless steel 6 ½”...
- Page 119 USER MANUAL Series HC SECTION 9 DRAWINGS Reference IR - 222 Rev 3 Page 47 10/17/2013...
Need help?
Do you have a question about the HC-3 and is the answer not in the manual?
Questions and answers