
Related Manuals for CSI City Softener MSC32-S2


Summary of Contents for CSI City Softener MSC32-S2
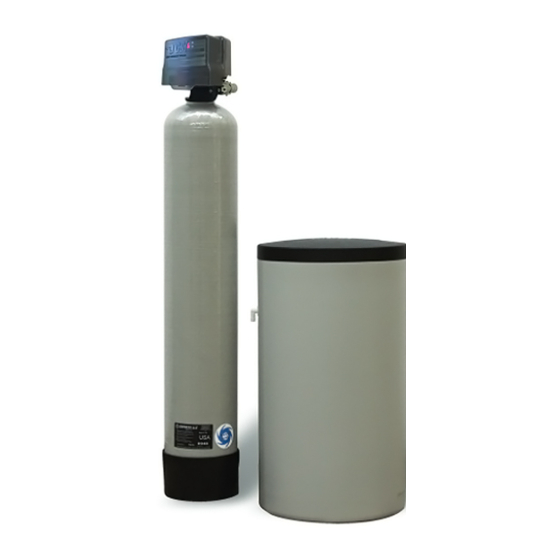
- Page 1 SIGNATURE 2 SERIES Signature 2 Signature 3 City Softener Manual Installation / Operation Manual...
-
Page 2: Table Of Contents
Softener Specifications............Page 3 Softener Installation..............Page 5 Programming the Control Valve..........Page 11 Master Programming............... Page 13 Utilizing Bluetooth..............Page 14 Control Valve Powerhead Assy. Sig. 2 & Sig 3...... Page 17 Valve Body Assembly Sig. 2............ Page 18 Bypass Assembly Sig. -
Page 3: Softener Specifications
Softener Specifications General Specifications - Two Tanks In One MSC32-S2 MSC48-S2 MSC32-S3 MSC48-S3 Regeneration Type Metered Metered Activated Carbon Media .5 cu. ft. 1 cu. ft. Softening Capacity 27,000 40,000 Salt Used / Regeneration (lbs) Maximum Raw Water Hardness (gpg) Maximum Raw Water Iron (ppm) Service Flow Rate (gpm per active tank)* Intermittent Flow Rate (gpm) - Page 4 Softener Specifications PLEASE NOTE THESE SPECIFICATIONS BEFORE PROCEEDING OPERATING PRESSURE RANGE : 20 - 125 PSI OPERATING TEMPERATURE RANGE : 33º F - 120º F INLET / OUTLET PIPE SIZE : 3/4: FNPT PLEASE COMPLY WITH ALL APPLICABLE PLUMBING CODES PROTECT THE SOFTENER AND PIPING FROM FREEZING TEMPERATURES Please read the entire Owner’s Manual and Instruction before installation.
-
Page 5: Softener Installation
Installation -Pre-Installation Check List- A water test should always be performed in order to determine total water hardness (in gpg) and total dissolved iron (in parts per million - ppm). This is critical for proper equipment selection, sizing and for determining the program for regen- eration frequency. - Page 6 Installation HARD WATER TO OUTSIDE FAUCETS SERVICE GROUNDED & UNSWITCHED 115- VOLT OUTLET HOT SOFT WATER COLD SOFT WATER CITY WATER INLET WATER METER PRESSURE RELIEF VALVE (To drain) SOFTENER WATER PRESSURE HEATER TANK BRINE TANK RELIEF VALVE MUST BE INSTALLED PUMP REQUIRED...
- Page 7 Installation -Installation Procedure- - Water Supply Connections and Bypass Valve - To allow for softener servicing, swimming pool filling or lawn sprinkling, a manual bypass valve has been installed at the factory. The bypass allows hard water to be manually routed around the softener. 1.
-
Page 8: Electrical Connection
Installation -Brine Line and Overflow Connection- 1. Position brine tank on a smooth, level surface near the softener resin tank. If necessary, the brine tank can be placed at a higher level than the resin tank, but never at a lower level. 2. - Page 9 Installation Note: Salt settings are pre-set at the factory for the maximum shown on the capacity charts. Warning: Do not reduce salt settings below 9 lbs. as the water level in the brine tank will not reach the grid plate. Note: Salt settings are pre-set at the factory for the maximum shown on the capacity charts.
- Page 10 Installation - Start Up Procedure - - Disinfection - For disinfection of your unit, please follow the Sani-System Procedure on the back of the packet provided. - Filling The Brine Tank With Salt - To expect a high level of performance and reliability, a salt manufactured specifically for water softeners must be used. Salt of this grade is virtually free from dirt and other particulates that would eventually cause the softener to malfunction.
-
Page 11: Programming The Control Valve
Programming the Control Valve - General Care and Cleaning - 1. Do not place heavy or sharp objects on water softener or cabinet. 2. Use only mild soap and warm water to clean exterior of the unit. Never use harsh, abrasive cleaners. 3. -
Page 12: Normal Operation
Programming the Control Valve Normal Operation 1. Home Display Metered models alternate the Time of Day and Gallons left until the next regeneration. The meter will count down to zero (0000) and then regenerate at the scheduled time set. 2. Battery Back-Up (Uses a standard 9-volt alkaline battery.) Features of Battery Back-Up: •... -
Page 13: Master Programming
Master Programming Mode Master Programming Mode To enter Master Programming Mode, press and hold both buttons for 5 seconds. Note: All Master Programming functions have been preset at the factory. Unless a change is desired, it is NOT necessary to enter Master Programming Mode. 1. -
Page 14: Utilizing Bluetooth
Utilizing Bluetooth Control For simplified set up and control, please install the Legacy View on a compatible Bluetooth 4.0+ enabled smart phone or tablet. 1. Download and install the Legacy View app from the Google Play Store, Apple App Store 2. - Page 15 Utilizing Bluetooth Control 1. Change Time of day (Press “set” to set time automatically based on device time) 1. Set Backwash Frequency This sets the amount of days between backwash cycles. 1. Set Regeneration Time Example: For 2am, just type 2 and press OK.
- Page 16 Utilizing Bluetooth Control Status and History From the Status and History, all items in ORANGE can be reset. Touch any table to explode a detailed list of the last 60 days. Start a regeneration or backwash cycle Option 1: Click the “Regenerate Unit Now.” If you would like to force the unit into the next cycle step click “Go to Next Regeneration Step”.
-
Page 17: Control Valve Powerhead Assy. Sig. 2 & Sig
Control Valve Assembly - Signature 2 & SIGNATURE 3 LETTERS IN DIAGRAM REPRESENT WIRING CONNECTIONS * "F" Port is for softener flow meter connection (flow meter not shown) Description Part Number Power Head Assy. 21003X100 Softener Circuit Boad Assy. 21001X102 Encoder 20001X124 Front Plate... -
Page 18: Valve Body Assembly Sig
Valve Body Assembly - Signature 2... - Page 19 Valve Body Assembly - Signature 2 Ref # Description Part # Qty. Piston Assembly 20001X231 10-24 x 13/16 Screw 20001X226 Seal & Spacer Kit 20561X253 End Spacer Flow Control Button 2.4 GPM 20251X268 Flow Control Button 3.5 GPM 20251X270 Plastic Flow Control Housing 20017X100 Flow Control Assy.
-
Page 20: Bypass Assembly Sig
Bypass Assembly - Signature 2 (1A) Ref # Description Part # Meter Assembly, Turbine Complete 20003X200 20561X292 Plastic Bypass Valve Assembly Bypass Valve 3/4” Stainless Steel 20561X270 Bypass Valve 1” Stainless Steel 20561X283... -
Page 21: Valve Body Assembly Sig
Valve Body Assembly - Signature 3 21/22... - Page 22 Valve Body Assembly - Signature 3 Description Part No. Piston Assembly 20001X231 10-24 X 13/16 Hex Head 20001X226 Seal and Spacer Kit 20561X253 Bottom Spacer Flow Control Button 2.4 GPM 20251X268 Flow Control Button 3.5 GPM 20251X270 Plastic Flow Control Housing 20017X100 Flow Control Assy.
-
Page 23: Bypass Assembly Sig
Bypass Assembly - Signature 3 Description Part No. D15 Bypass 20017X283 1” Female Straight Slip Set 20017X288 (optional) 1” NPT Elbow Set 20017X284 1” NPT Straight Set 20017X289 (optional) Elbow, Vertical Adapter 20017X295 (optional) Blank Elbow, Vertical Adapter 20017X294 (optional) 1/4”... -
Page 24: Service Instructions
Service Instructions / Instructional Videos Available at www.csiwater.com General Preliminary Instructions PERFORM BEFORE ALL SERVICING OPERATIONS 1. Turn off water supply to conditioner. -If the conditioner installation has a “three valve” bypass system, first open the valve in the bypass line, then close the valves at the conditioner inlet and outlet. - Page 25 Service Instructions / Instructional Videos Available at www.csiwater.com To Service Injector and Screen 1. Follow steps A1-A2. 2. Unscrew injector cover screws and remove injector cover. 3. Remove injector screen and clean or replace. 4. Remove injector and clean or replace. 5.
-
Page 26: Troubleshooting
Troubleshooting Guide SYMPTOM PROBABLE CAUSE CORRECTION Power supply plugged into Connect to constant power source intermittentent or dead power source 1. Softener Fails to Disconnected meter cable Reconnect cable Regenerate Improper control valve Reset program settings programming Automatically Defective power supply Replace power supply Meter is dirty or defective Clean or replace meter assembly... - Page 27 Troubleshooting Guide SYMPTOM PROBABLE CAUSE CORRECTION Plugged drain line or drain line control Check flow to drain. Clean drainline flow control button 7. Excessive Water in Dirty or damaged brine valve Clean or replace brine valve. Brine Tank and / or Plugged injector or screen Clean or replace injector screen.
-
Page 28: Error Codes
Error Codes Control Valve Error Code Diagnosis Under normal operating conditions, when your control valve is in the “in service” position, the display should alternate between the current time of day and the number of days remaining (for filters and time clock softeners) or gallons remaining (for metered softeners) until the next regeneration. - Page 29 Brine Tank Compoents 1 Year the price paid for the product. In no case shall CSI or seller be liable for REVERE Wireless Low Salt Alarm 90 Days any special, incidental, contingent or consequential damages. Special, incidental, contingent and consequential damages for which CSI is not * This warranty does not include media and/or cartridge filter elements.
- Page 32 CSI WATER TREATMENT SYSTEMS 710 Orange St, Ashland, OH 44805 l PH 419-281-6829 l FAX 419-281-2375 www.csiwater.com 11/17...
Need help?
Do you have a question about the City Softener MSC32-S2 and is the answer not in the manual?
Questions and answers