Scantech V-1020BT User Manual
Vega bt c1/c2 area image barcode scanner
Hide thumbs
Also See for V-1020BT:
- User manual (69 pages) ,
- Quick start manual (32 pages) ,
- User manual (133 pages)

Subscribe to Our Youtube Channel
Related Manuals for Scantech V-1020BT

Summary of Contents for Scantech V-1020BT
- Page 1 Scantech U s e r ’ s M a n u a l V-1020BT Handheld Bar Code Scanner VEGA BT C1/C2 Area Image Barcode Scanner with Bluetooth...
- Page 2 EMEA SCANTECH-ID BV Nijverheidsweg Noord 60-34 3812 PM Amersfoort The Netherlands Tel:+31-33-4698400 Fax:+31-33-4650615 E-mail:info@scantech-id.com www.scantech-id.com Head Quarter CHAMPTEK INCORPORATED 5/F, No.2 Alley 2, Shin-Wei Lane, Chung Cheng Rd., Hsin Tien City 231, Taipei, Taiwan Tel:+886-2-2219-2385 Fax:+886-2-2219-2387 E-mail:sales@champtek.com www.champtek.com China CHAMPTEK INCORPORATED #901, No.
- Page 3 User’s Installation and Configuration Manual Scantech-ID VEGA...
-
Page 4: Limited Warranty
Scantech-ID BV reserves the right to change parts of the device at any time without preceding or direct announcement to the client. -
Page 5: Table Of Contents
Chapter 3 Installation of the VEGA V-1020 ..........13 Unpacking ..............14 Mounting ............... 15 USB Driver ..............16 Chapter 4 Installation of the VEGA V-1020BT ..........17 Unpacking ..............18 Cradle Installation ............19 Set Up Bluetooth Communication ........20 Chapter 5 Cover Display ................ - Page 6 Product Safety Chapter 6 Configuring the VEGA ..............29 Preface ................30 Factory Default Setting ............ 32 Chapter 7 Programming Codes ..............33 Return to Default ............. 34 RS-232 Parameters ............35 USB Mode ..............38 Bluetooth Scanner Setup ..........39 Bluetooth Cradle Setup ...........
- Page 7 Scantech-ID VEGA Area Imager Appendices ....................78 ASCII Table ....................Readable Symbologies ................Technical Specifications ............... Scan map ....................Test Symbologies .................. Overview Part Numbers ..............
-
Page 8: Introduction
POS environment. Quality and Durability The VEGA comes with the same top quality as all other Scantech-ID products. So at a very competitive price the same quality and performance of more expensive products is available. -
Page 9: Chapter 1 Product Safety
Scantech-ID VEGA Area Imager Chapter 1 Product Safety... -
Page 10: Safety & Caution
Product Safety SAFETY & CAUTION Please read the following safety statement carefully. Please preserve this user manual for reference sometime. Before cleaning the VEGA, the users must cut off all AC power. Do not use liquid or spray type of detersive to clean the VEGA. Please use dampish cotton cloth to clean the VEGA. -
Page 11: Fcc Warning
Scantech-ID VEGA Area Imager FCC WARNING This equipment complies with the requirements in Part 15 of FCC. Any operation must complies with the conditions below: (a) The equipment will not cause any severe interference. (b) The equipment can avoid any interference from environment. -
Page 12: Scanner Labelling
Product Safety SCANNER LABELLING Scantech Model Name V-1020BT FCC ID:WOI-0852202T1000 Serial Number This device complies with Part 15 of the FCC Rules. Operation is subject to the following two conditions: (1) this device may not cause harmful interference and (2) this device must accept any interference received, including... -
Page 13: Chapter 2 General Description
Chapter 2 General Description... -
Page 14: Use Of The Vega
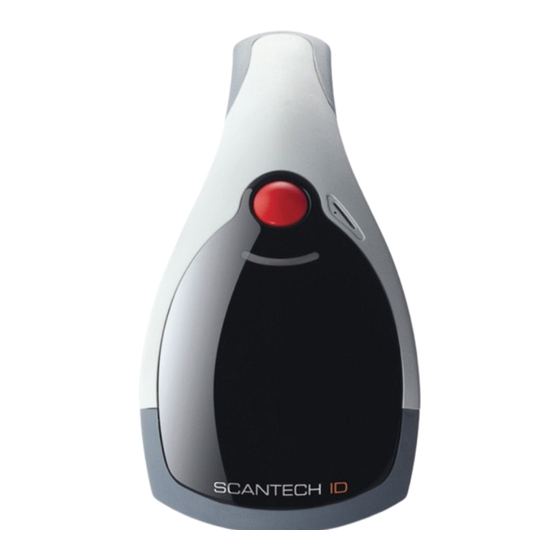
General Description USE OF THE VEGA The VEGA is very ergonomic and modern designed and very user friendly. It can be connected to your POS or Host system trough a RS-232 cable, USB cable or with Bluetooth.. To read or bar code, you simply press the red trigger button and aim the beam to the bar code or image. -
Page 15: Chapter 3 Installation Of The Vega V-1020
Chapter 3 Installation of the VEGA V-1020... -
Page 16: Unpacking
Installation of the VEGA V-1020 UNPACKING Unpack the VEGA as follows: 1. Take the VEGA and its accessories out of the box. 2. Remove the packing material. 3. Check the packing list to make sure you have received all of the items ordered. -
Page 17: Mounting
Scantech-ID VEGA Area Imager MOUNTING Once you have unpacked all components, you can start installing the VEGA. Installing the VEGA is divided in different steps: 1. Connect the VEGA to the supplied communication cable (RJ45 side). 2. Connect the VEGA communication cable to the POS or HOST system. -
Page 18: Usb Driver
USB driver on your POS or Host system, needed for correct operation between your system and the VEGA scanner. You can download this USB driver from the Scantech-ID web site: www. Scantech-ID.com / Support / Downloads... -
Page 19: Chapter 4 Installation Of The Vega V-1020Bt
Chapter 4 Installation of the VEGA V-1020BT... -
Page 20: Unpacking
Installation of the VEGA V-1020BT UNPACKING Unpack the VEGA as follows: 1. Take the VEGA and its accessories out of the box. 2. Remove the packing material. 3. Check the packing list to make sure you have received all of the items ordered. -
Page 21: Cradle Installation
Scantech-ID VEGA Area Imager CRADLE INSTALLATION To set up your VEGA scanner with Bluetooth technology, please follow the next steps. 1. Connect the supplied communication cable at the bottom side of the cradle. 2. Connect the other side of the communication cable to the right connector of your POS or HOST system. -
Page 22: Set Up Bluetooth Communication
Installation of the VEGA V-1020BT SET UP BLUETOOTH COMMUNICATION Before the VEGA scanner can be used for normal operation, Bluetooth communication must be set up between the VEGA scanner and cradle. Pairing 4.3.1 Pairing refers to when a VEGA scanner has been linked or paired to a specific cradle by scanning that cradle’s Bluetooth MAC address code, this Bluetooth MAC... - Page 23 Scantech-ID VEGA Area Imager ATTENTION The VEGA scanner must be charged for a minimum of 8 hours before the scanner can be placed in full operation for the first time. The cradle red led will indicate in red when the scanner is charged.
- Page 24 Installation of the VEGA V-1020BT Set up Server Mode Communication 4.3.3 To set-up the communication between the VEGA scanner and Bluetooth application device follow the next steps. The VEGA scanner must scan “Scanner Server Mode ON/Scanner Client Mode Off” barcode , to set the VEGA scanner in server mode.
-
Page 25: Chapter 5 Cover Display
Chapter 5 Cover Display... -
Page 26: Setup Cover Display
Cover Display SETUP COVER DISPLAY The VEGA scanner has the possibility to change the decorative cover display on the top of the scanner into a display that can show your own commercial message. Message format 5.1.1 Create your own commercial message with the following outline format, use thicker paper... -
Page 27: Change Cover Display
Scantech-ID VEGA Area Imager Change Cover Display 5.1.1 Follow the next instruction steps to change the black Cover Display into the transparent Cover Display, so that your customers can read your own commercial massage. Step 1: Press out the front rubber lid toward... - Page 28 Cover Display Step 4: Press out the other side of inner lock and remove the complete cover Step 5 Assemble transparent top cover rim into inner lock. Step 6 Assemble another side transparent top cover rim into the inner lock...
- Page 29 Scantech-ID VEGA Area Imager Step 7 Insert your commercial message card into the top cover toward the arrow. Step 8 Assemble the front rubber lid into the main unit toward the arrow. Step 9 Complete change top cover.
- Page 30 Cover Display...
-
Page 31: Chapter 6 Configuring The Vega
Chapter 6 Configuring the VEGA... -
Page 32: Preface
Configuring the VEGA PREFACE How to configure the VEGA: The Barcode Programming Feature gives the possibility to change the VEGA scanner settings with use programming codes or with the Utility Tool. Changing Scanner Settings with programming codes 6.1.1 You can set-up your VEGA by scan all necessary programming codes for parameters that meet applications. -
Page 33: Changing Scanner Settings With Utility Tool
Changing Scanner Settings with Utility Tool 6.1.2 Scantech-ID has setup this user manual with the most common used programming codes, it could be possible that you need more advanced settings to use the VEGA without any problems into your application. -
Page 34: Factory Default Setting
Configuring the VEGA FACTORY DEFAULT SETTING The VEGA is set default with the following settings: RS-232 COMMUNICATION DEFAULT Baudrate 57600 Parity None Data bits Stop bits RTS/CTS Postamble <CR+LF> DECODER SELECTION DEFAULT Aztec Codabar Code 11 Code 39 Code 93 Code128 Datamatrix EAN8 / EAN13... -
Page 35: Chapter 7 Programming Codes
Chapter 7 Programming Codes... -
Page 36: Return To Default
Programming Codes RETURN TO DEFAULT Scan this programming code to set the scanner parameters to factory default: Set factory default - Reset all configuration parameters to their factory default setting. - After this reset you must select all required parameters that meet applications. -
Page 37: Rs-232 Parameters
Scantech-ID VEGA Area Imager RS-232 PARAMETERS Baudrate 7.2.1 9600 19200 38400 <57600> 115200... - Page 38 Programming Codes Data bits 7.2.2 Data bits 7 <Data bits 8> Stop bits 7.2.3 <Stop bits 1> Stop bits 2...
- Page 39 Scantech-ID VEGA Area Imager Parity 7.2.4 <None> Even Handshaking 7.2.5 RTS/CTS Enable RTS is idle after each character <RTS/CTS disable>...
-
Page 40: Usb Mode
Programming Codes USB MODE Scan these programming code to set the scanner into USB mode. USB mode... -
Page 41: Bluetooth Scanner Setup
Scantech-ID VEGA Area Imager BLUETOOTH SCANNER SETUP Preface 7.4.1 How to configure the Bluetooth function: The Barcode programming feature gives the possibility to change the The Barcode programming feature gives the possibility to change the VEGA scanner settings with use programming labels. - Page 42 Programming Codes Programming Codes Scanner Server/Client Mode 7.4.4 Scanner Server Mode Scanner Client Mode Scanner Client Mode Memory Mode 7.4.5 Memory Mode ON Memory Mode Memory Mode <OFF> Memory Read Memory Clear...
- Page 43 Scantech-ID VEGA Area Imager Sleep Mode 7.4.6 Sleep Mode 1 minute <ON> Sleep mode 10 minutes Sleep mode 10 minutes Sleep Mode OFF Set Scanner Pin Code Mode 7.4.7 Set Default Security Code (PINCODE = 000000) Set Security Code ON...
- Page 44 Programming Codes Programming Codes Set Pin Code Character 7.4.8 PINCODE max. 6 digits, 0-9and A-Z ASCII CODE 1) Begin to Set PINCODE 2) Go to the ASCII Tables in Appendix A, scan 6 labels that represents the , scan 6 labels that represents the PINCODE.
-
Page 45: Bluetooth Cradle Setup
Scantech-ID VEGA Area Imager BLUETOOTH CRADLE SETUP You can set-up Bluetooth function by direct scan all necessary programming scan all necessary programming codes for Bluetooth parameters. Cradle Default Setting 7.5.1 Set Cradle Interface Default Default RS232, 19200, N-8-1 Cradle Interface 7.5.2... -
Page 46: Set Pin Code
Programming Codes Programming Codes Set Cradle Pin Code Mode 7.5.3 Set Default Security Code (PINCODE = 000000) Set Security ON Set Security OFF Set Pin Code 7.5.4 (PINCODE max. 6 digits ,0-9,A-Z ASCII CODE ) 1) Begin to Set PINCODE 2) Go to the ASCII Tables in Appendix A, scan 6 labels that represents the PINCODE. -
Page 47: Decoding Selection
Scantech-ID VEGA Area Imager DECODING SELECTION Symbologies selection 7.6.1 AZTEC ON AZTEC AZTEC <OFF> CODABAR ON CODABAR CODABAR <OFF> CODE 11 ON CODE 11 CODE 11 <OFF> CODE 39 <ON> CODE 39 OFF CODE 39 OFF... - Page 48 Programming Codes CODE 93 ON CODE 93 <OFF> CODE 128 <ON > CODE 128 OFF DATAMATRIX <ON> DATAMATRIX OFF EAN-8 <ON> EAN-8 OFF...
- Page 49 Scantech-ID VEGA Area Imager EAN-13 <ON> EAN-13 OFF EAN 128 <ON> EAN 128 OFF INTERLEAVED 2/5 ON INTERLEAVED 2/5 <OFF> GS1 DATABAR ON GS1 DATABAR <OFF>...
- Page 50 Programming Codes Programming Codes GS1 DATABAR EXPANDED ON GS1 DATABAR GS1 DATABAR EXPANDED EXPANDED <OFF> GS1 DATABAR LIMITED ON GS1 DATABAR GS1 DATABAR LIMITED LIMITED <OFF> MSI ON MSI <OFF> <OFF> PLESSEY ON PLESSEY PLESSEY <OFF>...
- Page 51 Scantech-ID VEGA Area Imager PDF417 <ON> PDF417 OFF MicroPDF417 On MicroPDF417 <OFF> UPC-A <ON> UPC-A OFF UPC-E <ON> UPC-E OFF...
-
Page 52: Disable All Symbologies
Note: This step does not include codes for all support Bar code symbologies. For a complete overview of support symbologies see appendix. If you need programming codes for symbologies which are not available in this chapter, please contact Scantech-ID Technical Support department or use VEGA utility tool. Disable all Symbologies. -
Page 53: Ean /Upc Parameters
Scantech-ID VEGA Area Imager EAN /UPC PARAMETERS Reading Type 7.7.1 UPC-A=EAN-13 <ON> UPC-A=EAN-13 OFF UPC-E=UPC-A ON UPC-E=UPC-A <OFF> EAN-8=EAN-13 ON EAN-8=EAN-13 <OFF>... - Page 54 Programming Codes ISBN ON ISBN <OFF> ISSN ON ISSN <OFF> Supplemental Set Up 7.7.2 ADD-ON digits <Not required but transmitted if read> ADD-ON digits required and transmitted...
-
Page 55: Check Digit Transmission
Scantech-ID VEGA Area Imager ADD-ON 2 ON ADD-ON 2 <OFF> ADD-ON 5 ON ADD-ON 5 <OFF> Check Digit Transmission 7.7.3 UPC-A Check Digit Transmission <ON> UPC-A Check Digit Transmission OFF... - Page 56 Programming Codes UPC-E Check Digit Transmission <ON> UPC-E Check Digit Transmission OFF EAN-8 Check Digit Transmitted <ON> EAN-8 Check Digit Transmission OFF EAN-13 Check Digit Transmitted <ON> EAN-8 Check Digit Transmission OFF...
-
Page 57: Code 11 Parameters
Scantech-ID VEGA Area Imager CODE 11 PARAMETERS Check Digit Transmission 7.8.1 <1 Digit> 2 Digits 2 Digits Calculate Check Digit and Transmit Calculate Check Digit Calculate Check Digit but not Transmit but not Transmit... - Page 58 Programming Codes Set up Code length 7.8.2 To set the minimum length: 1. Scan programming code minimum length 2. Go to the Decimal Value scan programming code that represents the minimum length to be read. Minimum length Length=4 Length=6 Length=8 Length=10 Length=12 Length=14...
-
Page 59: Code 39 Parameters
Scantech-ID VEGA Area Imager CODE 39 PARAMETERS Type of Code 7.9.1 <Standard> Full ASCII Check Digit Transmission 7.9.2 <Check Digit not used> Calculate Check Digit and Transmit Calculate Check Digit But not Transmit... - Page 60 Programming Codes Italian Pharmacy /Code 32 Checked and transmitted Italian Pharmacy /Code 32 Checked but not transmitted Set Up Code Length 7.9.3 To set the minimum length: 1. Scan programming code minimum length 2. Go to the Decimal Value scan programming code that represents the minimum length to be read.
- Page 61 Scantech-ID VEGA Area Imager Length=10 Length=12 Length=14...
-
Page 62: Code 93 Parameters
Programming Codes 7.10 CODE 93 PARAMETERS Set Up Code Length 7.10.1 To set the minimum length: 1. Scan programming code minimum length 2. Go to the Decimal Value scan programming code that represents the minimum length to be read. Minimum length Length=4 Length=6 Length=8... -
Page 63: Code 128 / Ean 128 Parameters
Scantech-ID VEGA Area Imager 7.11 CODE 128 / EAN 128 PARAMETERS Set up Code Length 7.11.1 To set the minimum length: 1. Scan programming code minimum length 2. Go to the Decimal Value scan programming code that represents the minimum length to be read. - Page 64 Programming Codes EAN 128 identifier 7.11.2 The ]C1 aim identifier for EAN128 is automatically added by default in front of the EAN 128 bar codes. <Include ]C1 identifier> Remove ]C1 identifier...
-
Page 65: Interleaved 2 Of 5 Parameters
Scantech-ID VEGA Area Imager 7.12 INTERLEAVED 2 OF 5 PARAMETERS Check Digit Transmission 7.12.1 <Check Digit not used> Calculate Check Digit and Transmit Calculate Check Digit But not Transmit Set up Code Length 7.12.2 To set the minimum length: 1. Scan programming code minimum length 2. - Page 66 Programming Codes Length=6 Length=8 Length=10 Length=12 Length=14...
-
Page 67: Msi Code Parameters
Scantech-ID VEGA Area Imager 7.13 MSI CODE PARAMETERS Check Digit Transmission 7.13.1 <Calculate Check Digit And Transmit MOD 10> Calculate Check Digit But not Transmit MOD 10 Calculate Check Digit And Transmit Double MOD 10> Calculate Check Digit But not Transmit... - Page 68 Programming Codes Set up Code Length 7.13.2 To set the minimum length: 1. Scan programming code minimum length 2. Go to the Decimal Value scan programming code that represents the minimum length to be read. Minimum length Length=4 Length=6 Length=8 Length=10 Length=12 Length=14...
-
Page 69: Plessey Code Parameters
Scantech-ID VEGA Area Imager 7.14 PLESSEY CODE PARAMETERS Check Digit Transmission 7.14.1 Check Digit Transmitted <Check digit <Check digit not transmitted> not transmitted> Set up Code Length 7.14.2 To set the minimum length: 1. Scan programming code minimum length 2. Go to the Decimal Value scan programming code that represents the at represents the minimum length to be read. - Page 70 Programming Codes Programming Codes Length=10 Length=12 Length=12 Length=14...
-
Page 71: Miscellaneous Parameters
Scantech-ID VEGA Area Imager 7.15 MISCELLANEOUS PARAMETERS Symbology Identifier 7.15.1 Symbology Identifier transmitted <Symbology Identifier not transmitted> With this function ON, a leading character will be added to the output string while scanning code, user may refer to the following table to know what kind of bar code is being scanned. -
Page 72: Preambles And Postambles
As a result, the scanner will give the following bar code output: [<STX>] [BAR CODE DATA] Preamble <None> <STX> It could be possible that you need other Preambles, in that case please use VEGA Utility tool or contact Scantech-ID Technical Support Department. - Page 73 As a result, the scanner will give the following bar code data output: [BAR CODE DATA] [<ETX>] Postamble None <CR+LF> <CR+LF> <ETX> It could be possible that you need other Postambles, in that case , in that case use VEGA utility Tool or contact Scantech-ID Technical Support Department.
-
Page 74: Operating Settings
Programming Codes 7.17 OPERATING SETTINGS Imager mode 7.17.1 You can set the best reading performance of your VEGA by adjusting certain imager parameters. To choose the best reading performance, depends on the environment, your used application and type of bar codes. Area mode for decode 1D and 2D bar codes. -
Page 75: Scanning Triggering
Scantech-ID VEGA Area Imager Scanning Triggering 7.17.2 <Level> A reading session begins (lighting and decode processing on) when beam is activated and stops when beam is deactivated. Continuous scanning When the scanner is turned on a continuous reading session begins (lighting and decode processing on). -
Page 76: Time Out
Programming Codes Level + Flashing This mode allows you the switch between level and flashing mode. When the scanner is turned on it is in flashing mode (see flashing mode for explanation). You can automatically switch to level mode by activating the beam line. After a period of inactivity lasting the time specified by the timeout the scan engine switches back to flashing mode. -
Page 77: Good Read Mode
Scantech-ID VEGA Area Imager Good Read Mode 7.17.4 When active, the scan engine stops the reading session after a successful decoding. - NOTE: this parameter is NOT used with continuous and continuous + flashing modes. <Active> Not Active Buzzer Beep Tone 7.17.5... -
Page 78: Beep Duration
Programming Codes Programming Codes Good Read Beeps 7.17.6 <One beep> Two Beeps Two Beeps None Beep Duration 7.17.7 60 msec <80 msec> <80 msec> 200 msec... -
Page 79: Good Read Led Duration
Scantech-ID VEGA Area Imager Good Read Led Duration 7.17.8 <80 msec> 0.5 sec 0.5 sec 1 sec Firmware version 7.17.9 Display the loaded firmware version of the scanner Firmware version... -
Page 80: Appendices
Scantech-ID VEGA Area Imager Appendices ASCII Table ................79 Readable Symbologies .............. 81 Technical Specifications............. 82 Scan Map ................. 84 Test Symbologies ..............86 Overview Part Numbers ............. 89... -
Page 81: Aascii Table
Scantech-ID VEGA Area Imager A ASCII TABLE Number Zero Number One... - Page 82 Appendices...
-
Page 83: B Readable Symbologies
Scantech-ID VEGA Area Imager B READABLE SYMBOLOGIES 1D Symbologies Symbology Default Enable Note Codabar Code 11 Code 39 Code 93 / 93i Code 128 EAN 8 / EAN 13 EAN 128 / UCC GS1 DataBar (RSS) Omni, Expanded, limited Interleaved 2 of 5... -
Page 84: C Technical Specifications
Appendices C TECHNICAL SPECIFICATIONS Physical Characteristics Weight (V-1020) Approx. 240 gr. (incl. cable) Weight (V-1020BT) Approx. 195 gr. (incl. batteries) Material ABS Plastic Connector RJ 45C 10Pins Dimension 186.8 mm x 81.6 mm x 63.9 mm Physical Characteristics Bluetooth Cradle Weight Approx 150 gr. - Page 85 Scantech-ID VEGA Area Imager Electrical Characteristics (V-1020BT wireless model) Battery Li-ion 3.7V / 1400 mA Charge time 4.5 hours Reads per charge 10,000 Cradle LED indicators battery charging: red Charge Completed: off Communication: blue Operating Current 500 mA Input Voltage...
-
Page 86: D Scan Map
Appendices D SCAN MAP Typical Reading Distances 0" 4" 8" 12" 16" 20" 10" 8" Data Matrix 7.5 mils 6" PDF417 6.6 mils 4" 2" 0" 2" 4" 0.125 mm / 5 mils 6" 0.25 mm / 10 mils 8" 100% contrast UPC / EAN 10"... - Page 87 Scantech-ID VEGA Area Imager VEGA Typical Reading Distances (centimeters) Symbology Density Minimum Maximum Distance Distance Code 39 0.125 mm 7.2 cm 13.1 cm 0.20 mm 3.8 cm 22.5 cm 0.25 mm 3.4 cm 27 cm 0.5 mm 5 cm 44 cm...
-
Page 88: Etest Symbologies
Appendices TEST SYMBOLOGIES Scan one or more of these labels to test bar code symbologies you enabled. test bar code symbologies you enabled. 1D Symbology Codabar CODE 11 CODE 39 CODE 93 CODE 128 EAN 8 1234 56 EAN 13 EAN 128/UCC 1 234567 890128... - Page 89 Scantech-ID VEGA Area Imager Interleaved 2 of 5 ISBN ISSN GS1 DataBar GS1 DataBar Stacked GS1 DataBar Expanded GS1 DataBar Expanded GS1 DataBar Expanded Stacked GS1 Databar Limited GS1 Databar Limited Plessey...
- Page 90 Appendices UPC A UPC E 12345 67890 12345 2D Symbologies AZTEC Datamatrix PDF417 MicroPDF417...
-
Page 91: Foverview Part Numbers
Scantech-ID VEGA Area Imager OVERVIEW PART NUMBERS VEGA with Area Imager Version with RS232 interface: 1. A273002 VEGA V-1020-02 2. A274002 VEGA V-1020BT-02 Version with USB (HID KBW) interface: 3. A273004 VEGA V-1020-04 4. A274003 VEGA V-1020BT-03 Version with USB (virtual com port) interface: 5. - Page 92 Scantech-ID BV Nijverheidsweg Noord 60-34 3812 PM Amersfoort The Netherlands Phone: +31 (0)33 469 84 00 Fax: +31 (0)33 465 06 15 E-mail: info@scantech-id.com Internet: www.scantech-id.com...
Need help?
Do you have a question about the V-1020BT and is the answer not in the manual?
Questions and answers