Tektronix SPG8000A Installation And Safety Instructions
Master sync / clock reference generator
Hide thumbs
Also See for SPG8000A:
- User manual (288 pages) ,
- Service manual (150 pages) ,
- Instructions manual (33 pages)

Related Manuals for Tektronix SPG8000A


Summary of Contents for Tektronix SPG8000A
- Page 1 SPG8000A Master Sync / Clock Reference Generator Installation and Safety Instructions *P071347900* 071-3479-00...
- Page 3 The servicing instructions are for use by qualified personnel only. To avoid personal injury, do not perform any servicing unless you are qualified to do so. Refer to all safety summaries prior to performing service. This document supports SPG8000A firmware V2.1 and above. www.tek.com 071-3479-00...
- Page 4 Tektronix. All rights reserved. Licensed software products are owned by Tektronix or its subsidiaries or suppliers, and are protected by national copyright laws and international treaty provisions. Tektronix products are covered by U.S. and foreign patents, issued and pending. Information in this publication supersedes that in all previously published material. Specifications and price change privileges reserved.
- Page 5 Warranty Tektronix warrants that this product will be free from defects in materials and workmanship for a period of one (1) year from the date of shipment. If any such product proves defective during this warranty period, Tektronix, at its option, either will repair the defective product without charge for parts and labor, or will provide a replacement in exchange for the defective product.
-
Page 7: Table Of Contents
Product installation ............................Rackmount installation (Option RACK only) ..................... Power connection ............................How to connect the power cable(s) ......................Network installation ............................Connecting the instrument to your PC(s) ....................To configure the network parameters ....................... SPG8000A Installation and Safety Instructions... - Page 8 Control/NTP port ............................ PTP ports ............................... GPI/LTC port ............................LCD display readouts ........................... Alert and fault error messages ....................... Remote control ............................. Web user interface ..........................General purpose interface (GPI/LTC) port ..................... SNMP traps ............................SPG8000A Installation and Safety Instructions...
- Page 9 Configure the AES outputs (Option AG only) ....................Configure the SDI outputs (Option SDI only) ....................Configure the primary power supply (Option DPW only) ................Configure presets ............................Compliance Information EMC compliance ............................Safety compliance ............................Environmental compliance ........................... SPG8000A Installation and Safety Instructions...
- Page 10 Table of Contents SPG8000A Installation and Safety Instructions...
-
Page 11: Important Safety Information
While using this product, you may need to access other parts of a larger system. Read the safety sections of the other component manuals for warnings and cautions related to operating the system. When incorporating this equipment into a system, the safety of that system is the responsibility of the assembler of the system. SPG8000A Installation and Safety Instructions... -
Page 12: Service Safety Summary
Provide a safe working environment. Always place the product in a location convenient for viewing the display and indicators. Be sure your work area meets applicable ergonomic standards. Consult with an ergonomics professional to avoid stress injuries. Use only the Tektronix rackmount hardware specified for this product. Service safety summary The Service safety summary section contains additional information required to safely perform service on the product. -
Page 13: Terms In The Manual
(This symbol may also be used to refer the user to ratings in the manual.) The following symbols may appear on the product: SPG8000A Installation and Safety Instructions... - Page 14 Important safety information viii SPG8000A Installation and Safety Instructions...
-
Page 15: Preface
Vertical interval time code (VITC) is available on each NTSC or PAL black output, also with independent time sources and offsets. The SPG8000A can also serve as a Network Time Protocol (NTP) server, providing the time-of-day reference to network-attached devices. -
Page 16: Optional Ptp (Ieee 1588) Support
Option PTP provides timing reference capability that is compliant with IEEE 1588 Precision Time Protocol (PTP) and supports SMPTE ST2059 and AES67 profiles. The SPG8000A can supply PTP outputs as a master and can reference to PTP inputs as a slave, or it can do both simultaneously. -
Page 17: Applications
Conventions used in this manual The term "instrument" is used throughout this manual to generically refer to the SPG8000A generator. If installed, the optional GPS receiver in the instrument can receive both GPS and GLONASS signals. The term “GPS” is used throughout this manual to generically refer to GPS and GLONASS signal functionality. - Page 18 Preface SPG8000A Installation and Safety Instructions...
-
Page 19: Operating Requirements
100 - 240 VAC ±10% WARNING. To reduce the risk of fire and shock, ensure that the mains supply voltage fluctuations do not exceed 10% of the operating voltage range. Line frequency 50/60 Hz Maximum power 130 VA SPG8000A Installation and Safety Instructions... - Page 20 Operating requirements SPG8000A Installation and Safety Instructions...
-
Page 21: Installation
(3G, DBT, PTP) that may be installed. Software options 3G (3G-SDI signals) and DBT (Dolby E audio generation) are included with Option SDI. Contact your local Tektronix Field Office or representative if there is a problem with your instrument or if your shipment is incomplete. -
Page 22: How To Enter The Option Key (Option Ptp Only)
NOTE. This procedure uses the instrument front panel to enter the option key. You can also use the SPG8000A Web interface to remotely enter the option key. Refer to the SPG8000A User Manual for information about using the SPG8000A Web interface to enter the option key. -
Page 23: Accessories
SPG8000ANT GPS and GLONASS satellites This 6 foot adapter cable connects from the 15‐pin D‐sub GPI/LTC connector on the SPG8000A to four XLR male connectors (for LTC input/outputs) and three BNC male connectors (for General Purpose Interface (GPI) input/outputs). For a replacement cable, order SPG800AUP Option XLR. -
Page 24: International Power Cord Options
When you order Option RACK, the instrument is configured at shipment for use in an equipment rack. Refer to the Rackmount Slides and Rails Kit Instructions, Tektronix part number 071-2746-XX, that was supplied with the instrument for instructions on how to install the rackmounting hardware. - Page 25 Pull with the minimum force required to move the instrument with a consistent, even motion. Loosen the knob screws, if present, that attach the front of the instrument to the rack. Gently pull the instrument toward you until you can reach the levers at the rear of the instrument. SPG8000A Installation and Safety Instructions...
-
Page 26: Power Connection
In the event that the primary supply fails, the backup supply will automatically provide power to maintain instrument operation. See the SPG8000A User Manual for detailed information about how to operate the instrument with two power supplies. -
Page 27: Connecting The Instrument To Your Pc(S)
Use the arrow buttons to set the subnet mask to be the same net mask (subnet mask) used by the PC, and then press the ENTER button. Do not enter a number if the PC does not have a net mask. SPG8000A Installation and Safety Instructions... -
Page 28: Gps And/Or Glonass Antenna Installation (Option Gps Only)
How long that takes depends on such things as antenna site, cable plant design, and available satellites. Excluding those variables, the typical time to acquire satellites and achieve specified stability with a good satellite signal, known position, and a warmed up instrument, is two minutes. SPG8000A Installation and Safety Instructions... -
Page 29: Antenna System
This antenna information is not intended to cover all aspects of the antenna system design. Important topics that were not covered include items like lightening protection and drip loops. For information about the cable plant design in your system, contact the appropriate person or group in your organization, or contract with a qualified installer. SPG8000A Installation and Safety Instructions... -
Page 30: Check The Oven Oscillator Calibration
Press the BACK button to exit the DIAGNOSTICS menu. If an oscillator calibration is needed, perform the calibration procedure located in the SPG8000A User Manual. GPS constellation configuration You can use the REFERENCE menu to configure the instrument for the type of satellite constellations you want the instrument to use. -
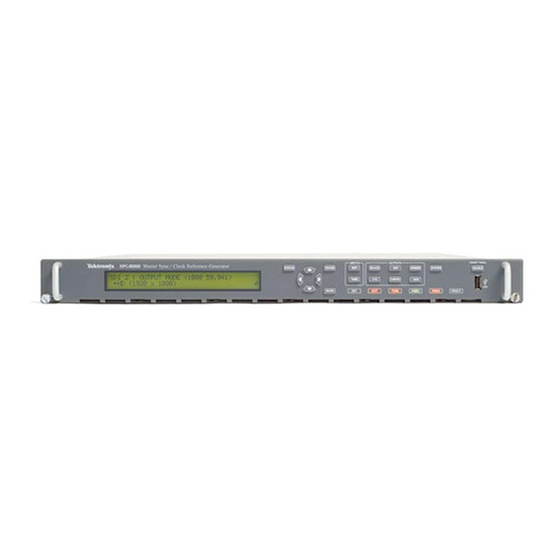
Page 31: Controls And Connections
TIME button. Use the TIME button to access the Time menu where you can configure timing settings such as the time of day, time zone offset, DST schedule, and alarm time and delay. SPG8000A Installation and Safety Instructions... -
Page 32: Outputs
Refer to SYSTEM menu for more information about the settings the period until the front panel times out. USB port Use the USB port to upgrade the instrument firmware and to copy files such as presets and test signal files between instruments. SPG8000A Installation and Safety Instructions... -
Page 33: Front Panel Indicators
The FOM warning level is set using the REFERENCE : GPS SIGNAL WARNING selection in the REF button menu. This status occurs when the GPS system is locked but the FOM falls below the configured warning threshold level. SPG8000A Installation and Safety Instructions... - Page 34 Power Supply module. This matches the orientation of the PWR1 and PWR2 indicators on the front panel. In addition to the PWR1 and PWR2 indicators, the rear panel of each Power Supply module has a STATUS LED that matches the status shown on the PWR1 and PWR2 indicators. SPG8000A Installation and Safety Instructions...
- Page 35 See the SPG8000A User Manual for detailed information about how to operate the instrument with two power supplies. The dim and bright orange warning states clear immediately if the marginal voltage condition is corrected.
- Page 36 (dim green), use the System menu to configure the other Power Supply module to be the active (primary) supply. See the SPG8000A User Manual for detailed information about how to operate the instrument with two power supplies.
- Page 37 3. Scroll through the diagnostic readouts and look for a “PLL UL” (unlocked) message. 4. When you are ready to have the instrument serviced, unplug the instrument from the power source and contact Tektronix customer support. SPG8000A Installation and Safety Instructions...
-
Page 38: Rear Panel Connectors
▪ The instrument is turned off Rear panel connectors The following figure shows the locations of the SPG8000A connectors on the rear panel. A brief discussion of each connector follows the illustration. Figure 4: SPG8000A rear panel Power connector(s) This instrument is designed to operate from a single-phase power source with the neutral conductor at or near earth ground. -
Page 39: Sdi 1-2 Output Connectors (Option Sdi Only)
The reference input requires proper external termination. The signal may connect on to other devices via the loop connection. However, the signal must be terminated eventually, either on the instrument or at the other device. SPG8000A Installation and Safety Instructions... -
Page 40: 10 Mhz And Black 1-2-3 Output Connectors
■ Displays solid red if the connected antenna is shorted. A shorted antenna will not damage the SPG8000A generator. If a splitter is used on the antenna, it may appear as a short at DC but will still pass through the RF signal, which will allow the internal GPS system to function. - Page 41 LTC 4 negative Ground Ground LTC 3 negative Ground LTC 2 negative Ground Ground LTC 1 negative Ground Preset select 2 LTC 3 positive LTC 2 positive H BNC LTC 1 positive V BNC LTC 4 positive SPG8000A Installation and Safety Instructions...
-
Page 42: Lcd Display Readouts
Press the up (▲) or down (▼) arrow button to select STATUS : FAULT or STATUS : ALERT. Press the left (◄) or right (►) arrow button to view all of the reported faults or alerts. The possible messages are listed in the following table. SPG8000A Installation and Safety Instructions... -
Page 43: Remote Control
When the Web user interface is disabled, no instrument access is allowed using a Web browser. Supported Web browsers. For best results, use Google Chrome, Mozilla Firefox, Safari, or Internet Explorer 9.0 or later when you connect to the Web Interface. SPG8000A Installation and Safety Instructions... -
Page 44: General Purpose Interface (Gpi/Ltc) Port
GPI/LTC connector. When pin 3 is configured to any other function (reset program time, jam sync, or none), only presets 1, 2 and 3 can be recalled. The following table lists the combinations of signal levels for the pins and the preset number to be recalled. SPG8000A Installation and Safety Instructions... -
Page 45: Snmp Traps
Genlock lock error or warning (for example, the instrument cannot lock to a genlock signal or the frequency of the genlock ■ signal and the internal reference have shifted considerably, and the SPG8000A is near loss of lock. The threshold for near loss of lock is approximately 2 × 10 from the ends of the tune range. - Page 46 Controls and connections SPG8000A Installation and Safety Instructions...
-
Page 47: Initial Configuration
Firmware upgrades Tektronix releases product updates to add new features and to fix problems with the product firmware. During installation, it is recommended that you verify your instrument has the latest firmware version installed. You can find the latest firmware for your product at the Tektronix Web site (www.tek.com/downloads). -
Page 48: Configure The Gps Reference Settings (Option Gps Only)
If the SPG8000A is to be a PTP slave, select PTP mode. ■ If the SPG8000A is to be both a PTP master and slave, select PTP mode, and then configure the secondary master. ■ If Genlock is selected as the Reference mode, then also set the time to VITC, LTC, or Internal. In addition, select to use the ST309 data as "input"... -
Page 49: Configure The Ntp Server (Options Gps And Ptp Only)
Initial configuration When ST2059 is the selected profile and the SPG8000A is configured as a PTP master, these additional menu selections appear. These settings only drive the Synchronization Metadata message content and have no effect on the operation of the master. -
Page 50: Configure The Black 4-5 And Composite Outputs (Option Bg Only)
Set the audio resolution (24 bits or 20 bits) ■ Select the frame reset signal to be synchronized with the digital audio signal ■ Set the timing offset of the audio outputs relative to the genlock or internal reference signal SPG8000A Installation and Safety Instructions... -
Page 51: Configure The Sdi Outputs (Option Sdi Only)
Configure the primary power supply (Option DPW only) Option DPW provides a second hot-swappable, redundant (backup) Power Supply module. Use the SYSTEM button menu to configure which of the two power supplies is the primary supply. SPG8000A Installation and Safety Instructions... -
Page 52: Configure Presets
The following instrument settings are stored in non-volatile memory and are not saved as part of the preset system: ■ The preferred supply configuration setting ■ Network configuration settings such as the IP address, gateway address and subnet mask ■ SNMP trap addresses SPG8000A Installation and Safety Instructions... -
Page 53: Compliance Information
■ EN 61000-3-2. AC power line harmonic emissions EN 61000-3-3. Voltage changes, fluctuations, and flicker Mfr. Compliance Contact. Tektronix, Inc. PO Box 500, MS 19‐045 Beaverton, OR 97077, USA www.tek.com Australia / New Zealand Declaration of Conformity – EMC Complies with the EMC provision of the Radiocommunications Act per the following standard, in accordance with ACMA: EN 55022. -
Page 54: Safety Compliance
These are sheltered locations where neither temperature nor humidity is controlled. The area is protected from direct sunshine, rain, or direct wind. Pollution Degree 4. Pollution that generates persistent conductivity through conductive dust, rain, or snow. Typical outdoor ■ locations. SPG8000A Installation and Safety Instructions... -
Page 55: Environmental Compliance
Directives 2012/19/EU and 2006/66/EC on waste electrical and electronic equipment (WEEE) and batteries. For information about recycling options, check the Tektronix Web site (www.tek.com/productrecycling). Perchlorate materials. This product contains one or more type CR lithium batteries. According to the state of California, CR lithium batteries are classified as perchlorate materials and require special handling. - Page 56 Compliance Information SPG8000A Installation and Safety Instructions...
- Page 57 Environmental operating requirements, 1 Network Ethernet port, 22 configuration, 9 installation, 8 NTP server FAULT indicator, 18 configuration, 31 Firmware upgrades, 29 port connector, 22 FRONT PANEL ENABLE button, 14 Optional accessories, 5 General Purpose Interface, 26 SPG8000A Installation and Safety Instructions...
- Page 58 22 firmware, 29 USB port, 14 Rackmount installation, 6 Rear panel connectors, 20 Web interface REF connector, 21 supported browsers, 25 Related manuals, xi Word Clock output connector, 21 SDI output connectors, 21 SPG8000A Installation and Safety Instructions...
Need help?
Do you have a question about the SPG8000A and is the answer not in the manual?
Questions and answers