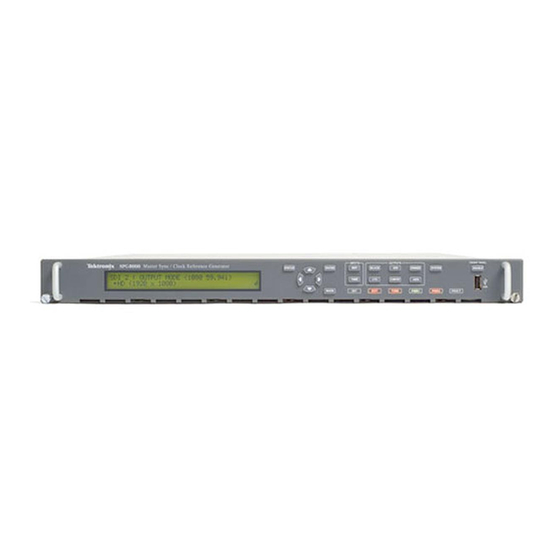
Tektronix SPG8000A Instructions Manual
Master sync / clock reference generator declassification and security instructions
Hide thumbs
Also See for SPG8000A:
- User manual (288 pages) ,
- Service manual (150 pages) ,
- Installation and safety instructions (58 pages)
Summary of Contents for Tektronix SPG8000A
- Page 1 SPG8000A Master Sync / Clock Reference Generator Declassification and Security Instructions www.tek.com *P077122100* 077-1221-00...
- Page 2 Copyright © Tektronix. All rights reserved. Licensed software products are owned by Tektronix or its subsidiaries or suppliers, and are protected by national copyright laws and international treaty provisions. Tektronix products are covered by U.S. and foreign patents, issued and pending. Information in this publication supersedes that in all previously published material.
-
Page 3: Table Of Contents
Table of Contents Preface ......................Clear and sanitize procedures ..................Memory devices ....................Troubleshooting....................How to clear or sanitize a nonfunctional instrument............How to recover from clearing or removing memory from the instrument ......SPG8000A Declassification and Security Instructions... - Page 4 Table of Contents SPG8000A Declassification and Security Instructions...
-
Page 5: Preface
These procedures are useful for customers with data security concerns. Products This document applies to the following components of the SPG8000A Master Sync / Clock Reference Generator: SPG8000A base generator Option DPW (second hot-swappable redundant (backup) power supply) - Page 6 (temporarily or permanently) from a secured area to a nonsecured area. User-modifiable. The user can write to the memory device during normal instrument operation, using the instrument interface or remote control. SPG8000A Declassification and Security Instructions...
-
Page 7: Clear And Sanitize Procedures
The following tables list the volatile and nonvolatile memory devices in the modules. Detailed procedures to clear or sanitize these devices are shown following the tables. Table 1: Volatile memory devices for the SPG8000A base generator Type Type and Backed... - Page 8 Clear and sanitize procedures Table 1: Volatile memory devices for the SPG8000A base generator (cont.) Type Type and Backed Method Data minimum user up by input User size Function data battery modification method Location accessible To clear sanitize volatile Indirectly...
- Page 9 Clear and sanitize procedures Table 2: Nonvolatile memory devices for the SPG8000A base generator Type of user Type and information Method of Data input User minimum size Function stored modification method Location Accessible To clear To sanitize Serial EEPROM Processor boot...
- Page 10 Clear and sanitize procedures Table 2: Nonvolatile memory devices for the SPG8000A base generator (cont.) Type of user Type and information Method of Data input User minimum size Function stored modification method Location Accessible To clear To sanitize Flash memory...
- Page 11 SRAM 128K × Used to store Signals Indirectly Option BG Restore Disconnect 36 IDT71V546 Composite selection Black board, factory inputs test signals U620 U720 settings then format Restore factory settings three times SPG8000A Declassification and Security Instructions...
- Page 12 SRAM 512K × Used to store Signals Indirectly Option AG Restore Disconnect 8 CY7C1049 audio sine selection Audio board, factory inputs wave signals of signal U310 settings then Restore factory settings three times SPG8000A Declassification and Security Instructions...
- Page 13 128 K x 8 Unused None 389-4093-00 board, U224 None Remove part and EEPROM destroy During normal instrument operation. SPG8000A Declassification and Security Instructions...
- Page 14 4. Press the left (◄) or right (►) arrow button to select Disable, and then press the ENTER button. NOTE. The DHCP feature must be disabled before you can clear the network settings stored in the instrument memory. SPG8000A Declassification and Security Instructions...
- Page 15 Press the ENTER button to save the changes. Repeat steps d and e for the Subnet Mask and Gateway addresses. 10. Press the BACK button to exit the PTP NETWORK submenu. SPG8000A Declassification and Security Instructions...
- Page 16 files before you delete them so that you can restore them at a later time, perform files from memory the following steps. Otherwise, proceed to step 12. 1. Connect a USB drive to the SPG8000A generator. 2. Press the SYSTEM button to select SYSTEM : PRESET. 3. Verify the status of the USB drive: a.
- Page 17 Delete the presets and user files from the instrument. 12. Connect the instrument and a computer using an Ethernet connection as described in the SPG8000A Installation and Safety Instructions. 13. On the computer, open an FTP client such as Windows Explorer.
- Page 18 files for the standard signals and logos that are supplied with the instrument. You do not need to delete the factory default files. 19. After you have deleted the desired files, close the FTP window. SPG8000A Declassification and Security Instructions...
-
Page 19: Troubleshooting
1. Power on the instrument. generator card 2. Calibrate the generator card as instructed in the SPG8000A Service Manual. 3. Reconfigure the generator card for your specific application. You can find configuration information in the SPG8000A Installation and Safety Instructions. - Page 20 The second line of the display lists the enabled options. Check that PTP is displayed. e. If Option PTP is not enabled, you must reenter the option key for Option PTP as described in the SPG8000A Installation and Safety Instructions. SPG8000A Declassification and Security Instructions...
- Page 21 files as described below: a. Connect the USB drive to the SPG8000A generator that you used to back up the presets or user data files. b. Press the SYSTEM button to select SYSTEM : PRESET.
- Page 22 Press the up (▲) or down (▼) arrow button to select SYSTEM : PRESET : SAVE. Press the left (◄) or right (►) arrow button to select Power On Default. g. Press the ENTER button to save the current instrument settings as the power on default. SPG8000A Declassification and Security Instructions...


Need help?
Do you have a question about the SPG8000A and is the answer not in the manual?
Questions and answers