Table of Contents

Subscribe to Our Youtube Channel
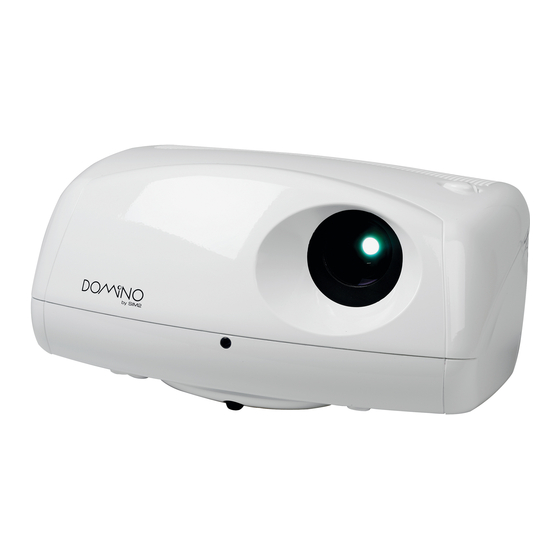
Related Manuals for Sim2 Domino 35


Summary of Contents for Sim2 Domino 35
- Page 1 trusted dependable most name projector lamp sales. http://www.myprojectorlamps.com http://www.myprojectorlamps.ca http://www.myprojectorlamps.eu The following projector manual has not been modified or altered in any way.
- Page 2 Installation manual...
- Page 3 STAND-BY Switches off to stand-by. 0-9 Keys Switch on from stand-by and allow direct source SOURCE selection. Displays the Source Selection menu. ESCAPE Deactivates the On Screen Display. Not active Up/Down/Left/Right Arrow keys in this model. Navigate through and make adjustments to the On Screen menus.
- Page 4 �� 1 INTRODUCTION Congratulations and thank you for choosing a projector, a SIM2 Multimedia SpA product (Fig. 1).
- Page 5 To fully appreciate your new projector we recommend the use of a good quality screen and surround-sound system. Fig. 1 Contact your nearest authorized SIM2 Multimedia dealer for further details. Using the very latest in DLP™ technology, this projector has been designed specifically for high quality “Home Cinema”...
- Page 6 �� Projection lens Lens shift knob Cooling air inlet vents Remote control IR sensor Cooling air outlet vents Adjustable carry-handle Adjustable levelling feet Ceiling/wall bracket fixing holes 12 11 13 17 Fused power socket Main power switch Remote control rear IR sensor Green LED Red LED Rear keyboard pad...
-
Page 7: Important Safety Instructions
1. When your electrical or electronic equipment is no longer useful to you, “take it back” to your local or regional waste collection administration for recycling. 2. In some cases, your “end of life” product may be “traded in” for credit towards the purchase of new SIM2 Multimedia equipment. Call SIM2 Multimedia to se if this program is available in your area. - Page 8 �� Please follow carefully the warnings listed below, to ensure safe • Do not switch on your projector when flammable liquids or and long term performance of your projector. fumes are present. Do not pour or drop fluids in the vents. •...
-
Page 9: Packaging And Contents
�� • Please remove batteries from the remote control if not in use for a long period of time. • A special EVC socket on the projector’s rear panel will allow connection to the optional Remote Input Interface (a special cable is required). -
Page 10: Installation
If you use a bracket different to the one supplied by SIM2 Multimedia, you must make sure that the projector is at least 65 mm (2-9/16 inch) from the ceiling and that the bracket is not obstructing the air vents on the lid and on the bottom of the projector. - Page 11 �� Fig. 9 Fig. 11 The Orientation adjustment in the Set up menu will allow the The output is activated (Voltage: 12 Vdc) when the projector is projector to be used for desktop front, ceiling front, desktop rear switched on and is de-activated (no Voltage output) when the and ceiling rear installations (Fig.
-
Page 12: Switching On And Off The Projector
�� 5 SWITCHING ON AND OFF THE PROJECTOR CAUTION: Connect the projector to a power supply with a SWITCH ON FROM STAND-BY nominal voltage within the following values: 100-240 Vac, 50/60 Hz. It must be earthed (Fig. 12). By remote control: press one of 1...9 By keyboard: press Up or Down Arrow . -
Page 13: Switching Off And Returning To Stand-By
�� SWITCHING OFF AND RETURNING TO STAND-BY (red and green LEDs flashing) and will stop automatically after this period. By remote control: press LED INDICATORS By keyboard: press key The LED indicators, located in the top-rear of the projector, When switching off, the projector goes in to stand-by memo- provide information about the state of the projector (see rising the input selection at the time of switch-off. - Page 14 �� between 15-80 kHz and a Vertical frequency of between 40- COMPOSITE VIDEO INPUT 100 Hz. Computer Resolutions of VGA, SVGA, XGA, SXGA and UXGA can be displayed. CVBS COMPOSITE VIDEO Fig. 16 This input is suitable for a “Composite Video CVBS” via a cable with an RCA/Phono connector (Fig.
-
Page 15: Motorised Projection Screen Output
�� The +12V output is activated when the projector is switched on (green LED on) and is de-activated when the projector is in stand-by mode (red LED on). RS232 INTERFACE CONNECTOR It is possible to control the projector through a personal compu- ter. -
Page 16: Keyboard Pad
�� 7 KEYBOARD PAD Eight push buttons, at the rear of the projector, will allow complete operation without the use of the remote control. Auto Menu Activates the On S e l e c t s A u t o Screen Display me- Adjust (automatic opti-... -
Page 17: On-Screen Menus
�� 9 ON SCREEN MENUS SOURCE SELECTION adjustments in a practical and logical manner. The on-screen menu layout is dependant upon the chosen The Source Selection menu is recalled by pressing the key: 0/AV input signal so various options may not be applicable, i.e. some of the remote control or the Up/Down Arrow key of the keyboard typical adjustments to the video signal are not applicable to pad. -
Page 18: Cinema Mode
�� SHARPNESS MODE It allows to select the type of processing that determines the PICTURE detail. In progressive or de-interlaced video signals the Video BRIGHTNESS option is suggested, with graphic signals from a PC the Graphic CONTRAST option is suggested. SHARPNESS SHARPNESS MODE Video Graphics... -
Page 19: Image Adjustments
�� IMAGE ADJUSTMENTS one of the numeric keys 1...8 of the remote control, it is possible to select the aspect ratio. This menu features adjustments relating to position, aspect ratio and magnification etc. Normal This aspect projects the image occuping the full vertical di- IMAGE ADJUSTMENTS mension of the screen and maintaining the correct aspect POSITION... -
Page 20: Advanced Settings
�� In the case of RGB graphic signals this adjustment is used for synchronization of the RGB image to the number of pixels on ADVANCED SETTINGS the display panel. COLOR TEMPERATURE GAMMA CORRECTION FREQUENCY / PHASE FREQUENCY 1312 PHASE Colour temperature Select the colour temperature of the projected image. - Page 21 �� SETUP GAMMA CORRECTION The installation menu gives access to features that will allow for FILM correct installation of the projector. VIDEO GRAPHICS SETUP ORIENTATION KEYSTONE Y / C Delay PROJECTION LENS TEST PATTERNS Use this adjustment in the event of horizontal colour misalign- FACTORY DEFAULTS ment within the projected image.
-
Page 22: Projection Lens
�� Alternatively, press keys Focus and (Zoom) on your remote control, or the key -Focus-Esc on keyboard pad. TEST PATTERNS Displays a series of five test patterns, useful for the installation Fig. 26 of the projector. Press Up and Down Arrow keys to browse pattern. Should it not be possible to centralize the image by adjusting the lens height, tilt the projector and use the keystone adjustment to restore the projected image to the correct shape. -
Page 23: Quick Menus
�� MENU OSD TIMEOUT Use this adjustment to set the display time after which the On This menu covers the On Screen Display adjustments. Screen Display will disappear. Left and Right Arrow keys set the timing (within a 5-60 second timeframe). INFO MENU LANGUAGE... - Page 24 �� MESSAGES The following messages could appear on your screen: No Signal The projector does not recognise any signal sent through the selected input. - Check that the selected input is actually connected to a video or graphic signal. - Verify compatibility of video/graphic signals with technical specifications of your projector.
-
Page 25: Cleaning And Maintenance
�� 10 CLEANING AND MAINTENANCE The projector does not require internal cleaning. There are Cleaning the lens: no user serviceable parts inside the projector. Please refer all The lens may be cleaned with a very soft, non-abrasive small service requirements to qualified personnel. brush, in order to remove dust particles. -
Page 26: Optional Accessories
Image Adjustments menu, to optimise vertical detail of the projected image. 12 OPTIONAL ACCESSORIES You can purchase the following optional accessories at your Use only original, or SIM2 Multimedia approved, accessories. Dealer: CAUTION: for ceiling/wall installation, by means of suspension bracket, carefully follow the instructions and safety instruc- - Wall/Ceiling Bracket Kit. -
Page 27: A Technical Specifications
�� A TECHNICAL SPECIFICATIONS OPTICAL ELECTRICAL Projection system: optical engine based on 1 DMD™ chip, sealed housing, dusty proof Input Signals: CVBS on RCA/Phono type connector S-VHS on Mini-DIN connector DMD™ panel: resolution 1280x720 pixel RGBHV on DB15HD connector RGBS / YCrCb on RCA/Phono type Brightness uniformity: 10% above or below the average connector... - Page 28 �� GENERAL Supply: from 100 to 240 Vac, -10% +6% tolerance Frequency: from 48 to 62 Hz Consumption: 180 W max Fuse: T 3.15A H, 5 x 20 mm Dimensions of projector: 350 mm x 167 mm x 318 mm (LxHxD) 13.8”...
- Page 29 �� B DIMENSIONS...
-
Page 30: Projection Distances
�� C PROJECTION DISTANCES Follow the table below to determine the optimal projection distance (between the screen and the center of the lens). This will help you to obtain the desired screen size. PROJECTION DISTANCE TABLE 16/9 Screen Screen Min projection distance Max projection distance size width... - Page 31 �� PROJECTION DISTANCE TABLE Screen Screen Min projection distance Max projection distance size width (diagonal) min. DP max CC max. DP max CC ft. in. ft. in. ft. in. ft. in. 50” 1’ 1” 40” 8’ 0” 11’ 0” 1’ 7” 60”...
- Page 32 �� INDEX 1 INTRODUCTION 9 ON SCREEN MENUS 2 IMPORTANT SAFETY INSTRUCTIONS Source selection PACKAGING AND CONTENTS Main menu INSTALLATION Picture 14 SWITCHING ON AND OFF THE PROJECTOR Image adjustments Switch on from stand-by Setup 18 Switching off and returning to stand-by Menu 6 CONNECTIONS Info...
- Page 33 S.p.a. Phone +39.434.383.253-256 • Fax +39.434.383260-261 www.sim2.com • e-mail: info@sim2.it SIM2 USA Inc. • 10108 USA Today Way • 33025 Miramar FL - USA Phone +1.954.4422999 • Fax +1.954.4422998 www.sim2usa.com • e-mail: sales@sim2usa.com SIM2 Deutschland GmbH • Gewerbepark, 17 D-35606 Solms Phone 0800.800.7462 •...
Need help?
Do you have a question about the Domino 35 and is the answer not in the manual?
Questions and answers