Table of Contents
Advertisement
Advertisement
Table of Contents

Subscribe to Our Youtube Channel
Related Manuals for Sim2 Domino 20


Summary of Contents for Sim2 Domino 20
- Page 1 Installation manual...
- Page 2 Arrow Up/Down activate Quick menus. MENU + Activates the On Screen Display menus. Navigates menu pages. Not active in this model. INFO Displays the selected source information and the projector status. Improves the video recorder signals quality. ASPECT Selects image Aspect ratio.
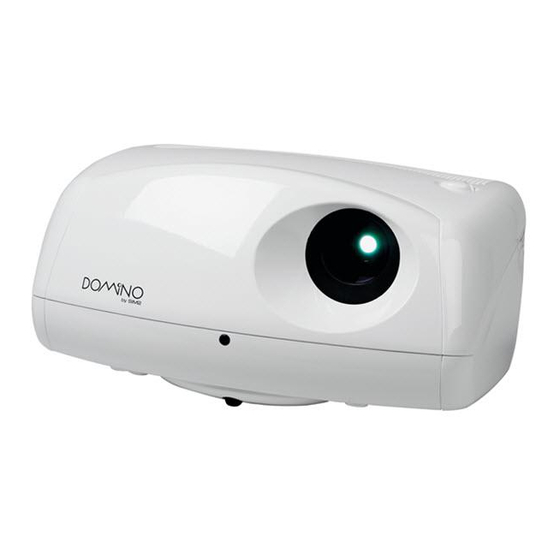
- Page 3 1 INTRODUCTION Congratulations and thank you for choosing the a SIM2 Multimedia SpA product (Fig. 1) .
- Page 4 To fully appreciate your new projector we recommend the use of a good quality screen and surround-sound system. Contact your nearest authorized SIM2 Multimedia dealer for further details. SIM2 carries out comprehensive functional testing in order to guarantee the maximum product quality.
- Page 5 12 11 13 17 Projection lens Lens shift knob Cooling air inlet vents Remote control IR sensor Cooling air outlet vents Adjustable carry-handle Adjustable levelling feet Ceiling/wall bracket fixing holes Fused power socket Main power switch Remote control rear IR sensor Green LED Red LED Rear keyboard pad...
-
Page 6: Important Safety Instructions
Prior to switching on the projector please read each chapter of this manual carefully as this manual provides basic instructions for using the projector. The installation of the lamp assembly, preliminary adjustments and procedures that necessitate the removal of the top cover, must be carried out by authorised, trained technicians. - Page 7 • Do not obstruct the cooling air inlets on the top cover, or the air outlets underneath the projector. • Do not switch on the projector if it is standing on soft surfaces such as cushions, pillows, blankets, mattresses and carpets: the air cooling outlets underneath could become obstructed.
-
Page 8: Packaging And Contents
• Take care not to shake the projector whilst carrying it by the handle. • Always position the projector away from direct heat sources. • Do not touch the surface of the projection lens. • The projector must be positioned on a stable, suitable platform or be installed using a bracket for fixed ceiling or wall installation. -
Page 9: Installation
If you use a bracket different to the one supplied by SIM2 Multimedia, you must make sure that the projector is at least 65 mm (2-9/16 inch) from the ceiling and that the bracket is not obstructing the air vents on the lid and on the bottom of the projector. - Page 10 (Fig. 10) . To activate an electric motorised screen a 12 Volt output is provided at the rear of the projector or with the optional Remo- te Input Interface. This can be connected to a screen interface unit, which can be supplied by screen manufacturers (Fig.
-
Page 11: Switching On And Off The Projector
Power switch Fused power socket Power plug Upon switch on (in position I) the projector will initialise (red and green LEDs on). Followed by stand-by mode (red LED on) (Fig. 13). SWITCH ON FROM STAND-BY By remote control: press one of 1...9 By keyboard: press Up or Down Arrow . -
Page 12: Led Indicators
Power button has been pressed and the software is initialized (15 s) Projector is in standby mode Projector is on FLASHING Projector is powering down; the fans are running to cool the lamp (1 min) Problems to display one or more source FLASHING Internal circuit failure - Remove cables by the plug and do not pull on the cable itself. -
Page 13: Composite Video Input
Connection is made via a 4-pin mini-DIN (Fig. 17) . VGA INPUT Personal Computers, Video Processors (scalers) and Video Game consoles can be connected to the projector via the HDB 15-Pin (VGA) terminal. Ensure the output of equipment connected is RGB with one of... -
Page 14: Motorised Projection Screen Output
MOTORISED PROJECTION SCREEN OUTPUT The projector is equipped with one output (Voltage: 12 Vdc) for motorised projection screen and screen. This 12V output should be connected to the appropriate screen interface provided by the screen manufacturer (Fig. -
Page 15: Remote Control
7 KEYBOARD PAD Eight push buttons, at the rear of the projector, will allow complete operation without the use of the remote control. Menu Activates the On Screen Display menus. Navigates Menu pages. Switches off to stand-by. Up/Down/Left/Right arrow keys... -
Page 16: On Screen Menus
9 ON SCREEN MENUS SOURCE SELECTION The Source Selection menu is recalled by pressing the key: 0/AV of the remote control or the Up/Down Arrow key of the keyboard pad. The selected source will be highlighted in yellow. Use Up and Down Arrow keys to browse sources. Right Arrow to select the desired source. - Page 17 PICTURE BRIGHTNESS CONTRAST SHARPNESS SHARPNESS MODE Video Graphics BRIGHTNESS Use this control to adjust the image’s black level. COLOR Use this control to adjust the colour level. TINT Controls the purity of the colours, to NTSC coded signal standards. Tint is only applicable to video input with NTSC stan- dard, to RGB 15kHz and YCrCb 15kHz inputs and YCrCb 32kHz (no RI2).
-
Page 18: Image Adjustments
IMAGE ADJUSTMENTS This menu features adjustments relating to position, aspect ratio and magnification etc. IMAGE ADJUSTMENTS POSITION ASPECT ADVANCED SETTINGS MAGNIFICATION IMAGE ADJUSTMENTS POSITION ASPECT FREQUENCY/PHASE ADVANCED SETTINGS MAGNIFICATION POSITION Use this adjustment to position the image vertically and horizontally. HORIZONTAL: VERTICAL: ASPECT... -
Page 19: Advanced Settings
User 1, 2, 3 Should you wish to use a format different to those preset, go to User menus. ASPECT / USER 1 HORIZONTAL VERTICAL SCREEN CONTROL By using the Horizontal and Vertical adjustments it is possible to select the screen shape of your choice. It is important to keep the relation between height and width so that the correct aspect ratio can be maintained. - Page 20 GREEN Gamma correction Selects the Gamma’s correction curve. It determines the projector’s response to the grey scale, emphasizing - more or less - the different grades of brightness (blacks, dark, medium, light greys, whites) in the projected image. GAMMA CORRECTION...
- Page 21 HORIZONTAL / VERTICAL KEYSTONE To obtain maximum quality of the projected image, we recommend the installation of the projector on a level platform parallel and central to the screen. In the event that the picture is not correctly positioned use the lens shift feature (Fig. 26) .
- Page 22 Displays a series of five test patterns, useful for the installation of the projector. Press Up and Down Arrow keys to browse pattern. FACTORY DEFAULTS Reconfigures the projector to original factory settings except Position, Orientation, Y/C Delay, Zoom and Focus. Confirm? MENU This menu covers the On Screen Display adjustments.
-
Page 23: Quick Menus
- Input a signal that is within specifications. High temperature The projector detects temperature internally; if it is too high it will switch itself off. - Check temperature of the room: it must be below 35°C (95°F) -
Page 24: Cleaning And Maintenance
(from stand-by). This will allow the lamp to cool down sufficiently. - If the lamp doesn’t come on – even though the projector has had sufficient time to cool down – seek technical assistance from your nearest Dealer. -
Page 25: Optional Accessories
- Ensure that infrared sensors (front and rear of projector) are not exposed to intense light levels. Use only original, or SIM2 Multimedia approved, accessories. CAUTION: for ceiling/wall installation, by means of... -
Page 26: A Technical Specifications
48 to 62 Hz Consumption: 180 W max Fuse: T 3.15A H, 5 x 20 mm Dimensions of projector: 352 mm x 174 mm x 318 mm (LxHxD) 13”-7/8 x 6”-7/8 x 12”-1/2 (LxHxD) Weight of projector: 5.0 kg (11 lbs) Packaging and... -
Page 27: B Dimensions
8 kg (17.7 lbs); recyclable packaging material ENVIROMENTAL Operation temperature: 0 to 35°C (32° to 95°F) Transportation temp.: -10 to 55°C (14° to 131°F) Storage temperature: -10 to 55°C (14° to 131°F) Humidity: 10% to 90% relative humidity non- condensing B DIMENSIONS Safety: EN 60950, UL 60950... -
Page 28: Projection Distances
C PROJECTION DISTANCES Follow the table below to determine the optimal projection distance (between the screen and the center of the lens). This will help you to obtain the desired screen size. Screen Screen size width (diagonal) 50" 39” 60" 47”... -
Page 29: Table Of Contents
INDEX 1 INTRODUCTION 2 IMPORTANT SAFETY INSTRUCTIONS 3 PACKAGING AND CONTENTS 4 INSTALLATION 5 SWITCHING ON AND OFF THE PROJECTOR Switch on from stand-by Switching off and returning to stand-by 6 CONNECTIONS Composite video input S-VIDEO Input VGA input RGB/YCrCb Input... - Page 30 S.p.a. Phone +39.434.383.253-256 • Fax +39.434.383260-261 www.sim2.com • e-mail: info@sim2.it SIM2 USA Inc. • 10108 USA Today Way • 33025 Miramar FL - USA Phone +1.954.4422999 • Fax +1.954.4422998 www.sim2usa.com • e-mail: sales@sim2usa.com SIM2 Deutschland GmbH • Gewerbepark, 17 D-35606 Solms Phone 0800.800.7462 •...
Need help?
Do you have a question about the Domino 20 and is the answer not in the manual?
Questions and answers