
Related Manuals for AMX DUX-12F


Summary of Contents for AMX DUX-12F
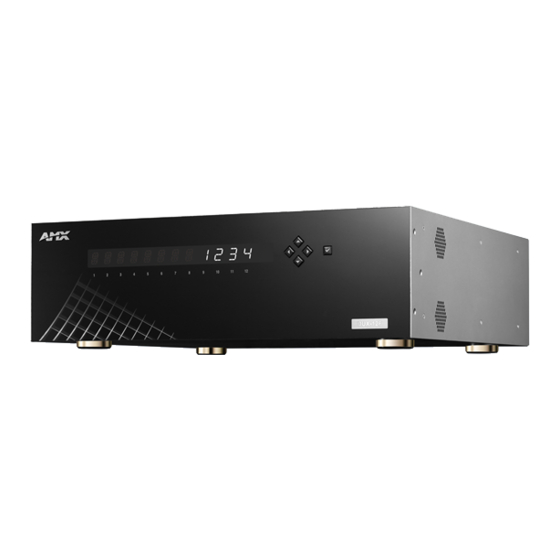
- Page 1 USER MANUAL DUX-12F Flexible Modular Matrix Switcher Support up to 4K@60Hz 4:4:4 8bit Top Speed Seamless Switching...
-
Page 2: Table Of Contents
3. SPECIFICATIONS .....................06 4. PANEL OVERVIEW ...................08 4.1 Front Panel ....................08 4.2 Rear Panel ....................09 5. INSTALLATION AND WIRING ................11 5.1 Installing DUX-12F ..................11 5.2 Ventilation ....................12 5.3 Installing Input and Output Boards ............12 5.4 Wiring ......................13 6. CONTROLLING ....................16 6.1 Control through Front Panel ...............16... -
Page 3: Important Safety Instructions
Protect the power cord from lightning storms or when un- being walked on or pinched used for long periods of time. particularly at plugs. Only use attachments/accesso- Refer all servicing to qualified ries specified by the manufac- service personnel. turer. DUX-12F USER MANUAL... -
Page 4: Introduction
4K/UHD video distribution system. Designed to be used with DUX Series single-channel HDMI and HDBaseT input and output boards, DUX-12F provides flexible switching solutions from 1x11 to 11x1 and supports 4K/UHD video signal with HDCP 2.2 compliant. -
Page 5: Packing List
2. PACKING LIST 1 x DUX-12F 1 x IR Remote Handset 1 x AC Power Cord 1 x IR Receiver (38KHz) 1 x USB to UART Cable 2 x Mounting Brackets 1 x User Manual ... -
Page 6: Specifications
3. SPECIFICATIONS The following specifications are based on a 8x4 DUX-12F installed with • 6 x DUX-F-I-HDMIs (HDMI input board), • 2 x DUX-F-I-HDBTs (HDBaseT input board), • 2 x DUX-F-O-HDMIs (HDMI output board), and • 2 x DUX-F-O-HDBTs (HDBaseT output board). - Page 7 • ±4kV (contact discharge) Power Supply AC 100~240V 50/60Hz Power Consumption 1080p: 130.5W; 4K: 135.6W 440mm x 433.7mm x 132.5mm (without mounting Dimensions (W x H x D) brackets) Weight 10.9kg Rack Space Required Certification CE, FCC DUX-12F USER MANUAL...
-
Page 8: Panel Overview
4. PANEL OVERVIEW The following panel instructions are based on a 8x4 DUX-12F installed with • 6 x DUX-F-I-HDMIs (HDMI input board), • 2 x DUX-F-I-HDBTs (HDBaseT input board), • 2 x DUX-F-O-HDMIs (HDMI output board), and • 2 x DUX-F-O-HDBTs (HDBaseT output board). -
Page 9: Rear Panel
HDMI/HDBT output. Connect this S/PDIF connector to digital audio output AUDIO OUT signal de-embedded from the HDMI/HDBT output. Connect this RJ-45 connector to a control system for Web UI or Telnet API control. DUX-12F USER MANUAL... - Page 10 Press to power on or off the device. Connect this input to power supply using the power cord Power Input provided. Power requirement: 100~240VAC 50/60Hz. For EDID management. (For more information, please EDID go to "9. EDID MANAGEMENT"). DUX-12F USER MANUAL...
-
Page 11: Installation And Wiring
CAUTION: Before installation, please ensure the Matrix is disconnected from the power supply. DUX-12F Switching Matrix occupies 3U space and can be placed on a solid and stable surface or installed on a standard equipment rack. To install the Matrix on an equipment rack: 1. -
Page 12: Ventilation
5.3 Installing Input and Output Boards With a DUX-12F, you may build up a switching system of up to 11 (inputs) x 1 (output) or 1 (input) x 11 (outputs) by a combined use of the DUX Series HDMI / HDBaseT input and output boards. -
Page 13: Wiring
5.4 Wiring After successful installation of HDMI and HDBaseT input and output boards, all the devices can be connected to the DUX-12F. The wiring guidance below is based on a 8x4 DUX-12F Switching Matrix installed with • 6 x DUX-F-I-HDMIs (HDMI input board), •... - Page 14 (on the front panel). The front panel LEDs will display the model name of "-DUX-12F-" , then show "1 1 1 1 1 1 1 1 1 0 0 0 0" and "1 2 3 4 5 6 7 8 9 10 11 12" alternately.
- Page 15 DUX-12F USER MANUAL...
-
Page 16: Controlling
LAN (for Web UI or Telnet) or RS232. The following chapters will explain the basic instructions of the above control methods and are based on a 8x4 DUX-12F Switching Matrix installed with • 6 x DUX-F-I-HDMIs (HDMI input board), •... -
Page 17: Control Through Ir Remote
Press to confirm Press to confirm 6.2 Control through IR Remote DUX-12F Switching Matrix can be controlled by the IR Remote provided. Point the IR Remote directly to the Matrix’s IR receiving window (3 @ Front Panel on page 8), you... -
Page 18: Lan Control (Via Web Ui)
"Appendix 1: API Command"). 6.3 LAN Control (via Web UI) When connected to a LAN, DUX-12F can be controlled through either Telnet or the tailor-designed Web UI. For advanced users who opt to control via Telnet, API command set is available in "Appendix 1: API Command". For users who prefer intuitive control, the Web UI will be the option. - Page 19 The following window will pop up. Login Window 6. Choose the language you wish to use: English or Chinese. 7. Enter password (default password: admin) and click Login to enter the main page of Web UI. Main Page of Web UI DUX-12F USER MANUAL...
-
Page 20: Matrix Control
• Switch • Preset Matrix Control Page 1) SWITCH The Switch section manages distribution of input source to output displays. Click the switch button ( turns to ) to select the input source for the output display. DUX-12F USER MANUAL... -
Page 21: Preset
Matrix. • Save: Input/output settings in the Switch section are saved. • Load: Preset already saved is loaded. Preset Section To save a Switch to Preset 1: Complete the input and output setting in the Switch section. DUX-12F USER MANUAL... -
Page 22: Admin Setting
To enter the Admin Setting page: 11. Click “Admin Setting” tag on the upper right corner of the page; 12. Enter the password (default password: 123456). 13. You will be navigated to the main page of Admin Setting. DUX-12F USER MANUAL... - Page 23 Admin Setting Page DUX-12F USER MANUAL...
-
Page 24: Cec Setting
To configure the EDID setting of any input through Web UI, please ensure the EDID DIP switch at rear panel of the Matrix is set to “0000” (or up position). For more information, please refer to "9. EDID MANAGEMENT". To set up the EDID setting for an input channel: DUX-12F USER MANUAL... -
Page 25: Resolution Setting
3) Resolution Setting Resolution Setting is where resolution can be set for each output channel. • Output: click the drop-down menu to select the output. • Resolution: click the drop-down menu to select the desired resolution for DUX-12F USER MANUAL... -
Page 26: Audio Input Setting
Options include HDMI/HDBT and AUDIO IN. • Audio Input Status: will change based on the Audio Input Select. Options include HDMI/HDBT and AUDIO IN. 5) Port Naming Port Naming allows you to redefine inputs and outputs to names easy to remember. DUX-12F USER MANUAL... -
Page 27: Preset Name
NOTE: The length of each preset name shall not exceed 15 characters and can include letters, numbers, space and Chinese characters. 7) Network Network is used to toggle between the dynamic and static IP addressing. The default IP address of the Matrix is 192.168.10.254. DUX-12F USER MANUAL... -
Page 28: Change Password
8) Change Password Change Password is where the Login password and/or Admin Setting Password to be changed. Default Login password is admin. Default Admin Setting password is 123456. • Save: click to save the changes made. DUX-12F USER MANUAL... -
Page 29: Update Web Ui
1) The Matrix’s LAN module will update and reboot automatically when Web UI upgrading is completed. Please wait for about 2-3 minutes, then refresh and log in again. 2) Please do not power off the Matrix during the process of upgrading. DUX-12F USER MANUAL... -
Page 30: Log
4. The following window will appear. Click “Here” to reconnect the system. 5. When completed the new logo will appear on the upper left corner of the screen. NOTE: The new logo used should be in PNG format and less than 512*62 pixels. DUX-12F USER MANUAL... -
Page 31: Reset All Settings To Default
Matrix will reboot automatically. Please wait for about 3 minutes until the reboot is done before you reconnect to Web UI. 13) Firmware Firmware section is for you to obtain information of the current firmware in use. DUX-12F USER MANUAL... -
Page 32: Rs232 Control
None Stop bits 1 bit Flow control None Command String Response Examples The following examples are based on a 8x4 DUX-12F installed with • 6 x DUX-F-I-HDMIs (HDMI input board), • 2 x DUX-F-I-HDBTs (HDBaseT input board), • 2 x DUX-F-O-HDMIs (HDMI output board), and •... -
Page 33: Ir Passthrough
5. Connect displays to HDBaseT receivers: Connect a display to each HDBaseT receiver. 6. Connect IR Emitters to HDBaseT transmitters and receivers. 7. When all set, the source devices and displays can be controlled via IR pass-through the HDBT. DUX-12F USER MANUAL... - Page 34 DUX-12F USER MANUAL...
-
Page 35: Rs232 Passthrough
8. RS232 PASSTHROUGH DUX-12F supports RS232 bi-directional pass through via its HDBT IN or HDBT OUT ports. To set up for RS232 pass-through (please refer to the chart next page): 1. Connect RS232: Connect a control system (e.g. NX-2200) to RS232 ports of the Matrix. - Page 36 DUX-12F USER MANUAL...
-
Page 37: Edid Management
9. EDID MANAGEMENT EDID (Extended Display Identification Data) is a data structure provided by a digital display to describe its capabilities to a video source. DUX-12F features an EDID management that can be used when the EDID setting’s does not meet the installation requirements. -
Page 38: Appendix 1: Api Command
APPENDIX 1: API COMMAND The following API commands are based on a 8x4 DUX-12F Switching Matrix installed with • 6 x DUX-F-I-HDMIs (HDMI input board), • 2 x DUX-F-I-HDBTs (HDBaseT input board), • 2 x DUX-F-O-HDMIs (HDMI output board), and •... - Page 39 O#: # = {1 ~ 4, ALL} Description: Switch Input 2 to Output 4 on the default level (normally Level 0) Command: CO1:3I2T Return: CO1:3I2T Description: Switch Input 2 to Output 1,2 and 3 on Level 0 DUX-12F USER MANUAL...
- Page 40 Description: L#: #={0, 1} or “L” is omitted Return: O#: # = {1~4} SO2T( ) ( # ): # = {1 ~ 8 or NULL} Description: Output 2 is not connected to any input on Level 0 DUX-12F USER MANUAL...
- Page 41 L#: #={0, 1} or “L” is omitted CI1A1T selection I#: #={1 ~ 8 } A#: # = {1 , 2} Description: Select audio from HDMI input for Input1 1: Audio from HDMI input; 2: Audio from S/PDIF input DUX-12F USER MANUAL...
- Page 42 CO1R1T 2 : 3840x2160@30 3 : 1920x1200@60 Description: 4 : 1920x1080@60 Set Output 1 resolution to 3840x2160@60. 5 : 1280x720@60 6 : 1600x1200@60 7 : 1280x800@60 8 : 1024x768@60 9 : AUTO(preferred native timing of the display) DUX-12F USER MANUAL...
- Page 43 Description: Description: L#: #={0, 1} or “L” is omitted Enable cec auto control of the sink connected O#: # = {1~4}; to Output 3 of Level 0 SPA# : # = {0, 1} // {0, 1}:{off, on} DUX-12F USER MANUAL...
- Page 44 3 : 4K@30Hz 4:4:4 8bit 5.1ch audio can be controlled by Web UI and API. 4 : 4K@30Hz 4:4:4 8bit 2.0ch audio 5 : 1080p@60Hz 4:4:4 8bit 5.1ch audio 6 : 1080p@60Hz 4:4:4 8bit 2.0ch audio 7...15 : Customize, DUX-12F USER MANUAL...
- Page 45 Command: CL#IR#T CIR2T To define IR Description: Return: SystemCode L#: #={0, 1} or “L” is omitted; CIR2T IR#: # = {1~3}; Description: 1: supports 0x00,0x4E; Define 0x00 as IR SystemCode 2: support 0x00 only 3: support 0x4Eonly DUX-12F USER MANUAL...
- Page 46 Cause a warm reboot. Command: Command: ~VER! To determine ~VER! the system’s Return: Application Code Return: ~VER!( AMX DUX-12F #.# ) version ~VER!( ^^^ ) e.g.: ~VER!( AMX DUX-12F 1.0 ) Command: Command: To upgrade the ~UPG! ~UPG! system’s Appli-...
- Page 47 [21] ~HELP!( To verify Commands list ) [22] ~VER!( To determine the system’s Appli- cation Code version ) [23] ~UPG!( To upgrade the system’s Appli- cation Code ) [24] ~APP!( To cause a warm reboot ) [25] ~SYSR!( To reset system setting ) DUX-12F USER MANUAL...
- Page 48 © 2017 Harman. All rights reserved. ENZO, NetLinx, AMX, AV FOR AN IT WORLD, HARMAN, and their respective logos are registered trademarks of HARMAN. Oracle, Java and any other company or brand name referenced may be trademarks/registered trademarks of their respective companies.
Need help?
Do you have a question about the DUX-12F and is the answer not in the manual?
Questions and answers