Table of Contents
Advertisement
Quick Links
Advertisement
Table of Contents

Related Manuals for Cal Flame LBK-710-SW


Summary of Contents for Cal Flame LBK-710-SW
- Page 1 LTR50001142, Rev. A 4/21/14...
-
Page 2: Table Of Contents
CONTACT INFORMATION Copyright 2014 LMS, Inc. All rights reserved. Duplication For customer service, please contact your authorized without written consent is strictly prohibited. Cal Flame™ is dealer immediately. If you need additional information registered trademark. and/or assistance, please contact:... -
Page 3: Safety Instructions
Storage and Handling Code, B149.2), as vents that can be opened into your home. applicable. • Cal Flame™ grills are not intended for installation • To prevent fire and smoke damage, remove all in or on recreational vehicles or boats. -
Page 4: Maintenance And Repair
• When handling LP gas line and connectors, • Do not heat any unopened glass or metal container do not allow them to come in contact with any of food on the grill. Pressure may build up and metal surfaces of the cabinet. Do not drop LP cause the container to burst, possibly resulting in connectors. -
Page 5: Preparing The Site For The Barbecue Island
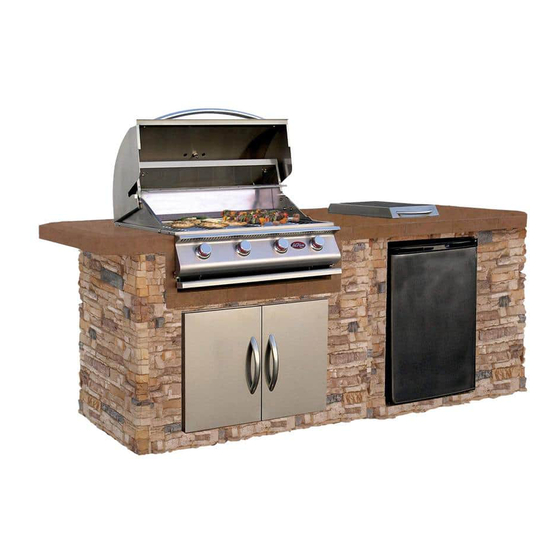
Preparing the Site for the Barbecue Island The Cal Flame G4 grill is expected to be use with a Cal Flame barbecue island . If the G4 grill used separately from barbecue island that it is sold with, it must be used in a safe manner that will not void your warranty . -
Page 6: Preparing A Good Foundation
Overhead Hazards Plan for Your Environment Do not place your barbecue island near trees and Consider factors such as exposure to wind, proximity shrubs. to traffic paths, and windows that open into the Maintain sufficient distance as to not overheat any home. -
Page 7: Electrical Requirements
Electrical Requirements You do not need to hire a contractor to install your refer to the following: electrical service, but you must ensure you have • Wire size is determined by length of run from all required permits and the installation complies breaker box to the barbecue island and maximum with State and local code. -
Page 8: Gas Requirements
Gas Requirements Converting Gas Grills IMPORTANT: Cal Flame G Series gas grills are manufactured to operate on liquid propane (LP). However, they can be converted to operate on natural gas (NG) by an authorized service technician. The grill that comes with your LBK-10-SW barbecue island does not include the parts for converting to NG. The gas conversion kit for Cal Flame grills can be ordered separately. -
Page 9: Natural Gas
Natural Gas NG Service Installation and Connection Natural gas installation of this appliance must conform with local codes or, in the absence of local codes, to the national fuel gas code, ANSI Z223.1a-1998. Installation in Canada must be in accordance with the standard CAN/CGA-B149.2, Propane Installation Code. -
Page 10: Installation And Connection
Installation and Connection Installation Check-Off List Use this table to guide you with the installation of your barbecue island. Follow these steps in sequence. 1. Prepare a proper foundation with stub-ups. page 8 2. Connect barbecue island to electrical service. page 9 3. - Page 11 Connect barbecue island to electrical service . You will need to hire a contractor to install and connect a 110 VAC electrical service inside the barbecue island. The island comes equipped with an outdoor GFI electrical outlet with a 12” romax lead. The footprint drawing on page 4 shows the approximate location for the stub-up.
- Page 12 Assemble tee connection for grill and side burner . Assemble a 3/8” pipe nipple to the 3/8” pipe tee using Teflon tape or pipe sealant. Use only sealant that is approved for use on LP gas. Install the pipe tee assembly to the grill intake pipe. Tighten assembly and align the branch opening of the tee with the hole of the cabinet.
- Page 13 Connect gas line to grill and side burner . Connecting the grill Slide the grill forward about six inches. Connect the gas line to the grill using the appropriate connection for your gas type. Liquid Propane Natural Gas Note: Make sure you have converted the grill for natural gas before connecting the gas line to the regulator.
-
Page 14: Natural Gas Connection
Connect to gas source . Liquid Propane Connection Use the pressure regulator and hose assembly supplied with the grill, or a regulator and hose assembly with the same specifications. Replacement LP regulator and hose must have a coupling nut that will connect to a QCC-1 cylinder valve on one end and a female fitting that will connect to a 3/8”... -
Page 15: Leak Testing Procedure
Leak Testing Procedure Perform a leak test at least once a year whether the bubbles in the soap solution indicates that a leak gas supply cylinder has been disconnected or not. In is present. addition, whenever the gas cylinder is connected to Stop a leak by tightening the loose joint or by the regulator or whenever any part of the gas system replacing the faulty part with a replacement... -
Page 16: Using Your Grill
Remember to use your Cal Flame grill safely by • Never put combustible material such as paper, following these reminders: cloth, or flammable liquids on your grill at any time. -
Page 17: Lighting The Burners
Inspect the hose before using the grill. If there is excessive abrasion or wear, or if the hose is cut, it must be replaced prior to using the grill. See page 6 for LP connection instructions and specifications. If you need a replacement hose, contact your Cal Flame dealer. •... -
Page 18: Basic Grill Operation
Basic Grill Operation Before lighting, make sure all burner controls are off. Turn the control knob to HIGH and preheat the Do not attempt to light the burners if the smell of grill for 15 minutes. Close the top cover during gas is present. -
Page 19: Flame Adjustment
Turn the flame adjustment screw to adjust the flame to your preference. Heat Distribution on the Cooking Grates When you place food your Cal Flame grill, remember that the back of the grill tends to be hotter than the front. -
Page 20: Optional Grill Accessories
Pizza Brick Tray You can use your grill as a pizza oven using the pizza brick tray. Made of stone and stainless steel, it fits on any Cal Flame grill and is large enough to cook a large sized pizza. -
Page 21: Charcoal Tray
Charcoal Tray Use Turn part of your Cal Flame grill into a charcoal and gas grill. Turn off the gas and wait for the grill to cool before setting the Charcoal Tray in place. Placement Remove two grates (left or right side) and the flame tamers (the angular metal pieces covering the burners). - Page 22 Deep Fryer Helper Set The Deep Fryer Helper can turn part of your grill into a deep frying station. It is designed to fit in any Cal Flame grill. The Deep Fryer Helper Set is shipped with its own instructions for placement and use . Read them carefully before use .
-
Page 23: Cleaning And Maintenance
Cleaning and Maintenance To ensure safe and proper maintenance, we recommend you follow these directions carefully. Clean internal parts of the grill regularly as determined by the amount of use and foods cooked. The entire grill should be cleaned at least once a year. In addition, keep the area around your grill clear and free from combustible materials, gasoline, and other flammable vapors and liquids. -
Page 24: Cleaning The Interior Of Your Grill
There are two methods of rust removal we Sheila Shine and wipe down with a dry cloth or paper recommend: towel until surface is free of rust. If there is significant rust or corrosion, use a Scotch-Brite scrubber. Rust removal with Instant Rust Out: Both of these products will act as a surface protectant Spray exterior stainless steel surfaces with Instant and help resist smudges, stains, and rust. -
Page 25: Covering Your Grill
When not in use and after cooling, cover your grill with our full length, zippered side canvas cover. (See your local Cal Flame dealer for details.) The cover will help protect your grill from detrimental effects of weather and environmental pollutants. Never put a cover on a hot grill. Allow the grill to cool before covering. -
Page 26: Seasonal Cleaning
Seasonal Cleaning If you haven’t used your grill in a few months, we recommend that you clean the burners and the interior of your grill. Cleaning the burners periodically will keep them burning evenly and cleanly and help prevent “flashback”, a type of fire in and around the gas tubes. This happens when spiders and small insects inhabit or make nests in the burner tubes, obstructing the gas flow. - Page 27 Clean the grill interior While the burners are out of the grill, you can use this opportunity to clean the interior of your grill thoroughly. You should still have the drip pan in place to catch water and grime as you clean the grill interior.
-
Page 28: Appendix
Appendix Troubleshooting Problem: Smell of gas is present Solution: Check for loose connections in the gas line. Perform a leak test following the procedure described in this manual. Problem: Burner does not ignite Solution: Note: Turn off the gas at the source while troubleshooting. Use the following procedure with the figure below. - Page 29 • Replace cooking components and grease collectors. If an obstruction is suspected in the control valve, contact your local Cal Flame dealer for assistance. Problem: Misalignment of Igniter on Burner Solution: •...
-
Page 30: Converting From Lp To Ng
IMPORTANT: The grill that comes with your LBK-10-SW barbecue island does not include the parts for converting to NG. The gas conversion kit for Cal Flame grills can be ordered separately. Ordering information can be found in this manual on page 28. The part number for the conversion kit is BBQ07101045. - Page 31 Step 2: Changing the burner orifices Replace the main burner orifices You will need: • 6mm socket or nut driver Remove the grates, flame tamers, and drip tray • Two to five 1.9mm orifices (depending on your from the grill. See figure below. grill • Pipe compound suitable for natural gas HEIGHT Orifice WIDTH...
- Page 32 Replace the side burner orifices Remove the grate, burner cap and burner You will need: diffuser from the side burner. • 7mm wrench, socket, or nut driver Using a 7mm wrench, remove the orifice for • One or two 1.75mm orifices (depending on the burner. your side burner) Apply a small amount of pipe compound to •...
-
Page 33: Replacement Parts
Replacement Parts See following page for part numbers. To order replacement parts: • contact an authorized selling dealer • Call LMS Customer Service at (800) 225-7727 • Visit us at www.quickbbqparts.com LBK-10-SW Barbecue Island LTR50001142, Rev. A www.calflamebbq.com... - Page 34 BBQ07100588-CC 5 burner BBQ07100589-CC 3 burner BBQ07100686 Drip pan 4 burner BBQ07100687 5 burner BBQ07100688-CC Thermometer BBQ07410350 Flavor bar BBQ04103000 Cal Flame logo BBQ04100972 Bezel BBQ08410351 2” knob BBQ04101028 Grates BBQ04100659 3 burner BBQ07100683 Handle 4 burner BBQ07100639 5 burner...
-
Page 35: Installing Sear Zone Burners
Installing Sear Zone Burners Disconnect or shut off the LP or natural gas line connected to the grill. Wait until the burners cool down. Open the hood and remove the grate and flame tamer on top of the stainless steel burner you want to replace. -
Page 36: Limited Warranty
Extent of Warranty Warranty Limitations This limited warranty is only valid on Cal Flame models This warranty is void if the barbecue island has been delivered in the United States or Canada and extends subject to negligence, alteration, misuse, repairs,... -
Page 37: Customer Service
Relations Department at 1462 E. Ninth St., Pomona CA 91766 or call (800) 225-7727. See your Cal Flame barbecue dealer for a copy of the applicable warranty, details and any questions you may have regarding the warranty coverage on your barbecue. - Page 38 LBK-10-SW Barbecue Island LTR50001142, Rev. A www.calflamebbq.com...
- Page 39 LBK-10-SW Barbecue Island LTR50001142, Rev. A www.calflamebbq.com...
- Page 40 Locating the product serial number The serial number of your Cal Flame grill is located on the back and is visible when the hood is down. You will need this number to properly register your grill and activate coverage. Write this information in the space provided below.
Need help?
Do you have a question about the LBK-710-SW and is the answer not in the manual?
Questions and answers