Table of Contents
Advertisement
Quick Links
Advertisement
Table of Contents

Related Manuals for Cal Flame Barbecue Grills & Carts


Summary of Contents for Cal Flame Barbecue Grills & Carts
- Page 1 LTR20091038, Rev. A 12/16/08...
-
Page 2: Table Of Contents
A fire resulting in serious injury or death may occur. If you are installing a natural gas grill, you are responsible for ensuring that the natural gas line installed is safe to use. LMS will not be held responsible for an improperly installed gas line. -
Page 3: Safety Instructions
• Do not use an extension cord to supply power to your Cal Flame™ grill or cart. Such use may result in fire, electrical shock or other personal injury. Do not install a fuse in the neutral or ground circuit. -
Page 4: Precautions Regarding Children
Storage • When your gas grill is not in use, turn off the gas at the supply cylinder. • Storage of a grill or cart indoors is permissible only if the supply cylinder is disconnected and removed. -
Page 5: Installation / Assembly
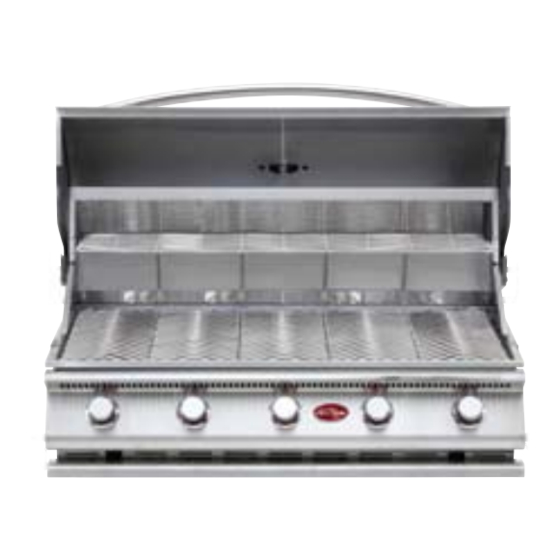
L.M.S. qualified installers and service technicians to ensure proper operation and prevent accidents. When planning your Cal Flame grill or cart location, access to gas lines and 110V power supplies should be considered. The location with the shortest gas line run is recommended. - Page 6 Model Number Description BBQ08874F 4 Burner Flat Drop In Grill BBQ04103034 Drip tray cut-out Model Number Description BBQ07868P 2 Drawer Storage BBQ07862P Griddle and Griddle Storage BBQ07889P 30” Warming Drawer BBQ07891P Cutting Board and Drawer BBQ08967P 110V Electric Pizza Oven Model Number Description BBQ07863P...
-
Page 7: Gas Requirements And Connection
If you do not have an updated filler valve on your existing propane tank, you will need to purchase one at your local hardware store. Without it you will not be able to attach your tank to your Cal Flame™ grill or refill the tank at your local propane refill station. -
Page 8: Lp Gas
LP Gas Tank Requirements For plumbed-in LP installation, use a convertible regulator and set it for LP gas. Maximum line pressure for plumbed-in propane is 14” WC (3.5 kPa). Minimum line pressure for propane is 11” WC. The grill unit must be used with the gas pressure regulator. -
Page 9: Natural Gas
0.5 psi (3.5 kPa). Your Cal Flame™ grill for use with natural gas comes equipped with its own regulator that MUST NOT be removed. If, this regulator needs to be replaced use only the type specified by Cal Flame™... -
Page 10: Installing The Transformer
Installing the Transformer All grills with electrical components such as lights or a convection fan will require the transformer to be installed and plugged in before you can use it. This needs to be done before the grill is inserted in the island or modular cart. When the transformer is attached to the grill chassis, use care in placing the grill in the island cutout to avoid hitting the transformer. -
Page 11: Installing Grills In Barbecue Islands
Installing Grills in Barbecue Islands You will need a second person to help you to avoid damaging the grill, the transformer, or your barbecue island . Before installing a grill or side burner in any island or cut out, make sure that the opening is not bigger than the outside frame of the grill unit. -
Page 12: Installing Side Burners
Installing Side Burners Assemble a 3/8” pipe nipple to the 3/8” pipe tee using Teflon tape or pipe sealant. Use only sealant that is approved for use on LP gas. Install the pipe tee assembly to the grill intake pipe. Tighten assembly and align the branch opening of the tee with the hole of the cabinet. -
Page 13: Using Your Grill
This will minimize the amount of dust and dirt that accumulates on your grill and extend the life of your grill. Remember to use your Cal Flame grill safely by following these reminders: •... -
Page 14: Lighting The Grill
Lighting the Grill Each time you light the grill, check the following: • Inspect the hose before using the grill. If there is excessive abrasion or wear, or if the hose is cut, it must be replaced prior to using the grill. If you need a replacement hose, contact your Cal Flame dealer. -
Page 15: Basic Grill Operation
Basic Grill Operation Before lighting, make sure all burner controls are off. Do not attempt to light the burners if the smell of gas is present. Check the connection with a soap and water solution after attaching the hose. For LP units, make sure there is gas in the tank and it is sitting upright. -
Page 16: Cooking With A Convection Grill
Cooking with a Convection Grill A convection grill has an internal fan that circulates heated air evenly throughout the grilling area when the hood is closed. Cooking in this way distributes heat more efficiently so you no longer have to be concerned with “hot spots”... -
Page 17: Turning On And Off The Lights And Fan
The ON / OFF switch controlling your halogen light is located at the control panel on the front lower left side. Certain models of the Cal Flame grill are equipped with either one or two halogen light. Your grill is equipped with a grounded (3 prong) -
Page 18: Cleaning And Maintenance
Do not obstruct the flow of combustion and ventilation air. If your LP-gas grill is placed in a stationary barbecue island, keep the access door for the propane cylinder clear of any obstruction. Ensure the ventilation opening for cylinder enclosure is kept clear. -
Page 19: Griddle
Island Cabinets Be sure to unplug the electrical supply before cleaning any part of your Cal Flame barbecue. Spray cabinet area with a soap and water solution. Rinse with a gentle stream of fresh water. Griddle To prevent burns or injury, make sure the griddle is completely cool before cleaning. -
Page 20: Light Bulb Replacement
Light Bulb Replacement WARNING: Never attempt to replace a light bulb when the grill is in use. Serious burns will result. WARNING: Never touch halogen bulbs with your bare fingers. Use a tissue or a small piece of paper to handle bulbs. Oils from your hands will damage halogen bulbs. -
Page 21: Troubleshooting
Appendix Troubleshooting Problem: Smell of gas is present Solution: Check for loose connections in the gas line. Perform a leak test following the procedure described in this manual. Problem: Burner does not ignite Solution: Use the following procedure with the figure below. Check the position of the sparker tip. - Page 22 • Replace all cotter pins. • Replace cooking components and grease collectors. If an obstruction is suspected in the control valve, contact your local Cal Flame dealer for assistance. Problem: Misalignment of Igniter on Burner Solution: •...
-
Page 23: Converting From Lp To Ng
. Lloyd’s Material Supply (L .M .S .) will not be held responsible for an improperly converted gas grill . All Cal Heat grills are manufactured as standard liquid propane (LP) grills and can be converted to burn natural gas (NG). - Page 24 Step 2: Changing the burner orifices Replace the infrared burner orifices Using a 13mm wrench, remove the orifice for the infrared burner. Apply pipe compound to the fitting threads where you will place the new orifice. Screw on the correct orifice for your grill until it is finger tight. Tighten the orifice with the 13mm wrench.
-
Page 25: Installing And Replacing Infrared Burners
Raise the stud from the locking hole and move the burner forward carefully to release it from the ignition and gas supply valve. Replacement Covers Cal Flame Drop-Ins BBQ010 COVER, GRILL, SMALL, 3 BURNER BBQ011 COVER, GRILL, MEDIUM, 4 BURNER... -
Page 26: 2009 Warranty
Extent of Warranty This 2009 Cal Flame Warranty is only valid on Cal Flame models delivered in the United States or Canada and extends through the selling dealer to the original purchaser at the original site of installation. This warranty becomes valid at time of purchase and ends either by specified time-frame listed above or upon owner transfer or relocation. -
Page 27: Warranty Exclusions
Relations Department at 1462 E. Ninth St., Pomona CA 91766 or call (800) 225-7727. See your Cal Flame barbecue dealer for a copy of the applicable warranty, details and any questions you may have regarding the warranty coverage on your barbecue. -
Page 28: Location Of Serial Number Plate
Locating the product serial number The serial number of your Cal Flame grill is located on the back and is visible when the hood is down. You will need this number to properly register your grill or cart and activate coverage. Write this information in the space provided below.
Need help?
Do you have a question about the Barbecue Grills & Carts and is the answer not in the manual?
Questions and answers