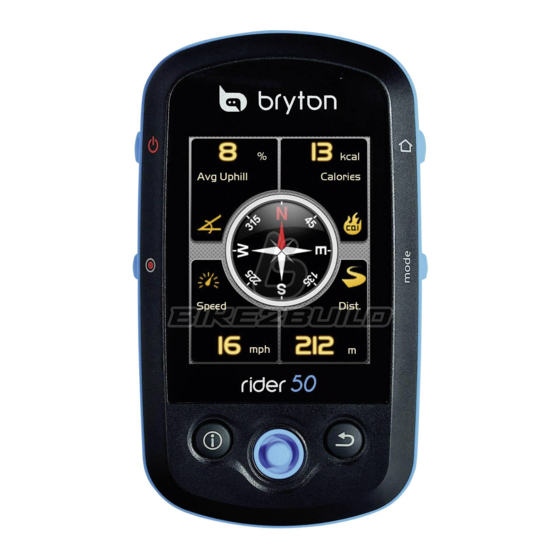
Bryton Rider 50 User Manual
Hide thumbs
Also See for Rider 50:
- Quick start manual (55 pages) ,
- User manual (51 pages) ,
- Quick start manual (54 pages)
Table of Contents
Advertisement
Quick Links
Advertisement
Table of Contents

Subscribe to Our Youtube Channel
Related Manuals for Bryton Rider 50


Summary of Contents for Bryton Rider 50
- Page 1 User's Manual...
-
Page 3: Table Of Contents
Data Recording ..... 16 Sensor ......8 History ......17 Install Heart Rate Belt ..9 Use the Map ....17 Turn on the Rider 50 ..10 Acquire Satellite Training ......18 Signals ......10 Fitness Training .... 18 Initial Setup ....10 Calorie Burn ...... - Page 4 Transfer Files to Your Heart Rate ........ 29 Computer ......... 41 Compass ........30 Transfer Files to Another Barometer ........ 30 Rider 50 ......42 Auto Detect ......31 Stopwatch ....44 Personalize User Profile 31 Countdown ....44 View GPS Status .... 32 Timer ......
-
Page 5: Getting Started
In free cycling, press start recording and press it • Press and hold to turn the again to pause. Press and Rider 50 on or off. hold to stop recording. • Short press to turn on or off the backlight. -
Page 6: Reset The Rider 50
In other pages, press to charging status. return to the previous page or cancel an operation. Reset the Rider 50 To reset the Rider 50, press and hold for five seconds. Accessories The Rider 50 comes with the following accessories: •... -
Page 7: Status Icons
Status Icons icon Description Bike in used Bike 1 Bike 2 GPS Signal Status No signal Weak signal Strong signal Power Status Full battery Half battery Low battery Heart Rate Sensor Active Cadence Sensor Active New Message notification Training Plan in Progress Log Record in Progress NOTE: Training Plan and Log Record are displayed only when they are in progress. -
Page 8: Charge The Battery
4. Plug the power adapter to a wall outlet. NOTE: You can also charge the Rider 50 using your computer. When charging battery via computer, it is recommended to turn off the Rider 50 to ensure the battery will be fully charged. -
Page 9: Install The Rider 50
Install the Rider 50 Mount the Rider 50 to the Bike 1. Slide to attach the Rider 50 unto the bike mount. 2. Place the bike mount on the bike. 3. Hook the rubber band to secure the bike mount. -
Page 10: Install Heart Rate Belt
NOTE: To ensure optimum performance, the distance between the sensor and the magnet must be within 3 mm. 4. When everything is aligned, tighten the cable ties to secure the speed sensor, cadence sensor, and cadence magnet. The installed components should look like the illustration. -
Page 11: Turn On The Rider 50
It may take 30 to 60 seconds to acquire signals. The GPS signal icon turns blue when GPS is fixed. Initial Setup When turning the Rider 50 on for the first time, the setup wizard appears on screen. Follow the instructions to complete setup. 1. Select the display language. -
Page 12: Transfer Data To Your Computer
2. Connect the mini-USB end of the USB cable to the mini-USB port of the Rider 50. 3. Connect the other end to your computer. The Rider 50 resets and enters the USB mode. The computer automatically detects the Rider 50 and installs the necessary driver and application. -
Page 13: Find & Go
5-way navigator to confirm. Navigate Rides from Preplanned Trip You can navigate a ride uploaded to your Rider 50 from the Bryton Bridge application. 1. Prepare your trip via Bryton Bridge application. 2. Connect your Rider 50 with the computer using the USB cable. -
Page 14: Find Places
5. Use the 5-way navigator to select Find & Go > Preplanned Trip. 6. Select a ride from the list and press the center of the 5-way navigator to confirm. It displays the details of the ride. Select an option: - display the available tracks (waypoints) on the map. -
Page 15: Enter A Location Name Using The On-Screen Keyboard
Enter a Location Name Using the On-screen Keyboard 1. Move the 5-way navigator up / down / left / right to select the character. 2. Press the center of the 5-way navigator to confirm the selection. • To toggle between upper and lower case letter, select •... -
Page 16: Find Coordinate
Find Coordinate You can search for places from the saved waypoints (location) and recent finds in your Favorites by entering the coordinate of the location. 1. In the Find & Go menu, use the 5-way navigator to select Find Coordinate. 2. -
Page 17: Back To Start
2. Use the 5-way navigator to select Find & Go > Stop Trip. Data Recording The Rider 50 can record points every second of your ride. • In training mode or direction mode, press to pause recording log. Press and hold to stop recording log. -
Page 18: History
History The Rider 50 automatically saves the history as the timer starts. History includes date, time, distance, average speed and altitude. After you have finished a ride, you can view the history data on the Rider 50. To view your history: 1. -
Page 19: Training
Bicycling is one of the best type of exercise for your body. It helps you to burn your calories, lose weight and increase your overall fitness. With the Rider 50 Training feature, you can set fitness training plans or simple workouts and train with your virtual partner, My Buddy. -
Page 20: Weight Lost
Press the center of the 5-way navigator to confirm. 5. Go for a ride. The Rider 50 switches to My Buddy mode, and calculates the total calories you have burned as you ride the bike. - Page 21 Using the On-screen Keyboard 1. Move the 5-way navigator up / down / left / right to select the number. • Highlight to reset the data. • Highlight to erase the data. • Highlight to move the cursor location. 2. Press the center of the 5-way navigator to confirm the selection. 3.
-
Page 22: Simple Workouts
Simple Workouts You can set simple workouts by entering your time, distance, or pace goals, and My Buddy will assist you to achieve them. The Rider 50 offers you with three types of simple workouts: • By Time (Time and Speed) •... -
Page 23: Distance And Time
Distance and Time 1. Press the Menu button. 2. Use the 5-way navigator to select Simple > By Distance. 3. Set your distance and time. 4. When finished, use the 5-way navigator to highlight press the center of the 5-way navigator to confirm. -
Page 24: My Buddy
1. Set up a fitness training plan or a simple workout. 2. Go for a ride. The Rider 50 displays My Buddy, and it competes with you during the training. NOTE: You can customize the data fields on My Buddy mode. See “My Buddy Grid”... -
Page 25: Step Counter
2. Use the 5-way navigator to select Step Counter. • Move the 5-way navigator up / down to select the item. • Press the center to confirm. 3. Start walking. The Rider 50 automatically counts each step you take. Step Counter... -
Page 26: Settings
Settings With the Settings feature, you can customize data field, grid settings, sensor settings, system settings, bike and user profile, alerts setup, and map setting. 1. Press the Menu button to open the menu. 2. Use the 5-way navigator to select Settings. -
Page 27: Map Grid
4. Move the 5-way navigator up / down to select the item setting, and press the center to confirm. 5. Move the 5-way navigator up / down to select the desired setting. 6. When finished, press the center of the 5-way navigator to confirm. -
Page 28: My Buddy Grid
My Buddy Grid 1. In the Settings menu, use the 5-way navigator to select Grid Display > My Buddy Grid. 2. Move the 5-way navigator left / right to select the number of grid display and press the center to confirm. 3. -
Page 29: Sensors
Sensors You can customize the sensor settings such as enable/disable the function, scan or do calibration for the Rider 50. Speed 1. In the Settings menu, use the 5-way navigator to select Sensors > Speed. 2. Move the 5-way navigator up... -
Page 30: Speed/Cadence
Speed/Cadence 1. In the Settings menu, use the 5-way navigator to select Sensors > Speed/Cadence. 2. Move the 5-way navigator up / down to select the desired setting and press the center to confirm. • On: enable the sensor. • Off: disable the sensor. -
Page 31: Compass
• On: enable the sensor. • Off: disable the sensor. • Calibration: calibrate the Rider 50 G-Sensor. Follow the on-screen instructions to calibrate your device. Barometer 1. In the Settings menu, use the 5-way navigator to select Sensors > Barometer. -
Page 32: Auto Detect
Auto Detect 1. In the Settings menu, use the 5-way navigator to select Sensors > Auto Detect. 2. Move the 5-way navigator up / down to select the desired setting and press the center to confirm. • Yes: automatically scan the sensors. -
Page 33: View Gps Status
View GPS Status You can view the information about the GPS signal the Rider 50 is currently receiving. The GPS signal icon turns blue when GPS is fixed. 1. In the Settings menu, use the 5-way navigator to select GPS Status. -
Page 34: Brightness
Brightness 1. In the Settings menu, use the 5-way navigator to select System > Brightness. 2. Move the 5-way navigator up / down to adjust the brightness level and press the center to confirm. Language 1. In the Settings menu, use the 5-way navigator to select System >... -
Page 35: Date Format
Date Format 1. In the Settings menu, use the 5-way navigator to select System > Time/Unit > Date. 2. Move the 5-way navigator up / down to select the desired date format and press the center to confirm. Time Format 1. -
Page 36: Unit Format
Unit Format 1. In the Settings menu, use the 5-way navigator to select System > Time/Unit > Unit. 2. Move the 5-way navigator up / down to select the desired unit format and press the center to confirm. Adjust Date and Time You can adjust the current date and time. -
Page 37: Personalize Bike Profile
Personalize Bike Profile You can customize your bicycle(s) profile. 1. In the Settings menu, use the 5-way navigator to select Bike profile > Bike 1 or Bike 2. 2. Move the 5-way navigator up / down to select the desired setting and press the center to confirm. -
Page 38: Alert
Alert With the Alert feature, the Rider 50 beeps and displays a message to notify you if: • your heart rate exceeds or drops below a specific number of beats per minute (bpm). • you exceed or drop below a custom speed setting during your ride. -
Page 39: Speed
Speed 1. In the Settings menu, use the 5-way navigator to select Alert > By Speed. 2. Move the 5-way navigator up / down to select the desired setting and press the center to confirm. • Alert: set the alert status. •... -
Page 40: Distance
Distance 1. In the Settings menu, use the 5-way navigator to select Alert > By Distance. 2. Move the 5-way navigator up / down to select the desired setting and press the center to confirm. • Alert: set the alert status. •... -
Page 41: Change Map Setting
Change Map Setting You can change the orientation of the map. 1. In the Settings menu, use the 5-way navigator to select Map > Rotate to heading. 2. Move the 5-way navigator up / down to select the desired setting and press the center to confirm. -
Page 42: Data Management
Data Management You can use the Rider 50 as a USB mass storage device, and you can purchase a separate micro SD card for additional external memory. Load Files Insert a MicroSD Card (optional) Insert a microSD card with the... -
Page 43: Transfer Files To Another Rider 50
Knock Knock. 4. A “Ready to Knock” window appears on the screen. Press the center of the 5-way navigator to confirm. NOTE: Bring both Rider 50 units within 4 meters (or closer) range of each other. Data Management... - Page 44 Press the center of the 5-way navigator to confirm. 3. To accept receiving data from another Rider 50 unit, use the 5-way navigator to highlight and press the center of the 5-way navigator to confirm. NOTE: The duration of file transfer depends on the file size. It is recommended to transfer smaller file size on each data sharing.
-
Page 45: Stopwatch
Stopwatch With the Stopwatch feature, you can measure the amount of time elapsed from the time the Rider 50 is activated and deactivated. You can switch between two modes: Countdown and Timer. Countdown is used to notify you when a set amount of time has passed. Timer is used to measure how long something takes. -
Page 46: Timer
4. To pause the countdown, move the 5-way navigator left /right to highlight and press the center of the 5-way navigator to confirm. 5. To reset the countdown, move the 5-way navigator left /right to highlight and press the center of the 5-way navigator to confirm. -
Page 47: Appendix
Appendix Specifications Rider 50 Item Description Display 2.2” Color LCD Resolution 176 x 220 Physical size 54.7 x 96 x 21.6 mm (2.15” x 3.77” x 0.85”) Weight 106 g (3.73 oz) Operating C ~ 50 temperature Battery Charge C ~ 40... -
Page 48: Cadence Sensor
Cadence Sensor Item Description Physical size 37.5 x 35 x 12 mm Weight 25 g 1 ATM Water Resistance Transmission range Battery life 8 hours per week Operating temperature C ~ 40 2.4GHz / Dynastream ANT+ Sport Radio frequency/protocol wireless communications protocol Accuracy may be degraded by poor sensor contact, electrical interference, and receiver distance from transmitter. -
Page 49: Wheel Size And Circumference
Wheel Size and Circumference The wheel size is marked on both sides of the tires. Wheel Size L (mm) Wheel Size L (mm) 12 x 1.75 24 x 1.75 1890 24 x 2.00 1925 14 x 1.5 1020 14 x 1.75 1055 24 x 2.125 1965... - Page 50 Wheel Size L (mm) Wheel Size L (mm) 26 x 2.10 2068 700 x19C 2080 26 x 2.125 2070 700 x 20C 2086 26 x 2.35 2083 700 x 23C 2096 26 x 3.00 2170 700 x 25C 2105 27 x 1 2145 700 x 28C 2136...
-
Page 51: Basic Care For Your Rider 50
Basic Care For Your Rider 50 Taking good care of your Rider 50 will reduce the risk of damage to your Rider 50. • Do not drop your Rider 50 or subject it to severe shock. • Do not expose your Rider 50 to extreme temperatures and excessive moisture.
Need help?
Do you have a question about the Rider 50 and is the answer not in the manual?
Questions and answers