Advertisement
Quick Links
Advertisement

Subscribe to Our Youtube Channel
Related Manuals for Graco 1812897


Summary of Contents for Graco 1812897
- Page 1 Graco PD202869D 10/14...
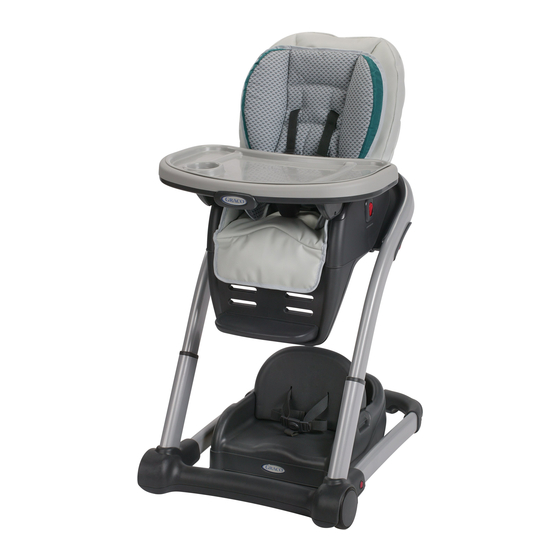
- Page 2 This product can be used in the following modes: Infant Feeding Booster Highchair (Infant seat attached to Toddler Booster) Toddler Booster Youth Chair...
- Page 3 Failure to follow these warnings and the assembly instructions could result in serious injury or death. • PLEASE SAVE OWNER’S MANUAL FOR FUTURE USE. • DO NOT ADJUST the height or recline of product with your child in it. • ADULT ASSEMBLY REQUIRED. •...
-
Page 4: Parts List
Parts list This model may not include some features shown below. Check that you have all the parts for this model BEFORE assembling your product. If any parts are missing, call Customer Service. Phillips screwdriver required. ALL MODELS Tray Insert (2 on certain models) (CERTAIN MODELS) - Page 5 Assembling Youth Chair Insert wheels into rear leg of highchair in the holes provided. SNAP! Lay youth chair flat on the floor. Insert rear leg as shown. SNAP! The buttons on side will snap into place when secured. If you need to remove leg for storage, press button in and pull up.
- Page 6 Footrest Insert foot rest into bottom of seat as shown. Push footrest toward front of seat. Attach footrest cover by inserting into bottom of seat as shown. Attach footrest cover by screwing 3 Phillips head screws into footrest as shown.
- Page 7 Hold footrest perpendicular to the front of the highchair. Insert into one of the 3 height options and rotate foot rest down to secure.
- Page 8 Infant Seat Assembly Insert seat back into base of infant seat. NOTE: Make sure straps DO NOT get caught between seat bottom and back. Squeeze handle to allow rods to drop into holes. SNAP!
- Page 9 Seat Pad Insert the webbing on the back of the seat pad into the slots in the seating area. Attach seat pad to infant seat as shown. Pull waist straps through openings in seat pad. Pull shoulder straps and crotch strap through openings in seat pad.
- Page 10 Make sure recline handle is sticking out the hole in the seat pad. Secure seat pad with hooks at the front of infant seat as shown. Snap seat pad flaps into armrest on both sides of infant seat.
- Page 11 Body Support (certain models) Never use this body support on any other product. If body support pillows are not needed, you can remove them by accessing the underside as shown. Place body support on top of the seat pad. Pull waist straps through openings in body support.
- Page 12 Pull shoulder straps through openings in body support. Pull crotch strap through opening in body support.
- Page 13 Body Support (certain models) Never use this body support on any other product. Place body support on top of the seat pad. Pull waist straps through openings in body support.
- Page 14 Pull shoulder straps through openings in body support.
-
Page 15: Harness Covers (On Certain Models)
Harness covers (On certain models) Never use harness covers on any other product. Slide harness covers onto shoulder straps. - Page 16 Attaching Infant Seat to Youth Chair Place infant seat on youth chair. SNAP! Check infant seat is latched into place by pulling up on it. WARNING: DO NOT remove seat with the child in it. To remove infant seat, push in buttons on side of seat and pull up.
- Page 17 Trays Push tray into openings on the front of the infant seat. SNAP! To attach large tray, squeeze handles and place over smaller tray.
- Page 18 Tray Insert Dishwasher safe. Attach tray insert by pushing it down on the tray. To remove pull up on the back of the tray.
- Page 19 Remove Tray To remove large tray, squeeze both side handles on bottom of tray and lift up. To release push button on front of tray. Pull tray away from highchair.
- Page 20 Basket (On certain models) Never store items in basket that are not safe for children and never allow children to play around storage basket. Attach basket to mounts in legs of highchair as shown.
-
Page 21: Harness System
Harness System WARNING Falling Hazard: Always use the seat belt. 5 Point Harness 3 Point Buckle To convert to 3-pt harness. Use slide adjuster at waist for further adjustment. Use slide adjuster at shoulder and waist for tighter adjustment. - Page 22 When changing harness strap slots, MAKE SURE harness straps are going through same slots in seat pad and seat back. The harness straps must go into slot that is even with or slightly above the shoulders. Avoid twisting straps.
-
Page 23: Adjusting Height
Adjusting Height WARNING: DO NOT adjust the height of the product with the child in it. To adjust height, squeeze buttons on the back of both legs and lower or raise seat. There are 6 height positions. - Page 24 Recline WARNING: DO NOT adjust the seat recline with the child in it. Squeeze handle on back of seat and push down or pull up to adjust. There are 3 recline positions. I...
- Page 25 Brakes Always apply both brakes. Check that brakes are on by trying to push highchair.
- Page 26 Assembling Toddler Booster Place booster on a chair with no armrests and that has a back, ensuring that the straps are hanging freely. Make sure that there are no extra seatpads or cushions on the chair that you are using with the toddler booster.
- Page 27 Wrap bottom straps around base of seat and secure clip under the seat. Tighten by pulling on the loose straps. CHECK to make sure toddler booster is securely attached by moving from side to side. SNAP! NOTE: If child is under 3, removable seat back insert with harness must be used.
- Page 28 Removable Seat Back Insert with Harness Squeeze handle on removable seat back and insert into desired notches on inside of toddler booster. CHECK seat back is latched into place by pulling up on it. There are 2 positions for the removable seat back.
- Page 29 To secure child, fasten waist straps into both sides of crotch strap. Use slide adjuster at waist for tighter adjustment. Repeat on other side. To open 3 point harness, press on button in center.
- Page 30 Assembling Infant Feeding Booster If removable seat back insert is in the seat you will need to remove it before assembling the infant booster. Attach infant seat over toddler booster. Never use the infant seat without toddler booster or youth chair. Push down on infant seat to secure.
- Page 31 Ensure the booster is attached correctly by pulling up on it. To remove infant seat, push in buttons on side of seat and pull up.
- Page 32 Using Youth Chair If child is under 3 you will need to attach back insert. Squeeze handle on back insert and insert into desired notches on inside of youth chair. There are 2 positions for the back insert. CHECK seat back is latched into place by pulling up on To open 3 point harness, press on button in center.
- Page 33 When using with children over 3 years old, adjust height by squeezing button on the back of both legs and sliding up or down to desired height. Make sure both sides are latched. Remove footrest if child’s feet hang farther than any of the three footrest positions.
-
Page 34: Care And Maintenance
Care and Maintenance • BEFORE EACH USE. Inspect the highchair for damaged hardware, loose joints, missing parts, or sharp edges. • DO NOT USE highchair if any parts are missing or broken. • DO NOT substitute parts. • TO CLEAN HIGHCHAIR use only household soap and warm water. NO BLEACH or detergent. •...
Need help?
Do you have a question about the 1812897 and is the answer not in the manual?
Questions and answers