Table of Contents
Advertisement
Read all instructions BEFORE assembly and USE of product.
KEEP INSTRUCTIONS FOR FUTURE USE.
Lea todas las instrucciones ANTES de armar y USAR el producto.
GUARDE LAS INSTRUCCIONES PARA USO FUTURO.
See back page for quick set up guide.
Vea la última página para la guía de instalación rápida.
2020 Graco PD256017F 4/20
Advertisement
Table of Contents

Related Manuals for Graco Travel Lite Crib with Stages


Summary of Contents for Graco Travel Lite Crib with Stages
- Page 1 KEEP INSTRUCTIONS FOR FUTURE USE. Lea todas las instrucciones ANTES de armar y USAR el producto. GUARDE LAS INSTRUCCIONES PARA USO FUTURO. See back page for quick set up guide. Vea la última página para la guía de instalación rápida. 2020 Graco PD256017F 4/20...
- Page 2 1 WARNING • ADVERTENCIA Pages • Páginas 2 Features • Características Pages • Páginas Parts List • Lista de piezas 3 Assembly • Ensamblaje 8-10 Pages • Páginas Playard Set Up • Instalar 4 Use • Uso 11-13 Pages • Páginas To Fold •...
- Page 3 • Never use this product if there are any loose or missing fasteners, loose joints, broken parts or torn mesh. Check before assembly and periodically during use. Contact Graco at 1-800-345-4109 for replacement parts and instructions if needed. Never substitute parts.
- Page 4 • On soft bedding. NEVER add a mattress, pillow, comforter or padding. Use ONLY mattress pad provided by Graco. Mattress dimension: 20”x 30” (50.8 cm x 76.2 cm). • To reduce the risk of SIDS, pediatricians recommend healthy infants be placed on their backs to sleep, unless otherwise advised by your physician.
- Page 5 • Nunca use este producto si hay sujetadores sueltos o que faltan, uniones flojas, piezas o mallas rotas. Verifique antes del armado y periódicamente durante el uso. De ser necesario, comuníquese con Graco al 1-800-345-4109 para obtener piezas de repuesto e instrucciones. Nunca sustituya las piezas. Uso del corralito •...
- Page 6 • En ropa de cama blanda. NUNCA agregue un colchón, cojín, edredón o acolchado. Use SOLAMENTE el colchón provisto por Graco. Dimensiones del colchón: 20” x 30” (50.8 cm x 76.2 cm) • Para reducir el riesgo del síndrome de la muerte repentina en bebés (SIDS por sus siglas en inglés), los pediatras recomiendan que los...
- Page 7 2-A Parts list • Lista de las piezas This model may not include some Este modelo podría no incluir algunas de las características que se features shown below. Check that you have all the parts for this indican a continuación. Verifique model BEFORE assembling your que tiene todas las piezas de este modelo ANTES de armar su...
- Page 8 3-A Setup • Installar NEWBORN RECIÉN NACIDO STAGE for baby under para bebés que 15 lb pesen menos de 15 libras INFANT BEBÉ STAGE for baby under 20 lb para bebés que pesen menos de 20 libras TODDLER NIÑO STAGE for children under para niños que 35 "...
- Page 9 SNAP! ¡CRAC! • When setting up, lock rails before lowering center. Be sure top rails have become rigid. If not, pull up again until they are rigid. If top rails do not latch, lift the center of the floor higher. •...
- Page 10 Pull strap through bottom of playard and wrap around tube and refasten SNAP! ¡CRAC! snap. Repeat on other corners. Tire la correa a través del fondo del corralito, pásela alrededor del tubo y vuelva a trabarla. Repita el procedimiento en las otras esquinas.
- Page 11 4-A To Fold • Cómo plegarlo Release straps on bottom of playard. Pull mattress fully out of playard. Libere las correas en el fondo del corralito. Saque completamente la almohadilla el colchón del corralito. DO NOT unlock top rails yet. Center of floor must be halfway up before top rails will unlock.
- Page 12 Do not force. If unit will not fold, look for a partially latched top rail. Squeeze the latch button to release the rail. No la fuerce. Si la unidad no se pliega, busque un riel de arriba parcialmente trabado. Apriete el botón de la traba para destrabar el riel.
- Page 13 4-B To Cover • Para cubrirlo Cover unit with handle out. Cubre la unidad con la manija hacia afuera. Zip together. Use el cierre.
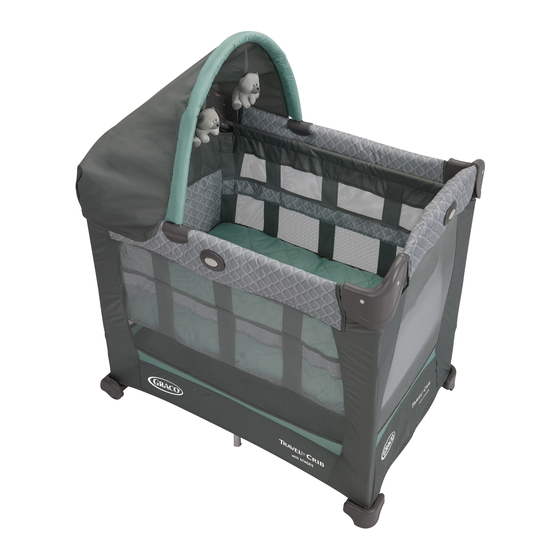
- Page 14 5-A Indoor Canopy • Capota para interiores WARNING • Possible entanglement injury. Keep out of baby’s reach. Remove canopy when baby begins to push up on hands and knees. Recommended use from birth to 5 months. • Toys are not intended to be mouthed by the baby and should be positioned clearly out of reach of the baby's face and mouth.
- Page 15 Attach one end of canopy bar into center connector. Sujete un extremo de la barra de la capota al conector del centro. Insert assembled canopy parts into canopy fabric. Inserte las piezas de la capota ensambladas en la tela de la capota.
- Page 16 • If a sheet is used with the pad use only the one provided by Graco or one specifically designed to fit the dimensions of the bassinet.
- Page 17 • Si usa una sábana con la almohadilla, use solamente la provista por Graco o una específicamente diseñada según la dimensión de la cuna.
- Page 18 Identify the channels for Stage 1 and Stage 2 bassinet use. Identifique los canales para usar en la etapa 1 y la etapa 2 del moisés. Stage 2 Long and Short Channels Etapa 2 Canales corto y largo Stage 1 Long and Short Channel Etapa 1 Canal corto y largo You will need to remove the mattress/pad from the bottom of the playard to use inside your bassinet.
- Page 19 5-C For Stage 1 Bassinet Use • Para usar el moisés en la etapa 1 Insert mattress pad into bassinet as shown. Ponga la almohadilla del colchón en la cuna como se indica. Insert long tubes into Stage 1 channels on the long sides of bassinet as shown.
- Page 20 Place bassinet inside playard as shown. Ponga el moisés dentro del corralito como se indica. Make sure the bassinet tubes are inserted into all four corners as shown. CHECK that bassinet tube webbing does not get stuck in corners. Asegúrese de que los tubos del moisés estén colocados en las cuatro esquinas como se indican.
- Page 21 5-D For Stage 2 Bassinet Use • Para el uso en la etapa 2 WARNING • FALL HAZARD: To help prevent falls, do not use this product when the infant begins to push up on hands and knees or weighs over 20 lb (9.1 kg), whichever comes first.
- Page 22 Insert long tubes into Stage 2 channels on the long sides of bassinet as shown. When inserting tubes into channels, make sure to use the corresponding channel on opposite side of bassinet. Coloque los tubos largos en los cana- les de la etapa 2 en los costados lar- gos del moisés como se indica.
- Page 23 Place bassinet inside playard as shown. Ponga el moisés dentro del corralito como se indica. Make sure the bassinet tubes are inserted into all four corners as shown. Asegúrese de que los tubos del moisés estén colocados en las cuatro esquinas como se indican.
- Page 24 DE VEZ EN CUANDO, INSPECCIONE SU CORRALITO para ver si hay piezas gastadas, material o puntos rotos. Cambie o repare las piezas si fuera necesario. Use solamente piezas de repuesto Graco®. PARA LIMPIAR EL CORRALITO, use solamente jabón de uso doméstico o detergente y agua tibia.
- Page 25 6-B Replacement Parts • Warranty Information (USA) Información sobre la garantía y las piezas de repuesto (EE.UU.) To purchase parts or Para comprar piezas o accessories or for warranty accesorios o para obtener information in the United información sobre la garantía States, please contact us at en los Estados Unidos, por favor the following:...
- Page 26 6-C Product Registration (USA) Registro del producto (EE.UU.) To register your Graco product from within the U.S.A. visit us online at www.gracobaby.com/productregistration or return registration card provided with your product. We currently do not accept product registrations from those living outside the United States of America.
- Page 27 Folding - Quick Guide Pliegue – Guía rápida 1. Pull red tab up to unlock. Stop when you hear it click. (See page 11) 1. Tire de lengüeta roja hacia arriba para desbloquear. Deténgase cuando oiga un clic. (Consulte la página 11) 2.
- Page 28 Set Up - Quick Guide Instalación – Guía rápida SNAP! SNAP! SNAP! ¡CRAC! ¡CRAC! ¡CRAC! SNAP! ¡CRAC! 1. Pull up on all 4 sides 1. Tire hacia arriba de and snap into place. los 4 costados y Do not push center of trábelos en su lugar.
Need help?
Do you have a question about the Travel Lite Crib with Stages and is the answer not in the manual?
Questions and answers
Do you have any more of these pack n plays?