Table of Contents
Advertisement
Advertisement
Table of Contents

Related Manuals for Optoma WHD200


Summary of Contents for Optoma WHD200
-
Page 2: Table Of Contents
Table of Contents TABLE OF CONTENTS......................0 1. IMPORTANT INFORMATION .................... 2 ......................2 AFETY RECAUTIONS ................2 ANGER E CAREFUL WITH ELECTRICITY 2. INTRODUCTION ........................ 7 2.1 PACKING CONTENT ......................7 2.2 OVERVIEW........................7 2.2 OVERVIEW........................3 2.2.1 T ...................... -
Page 3: Important Information
Important Information Power outlet: To prevent electric shock, make sure to use the appropriate AC Please take the time to read this user manual adapters as power supply to the before using the TRANSMITTER and RECEIVER. transmitter and the receiver. It contains important information about ... - Page 4 Water Exposure: To reduce the risk of fire TRADEMARK INFORMATION or electric shock, do not expose the receiver/transmitter to rain or moisture. HDMI, the HDMI Logo and This is indoor solution. High-Definition Multimedia Interface Our company has the right to modify are trademarks of HDMI Licensing LLC.
-
Page 5: R Eceiver
EN 60065: 2014/AC:2016 device may not cause harmful Audio, Video and Similar electronic interference, and (2) this device must apparatus accept any interference received, including interference that may cause EN 50385:2002 Product standard to demonstrate the undesired operation. compliances of radio base stations and fixed terminal stations for wireless This equipment has been tested and... - Page 6 radio/TV technician for help. received, including interference that may cause undesired operation. FCC Caution: Any changes or Le présent appareil est conforme aux modifications not expressly approved by CNR d’ ISED applicables aux appareils the party responsible for compliance radio exempts de licence. L’exploitation could void the user's authority to operate est autorisée aux deux conditions this equipment.
- Page 7 Avertissement: Radiation Exposure Statement: Le guide d’utilisation des dispositifs This equipment complies with ISED pour réseaux locaux doit inclure des radiation exposure limits set forth for an instructions précises sur les restrictions uncontrolled environment. This susmentionnées, notamment : equipment should be installed and operated with minimum distance 20cm between the radiator &...
-
Page 8: Introduction
Introduction WHDI DEVICE is a Full HD wireless transmission device. This solution delivers uncompressed 1080p full HD video and audio content to your existing HDTV set wirelessly. It operates the transmission in 5.1 GHz~ 5.9 GHz frequencies and it can adjust its communication frequency automatically in case of interference from another RF system. -
Page 9: Overview
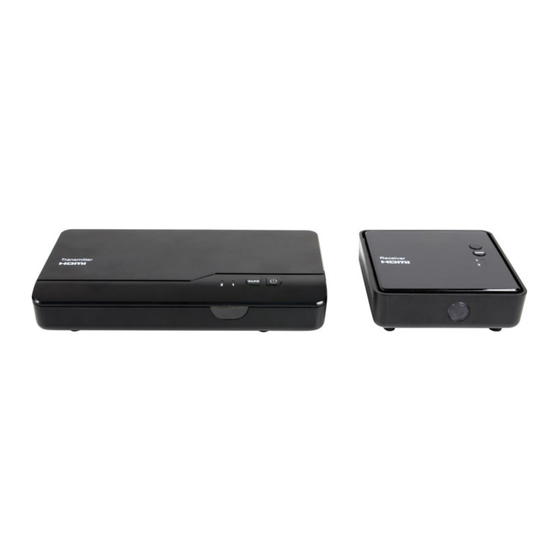
2.2 Overview 2.2.1 Transmitter Front Panel Buttons and LEDs Source Selection Button Press to switch Source inputs of the transmitter. Power Button with LED Indicator Press to turn the transmitter on and off. The indicator in the power button is lit in solid blue when the power is on, and turns red in standby mode. -
Page 10: Receiver
2.2.2 RECEIVER (RX): PC to TV Receiver Front Panel Buttons and LEDs Power Button with LED indicator Press to turn the receiver on and off. The indicator in the power button lights up in blue when the power is on, and turns red in standby mode. -
Page 11: Eceiver
2.2.3 Remote Controller Unit (RCU) Instruction POWER Button Press to turn the Transmitter & Receiver on/off. When both of TX & RX Power LEDs are red, press Power button either TX OR RX, it can wake up each other automatically. INFO. -
Page 12: Installation
Installation Step1: Setup the transmitter Connect Two High-Definition Audio/Video Sources to the transmitter: (1) Connect the transmitter’s “HDMI IN” to the High-Definition AV sources’ “HDMI OUT” through by HDMI cable. The transmitter has two HDMI inputs for the High-Definition source device, like PS3, Blu-ray Player. -
Page 13: Step2: Setup The Receiver Receiver
Step2: Setup the receiver HDTV set connection with RECEIVER: (1) Connect the HDMI cable to the HDMI OUT jack of the receiver and to your HDTV set (or an HD projector). Press the Source / Input button of your TV’s remote to select the appropriate “HDMI” video input. -
Page 14: Step3: Setup The Ir Blaster Extender Cable And Ir Sensor Extender Cable
Step3: Setup the IR blaster extender cable and IR sensor extender cable If necessary, connect the Infrared (IR) blaster (or sensor) Extender cable. Users can point hand-held remote control of your High Definition AV equipment at the receiver or the HDTV set to operate the source devices, not exceeding the distance of 66 feet at Line-of-sight. -
Page 15: Step 4: Boot Up The Transmitter And Receiver
Step 4: Boot up the Transmitter and Receiver (1) Place the two AAA batteries into the remote control. (2) After the power cord is plugged into the electrical outlet, the WHDI DEVICE will be turned on automatically. (3) If it is in Standby mode (Both POWER LED of transmitter and receiver are lit in red), press the POWER button on both transmitter and receiver to turn on the transmitter and the receiver. - Page 16 (5) During the warm-up, the POWER LED will blink in blue until the signal link between the TRANSMITTER and the RECEIVER is established. It will take 15 ~ 20 seconds for system boot up successfully. (6) Ensure your TV set or projector is in “HDMI input” mode, and is already powered on. (7) Press the Source button on the RCU or on the top of receiver / transmitter for Source input switch until you see the video being broadcasted from your device.
- Page 17 Item / Power LED Status LED OSD Display Status Description Mode (on RX) (on RX) (on RX) Standby Static Red For power saving mode. Initial Boot It will spend 15 ~ 20 Blinking up / Warm Blinking seconds for system boot Blue 4 level, looping.
- Page 18 Please make sure source devices have been power on; also try to re-plug the HDMI cable to make sure the HDMI connector had settled well. If there is no video displayed and OSD displayed “Not Supported Format”, this is an indication that the video frame rate from source devices is not supported, please refer chapter 5 to switch a supported video timing.
- Page 19 Press the SOURCE button on the RCU or on the top of transmitter (or receiver) for audio/video source input selection. OSD Displayed: HDMI1 CH10 1280x1024 HDMI2 CH10 1280x1024 Press the IR button of RCU for change IR Blaster frequency, enable to switch IR Blaster frequency 47K to 56K to 36K recurring.
-
Page 20: Step 5: Mounting The Whdi Device To The Wall
Step 5: Mounting the WHDI DEVICE to the Wall (5) Place WHDI DEVICE main holes over the (1) Refer the drawing of the bottom page protruding screws and slide down into that have relative position of the main position. holes and attach this paper on wall. (2) Drill pilot holes. -
Page 21: Troubleshooting
Troubleshooting Problem Solution The WHDI DEVICE Check if the power plugs of TRANSMITTER/RECEIVER are properly power indicator LED inserted into a functioning power outlet. doesn't light up. Verify that the proper cables have been selected and installed between the TRANSMITTER (transmitter) input and your High-Definition device output. - Page 22 intermittent video. “Supported Resolution” chapter where the video frame rate from your HD AV device WHDI DEVICE can support is defined. Ensure the transmission distance is less than 66 feet (LOS). Check your TV’s volume is properly set and not set in "MUTE" mode. ...
-
Page 23: Supported Resolution
Supported Resolution If the SOURCE LED continues to blink in blue (slower than “no signal” mode); OSD display: and there is no video displayed or the video quality suffers, it indicates that the video frame rate from your A/V source device is not supported. Ensure that the consumer timing of your HD device is compliant with the standard listed below: Video Format Timings Resolution... -
Page 24: Audio Bit Rate Support
Audio Bit Rate Support Digital Audio from HDMI inputs: Up to 6Mbit/s bit-rate support. Support AC3 and DTS. 2-channel PCM: 16~24 bits audio sample with 32~96KHz sampling rate as below: 2channel PCM 32KHz 44.1KHz 48KHz 96KHz 16 bits 24 bits Product Specification General Specifications... - Page 25 IB0438099...
Need help?
Do you have a question about the WHD200 and is the answer not in the manual?
Questions and answers