Table of Contents
Advertisement
Quick Links
Advertisement
Table of Contents

Related Manuals for Symbol MC18


Summary of Contents for Symbol MC18
- Page 1 MC18 PRODUCT REFERENCE GUIDE...
- Page 3 MC18 Product Reference Guide MN000834A01 Rev. A June 2014...
- Page 4 Symbol Technologies. No right to copy a licensed program in whole or in part is granted, except as permitted under copyright law. The user shall not modify, merge, or incorporate any form or portion of a licensed program with other program material, create a derivative work from a licensed program, or use a licensed program in a network without written permission from Symbol Technologies.
-
Page 5: Revision History
Revision History Changes to the original manual are listed below: Change Date Description 01 Rev. A 06/27/14 Initial release. - Page 6 MC18 Product Reference Guide...
-
Page 7: Table Of Contents
Getting Started ..........................1-6 Connecting the Battery ......................... 1-6 Charging the Battery ........................ 1-9 Manual Release of MC18 from the Cradle ................1-10 Software Release of MC18 from the Cradle ................1-11 Starting the MC18 .......................... 1-12 Touch Screens ..........................1-13 Data Capture .......................... - Page 8 Chapter 3: Wireless Applications Introduction ............................ 3-1 802.11d Overview .......................... 3-1 Configuring My Country for Use with WLAN on an MC18 ............. 3-1 Enabled 802.11d Network ......................3-2 Disabled 802.11d Network ....................... 3-2 Create WCS Options Registry File ..................3-2 Update MC18 via 802.11d Enabled Staging Network ............
- Page 9 Entering Information Using the Keyboard Input Panel ............. 5-10 Task Bar and Start Menu Properties ..................5-10 Properties ........................... 5-10 Advanced Tab ........................5-11 Screen Calibration ......................... 5-11 Waking the MC18 .......................... 5-12 Chapter 6: Special Considerations Introduction ............................ 6-1 Fonts .............................. 6-1 Asian Font Installation ......................6-2 Software Development Considerations ..................
- Page 10 Working with FFS Partitions ..................... 9-23 RegMerge.dll ........................9-23 CopyFiles ........................... 9-24 Non-FFS Partitions ........................9-24 Downloading Partitions to the MC18 ..................9-25 Chapter 10: Maintenance and Troubleshooting Introduction ............................ 10-1 Maintaining the MC18 ........................10-1 Battery Safety Guidelines ......................10-1 Battery Management ........................
- Page 11 Table of Contents Materials Required ........................10-4 Cleaning the MC18 ........................10-4 Housing ..........................10-4 Display ..........................10-4 Scanner Exit Window ......................10-4 Connector ........................... 10-4 Cleaning Cradle Connectors ....................10-5 Cleaning Frequency ......................... 10-5 Troubleshooting ..........................10-6 MC18 ............................10-6 Cradle ............................
- Page 12 MC18 Product Reference Guide...
-
Page 13: About This Guide
This guide provides information about setting up and configuring MC18 mobile computers and installing its accessories. NOTE Some screens or windows shown in this guide may differ from the actual screens shown on the MC18. Documentation Set The documentation set for the MC18 is divided into guides that provide information for specific user needs. -
Page 14: Fusion Software
Chapter 1, Getting Started, describes the features and basic operation of the MC18, lists the accessories for the MC18 and explains how to install and charge the batteries and start the MC18 for the first time. • Chapter 2, Staging and Provisioning, provides information for staging and provisioning the MC18 using Mobility Software Platform (MSP). -
Page 15: Notational Conventions
• Chapter 9, Application Deployment, provides instructions for installing the Device Configuration Package (DCP) for MC18 and the EMDK for C on the host computer and downloading software and files to the MC18. • Chapter 10, Maintenance and Troubleshooting, includes instructions on cleaning and storing the MC18, and provides troubleshooting solutions for potential problems during MC18 operation. -
Page 16: Related Documents And Software
• Software type and version number. Symbol Technologies responds to calls by E-mail, or telephone within the time limits set forth in support agreements. If your problem cannot be solved by Symbol Technologies Global Customer Support, you may need to return your equipment for servicing and will be given specific directions. -
Page 17: Chapter 1: Getting Started
CHAPTER 1 GETTING STARTED Introduction This chapter describes the features of the MC18 and explains how to install and charge the battery, how to capture data using the integrated Imager and how to reset the MC18. Unpacking Carefully remove all protective material from the MC18 and save the shipping container for later storage and shipping. -
Page 18: Features
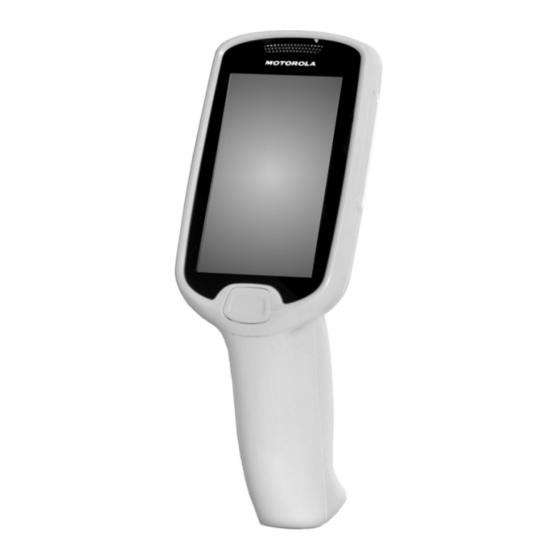
1 - 2 MC18 Product Reference Guide Features Status LED Display Branding Plate Slot Mobile Computer Series Scan Key Front View Figure 1-1... - Page 19 Special Considerations 1 - 3 Scan Exit Window Branding Plate Slot Speaker Battery Cover Power Connector Back View Figure 1-2...
-
Page 20: Accessories
Requires PWRS-14000-241R, DC line cord and country specific AC line cord sold separately. Single Slot Cradle CRD-MC18-1SLOT-01 The cradle is used for docking a single MC18. Requires power supply unit (PWRS-14000-241R), DC line cord and country specific AC line cord sold separately. Release Key. - Page 21 Accessories Table 1-1 Accessory Part Number Description Cart Holder Mounting Kit PSS-3SH01-00R Kit for mounting the MC18 on a shopping cart. Programming Cable CBL-MC18-USB1-01 USB communication cable for connecting the MC18 to a host computer. Interconnection Cable 25-66431-01R An extension cable (12.6 Inch / 32 centimeter) for connection three slot cradle to DC “Y”...
- Page 22 1 - 6 MC18 Product Reference Guide Accessories Table 1-1 Accessory Part Number Description AC Line Cord 50-16000-220R AC Line Cord, 1.8 meter, grounded three wire CEE 7/7plug. Associated countries: Europe, Abu Dhabi, Bolivia, Dubai, Egypt, Iran, Russia, Vietnam. AC Line Cord 50-16000-257R AC Line Cord, 1.8 meter, grounded three wire,...
-
Page 23: Status Led
MC18. Note that Scan Key functions can be changed by an application so the MC18’s Scan Key may not function exactly as described. Refer to the EMDK Help file for detailed information for programming the Scan Key. -
Page 24: Getting Started
• Charge the battery. Installing the Battery To start using the MC18, the battery must be installed and charged. To install the battery: Using Torx T8 drive, remove two screws that secure the battery cover. Lift the battery cover from the handle. -
Page 25: Charging The Battery
CAUTION 10-1. NOTE Battery life is based upon the following; MC18 usage, WLAN radio is set to maximum power mode, WLAN is associated with an Access Point and display backlight set to 25% brightness. Before using the MC18 for the first time, charge the battery. The battery fully charges in approximately four hours. - Page 26 1 - 10 MC18 Product Reference Guide Dock the MC18 in a cradle. The MC18 starts to charge automatically and is shown on the taskbar. Single Slot Cradle Three Slot Cradle Docking MC18 into Cradle Figure 1-7...
-
Page 27: Starting The Mc18
The MC18 starts automatically as soon as power is applied; either with a charged battery installed or when inserted into the cradle. If charged battery is installed and the MC18 is turned off, hold the scan key pressed for five seconds to turn on. If the MC18 does not power on, perform a cold boot (see Performing a Cold Boot on page 1-17). -
Page 28: Scanning Considerations
Scanning within range brings quick and constant decodes; scanning too close or too far away prevents decodes. Move the MC18 closer and further away to find the right working range for the bar codes being scanned. However, the situation is complicated by the availability of various integrated scanning modules. -
Page 29: Scanning Tips
Hold the scanner farther away for larger symbols. • Move the scanner closer for symbols with bars that are close together. NOTE Scanning procedures depend on the application and MC18 configuration. An application may use different scanning procedures from the one listed above. DataWedge DataWedge is an application that reads data from a scanning source, processes the data and sends the data to an application as if the user is entering it on a keyboard. -
Page 30: Disable Datawedge
1 - 14 MC18 Product Reference Guide Click 0. Back. Click 0. Exit. DataWedge Stopped Figure 1-12 Select Running to start the DataWedge process. The DataWedge Status changes to Ready. DataWedge Running Figure 1-13 Click OK to exit. Disable DataWedge Use this procedure to disable DataWedge: Select Start >... - Page 31 The MC18 cradles contain a locking mechanism that locks the MC18 inside the cradle when docked. The MC18 releases from the cradle when a software command is received from the system. If the MC18 fails to un-lock during normal operation, use a release key to un-lock the MC18.
-
Page 32: Resetting The Mc18
Figure 1-15 Resetting the MC18 There are two types of resets, warm boot and cold boot. A warm boot restarts the MC18 by closing all running programs. A cold boot also restarts the MC18, but erases all stored records and entries in RAM. In addition it returns formats, preferences and other settings to the factory default settings. -
Page 33: Performing A Cold Boot
Performing a Cold Boot A cold boot restarts the MC18 and erases all user stored records and entries that are not saved in flash memory (Application and Platform folders). Never perform a cold boot unless a warm boot does not solve the problem. -
Page 34: Mc18
1 - 18 MC18 Product Reference Guide... -
Page 35: Chapter 2 Staging And Provisioning
Platform (MSP) 3.X. Staging Staging is the process of setting up the MC18 to download packages for provisioning. The MC18 uses the Rapid Deployment (RD) Client for staging. The RD Client enables simple and rapid provisioning of new (out of the box) mobile computers and simplifies the out-of-box provisioning by scanning bar codes or connecting to a profile server. -
Page 36: Bar Code Staging
2 - 2 MC18 Product Reference Guide RD Bar Code Printout Sample Figure 2-1 Bar Code Staging When the MC18 boots for the first time (or after a cold boot) the window appears. The App Launcher RD Client option is highlighted. - Page 37 The display indicate the bar code to scan. Rapid Deployment Window - Scanning Bar Codes Figure 2-3 After all the bar codes are scanned successfully, the MC18 connects to the server and the PROCESSING window displays while network settings are configured.
-
Page 38: On-Demand Staging
MC18 is connected via ActiveSync. Already existing IP Connection Mode This mode uses any IP connection that is already active on the MC18. This could be a direct Ethernet port (if available), or a WLAN connection that was configured and established before the was launched. - Page 39 Staging and Provisioning 2 - 5 Waiting for Bar Codes Figure 2-6 Use Options > Exit button in RD client application to exit. The window appears. Main Menu RD Client Main Menu Figure 2-7 Select Search Connected Networks or Search Unconnected Networks. The SEARCHING NETWORKS window appears.
-
Page 40: Rd Client Main Menu
2 - 6 MC18 Product Reference Guide Staging Complete Window Figure 2-9 Use Options > Exit button in RD client application to exit. RD Client Main Menu The RD Client contains the following options: Main Menu • Search Connected Networks. See On-Demand Staging on page 2-4 for detailed information. -
Page 41: Log Menu
Staging and Provisioning 2 - 7 • Operating system type • Plug-in type. Select option. View Client Info Client Info Window Figure 2-11 Press the OK to return to the Main Menu Log Menu contains the following options: Log Menu •... -
Page 42: View Job Log
2 - 8 MC18 Product Reference Guide Select option. View Log View Log Window Figure 2-13 Return to the Log Menu View Job Log Use the option to display a list of jobs that have be processed. View Job Log Select option. -
Page 43: Set Job Log Level
Job log. Set Job Log Level Set Job Log Level Window Figure 2-16 Select a level option. Package List Use the option to display the packages that have been installed on the MC18. Package List Select the option. Package List... - Page 44 2 - 10 MC18 Product Reference Guide Package List Window Figure 2-17 Return to the Main Menu...
-
Page 45: Provisioning
Staging and Provisioning 2 - 11 Provisioning Provisioning is the process of installing software packages onto the MC18 mobile computers. MSP Agent NOTE MSP Agent is also known as MSP 3.X Provisioning Client. The Provisioning Client is responsible for implementing device-side provisioning activities as defined by a policy. -
Page 46: Monitor Processing
Force Check-In Force Check-in Window Figure 2-20 Press Main Menu to return to the Main Menu Package List Use the option to display the packages that have been installed on the MC18. Package List Select the option. Package List... -
Page 47: Client Info
Staging and Provisioning 2 - 13 Package List Window Figure 2-21 Press OK to return to the Main Menu Client Info Use the window to view the following information: Client Info • RD Client version • Product name • Operating system type •... -
Page 48: View Log
2 - 14 MC18 Product Reference Guide Select option. Log Menu Log Menu Window Figure 2-23 Press OK to return to the Main Menu View Log Use the option to display a list of events that have occurred. View Log Select option. -
Page 49: Set Log Level
Staging and Provisioning 2 - 15 View Job Log Window Figure 2-25 Press OK to return to the Log Menu Set Log Level Use the option to set the level of the information that appears in the log. Set Log Level Set Log Level Window Figure 2-26 Select a level option. -
Page 50: Hide Ui
2 - 16 MC18 Product Reference Guide Set Job Log Level Window Figure 2-27 Select a level option. Hide UI Use the option to minimize the MSP Agent application. The MSP Agent application runs in the Hide UI background while minimized. -
Page 51: Chapter 3 Wireless Applications
The MC18 supports the 802.11a, 802.11b, 802.11g and 802.11n standards. Before using the MC18 on a WLAN, the facility must be set up with the required hardware to run the wireless LAN and the MC18 must be configured. Refer to the documentation provided with the access points (APs) for instructions on setting up the hardware. -
Page 52: Enabled 802.11D Network
This staging network needs to have 802.11d enabled. This staging network could be as simple as an AP connected to a host computer and multiple MC18s. A separate non-MC18 Fusion based device (MC67, MC92N0, VC70, etc.) is needed to create the Fusion Options gpdexport file. -
Page 53: Update Mc18 Via 802.11D Enabled Staging Network
The MC18 should perform a cold boot so that the new configuration takes effect. Connect to the Non-802.11d Network Since the MC18 is now setup to not use 802.11d and is configured with the correct country code for the network, the normal RD procedure should be used from this point forward. -
Page 54: Signal Strength Icon
MC18 Product Reference Guide Signal Strength Icon Wireless Applications Menu Figure 3-1 Signal Strength Icon icon in the task tray indicates the MC18 wireless signal strength as follows: Signal Strength Wireless Applications Icons, Signal Strength Descriptions Table 3-1 Icon Status... -
Page 55: Turning Off The Radio
Service Discovery Access Profile - SDAP • Serial Port Profile – SPP • Wake on BT Bluetooth Printing Use this procedure to pair the MC18 to a Bluetooth printer: Launch BT Explorer by clicking the BT Icon in notification area. Click File -> New Connection. - Page 56 Click Next on New Connection wizard to start device discovery. Select the printer and choose next to start pairing process. Enter the PIN. Once the printer is paired with MC18, services of printer are listed. Choose serial printer service and connect.
- Page 57 CHAPTER 4 SYNC WITH HOST COMPUTER To communicate with a host computer, the host computer requires a synchronization program. After synchronizing the MC18 with a host computer, changes made on the MC18 or host computer appear in both places. To communicate with a host computer running Windows XP, install Microsoft ActiveSync (version 4.5 or higher).
-
Page 58: Housing
Figure 4-1 CAUTION Do not remove the battery cover while the MC18 is on and do not operate the MC18 with the battery cover removed. Follow proper Electro-Static Discharge (ESD) precautions to avoid damaging the MC18. Proper ESD precautions include, but are not limited to, working on an ESD mat and ensuring that the operator is properly grounded. -
Page 59: Mc18
4-2). Connect the USB connector of the programming cable panel to the Host Computer. The host computer automatically detects the MC18 and starts ActiveSync or Windows Mobile Device Center - the synchronization program window appears on the host computer screen. -
Page 60: Chapter 4: Activesync
For Mobile Device Center, select Set up your device or select Connect without setting your device to connect as a guest. For ActiveSync, click Next. The Microsoft ActiveSync window indicates that it is connected to the MC18. For Windows Mobile Device Center, select the required option. -
Page 61: Setting Up An Activesync Connection On The Host Computer
Align the battery cover on the MC18 and lower the panel to fit on the MC18. Using a T8 Torx drive, secure with battery cover to the MC18 using the two Torx screws. Torque the screws to 3.6 kgf/cm (3.1 in-lbs). -
Page 62: Setting Up A Partnership
4 - 6 MC18 Product Reference Guide Connection Settings Window Figure 4-6 Select check box. Allow USB connections Select the check box. Show status icon in Taskbar Select to save any changes made. Setting up a Partnership Use this procedure to set up a partnership:... - Page 63 Sync with Host Computer 4 - 7 Select Synchronization Setting Window Figure 4-8 Select the appropriate settings and click Next Setup Complete Window Figure 4-9 Click Finish The Microsoft ActiveSync window displays.
- Page 64 ActiveSync Connected Window Figure 4-10 During the first synchronization, information stored on the MC18 is copied to the host computer. When the copy is complete and all data is synchronized, the MC18 can be disconnected from the host computer. NOTE The first ActiveSync operation must be performed with a local, direct connection. To retain partnerships after a cold boot, capture partnership registry information in a .reg file and save it in the Flash File...
- Page 65 Sync with Host Computer 4 - 9 In the WMDC window, under Mobile Device Settings, click Connection settings. Connection Settings Window Figure 4-12 Select Allow USB connections and adjust any additional settings as needed. Click OK to save your settings. Setting up a Partnership To set up a partnership: In the WMDC window, under Mobile Device Settings, click Set up your device.
- Page 66 Connected Window Figure 4-15 During the first synchronization, information stored on the MC18 is copied to the host computer. When the copy is complete and all data is synchronized, the MC18 can be disconnect from the host computer. For more information about using WMDC, start the application on the host computer, then see Help.
-
Page 67: Chapter 5 Using The Windows Ce Desktop
CHAPTER 5 USING THE WINDOWS CE DESKTOP Introduction The MC18 runs Windows CE 7.0 operating system and the operating system is only available for configuration when connected to a host computer via sync program. The MC18 enabled device is available using the user interface (UI). -
Page 68: Cradle
Description Rapid Deployment Client Launches the Rapid Deployment application. File Explorer File Explorer enables working with files, folders and network on the MC18. Utilities Provides easy access to most used applications such as Internet Explorer. Cradle Applications Provides for cradle software update, control and settings and diagnostics applications. -
Page 69: Windows Ce 7.0 Desktop
MC18. The battery status icons provide the battery status in 10% increments from 10% to 100%. The Taskbar is shown on the lower part of the MC18 screen. To set the properties of the taskbar, see Properties on page 5-6. -
Page 70: Start Button
The battery status icons provide the battery status in 10% increments from 10% to 100%. Indicates that the battery is fully charged and the MC18 is running on external power. Indicates IP status. Only displays when the MC18 is in emulation mode. -
Page 71: Programs Menu
From the Start menu, click Programs to launch the Programs menu. Refer to the Application Guide for ® Symbol Technologies Enterprise Mobility Devices, p/n 72-68901-xx and the Microsoft Applications for Windows Mobile and WinCE 7.0 User Guide, p/n 72E-78456-xx for application information. -
Page 72: Task Bar And Start Menu Properties
5 - 6 MC18 Product Reference Guide Keyboard XAMLIM Keyboard Input Panel Figure 5-6 Task Bar and Start Menu Properties Use the Properties functions to set display and clock options. Properties Touch Start > Settings > Taskbar and Start Menu ..The Taskbar and Start Menu window displays. -
Page 73: Waking The Mc18
Touch OK to save the settings and exit the window. Waking the MC18 The wake up conditions define what actions wake up the MC18 after it has gone into suspend mode. The MC18 can go into suspend mode automatically by control panel time-out settings. These settings are... - Page 74 5 - 8 MC18 Product Reference Guide...
-
Page 75: Chapter 6 Special Considerations
• Arabic (fonts support only) The MC18 supports the installation of font libraries for use with application and web development. Simplified Chinese, Korean, and Japanese font libraries are available on the Support Central Web site, http://supportcentral.motorola.com. Other standard UTF-8 encoded fonts are available from third party font... - Page 76 6 - 2 MC18 Product Reference Guide vendors. Developers should refer to Microsoft and third party vendor documentation for development and usage details. It should be noted that installing a language font library will not change the language configuration of the operating system image, i.e., Windows messages will still be displayed in the language designated in the...
-
Page 77: Asian Font Installation
• Always lock the cradle after unlocking it. • Cold booting the MC18 erases all files in RAM. Be sure to save any critical files in Application folder, e.g.; Radio profile, time zone setting, license keys etc. • User developed applications should provide a method for exiting or launching Rapid Deployment to enable re-staging the MC18. -
Page 78: Tips For Improving Battery Life
Once inserted in the cradle, the MC18 wakes up automatically. • If placed in suspend mode, scan key press can be set to wake up the MC18. This can greatly increase battery life. •... - Page 79 Special Considerations 6 - 5 Select > > > icon > tab. Start Settings Control Panel Backlight Battery Power Select the check box and select a value from the On battery power: Disable backlight if not used for: drop-down list box. Select the tab.
- Page 80 Cradle Firmware Update The CradleFWUpdater application allows to manually update cradle firmware using MC18 terminal. Use this procedure to update Cradle Firmware: Using a synchronization program, copy the new firmware file to the MC18 (see Chapter 4, Sync with Host Computer).
- Page 81 On the App Launcher screen, click Cradle Applications. Result: The Cradle Applications menu is displayed App Launcher Screen Figure 6-2 On the Cradle Applications menu, click Cradle Firmware Update. Dock the MC18 inside the cradle. Double click FW File location. Result: The Select HEX box is displayed.
- Page 82 6 - 8 MC18 Product Reference Guide From the Select HEX box, select a firmware file and click OK. Click Program Firmware. A warning box displays Please don’t remove the device from the cradle until PW Update completes. Click OK to initiate the firmware update process.
- Page 83 The Cradle Utility application allows to manually set and control cradle features. • Unlock: enables to set a 10 to 30 seconds time-out delay before the MC18 is releases from the cradle. • Cradle Information: Setting or retrieving the cradle ID and location (row, column and dispenser wall).
- Page 84 Use this procedure to set and control the cradle: Dock the MC18 inside the cradle. On the home screen of the MC18, double click the AppLauncer icon on the home screen of the MC18 Result: The App Launcher screen is displayed, On the App Launcher screen, click Cradle Applications.
-
Page 85: Led Indications
Unlock Period: The number of seconds that pass from the time the unlock signal is received to unlocking the MC18 from the cradle. Unlock: Press Unlock to manually unlock the MC18 from the cradle. LED: Check the LED box to enable the cradle LED indication. - Page 86 6 - 12 MC18 Product Reference Guide Read Data: Retrieve setting data from the cradle memory and display on the screen. Enable Fast Charge: Enable the cradle to charge the MC18 at a current of 1.5A (default setting is 1A) Exit: Exit the Cradle Applications menu.
- Page 87 Duration in which the battery was charged during the current charge cycle • Time since last reboot. Use this procedure to view hardware diagnostics to the MC18 NOTE Performing hardware diagnostics to the MC18 can also be done through the Pocket Browser application.
- Page 88 6 - 14 MC18 Product Reference Guide On the App Launcher screen, click Test Applications. Result: The Test Application menu is displayed Click DiagnosticApp. | Result: The Diagnostic Test App screen is displayed. Diagnostic Test App Screen Figure 6-3...
- Page 89 Soft Button Panel The Soft Button Panel application enables to create a soft button panel at the lower part of the MC18 screen. The soft button panel includes three buttons that can be customize to perform the following basic keyboard operations: •...
- Page 90 Help find the products they are looking for and suggests related items to complement their primary purchase. Demonstrating the Application To demonstrate the demo application: To start creating a demo application, tap Start > Programs > MC18 Demo - the MC18 Demo Application start screen is displayed. MC18 Demo Application Start Screen Figure 6-5 Tap on New Shopper to demo the experience of a new shopper or Frequent Shopper to demo the experience of a frequent shopper.
- Page 91 Special Considerations 6 - 17 Tap Start Demo to start the demonstration - the Welcome Shopper Screen is displayed. Shopper Welcome Screen Figure 6-6 Scan a product bar code to start shopping. Alternatively, turn the shopping dial left or right to view and select offers, tips and social media content or tap Start shopping to see your Basket Screen.
- Page 92 6 - 18 MC18 Product Reference Guide : Product on your shopping list that was not purchased yet • : Product on your shopping list that you have purchased • : Product you have purchased that was not on your shopping list.
- Page 93 Special Considerations 6 - 19 • Spend: Weekly and monthly spending information and analysis Spend Screen Figure 6-10 : Tap to return to shopper welcome screen • : Tap to display today’s spend information • : Tap to restart, quit or enable/disable notifications •...
- Page 94 Use the Upload file option to upload a database file in JSON (JavaScript Object Notation) format from the MC18 or a web location. Use the Upload video option to upload a video file from the MC18 or a web location.
Need help?
Do you have a question about the MC18 and is the answer not in the manual?
Questions and answers