Advertisement
Quick Links
Advertisement

Related Manuals for Almost Heaven Saunas Logan Sauna


Summary of Contents for Almost Heaven Saunas Logan Sauna
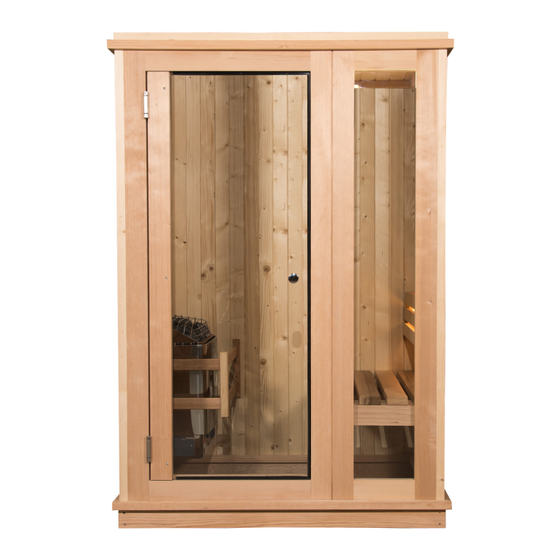
- Page 1 ® Logan Sauna Installation & Owner’s Manual...
- Page 2 Be sure to immediately check your boxes against your shipping list and bill of lading to make sure all boxes are there. Examine for any damage and notify Almost Heaven Saunas if there needs to be a repair or replacement of damaged or missing materials.
- Page 3 1. Connect the 4 FLOOR RISERS Your existing floor will serve as the floor for your sauna. The pre-fabricated rails and risers will be placed on your existing floor and provide the structural support for the sauna room. The 4 floor risers are pre-drilled and are assembled with 2” screws. Measure to make sure the frame is square before driving screws.
- Page 4 4. Position WALL SECTIONS A & B Position Wall Section A and Wall Section B as shown. Wall Section A will overlap Wall Section B. Tip: Have a helper on hand to assist with keeping the panels steady during assembly. 5.
- Page 5 7. Position DOOR SECTION D Position Door Section D so that Wall Section A overlaps it. Wall Section A has pre-drilled holes for attaching it to Door Section D. 8. Position WINDOW SECTION E Window Section E will attach to Door Section D by way of their tongue-and-groove profile —...
- Page 6 11. Attach BACK REST Measure the desired height at which you want to install the back rest (suggested: 8-12” above the bench, centered on the wall). Use 2” screws and pre-drilled holes to attach the Back Rest to Wall Sections F. 12 .
- Page 7 16. Build ROOF SUPPORT Assemble 4 roof support rails by drawing corners together with 2” screws through the pre-drilled holes. NOTE: Be sure that the rails are square and level and that the screw head does not protrude into the groove. 17.
-
Page 8: Heater Installation
20. Attach ROOF TRIM Find the package of 2 Roof Trim pieces and attach to the raw edge of the Roof Sections with finish nails, one piece on the front and one on the back. NOTE: The trim pieces are not pre-drilled. You may install using finish nails. - Page 9 25. Attach DOOR KNOB Take the two sections of the door knob and insert the thread through the hole in the door. Tighten so that handles are snug to glass. NOTE: Hand tighten only and be sure rubber gas-ket is between knob and glass. 9 of 10...
-
Page 10: Operation
OPERATION After the sauna has been installed, sweep down the inside to remove any sawdust and wood shavings, and then vacuum completely. Using a damp cloth and warm water, wipe down the entire sauna including the benches to remove any remaining dirt, dust and debris. Rinse off the sauna stones and install them in or on the heater in accordance with the heater manufacturer’s instructions. - Page 12 ®...
Need help?
Do you have a question about the Logan Sauna and is the answer not in the manual?
Questions and answers