Table of Contents
Advertisement
Instruction
manual
To learn more about Porter-Cable
visit our website at:
http://www.porter-cable.com
Copyright © 2003 Porter-Cable Corporation
ESPAÑOL: PÁGINA 15
FRANÇAISE : PAGE 29
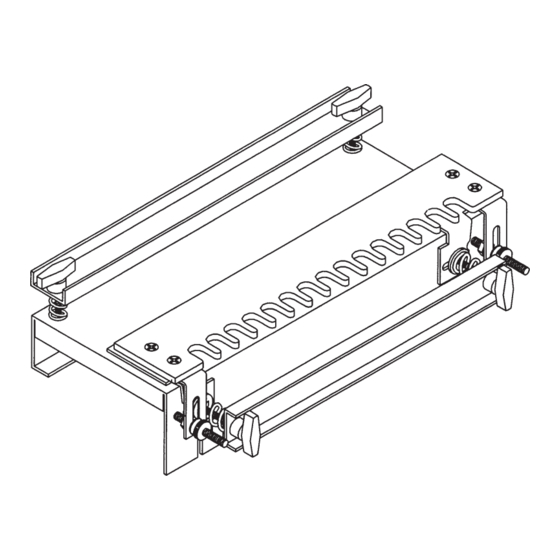
Dovetail Fixture/Jig
MODEL 4112 Includes
MODEL
4113 Dovetail Templet
MODEL 4114
For
1
" Half-Blind
/
4
Dovetails
MODEL 4115
1
For
" Box Joints
/
2
IMPORTANT
Please make certain that the person who is
to use this equipment carefully reads and
understands
these
starting operations.
The Model and Serial No. plate is located on the main
housing of the tool. Record these numbers in the
spaces below and retain for future reference.
Model No. _____________________________________
Type __________________________________________
Serial No.______________________________________
1
" Half-Blind
/
2
instructions
before
Part No. 900487 - 09-12-03
Advertisement
Table of Contents

Summary of Contents for Porter-Cable 4112, 4113, 4114, 4115
- Page 1 Instruction manual To learn more about Porter-Cable visit our website at: http://www.porter-cable.com Copyright © 2003 Porter-Cable Corporation ESPAÑOL: PÁGINA 15 FRANÇAISE : PAGE 29 Dovetail Fixture/Jig MODEL 4112 Includes MODEL 4113 Dovetail Templet MODEL 4114 " Half-Blind Dovetails MODEL 4115 "...
-
Page 2: Important Safety Instructions
NOT be modified and/or used for any application other than for which it was designed. If you have any questions relative to its application DO NOT use the tool until you have written Porter-Cable and we have advised you. -
Page 3: Additional Safety Rules
When servicing use only identical replacement parts. FOREWORD Porter-Cable Base Model 4112 Dovetail Fixture/Jig together with a Porter-Cable router, templets, templet guides and router bits, can be used to produce the following types of joints for drawers and boxes. " Half-Blind Dovetails "... -
Page 4: Assembly And Adjustment
ASSEMBLY AND ADJUSTMENT 1. Clamp Knobs (4) 2. Spacers (4) 3. 10-32 x .375 Socket Head Screws (4) 4. Templet Brackets (2) 5. Springs (4) 6. 1/4-20 Knurled Nuts (2) 7. 1/4-20 Lock Nuts (2) 8. Base 9. Top Clamp Bar (Long) 10. - Page 5 IDENTIFYING DRAWER PARTS It is recommended that scrap lumber be used when making your first dovetail cut so all adjustments and fits can be checked to insure a satisfactory joint. Once the templet and router have been set up to rout a satisfactory dovetail joint, any number of joints can be made.
- Page 6 The following are required to produce Available Accessories PREPARING ROUTER DISCONNECT ROUTER FROM POWER SOURCE. 2. Insert templet guide, (A) Fig. 4, in hole (B), in router sub-base (C). 3. Install templet guide locknut (D) on templet guide and firmly tighten to lock templet guide in sub-base. 4.
- Page 7 2. Place drawer front “inside up” under top clamp bar and against side of drawer which is extending above surface of Dovetail Fixture/Jig. 3. Place the " half-blind dovetail templet on top of the drawer front. Using a standard scale or ruler, adjust locknuts, item 7, Fig.
- Page 8 9. Fig. 11 shows both the left and right corner of a drawer fitted together after they were both routed from the left end of the templet. Note the location of partial pins on drawer sides. 10. If for appearance reasons the partial pins are desired to be in the same location of both sides of the drawer as shown in Fig.
- Page 9 PREPARING ROUTER Prepare router the same as for " half-blind dovetails except install 42054 templet guide, 43639 bit, and adjust depth of cut (B) Fig. 5 to ". CLAMPING DRAWER PARTS Drawer parts are clamped in the same manner as those for 1.
- Page 10 " AND " HALF-BLIND RABBETED DOVETAILS PREPARING ROUTER Prepare router the same as that for dovetails depending on size to be cut. PREPARING DRAWER FRONT The drawer front should be " longer and drawer size required and have a completely around the inside of the drawer front. NOTE: Maximum depth of drawer is 10 rabbeted dovetails.
- Page 11 NOTE: Any material up to PREPARING ROUTER Prepare router the same as for " half-blind dovetails except install equal to " plus thickness of material to be joined. CLAMPING BOX PARTS NOTE: All box joint cuts are made with the box parts clamped to the front of the Dovetail Fixture/Jig. 1.
- Page 12 ROUTING BOX JOINTS 1. Before turning on router, place it on templet and make sure bit will not hit Dovetail Fixture/Jig as it cuts into scrap material. 2. Carefully rout box joints. 3. Loosen front clamp, rotate material as shown in Fig. 21 and position up against templet and edge guide. Clamp securely in place and rout other end.
- Page 13 SERVICE AND REPAIRS All quality tools will eventually require servicing or replacement of parts due to wear from normal use. These operations, including brush inspection and replacement, should ONLY be performed by either an AUTHORIZED PORTER-CABLE SERVICE STATION or a PORTER-CABLE guaranteed against defective material and workmanship.
- Page 14 ONE YEAR WARRANTY Porter-Cable warrants its Professional Power Tools for a period of one year from the date of original purchase. We will repair or replace at our option, any part or parts of the product and accessories covered under this warranty which, after examination, proves to be defective in workmanship or material during the warranty period.
- Page 15 Cable • Delta products should be obtained by contacting any Porter-Cable • Delta Distributor, Authorized Service Center, or Porter-Cable • Delta Factory Service Center. If you do not have access to any of these, call 888-848-5175 and you will be directed to the nearest Porter-Cable • Delta Factory Service Center. Las Estaciones de Servicio Autorizadas están ubicadas en muchas grandes ciudades.


Need help?
Do you have a question about the 4112, 4113, 4114, 4115 and is the answer not in the manual?
Questions and answers