Advertisement
GETTING STARTED
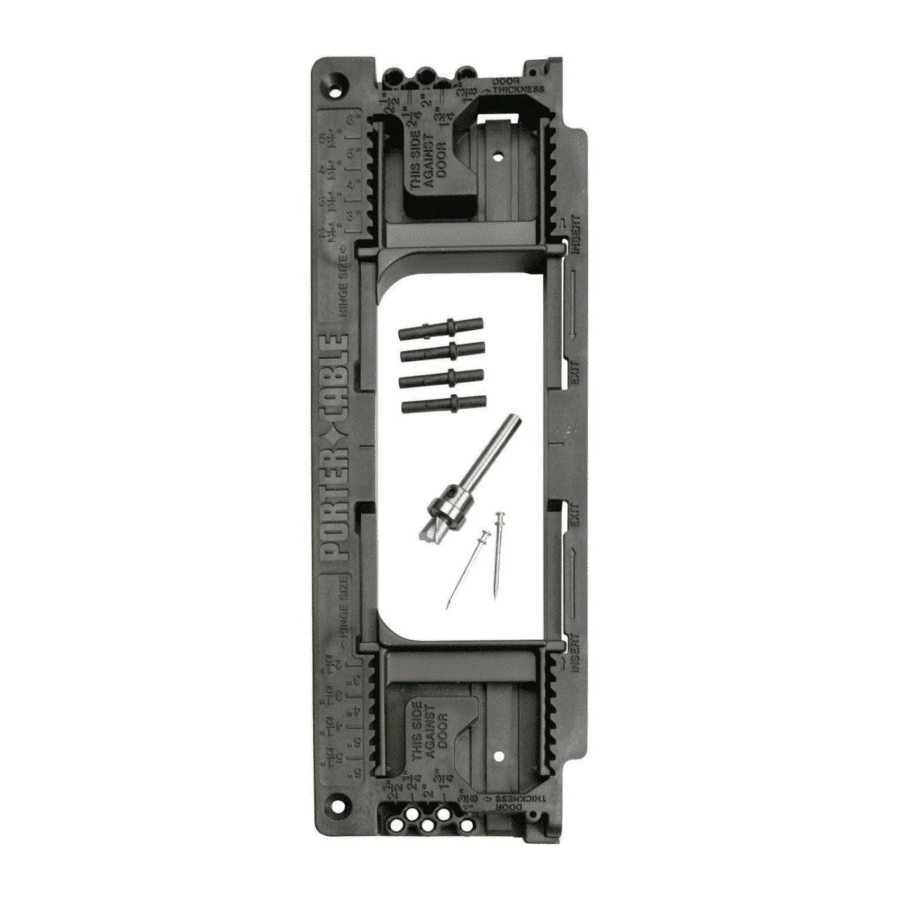
The 59370 Door Hinge Template is designed to cut out areas for the hinge on both doors and door frames.
Make sure your door fits the frame opening. Between the door and frame, there should be a 1/8" clearance on top (See Fig. 1) and knob side and 1/16" clearance on hinge side.

HINGE LENGTH
Set template to the proper hinge size by setting both adjustable guides (one shown at (A) Fig. 2) to the proper stop.

Fig.2
There are stops (B) in the guide to accommodate hinges from 6" to 2-½" in length, in half-inch increments. To resize the guides, pull down through each stop to the desired length.

Never move guides back toward the 6" mark if you want to resize. When moving guides from smaller to a larger setting, pull guides beyond the 2-½" mark until tabs are clear, reinsert them at the 6" stop and move them to desired hinge length.
CHOOSING THE HINGE SHAPE
For 5/8" radius hinge, position guides (C) as shown in Fig. 3.

For 1/4" radius and square corner hinges, position guides (D) as shown in Fig. 4.

DOOR THICKNESS
Move peg (E) Fig. 2 to proper door thickness stop (F) (1-3/8" to 2-½"). Once peg is in place, twist clockwise to lock. Repeat for other end.
SET BIT DEPTH
Make sure the router is disconnected from power supply.
With the router bit installed turn the router upside down and place the template and hinge on top of the sub-base as shown in Fig. 5.

Adjust the bit depth so that the Fig. 3 bottom of the bit is flush with top of the hinge.
 NOTE: Bit included is ½" cutting diameter with 5/8" diameter bearing. (Recommended replacement bit is Porter-Cable model 43671PC.)
NOTE: If you are installing a replacement door, skip to "MARKING THE DOOR."
MARKING HINGE LOCATIONS
For top hinge, measure down from inside of door frame to top edge of desired hinge location (G) Fig. 6 and make a mark. From this mark, measure down one-half of hinge length and mark center as shown.

For bottom hinge, measure up from floor to bottom edge of desired hinge location and make a mark (H) Fig. 7. From this mark, measure up one-half of hinge length and mark center as shown.

NOTE: For two hinge installation, the top hinge is typically 5" to 7" from the top and 10" to 11" from the floor. For a third or middle hinge, mark where the center of this hinge would be located.
ROUTING FRAME WITH TEMPLATE
Place template edge to frame as shown in Fig. 8. Align template center mark (I) to center mark (J) on door frame. Nail template firmly in place at holes (K) and (L) using supplied three-penny double-headed nails.


Read your router's instruction manual before cutting the hinge area.
Route the hinge area on the frame. Start routing along the edge of the frame in the center (M) Fig. 8 of the template and continue clockwise until all material is removed. Use a claw hammer to carefully pull nails straight out and remove template from frame.
NOTE: If single-headed replacement nails used, insert claw hammer under the lip (N) Fig. 9 that extends off the end of the template to raise nail head above template.

Then insert claw under the nail head (O) and carefully remove nail. Rout remaining hinge areas following above procedure.

NOTE: For square-cornered hinges, chisel corners to fit hinge. (Fig. 11)

MARKING THE DOOR
Once hinge areas are routed, temporarily install hinges onto frame. Keeping proper clearances as described in Fig 12, hold door into frame opening and mark top and bottom (P) of each hinge on the door as shown in Fig.12.

Take down door and remove hinges from frame. Clamp door to a work bench. Measure and mark each hinge center line (Q) on door edge, as shown in Fig. 12 and Fig. 13.

ROUTING DOOR WITH TEMPLATE
Place template to door as shown in Fig. 13. Align template center mark (R) to center mark (Q) on door. Nail template firmly in place at holes (S) and (T) using supplied three penny double-headed nails.
Read your router's instruction manual before cutting the hinge area. Don't hold door while routing. Make sure door is secured firmly before routing.
Route the hinge areas on the door, following same procedure as described in "ROUTING FRAME WITH Template."
FINISHING THE JOB
Install hinges on door and hang door to frame.
Documents / ResourcesDownload manual
Here you can download full pdf version of manual, it may contain additional safety instructions, warranty information, FCC rules, etc.
Advertisement


Need help?
Do you have a question about the 59370 and is the answer not in the manual?
Questions and answers