Moneris mobile 8200 User Manual
Hide thumbs
Also See for mobile 8200:
- Operating manual (253 pages) ,
- Quick reference manual (9 pages) ,
- Quick reference manual (4 pages)
Table of Contents
Advertisement
Quick Links
Advertisement
Table of Contents

Related Manuals for Moneris mobile 8200


Summary of Contents for Moneris mobile 8200
- Page 1 Using Your Terminal Moneris Mobile 8200 ®...
- Page 2 Need help? Call 1-866-319-7450 Record your Moneris merchant number here:...
-
Page 3: Table Of Contents
Contents Moneris Mobile 8200 ......Wireless communication ...... -
Page 4: Moneris Mobile 8200
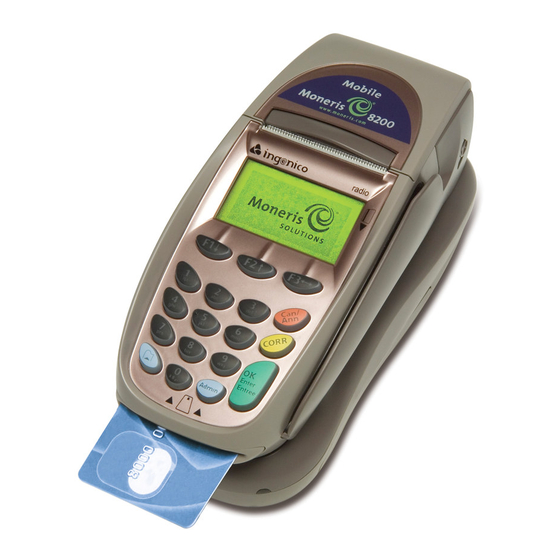
Moneris Mobile 8200 Use this handheld, all-in-one wireless terminal to process transactions at the point of sale (POS). When prompted, you (and sometimes your customer) will key in information on the terminal. If your customer is required to key in information, you will pass the terminal back and forth. - Page 5 Terminal keys F1, F2, F3 • Move through the items on the display. • Select the option displayed above the key (e.g. If YES displays above F1, press to select YES. If displays above F3, press to scroll up). • To select an item, scroll through the list until the item is highlighted (e.g.
- Page 6 Rechargeable battery The Mobile 8200 is powered by this removable battery. Along with the wireless communication feature, the battery power allows you to take the terminal right to your customer. The base There are two types of battery-charging bases that can be used with...
-
Page 7: Wireless Communication
Wireless communication Optional devices The Mobile 8200 terminal uses wireless communication to connect to a communications base. The terminal must be within the coverage area of the communications base to process transactions. Important icons Wireless signal status This icon appears in the top right corner of the display on the following screens: MAIN MENU, REPORT FUNCS, ADMIN FUNCS, and CONFIG FUNCS. -
Page 8: Battery Use
Battery use Helpful hints Check the battery charge level before taking the terminal to the customer. Li-ion batteries: Remember to put the terminal back on the base between transactions to maintain the battery charge. NiMH batteries: Remember to let the NiMH battery discharge completely before putting the terminal back on a base. - Page 9 Extending battery life Stand-By mode To save battery life, the 8200 terminal goes into Stand- By mode when it has not been used for a set time period and is not on a base. In Stand-By mode, the green backlight is off, and the display screen is blank.To exit Stand-By mode, power up the terminal (see below).
-
Page 10: Card Entry Options
Card entry options Insert: Chip cards 1. Wait for“SWIPE OR INSERT CARD” to display on the terminal. 2. Either you or the customer insert the card into the chip reader. Note: Unless the terminal prompts otherwise, do not swipe a chip card even if the card has a magnetic stripe. -
Page 11: Transactions
Transactions All instructions in this guide begin at the READY screen. To access the READY screen from any other screen, press the Can/Ann key repeatedly until the READY screen appears. Guidelines for financial transactions 1. Determine the transaction to be processed (e.g. Purchase or Refund). - Page 12 Financial transactions Purchase [100] Credit or debit Purchase of goods or services. 1. If PURCHASE is the default, key in a Purchase amount, and press OK. (If PURCHASE is not the Admin key, select TRANSACTIONS, default, press the and then select PURCHASE.) 2.
- Page 13 Advice [103]/Force Post [103] An Advice transaction completes a Pre-Auth. A Force Post transaction completes a voice-authorized Purchase. Note: The Advice transaction must be processed on the same terminal as the original Pre-Auth. 1. Press the Admin key, select TRANSACTIONS, and then select ADVICE.
- Page 14 (Continued from page 11) otherwise, simply press at each of these prompts. • When “ENTER ORIGINAL AMOUNT” appears, in the Pre-Auth amount printed on the Pre-Auth receipt, and press (see Pre-Auth Receipt image on page 14). • When “ENTER TIP AMOUNT” appears, key in the amount written on the Tip line, and press...
- Page 15 ENTER TIP Keys in a percentage or dollar amount PERCENTAGE (or nothing at all), and presses OK. ENTER TIP AMOUNT SELECT ACCOUNT Presses (for Chequing account). Or presses (for Savings account). ENTER PIN & OK Keys in their PIN (Personal Identification Number), and presses OK.
-
Page 16: Receipts
Receipts Signing credit card receipts Merchant copy Always retain this copy for your records, but note that if a signature line is printed, you must obtain the cardholder’s signature. • If VERIFIED BY PIN is printed, do not obtain a signature. - Page 17 Reprint Merchant Receipt [66] Prints a duplicate of the Merchant Copy of the receipt. 1. Press the Admin key, select REPORTS, and then select TRANS INQUIRY. • If “SWIPE ADMIN CARD” appears, swipe your POS Admin card to print the unmasked card number on the duplicate receipt.
-
Page 18: Reporting
Reporting Masking on reports Card numbers print unmasked (in full) on reports only if you swipe your POS Admin card at the “SWIPE ADMIN CARD” prompt. Or simply press at this prompt to print masked numbers on reports. Clerk Subtotals Report [82] Prints transactions by Clerk ID for one, a group, or all clerks.Transactions are grouped by type and itemized under card type. - Page 19 The terminal finishes printing the report and returns to the READY screen. Merchant Subtotals Report [95] Prints a list of transaction type totals by card type for the current batch from the Moneris Host. Grand totals by transaction type are also included. 1. Press the Admin...
- Page 20 Tip Totals Report [96] Prints a summary of tip amounts entered for transactions in a specified batch or a specified date range. Note: If Clerk Subtotalling is enabled, tips are summarized by Clerk ID. 1. Press the Admin key, select REPORTS, and then select TOTALS.
-
Page 21: Administrative Transactions
LOGOFF. The “PLEASE LOGON” prompt appears within 60 seconds. Re-Initialization [01] The Moneris Merchant Service Centre may ask you to re-initialize your terminal if changes have been made to it or your merchant account. 1. Press the Admin key, select CONFIGURATION, and then select INITIALIZATION. -
Page 22: End-Of-Day Process
End-of-day process Merchant Close If your merchant account is set up for Merchant Close settlement, you must process a Close Batch transaction in order to have the funds from your POS transactions deposited to your business account. Here’s how: Step 1: Print a Stored Transactions List [60] 1. - Page 23 System Close If your account is set up for System Close settlement, Moneris automatically settles your transactions for you at the end of each day. You must still verify transaction totals on a daily basis. Here’s how: Step 1: Print a Stored Transactions List [60] See page 20.
-
Page 24: Troubleshooting
Can/Ann key to clear the message, and then retry the transaction. If the error message reappears, follow the instructions below. If the problem is still not resolved, call the Moneris Merchant Service Centre at 1-866-319-7450. Error message Solution AMOUNT... - Page 25 CARD REMOVED The chip card was removed during the transaction. 1. Retrieve the 8200. 2. Press until the READY screen appears. 3. Retry the transaction. CHECK PRINTER 1. Open the printer. 2. Ensure that a paper roll is inside and that it is properly inserted.
- Page 26 REFUND LIMIT The total value of Refunds performed EXCEEDED today is greater than your daily Refund Limit. Contact Moneris for a temporary increase in your daily Refund Limit. Please have the original Purchase receipt available for reference. TIME-OUT The customer took too long to respond to the prompts.
- Page 27 Equipment problems Problem Solution Base status Wait for 30 seconds, then check that the power cable on the base is plugged light off. in tightly. • If the battery is attached to a Battery isn’t terminal, ensure is displayed charging. on the terminal when it is on the communications base.
- Page 28 Solutions. For informational purposes only. Neither Moneris Solutions Corporation (“Moneris”) nor any of its affiliates shall be liable for any direct, indirect, incidental, consequential or punitive damages arising out of use of any of the information contained in this guide. Neither Moneris or any of...
Need help?
Do you have a question about the mobile 8200 and is the answer not in the manual?
Questions and answers