
Related Manuals for Elba S 66 X 938


Summary of Contents for Elba S 66 X 938
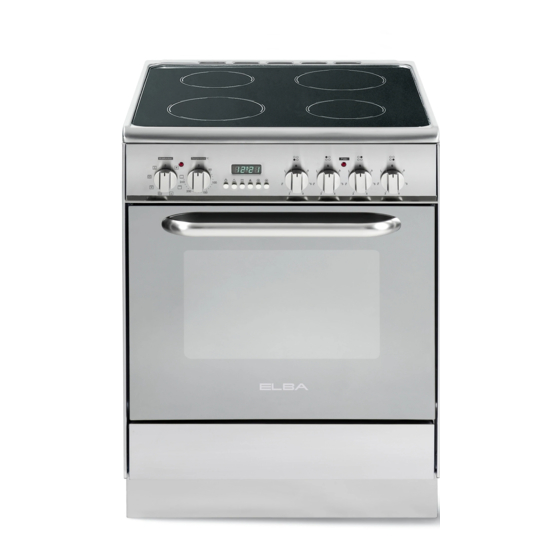
- Page 1 Instructions for the use - Installation advices GLASS CERAMIC COOKER ELBA QUALITY MADE IN ITALY H O M E A P P L I A N C E S Made in Italy...
-
Page 3: Dear Customer
Dear Customer, Thank you for having purchased and given your preference to our product. The safety precautions and recommendations reported below are for your own safety and that of others. They will also provide a means by which to make full use of the features offered by your appliance. -
Page 4: Important Safety Precautions And Recommendations
IMPORTANT SAFETY PRECAUTIONS AND RECOMMENDATIONS IMPORTANT: This appliance is designed and manufactured solely for the cooking of domestic (household) food and is not suitable for any non domestic application and therefore should not be used in a commercial environment. The appliance guarantee will be void if the appliance is used within a non domestic environment i.e. - Page 5 • Do not use a steam cleaner because the moisture can get into the appliance thus make it unsafe. • Do not touch the appliance with wet or damp hands (or feet). • Do not use the appliance whilst in barefoot. • If you should decide not to use this appliance any longer (or decide to substitute another model), before disposing of it, it is recommended that it be made inoperative in an appropriate...
- Page 6 • Make sure that electrical cables connecting other appliances in the proximity of the cooker cannot come into contact with the hob or become entrapped in the oven door. • WARNING: Unattended cooking on a hob with fat or oil can be dangerous and may result in fire.
- Page 7 • CAUTION: Do not use harsh abrasive cleaners or sharp metal scrapers to clean the oven door glass since they can scratch the surface, which may result in shattering of the glass. • Do not line the oven walls with aluminium foil. Do not place ba- king trays or the drip tray on the base of the oven chamber.
-
Page 8: Cooking Hob
COOKING HOB Fig. 1.1 VITROCERAMIC COOKING HOB “Hi-light” cooking zone Ø 180 mm 1646 W “Hi-light” cooking zone Ø 145 mm 1098 W “Hi-light” cooking zone Ø 210 mm 2104 W Cooking zones residual heat indicators Attention! Electrical Shock Hazard. If the hob is cracked or otherwise damaged by falling objects etc., isolate the cooker from the power at the fuse / circuit breaker and call Customer Service. -
Page 9: Control Panel
CONTROL PANEL Fig. 2.1 Made in Italy CONTROLS DESCRIPTION Front right cooking zone control knob Rear right cooking zone control knob Rear left cooking zone control knob Front left cooking zone control knob Electronic clock/programmer Multifunction oven thermostat knob Multifunction oven switch knob Pilot lamps: Oven thermostat indicator light Cooking zones indicator light... -
Page 10: Important Note
USE OF VITROCERAMIC HOB IMPORTANT NOTE: The ceramic surface of the hob allows a fast transmission of heat in the vertical direc- The heating elements incorporate a ther- tion, from the heating elements underneath molimiter that switches ON/OFF the ele- the ceramic glass to the pans set on it. -
Page 11: Cooking Hints
COOKING HINTS Cooking zone controlled by a Knob 12 position TYPE OF COOKING setting energy regulator Switched OFF For melting operations (but- ter, chocolate). To maintain food hot and to heat small quantities of liquid (sauces, eggs). To heat bigger quantities; to whip creams and sauces (vegetables, fruits, soups). - Page 12 RESIDUAL HEAT INDICATOR Caution! The hob also features 4 warning lights The cooking hob becomes very hot which are connected to the corresponding during operation. plates. Keep children well out of reach. When the temperature of a cooking plate is above 60°C, the relevant warning light will COOKING HINTS: also light up to warn of heat on the surface...
- Page 13 ADVICE FOR SAFE USE OF THE CLEANING COOKTOP Before you begin cleaning make sure that the appliance is switched off. • Before switching on make sure that Remove any encrustation using a scraper you have the correct knob for the ho- specific for glass ceramic surfaces.
-
Page 14: Multifunction Electric Oven
MULTIFUNCTION ELECTRIC OVEN OPERATING PRINCIPLES Attention: The oven door becomes Heating and cooking in the MULTIFUN- very hot during operation. CTION oven are obtained in the following Keep children away. ways: by normal convection The heat is produced by the upper and GENERAL FEATURES lower heating elements. -
Page 15: Thermostat Knob
Fig. 4.1 Fig. 4.2 THERMOSTAT KNOB (figs. 4.2) To turn on the heating elements of the oven, set the function selector knob on the desired program and the thermostat knob onto the desired temperature. To set the temperature, it is necessary to make the knob indicator meet the chosen number. The elements will turn ON or OFF automatically according to the energy need which is determined by the thermostat. -
Page 16: Defrosting Frozen Foods
GRILLING The infra-red heating element is switched on. The heat is diffused by radiation. Use with the oven door closed and with the thermostat knob to between 50 and 225°C for 15 minutes, then to position 175°C. Note: It is recommended that you do not grill for longer than 30 minutes at any one time. Attention: the oven door becomes very hot during operation. -
Page 17: Cooking Advice
CONVECTION COOKING WITH VENTILATION The upper and lower heating elements and the fan turn on. The heat coming from the top and bottom is diffused by forced convection. The temperature must be regulated between 50°C and the maximum temperature with the thermostat knob. -
Page 18: Oven Cooking
GRILLING AND “AU GRATIN” COOKING EXAMPLES Temperatures are approximate as they vary Set the switch to position depending on the quality and amount of Set the thermostat to position 175°C and af- food. ter having preheated the oven, simply place Remember to use ovenproof dishes and to the food on the shelf. -
Page 19: Electronic Programmer
ELECTRONIC PROGRAMMER The electronic programmer is a device which groups together the following functions: • 24 hours clock with illuminated display • Timer (up to 23 hours and 59 minutes) • Program for automatic oven cooking • Program for semi-automatic oven cooking Description of the buttons: Description illuminated... -
Page 20: Electronic Clock
ELECTRONIC CLOCK ELECTRONIC TIMER (fig. 5.2) The programmer is equipped with an elec- The timer program consists only of a buz- tronic clock with illuminated numbers which zer which may be set for a maximum period indicates hours and minutes. of 23 hours and 59 minutes. -
Page 21: Automatic Oven Cooking
AUTOMATIC OVEN COOKING Set the temperature and the cooking program by using the switch and ther- To cook food automatically in the oven, it is mostat knobs of the oven (see specific necessary to: chapters). Set the length of the cooking period. oven programmed Set the end of the cooking time. -
Page 22: Semi-Automatic Cooking
SEMI-AUTOMATIC COOKING At the end of the cooking time the oven will turn off automatically, the symbol This is used to automatically switch off the will turn off, AUTO will flash and a buzzer oven after the desired cooking time has will be sound, which can be turned off by elapsed. -
Page 23: Cleaning And Maintenance
CLEANING AND MAINTENANCE GENERAL ADVICE ENAMELLED PARTS Important: Before any operation of • All the enamelled parts must be cleaned cleaning and maintenance discon- with a sponge and soapy water or other nect the appliance from the electri- non-abrasive products. cal network. - Page 24 INSIDE OF OVEN The oven should always be cleaned after use when it has cooled down. The cavity should be cleaned using a mild detergent solution and warm water. Suita- ble proprietary chemical cleaners may be used after first consulting with the manu- facturers recommendations and testing a small sample of the oven cavity.
- Page 25 OVEN DOOR The internal glass panel can be easily re- moved for cleaning by unscrewing the 2 retaining screws (fig. 6.3). Do not use harsh abrasive cleaners or sharp metal scrapers to clean the oven door glass since they can scratch the surface, which may result in shattering of the glass.
- Page 26 OVEN DOOR Type A Fig. 6.5a REMOVING THE OVEN DOOR The oven door can easily be removed as follows: • Open the door to the full extent (fig. 6.5a). • Attach the retaining rings to the hooks on the left and right hinges (fig. 6.5b). •...
-
Page 27: Door Assembly
OVEN DOOR Type B REMOVING THE OVEN DOOR The oven door can easily be removed as follows: • Open the door completely. • Push down the lever “L” (fig. 6.6a) and, keeping it in this position, slowly close the door in order to block the hinge. - Page 28 Advice for the installer IMPORTANT • Cooker installation must only be carried out by QUALIFIED TECHNICIANS and in compliance with local safety standards. Failure to install the appliance correctly could invalidate any manufacturer’s warranty. • The appliance must be installed in compliance with regulations in force in your country and in observation of the manufacturer’s instructions.
-
Page 29: Installation
INSTALLATION LOCATION The appliance must be kept no less than 50 mm away from any side wall which exceed the height of the hob surface (fig. 7.1). The appliance must be hou- sed in heat resistant units. The walls of the units must be capable of resisting tem- peratures of 75°C above room temperature. -
Page 30: Electrical Section
ELECTRICAL SECTION N.B. For connection to the mains, do IMPORTANT: The cooker must be in- not use adapters, reducers or branching stalled in accordance with the manu- devices as they can cause overheating facturer’s instructions. and burning. Incorrect installation, for which the manufacturer accepts no responsibili- If the installation requires alterations to the ty, may cause damage to persons, ani-... -
Page 31: Electrical Connection
ELECTRICAL CONNECTION Before effecting any intervention on To connect the supply cable: the electrical parts of the appliance, • the connection to the network must be Remove the screws securing the co- interrupted. ver ‘A’ on the rear of the cooker (fig. 8.1). - Page 32 The manufacturer reserves the right to make all modifications to its products deemed necessary for manufacturer commercial reasons at any moment and without prior notice, without jeopardising the essential functional and safety characteristics of the appliances. www.elba-cookers.it H O M E A P P L I A N C E S Made in Italy...
Need help?
Do you have a question about the S 66 X 938 and is the answer not in the manual?
Questions and answers