Moxa Technologies OnCell G3470A-LTE User Manuals
Industrial cellular gateway
Hide thumbs
Also See for OnCell G3470A-LTE:
- Quick installation manual (15 pages) ,
- User manual (77 pages)

Related Manuals for Moxa Technologies OnCell G3470A-LTE


Summary of Contents for Moxa Technologies OnCell G3470A-LTE
- Page 1 OnCell G3470A-LTE User’s Manual Edition 1.1, July 2016 www.moxa.com/product © 2016 Moxa Inc. All rights reserved.
- Page 2 OnCell G3470A-LTE User’s Manual The software described in this manual is furnished under a license agreement and may be used only in accordance with the terms of that agreement. Copyright Notice © 2016 Moxa Inc. All rights reserved. Trademarks The MOXA logo is a registered trademark of Moxa Inc.
-
Page 3: Table Of Contents
Step 1: Inserting a SIM Card ......................2-2 Step 2: Turning on the OnCell G3470A-LTE ..................2-2 Step 3: Connecting the OnCell G3470A-LTE to a Computer ............... 2-2 Step 4: Configuring the Computer’s IP Address ................2-2 Step 5: Accessing the Web Console ....................2-3 Step 6: Establishing a Cellular Connection .................. - Page 4 Logout ............................3-42 Software Installation and Configuration ................... 4-1 Overview ............................4-2 Wireless Search Utility ......................... 4-2 Installing the Wireless Search Utility ....................4-2 Configuring the Wireless Search Utility ................... 4-5 Supporting Information ........................A-1 Firmware Recovery ..........................A-2 DoC (Declaration of Conformity) ......................A-3 Federal Communication Commission Interference Statement ............
-
Page 5: Introduction
Introduction The OnCell G3470A-LTE industrial cellular gateway is an ideal wireless solution for remote monitoring applications. With wide temperature support and power and antenna isolation design, the OnCell G3470A-LTE is rugged enough for any harsh industrial environment. The following topics are covered in this chapter: ... -
Page 6: Overview
Ethernet network for cellular applications. With the integrated 4-port gigabit Ethernet switch and LTE support, the OnCell G3470A-LTE offers a faster cellular connection with a lower total cost of ownership. To enhance reliability, a key for industrial users, the OnCell G3470A-LTE features isolation design for both power and antenna inputs. -
Page 7: Product Specifications
OnCell 3470A-LTE Introduction Product Specifications Cellular Interface Standards: GSM/GPRS/EDGE/UMTS/HSPA/LTE Band Options: OnCell G3470A-LTE-EU: • LTE 2100/1800/2600/900/800 MHz (B1/B3/B7/B8/B20) • UMTS/HSPA 2100/1900/850/800/900 MHz OnCell G3470A-LTE-US: • LTE 1900/AWS/850/700/1900 MHz (B2/B4/B5/B13/B17/B25) • UMTS/HSPA 2100/1900/AWS/850/900 MHz • Universal Quad-band GSM/GPRS/EDGE 850/900/1800/1900 MHz LTE Data Rate: •... -
Page 8: Physical Characteristics
Details: See www.moxa.com/warranty ATTENTION • The OnCell G3470A-LTE is NOT a portable mobile device and should be located at least 20 cm away from the human body. • The OnCell G3470A-LTE is NOT designed for the general public. A well-trained technician should be... -
Page 9: Functional Design
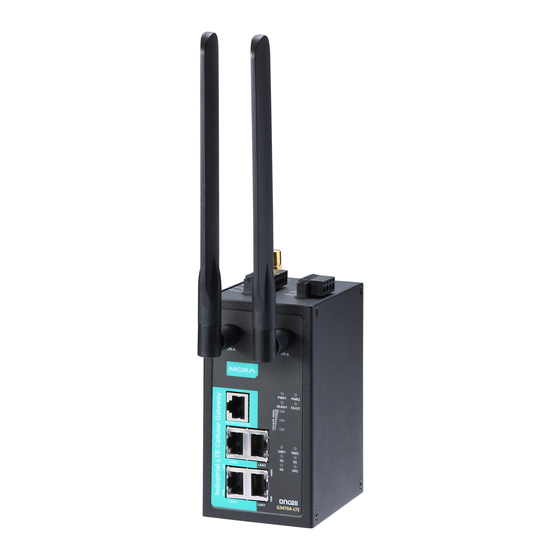
OnCell 3470A-LTE Introduction Functional Design 1. GPS antenna connector (female SMA) 2. Terminal block (two digital input and one digital relay) 3. Grounding screw (M5) 4. Terminal block (PWR1 and PWR2) 5. 2x2 MIMO antenna ports for LTE (female SMA) 6. -
Page 10: Led Indicators
Introduction LED Indicators The LEDs on the front panel of the OnCell G3470A-LTE provide a quick and easy means of determining the current operational status and wireless settings. The following table summarizes how to read the device’s wireless settings from the LED displays. More information is available in Chapter 3 in the “Basic Wireless Settings”... -
Page 11: Beeper
The beeper emits two short beeps when the system is ready. Reset Button The RESET button is located on the bottom panel of the OnCell G3470A-LTE. You can reboot the OnCell G3470A-LTE or reset it to factory default settings by pressing the RESET button with a pointed object such as an unfolded paper clip. -
Page 12: Getting Started
Getting Started This chapter explains how to install Moxa’s OnCell G3470A-LTE for the first time, and quickly set up your wireless network and test whether the connection is running well. The Function Map discussed in the third section provides a convenient means of determining which functions you need to use. -
Page 13: First-Time Installation And Configuration
First-time Installation and Configuration Before installing the OnCell G3470A-LTE, make sure that all items in the package checklist are in the box. In addition, you will need access to a notebook computer or PC equipped with an Ethernet port. The OnCell G3470A-LTE has a default IP address that you must use when connecting to the device for the first time. -
Page 14: Step 5: Accessing The Web Console
To activate the changes click Restart and then Save and Restart after you change the settings. About 30 seconds are needed for the OnCell G3470A-LTE to complete the reboot procedure. Step 6: Establishing a Cellular Connection After installing a SIM card, obtain the SIM card PIN and APN (Access Point Name) information from your service provider and configure the cellular WAN settings. -
Page 15: Step 7: Verifying The Cellular Connection
If the installed SIM card supports 3G or 4G service but only the 2G LED is turned on, this indicates that the OnCell G3470A-LTE is connected to the cellular network but is not registered for 3G or 4G service. Make sure that you enter the correct APN information in the web console. -
Page 16: Web Console Configuration
Web Console Configuration This chapter describes the web console that you can use to configure your OnCell G3470A-LTE and set up a wireless network. The following topics are covered in this chapter: Accessing the Web Console Status Configuration Menu Overview ... -
Page 17: Accessing The Web Console
It may take a few moments for the web page to load on your computer. Note that the Model name and IP address of your OnCell G3470A-LTE are both shown on the title bar of the web page. You can use this information to identify multiple OnCell G3470A-LTE units. -
Page 18: Configuration Menu Overview
Note: These functions are all optional. Current status information for monitoring wired/wireless network performance, advanced services, and device management functions. Functions for maintaining the OnCell G3470A-LTE, and for diagnosing the network. On-demand functions to support the web console management operation. -
Page 19: Overview
OnCell 3470A-LTE Web Console Configuration Overview The Overview page provides a summary of the OnCell G3470A-LTE’s current status. The information is categorized into groups: System Info, LAN Info, and Cellular Info. Basic Settings The Basic Settings group includes the most commonly used settings required by administrators to maintain and control the OnCell G3470A-LTE. -
Page 20: Network Settings
URL instead of the IP address. Time Settings You can synchronize the system time on the OnCell G3470A-LTE based on an NTP (Network Time Protocol) server or user-specified date and time information. The OnCell G3470A-LTE includes the system time in system logs. -
Page 21: Cellular Settings
• Auto IP Report Settings–If your service provider assigns a dynamic WAN IP address, you can configure this screen to set the OnCell G3470A-LTE to automatically send its WAN IP address to the specified host. • GPS Settings–Configure this screen to enable the built-in GPS sensor to locate your OnCell G3740A-LTE. - Page 22 OnCell 3470A-LTE Web Console Configuration If you install two SIM cards in the OnCell G3470A-LTE, you can select Dual SIM mode and enable the GuaranLink feature set the OnCell G3470A-LTE to regularly check connection quality and perform an automatic switchover in case a cellular connection is down. This setting ensures operator-level redundancy.
-
Page 23: Guaranlink
GuaranLink Recovery Process for Dual SIM Connections The GuaranLink feature in OnCell G3470A-LTE automatically tries to re-establish a connection when a connection failure occurs by performing one of the following actions depending on the number of SIM cards enabled in the device: •... - Page 24 Register to network This field is used for ISP initial connection check. timeout Enter the time (10 – 600 minutes) the OnCell G3470A-LTE is to wait before terminating connection to an ISP and starts the GuaranLink recovery process. Data session retry Enter the number of times (1 to 5;...
- Page 25 Register to network timeout field. If the OnCell G3470A-LTE fails to register to the base station within the timeout period, it starts the GuaranLink recovery process. Select Disable to allow the OnCell G3470A-LTE to wait until base station registration is successful.
-
Page 26: Auto Ip Report Settings
In cases where a service provider assigns dynamic IP addresses, you can configure the Auto IP Report Settings screen to set the OnCell G3470A-LTE to regularly send its WAN IP address to a remote host. The following table describes the fields. -
Page 27: Gps Settings
Advanced Settings Several advanced functions are available to increase the functionality of your OnCell G3470A-LTE and wireless network system. The DHCP server helps you deploy wireless clients efficiently. Packet filters provide security mechanisms, such as firewalls, in different network layers. Moreover, SNMP support can make network management easier. -
Page 28: Dhcp Server (For Ap Mode Only)
DHCP requests from the clients. The IP-related parameters you set on this page will also be sent to the client. You can also assign a static IP address to a specific client by entering its MAC address. The OnCell G3470A-LTE provides a Static DHCP mapping list with up to 16 entities. -
Page 29: Ddns
Web Console Configuration DDNS If a DHCP server assigns an IP address to the OnCell G3470A-LTE, you can configure dynamic DNS (DDNS) setting on the OnCell G3470A-LTE to allow remote servers to access the OnCell G3470A-LTE using its domain name instead of IP address. For more information on DDNS, see Appendix C. - Page 30 = all packets are denied IP Protocol Filter The OnCell G3470A-LTE’s IP protocol filter is a policy-based filter that can allow or filter out IP-based packets with specified IP protocol and source/destination IP addresses. The OnCell G3470A-LTE provides 8 entities for setting IP protocol and source/destination IP addresses in your filtering policy.
-
Page 31: Snmp Agent
MD5 or SHA, is the most secure protocol. You can also enable data encryption to enhance data security. The OnCell G3470A-LTE’s MIB can be found in the software CD and supports reading the attributes via SNMP. (Only get method is supported.) SNMP security modes and security levels supported by the OnCell G3470A-LTE are shown in the following table. - Page 32 OnCell 3470A-LTE Web Console Configuration Protocol Setting on Authentication Data Method Version UI web Type Encryption page MD5 or SHA Authentication Data Provides authentication based on HMAC-MD5 or based on MD5 or encryption HMAC-SHA algorithms, and data encryption key. 8-character passwords and a data encryption key are the minimum requirements for authentication and encryption.
-
Page 33: Port Forwarding
NOTE You can make LAN computers accessible from the Internet by enabling Virtual Server. You can also configure port forwarding on the OnCell G3470A-LTE to redirect traffic to a specific port on a LAN computer. To access the Port Forwarding screen, click Advanced Settings Port Forwarding. The Oncell G3470A-LTE supports a total of 32 port forwarding rules. -
Page 34: Vpn
The following figure shows a network example. OnCell G3470A-LTE VPN Feature Overview • The OnCell G3470A-LTE IPSec provides security in a network with Gateway-to-gateway topology as illustrated in the following figure. • The OnCell G3470A-LTE initiates a VPN connection to a VPN Server. -
Page 35: Ipsec Settings
OnCell 3470A-LTE Web Console Configuration IPSec Settings You can enable or disable the IPSec and NAT traversal functions and configure up to five VPN tunnels in the IPSec Settings screen (click Advanced Settings > VPN > IPSec Settings). The following table provides the field descriptions. Field Description Factory Default... - Page 36 Site-to-Site(any) – Select this option to create a VPN tunnel between a static local subnet and a dynamic remote subnet. Select Start in Initial to set the OnCell G3470A-LTE to initiate Startup mode Start in Initial a connection with the remote VPN gateway.
- Page 37 Dead Peer Detection DPD action When you enable the Dead Peer Detection (DPD) feature, the Disable OnCell G3470A-LTE performs one of the following actions when connection to a remote IPSec tunnel is down: • Hold: Keep the VPN tunnel •...
- Page 38 To configure pre-shared key authentication mode in phase 1 key exchange, in the Tunnel settings screen, select Pre-shared key from the Authentication mode drop-down list. Then, enter a key in the text field. Make sure that you configure the same key on the OnCell G3470A-LTE and the remote VPN gateway. Configuring RSA Signature Settings To configure RSA signature settings, complete the following steps: 1.
- Page 39 Certificate Generation X.509 is a digital certificate method commonly used for IPSec authentication. You can generate a self-signed root CA or local certificate on the OnCell G3470A-LTE and import or export the certificate on a remote VPN gateway. To display the Certificate Generation screen, click Advanced Settings > VPN > X.509 Certificate >...
- Page 40 3. Click Certificate Export to export the public key file for the certificate that you import on a remote VPN gateway. 4. Click PKCS#12 Export to export the private key file for local certificates on the OnCell G3470A-LTE. You can import the local certificate in the Local Certificate Upload screen.
-
Page 41: Auto Warning Settings
In addition to logging these events, the OnCell G3470A-LTE supports different approaches to warn engineers automatically, such as SNMP trap, e-mail, and relay output. It also supports two digital inputs to integrate sensors into your system to automate alarms by email and relay output. -
Page 42: Syslog
Config-related events Event is triggered when… Configuration Changed A configuration item has been changed. Configuration file import via Web Console The configuration file is imported to the OnCell G3470A-LTE. Console authentication failure An incorrect password is entered. Firmware upgraded The OnCell G3470A-LTE’s firmware is updated. -
Page 43: E-Mail
OnCell 3470A-LTE Web Console Configuration Syslog Server Settings You can configure the parameters for your Syslog server on the Syslog Server Settings screen. Field Description Factory Default Syslog server 1/2/3 Enter the IP address of the 1st/ 2nd/ 3rd Syslog Server Syslog port Enter the UDP port for the syslog server. - Page 44 ATTENTION Consult your Network Administrator or ISP for the proper mail server settings. The Auto warning function may not work properly if it is not configured correctly. The OnCell G3470A-LTE’s SMTP AUTH supports LOGIN, PLAIN, and CRAM-MD5 (RFC 2554). Mail server...
-
Page 45: Relay
OnCell 3470A-LTE Web Console Configuration Relay Relay Event Types Select Active to enable the event types. For information on the event types, refer to the System Log Event Types section. Trap Traps can be used to signal abnormal conditions (notifications) to a management station. This trap-driven notification can make your network more efficient. - Page 46 OnCell 3470A-LTE Web Console Configuration Trap Event Types SNMP Trap Receiver Settings SNMP traps are defined in SMIv1 MIBs (SNMPv1) and SMIv2 MIBs (SNMPv2c). The two styles are basically equivalent, and it is possible to convert between the two. You can set the parameters for SNMP trap receivers through the web page.
-
Page 47: Sms
Select Active to enable the event types. For information on the event types, refer to the System Log Event Types section. SMS Alert Settings You can set the OnCell G3470A-LTE to send SMS notifications to up to four phone numbers and select a message encoding format in the SMS Alert Settings screen. Field... -
Page 48: Status
OnCell G3470A-LTE. Network Statistics The Network Statistics screen displays information on each interface. Routing Table The Routing Table screen displays the list of routes the OnCell G3470A-LTE uses to send packets on each interface. Possible flags include: U: route is up... -
Page 49: Dhcp Client List (For Ap Mode Only)
OnCell 3470A-LTE Web Console Configuration DHCP Client List (for AP mode only) The DHCP Client List shows all the clients that require and have successfully received IP assignments. You can click the Refresh button to refresh the list. You can press Select all button to select all content in the list for further editing. System Log Triggered events are recorded in System Log. -
Page 50: Relay Status
OnCell 3470A-LTE Web Console Configuration Relay Status The status of user-configurable events can be found under Relay Status. If an event is triggered, the event is included on this list. After you have addressed an event, click Acknowledge Event. DI and Power Status You can view the digital input (DI) and power input information in the DI and Power Status screen. -
Page 51: Vpn Log
The VPN Log screen displays VPN connection information. VPN System log The following table lists the system logs for the VPN feature. [VPN name] indicates the name of the VPN tunnel you have created on the OnCell G3470A-LTE. System log Description [VPN name] mismatch of PSK Pre-shared key mismatch. -
Page 52: Maintenance
[VPN name] receive payload name Receive “VPN INVALID_KEY_INFORMATION , INVALID_CERTIFICATE or …” from a remote VPN gateway. Maintenance Maintenance functions provide the administrator with tools to manage the OnCell G3470A-LTE and wired/wireless networks. Console Settings You can enable or disable access permissions to the device through a LAN or WAN for the following consoles: HTTP, HTTPS, Telnet, and SSH. -
Page 53: Firmware Upgrade
The latest firmware is available at Moxa’s download center. Before running a firmware upgrade, make sure the OnCell G3470A-LTE is off-line. Click the Browse button to specify the firmware image file and click Firmware Upgrade and Restart to start the firmware upgrade. After the progress bar reaches 100%, the OnCell G3470A-LTE will reboot itself. -
Page 54: Load Factory Default
Load Factory Default Use this function to reset the OnCell G3470A-LTE and roll all settings back to the factory default values. You can also reset the hardware by pressing the reset button on the top panel of the OnCell G3470A-LTE. -
Page 55: Manual Sms
Whether the SMS was successfully sent Remote SMS Control In cases where the OnCell G3470A-LTE is installed in a location with limited GPRS service, you can use the remote SMS control feature to get the current status of the OnCell G3470A-LTE or restart the OnCell G3470A-LTE. -
Page 56: Save Configuration
All data stored in volatile memory will disappear when the OnCell G3470A-LTE is shutdown or rebooted unless they are y. Because the OnCell G3470A-LTE starts up and initializes with the settings stored in flash memory, all new changes must be saved to flash memory before restarting the OnCell G3470A-LTE. -
Page 57: Restart
If you run the Restart function without changing any configurations or saving all your changes, you will see just one Restart button on your screen. You will not be able to run any of the OnCell G3470A-LTE’s functions while the system is rebooting. Logout Logout helps users disconnect the current HTTP or HTTPS session and go to the Login page. -
Page 58: Software Installation And Configuration
Software Installation and Configuration The following topics are covered in this chapter: Overview Wireless Search Utility Installing the Wireless Search Utility Configuring the Wireless Search Utility... -
Page 59: Overview
Software Installation and Configuration Overview The Documentation & Software CD included with your OnCell G3470A-LTE is designed to make the installation and configuration procedure easy and straightforward. This auto-run CD includes the Wireless Search Utility (to broadcast search for all OnCell G3470A-LTE units accessible over the network), the OnCell G3470A-LTE User’s Manual, and Quick Installation Guide. - Page 60 OnCell 3470A-LTE Software Installation and Configuration 2. Click Next to install program files to the default directory, or click Browse to select an alternate location. 3. Click Next to create the program’s shortcut files to the default directory, or click Browse to select an alternate location.
- Page 61 OnCell 3470A-LTE Software Installation and Configuration 4. Click Next to select additional tasks. 5. Click Next to proceed with the installation. The installer then displays a summary of the installation options. 6. Click Install to begin the installation. The setup window will report the progress of the installation. To change the installation settings, click Back and navigate to the previous screen.
-
Page 62: Configuring The Wireless Search Utility
Configuring the Wireless Search Utility The Broadcast Search function is used to locate all OnCell G3470A-LTE APs that are connected to the same LAN as your computer. After locating an OnCell G3470A-LTE, you will be able to change its IP address. Since the Broadcast Search function searches by TCP packet and not IP address. - Page 63 OnCell 3470A-LTE Software Installation and Configuration 3. Click Search. 4. The “Searching” window indicates the progress of the search. When the search is complete, all devices that were located will be displayed in the Wireless Search Utility window.
- Page 64 OnCell 3470A-LTE Software Installation and Configuration 5. Click Locate to cause the selected device to beep. 6. Make sure that your device is unlocked before using the search utility’s icons setting. The device will unlock automatically if the password is set to the default. Otherwise you must enter the new password manually. 7.
- Page 65 OnCell 3470A-LTE Software Installation and Configuration 8. Use the scroll down list to select the MAC addresses of the devices that you want to manage, and then click Add. Key in the password for the device and then click OK to save. If you return to the search page and search for the device again, you will find that the device will unlock automatically.
- Page 66 OnCell 3470A-LTE Software Installation and Configuration Click Assign IP to change the IP setting. The three advanced options—Search, Connection, and Miscellaneous—are explained below: Search • Retry count (default=5): Indicates how many times the search will be retried automatically. • Retry interval (ms): The time to wait between retries. Connection •...
- Page 67 OnCell 3470A-LTE Software Installation and Configuration Misc. Search on start: Checkmark this box if you would like the search function to start searching for devices after you log in to the Wireless Search Utility. 4-10...
-
Page 68: Supporting Information
Supporting Information This chapter presents additional information about this product. You can also learn how to contact Moxa for technical support. The following topics are covered in this appendix: Firmware Recovery DoC (Declaration of Conformity) Federal Communication Commission Interference Statement ... -
Page 69: Firmware Recovery
You can refer to the following instructions to recover the firmware: Connect to the OnCell G3470A-LTE’s RS-232 console with 115200bps and N-8-1. You will see the following message shown on the terminal emulator every one second. -
Page 70: Doc (Declaration Of Conformity
OnCell 3470A-LTE Supporting Information DoC (Declaration of Conformity) Federal Communication Commission Interference Statement This equipment has been tested and found to comply with the limits for a Class B digital device, pursuant to Part 15 of the FCC Rules. These limits are designed to provide reasonable protection against harmful interference in a residential installation. -
Page 71: R&Tte Compliance Statement
OnCell 3470A-LTE Supporting Information R&TTE Compliance Statement Moxa declares that the apparatus OnCell G3470A-LTE complies with the essential requirements and other relevant provisions of Directive 1999/5/EC. This equipment complies with all the requirements of DIRECTIVE 1999/5/CE OF THE EUROPEAN PARLIAMENT AND THE COUNCIL OF 9 March 1999 on radio equipment and telecommunication terminal equipment and the mutual recognition of their conformity (R&TTE). -
Page 72: Dynamic Domain Name Server
The following is a summary of the process: 1. The OnCell G3470A-LTE sends a request for an IP address to the DHCP server. At the same time, it notifies the DHCP server of its desired server name (“OC3100” in the illustration) according to the option 12 standard. - Page 73 OnCell 3470A-LTE Dynamic Domain Name Server The above screenshot shows how DHCP can be set up to update the DNS.
-
Page 74: Well-Known Port Numbers
Well-Known Port Numbers In this appendix, we provide a list of port numbers that may cause network problems if you set the OnCell G3470A-LTE to one of these ports. Refer to RFC 1700 standards for a list of well-known port numbers or to the following introduction from the IANA: The port numbers are divided into three ranges: the Well Known Ports, the Registered Ports, and the Dynamic and/or Private Ports. - Page 75 OnCell 3470A-LTE Well-Known Port Numbers UDP Socket Application Service Reserved Management Utility Echo Discard Active Users (systat) Daytime Any private printer server Resource Location Protocol Host name server (names server) Whois (nickname) Login Host Protocol (login) Domain Name Server (domain) Trivial Transfer Protocol (TETP) Gopher Protocol Finger Protocol...
Need help?
Do you have a question about the OnCell G3470A-LTE and is the answer not in the manual?
Questions and answers