
Subscribe to Our Youtube Channel
Related Manuals for Moxa Technologies OnCell G3470A-LTE-EU-T


Summary of Contents for Moxa Technologies OnCell G3470A-LTE-EU-T
- Page 1 OnCell G3470A-LTE User’s Manual Version 1.4, October 2019 www.moxa.com/product © 2019 Moxa Inc. All rights reserved.
- Page 2 OnCell G3470A-LTE User’s Manual The software described in this manual is furnished under a license agreement and may be used only in accordance with the terms of that agreement. Copyright Notice © 2019 Moxa Inc. All rights reserved. Trademarks The MOXA logo is a registered trademark of Moxa Inc. All other trademarks or registered marks in this manual belong to their respective manufacturers.
-
Page 3: Table Of Contents
Table of Contents Introduction ............................1-1 Overview ............................1-2 Package Checklist ..........................1-2 Product Features ..........................1-2 Product Specifications ......................... 1-3 Functional Design ..........................1-4 LED Indicators ..........................1-5 Beeper ............................1-6 Reset Button ..........................1-6 Getting Started..........................2-1 First-time Installation and Configuration ....................2-2 Step 1: Inserting a SIM Card ...................... - Page 4 Logout............................. 3-45 Software Installation and Configuration ................... 4-1 Overview ............................4-2 Wireless Search Utility ......................... 4-2 Installing the Wireless Search Utility ....................4-2 Configuring the Wireless Search Utility ................... 4-5 Supporting Information ........................A-1 Firmware Recovery ..........................A-2 DoC (Declaration of Conformity) ......................A-3 Federal Communication Commission Interference Statement ............
-
Page 5: Introduction
Introduction The OnCell G3470A-LTE industrial cellular gateway is an ideal wireless solution for remote monitoring applications. With wide temperature support and power and antenna isolation design, the OnCell G3470A- LTE is rugged enough for any harsh industrial environment. The following topics are covered in this chapter: ... -
Page 6: Overview
OnCell G3470A-LTE Introduction Overview The OnCell G3470A-LTE industrial cellular gateway provides a higher cellular bandwidth and more reliable connection to your Ethernet network for cellular applications. With the integrated 4-port gigabit Ethernet switch and LTE support, the OnCell G3470A-LTE offers a faster cellular connection with a lower total cost of ownership. -
Page 7: Product Specifications
OnCell G3470A-LTE Introduction Product Specifications NOTE The latest specifications for Moxa’s products can be found at https://www.moxa.com. ATTENTION • The OnCell G3470A-LTE is NOT a portable mobile device and should be located at least 20 cm away from the human body. •... -
Page 8: Functional Design
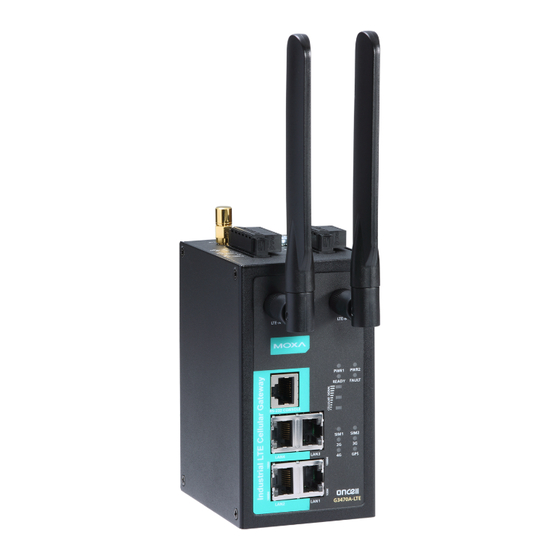
OnCell G3470A-LTE Introduction Functional Design 1. GPS antenna connector (female SMA) 2. Terminal block (two digital input and one digital relay) 3. Grounding screw (M5) 4. Terminal block (PWR1 and PWR2) 5. 2x2 MIMO antenna ports for LTE (female SMA) 6. -
Page 9: Led Indicators
OnCell G3470A-LTE Introduction LED Indicators The LEDs on the front panel of the OnCell G3470A-LTE provide a quick and easy means of determining the current operational status and wireless settings. The following table summarizes how to read the device’s wireless settings from the LED displays. More information is available in Chapter 3 in the “Basic Wireless Settings”... -
Page 10: Beeper
OnCell G3470A-LTE Introduction Beeper The beeper emits two short beeps when the system is ready. Reset Button The RESET button is located on the bottom panel of the OnCell G3470A-LTE. You can reboot the OnCell G3470A-LTE or reset it to factory default settings by pressing the RESET button with a pointed object such as an unfolded paper clip. -
Page 11: Getting Started
Getting Started This chapter explains how to install Moxa’s OnCell G3470A-LTE for the first time, and quickly set up your wireless network and test whether the connection is running well. The Function Map discussed in the third section provides a convenient means of determining which functions you need to use. The following topics are covered in this chapter: ... -
Page 12: First-Time Installation And Configuration
OnCell G3470A-LTE Getting Started First-time Installation and Configuration Before installing the OnCell G3470A-LTE, make sure that all items in the package checklist are in the box. In addition, you will need access to a notebook computer or PC equipped with an Ethernet port. The OnCell G3470A-LTE has a default IP address that you must use when connecting to the device for the first time. -
Page 13: Step 5: Accessing The Web Console
OnCell G3470A-LTE Getting Started Step 5: Accessing the Web Console To access the web console: 1. Open a web browser. 2. Enter http://192.168.127.254 in the address field. 3. A login screen appears. Enter the user name (the default is “admin”) and password (the default is “moxa”);... -
Page 14: Step 7: Verifying The Cellular Connection
OnCell G3470A-LTE Getting Started Step 7: Verifying the Cellular Connection You can use one of the following methods to verify the cellular connection: 1. Check the LED display. Check the SIM 1, SIM2, 2G, 3G, and 4G LEDs on the front panel. If a SIM LED is blinking, this indicates that a SIM card is not installed in the SIM slot or the SIM card PIN information is not configured in the web console. -
Page 15: Web Console Configuration
Web Console Configuration This chapter describes the web console that you can use to configure your OnCell G3470A-LTE and set up a wireless network. The following topics are covered in this chapter: Accessing the Web Console Status Configuration Menu Overview ... -
Page 16: Accessing The Web Console
OnCell G3470A-LTE Web Console Configuration Accessing the Web Console Moxa OnCell G3470A-LTE’s web browser interface provides a convenient way to modify its configuration and access the built-in monitoring and network administration functions. The recommended web browser is Microsoft ® Internet Explorer 7.0 or 8.0 with JVM (Java Virtual Machine) installed. NOTE To use the OnCell G3470A-LTE’s management and monitoring functions from a PC host connected to the same LAN as the OnCell G3470A-LTE, you must make sure that the PC host and the OnCell G3470A-LTE... -
Page 17: Configuration Menu Overview
OnCell G3470A-LTE Web Console Configuration Configuration Menu Overview Quick overview of the OnCell G3470A-LTE’s status. Basic settings for administering the OnCell G3470A-LTE. Essential settings related to establishing a cellular network. Advanced features to support additional network management and secure wired and wireless communication. Note: These advanced functions are all optional. -
Page 18: Overview
OnCell G3470A-LTE Web Console Configuration Overview The Overview page provides a summary of the OnCell G3470A-LTE’s current status. The information is categorized into groups: System Info, LAN Info, and Cellular Info. Basic Settings The Basic Settings group includes the most commonly used settings required by administrators to maintain and control the OnCell G3470A-LTE. -
Page 19: Network Settings
OnCell G3470A-LTE Web Console Configuration Network Settings You can use the Network Settings screen to configure TCP/IP settings. Field Description Default setting IP address Enter the unique IP address for the OnCell G3470A-LTE. 192.168.127.254 Subnet mask Enter the subnet mask to specify the type of network to which 255.255.255.0 the OnCell G3470A-LTE is connected. -
Page 20: Cellular Settings
OnCell G3470A-LTE Web Console Configuration Field Description Default setting Time zone Select a time zone from the drop-down list. The default option is GMT (Greenwich Mean Time). Note: Changing the time zone automatically changes the Current local time. We strongly recommend that you set the time zone before you set the Current local time. - Page 21 OnCell G3470A-LTE Web Console Configuration If you install two SIM cards in the OnCell G3470A-LTE, you can select Dual SIM mode and enable the GuaranLink feature set the OnCell G3470A-LTE to regularly check connection quality and perform an automatic switchover in case a cellular connection is down. This setting ensures operator-level redundancy. Field Description Default setting...
-
Page 22: Guaranlink
OnCell G3470A-LTE Web Console Configuration Field Description Default setting SIM 1/2 Select Auto if you want the OnCell device to automatically select Auto Authentication Type either PAP or CHAP authentication method when setting up a data session. Select PAP (Password Authentication Protocol) to send user name and password to the server and verify that the user name and password match with the server database. - Page 23 OnCell G3470A-LTE Web Console Configuration GuaranLink Settings In the navigation panel, click Network Settings GuaranLink Settings to display the configuration screen. The following table describes the fields. Field Description Default setting GuaranLink Select Enable to activate the GuaranLink feature. Disable For operator-level redundancy, enable GuaranLink with Dual SIM mode to set the OnCell G3470A-LTE to regularly check connection...
- Page 24 OnCell G3470A-LTE Web Console Configuration Field Description Default setting ISP initial Select Enable to set the OnCell G3470A-LTE to complete the Disable connection check registration process to a base station before the timeout specified in the Register to network timeout field. If the OnCell G3470A-LTE fails to register to the base station within the timeout period, it starts the GuaranLink recovery process.
-
Page 25: Auto Ip Report Settings
OnCell G3470A-LTE Web Console Configuration Auto IP Report Settings In MDVPN (mobile data virtual private network) applications where service providers set up private VPNs for enterprise customers, a cellular gateway must be assigned IP address that is visible to a remote host in a central office. -
Page 26: Gps Settings
OnCell G3470A-LTE Web Console Configuration GPS Settings You can activate the GPS module function under GPS Settings, and then enable GPS serial mode under Real COM mode or Reverse Real COM mode. OnCell Central Manager provides the current location, including latitude and altitude information. -
Page 27: Dhcp Server
OnCell G3470A-LTE Web Console Configuration DHCP Server DHCP (Dynamic Host Configuration Protocol) is a networking protocol that allows administrators to assign temporary IP addresses to network computers by “leasing” an IP address to a user for a limited amount of time, instead of assigning permanent IP addresses. -
Page 28: Ddns
OnCell G3470A-LTE Web Console Configuration DDNS If a DHCP server assigns an IP address to the OnCell G3470A-LTE, you can configure dynamic DNS (DDNS) setting on the OnCell G3470A-LTE to allow remote servers to access the OnCell G3470A-LTE using its domain name instead of IP address. - Page 29 OnCell G3470A-LTE Web Console Configuration ATTENTION Be careful when you enable the filter function: Drop + “no entity on list is activated” = all packets are allowed Accept + entity on list is activated” = all packets are denied “no IP Protocol Filter The OnCell G3470A-LTE’s IP protocol filter is a policy-based filter that can allow or filter out IP-based packets with specified IP protocol and source/destination IP addresses.
-
Page 30: Snmp Agent
OnCell G3470A-LTE Web Console Configuration The Application name is a text string that describes the corresponding entity with up to 31 characters. Remember to check the Active check box for each entity to activate the setting. Field Description Default setting Enable Select Enable to enable TCP/UDP port filtering. - Page 31 OnCell G3470A-LTE Web Console Configuration Protocol Setting on Authentication Data Method Version UI web Type Encryption page MD5 or SHA Authentication Data Provides authentication based on HMAC-MD5 based on MD5 or encryption or HMAC-SHA algorithms, and data encryption key. 8-character passwords and a data encryption key are the minimum requirements for authentication and encryption.
-
Page 32: Port Forwarding
OnCell G3470A-LTE Web Console Configuration Field Description Default setting Private MIB The object ID (OID) is the enterprise value for the OnCell information Device G3470A-LTE. This value is not configurable. object ID Port Forwarding You can configure port forwarding settings on the OnCell G3470A-LTE to redirect specific packets from a remote host on the WAN to a server on the LAN. -
Page 33: Vpn
OnCell G3470A-LTE Web Console Configuration Computers that are part of a virtual private network (VPN) use a second, “virtual” IP address to connect to the Internet. Instead of running across a single private network, some of the links between nodes that are part of a VPN use open network connections or virtual circuits on a larger network, such as the Internet. - Page 34 OnCell G3470A-LTE Web Console Configuration IPSec Settings You can enable or disable the IPSec and NAT traversal functions and configure up to five VPN tunnels in the IPSec Settings screen (click Advanced Settings > VPN > IPSec Settings). The following table provides the field descriptions. Field Description Factory Default...
- Page 35 OnCell G3470A-LTE Web Console Configuration Configuring a VPN Tunnel To configure a VPN tunnel, click Edit in the IPSec Settings screen. The following table provides the field descriptions. Field Description Factory Default IPSec enable Select Enable to activate the VPN tunnel. Disable Connection name Enter a descriptive name for the VPN tunnel.
- Page 36 OnCell G3470A-LTE Web Console Configuration Field Description Factory Default Remote ID Enter an ID (IP/FQDN/User_FQDN) to identify and authenticate the remote VPN endpoint. Key Exchange (Phase1) Operation mode Select main mode or aggressive mode to configure the Main standard negotiation parameters for IKE Phase 1 of the VPN Tunnel.
- Page 37 OnCell G3470A-LTE Web Console Configuration Field Description Factory Default • Restart by Peer: Re-establish the VPN tunnel on Wait for connecting mode. DPD delay The period of dead peer detection messages. DPD timeout Timeout to check if the connection is alive or not. Configuring Pre-shared Key Settings To configure pre-shared key authentication mode in phase 1 key exchange, in the Tunnel settings screen, select Pre-shared key from the Authentication mode drop-down list.
- Page 38 OnCell G3470A-LTE Web Console Configuration Device A Device B 1. Generate Root CA 1. Generate Root CA 2. Generate Local Certificate 2. Generate Local Certificate 3. Click PKCS#12 Export to export the 3. Click PKCS#12 Export to export the local certificate (local_CA_A.p12) local certificate (local_CA_B.p12) 4.
- Page 39 OnCell G3470A-LTE Web Console Configuration To generate a root CA certificate, complete the following steps: 1. In the Certificate Generation screen, enter information in the fields under Root Certificate Generation. Field Description Certificate days Enter the number of days the certificate is valid for. Certificate password Enter a password to create a password-protected certificate.
- Page 40 OnCell G3470A-LTE Web Console Configuration Field Description Organization unit Enter the unit or section in the organization. name Common name Enter a name (such as a server name or your name). Email address Enter an email address. 2. Click Generate Local Certificate. 3.
-
Page 41: Auto Warning Settings
OnCell G3470A-LTE Web Console Configuration 1. Click Advanced Settings > VPN > X.509 Certificate > Remote Certificate Upload. 2. In the Remote certificate upload field, click Browse to select a local certificate. 3. Click Import. Auto Warning Settings Since industrial-grade devices are often located at the endpoints of a system, these devices will not always know what is happening elsewhere on the network. -
Page 42: Syslog
OnCell G3470A-LTE Web Console Configuration System restart (warm start) The OnCell G3470A-LTE is rebooted, such as when its settings are changed (IP address, subnet mask, etc.). Network-related events Event is triggered when… LAN link on The LAN port is connected to a device or network. LAN link off The port is disconnected (e.g., the cable is pulled out, or the opposing device shuts down). -
Page 43: E-Mail
OnCell G3470A-LTE Web Console Configuration Field Description Factory Default Syslog server 1/2/3 Enter the IP address of the 1st/ 2nd/ 3rd Syslog Server Syslog port Enter the UDP port for the syslog server. E-Mail E-Mail Event Types Select the Active checkbox to enable an event item. By default, all values are deactivated (unchecked). E-mail Server Settings The E-mail server settings determine how e-mail warnings are sent for system and serial port events. -
Page 44: Relay
OnCell G3470A-LTE Web Console Configuration ATTENTION Consult your Network Administrator or ISP for the proper mail server settings. The Auto warning function may not work properly if it is not configured correctly. The OnCell G3470A-LTE’s SMTP AUTH supports LOGIN, PLAIN, and CRAM-MD5 (RFC 2554). Mail server Setting Description... -
Page 45: Trap
OnCell G3470A-LTE Web Console Configuration Trap Traps can be used to signal abnormal conditions (notifications) to a management station. This trap-driven notification can make your network more efficient. Because a management station usually takes care of a large number of devices that have a large number of objects, it will be overloading for the management station to poll or send requests to query every object on every device. -
Page 46: Sms
OnCell G3470A-LTE Web Console Configuration Field Description Default setting Trap version Select the SNMP version for SNMP traps. Trap server Enter the IP address or domain name of the SNMP trap server. IP/name Trap community Enter the community string or password (up to 31 characters) alert for authentication. - Page 47 OnCell G3470A-LTE Web Console Configuration SMS Alert Settings You can set the OnCell G3470A-LTE to send SMS notifications to up to four phone numbers and select a message encoding format in the SMS Alert Settings screen. Field Description Factory Default To phone number Enter the phone numbers to which the OnCell G3470A-LTE 1/2/3/4...
-
Page 48: Status
OnCell G3470A-LTE Web Console Configuration Status DNS Information The DNS information screen displays the DNS server to which the OnCell G3470A-LTE is connected and the DNS server information. SIM Status The SIM Status screen displays the current SIM card in use and the status of the SIM cards installed in the OnCell G3470A-LTE. - Page 49 OnCell G3470A-LTE Web Console Configuration The network statistic parameters and values are described in the following tables: Interface Action Description Received The number of packets the device received through the LAN interface Sent The number of packets the device sent through the LAN interface Received CWAN The number of packets the device received through the CWAN interface...
-
Page 50: Routing Table
OnCell G3470A-LTE Web Console Configuration Routing Table The Routing Table screen displays the list of routes the OnCell G3470A-LTE uses to send packets on each interface. Possible flags include: U: route is up +: default gateway D: route is down T: static route G: use gateway H: target is a host... -
Page 51: System Log
OnCell G3470A-LTE Web Console Configuration System Log Triggered events are recorded in System Log. You can export the log contents to an available viewer by clicking Export Log. You can use the Clear Log button to clear the log contents and the Refresh button to refresh the log. -
Page 52: Di And Power Status
OnCell G3470A-LTE Web Console Configuration DI and Power Status You can view the digital input (DI) and power input information in the DI and Power Status screen. VPN Log The VPN Log screen displays VPN connection information. VPN System log The following table lists the system logs for the VPN feature. -
Page 53: Maintenance
OnCell G3470A-LTE Web Console Configuration System log Description [VPN name] DPD: Restarting Connection Renegotiate VPN SA immediately. [VPN name] encrypt alg is different VPN encryption mismatch. [VPN name] hash alg is different VPN hash mismatch. [VPN name] DH group is different VPN Diffie-Hellman group mismatch. -
Page 54: Firmware Upgrade
OnCell G3470A-LTE Web Console Configuration If the node and access path are available, you will see that all packets were successfully transmitted with no loss. Otherwise, some, or even all, packets may get lost, as shown in the following figure. Firmware Upgrade The OnCell G3470A-LTE can be enhanced with more value-added functions by installing firmware upgrades. -
Page 55: Load Factory Default
OnCell G3470A-LTE Web Console Configuration In the Config Import section, click Choose File to select a configuration file and click Config Import button to begin importing configuration. To save the configuration file to a storage media, click Config Export. The configuration file is a text file and you can view and edit it with a general text-editing tool. -
Page 56: Password
OnCell G3470A-LTE Web Console Configuration Password Use the Password function to change the administrative password of existing user accounts. First input the Current password, and then type the new password in the New password and Confirm password input boxes. To maintain a higher level of network security, do not use the default password (moxa), and be sure to change all user account passwords regularly. -
Page 57: Remote Sms Control
OnCell G3470A-LTE Web Console Configuration Remote SMS Control In cases where the OnCell G3470A-LTE is installed in a location with limited GPRS service, you can use the remote SMS control feature to get the current status of the OnCell G3470A-LTE or restart the OnCell G3470A-LTE. -
Page 58: Restart
OnCell G3470A-LTE Web Console Configuration After you click on Save Configuration in the left menu box, the following screen will appear. Click Save if you wish to update the configuration settings in the flash memory at this time. Alternatively, you may choose to run other functions and put off saving the configuration until later. -
Page 59: Logout
OnCell G3470A-LTE Web Console Configuration Logout Logout helps users disconnect the current HTTP or HTTPS session and go to the Login page. For security reasons, we recommend you logout before quitting the console manager. 3-45... -
Page 60: Software Installation And Configuration
Software Installation and Configuration The following topics are covered in this chapter: Overview Wireless Search Utility Installing the Wireless Search Utility Configuring the Wireless Search Utility... -
Page 61: Overview
OnCell G3470A-LTE Software Installation and Configuration Overview The Documentation & Software CD included with your OnCell G3470A-LTE is designed to make the installation and configuration procedure easy and straightforward. This auto-run CD includes the Wireless Search Utility (to broadcast search for all OnCell G3470A-LTE units accessible over the network), the OnCell G3470A-LTE User’s Manual, and Quick Installation Guide. - Page 62 OnCell G3470A-LTE Software Installation and Configuration 2. Click Next to install program files to the default directory, or click Browse to select an alternate location. 3. Click Next to create the program’s shortcut files to the default directory, or click Browse to select an alternate location.
- Page 63 OnCell G3470A-LTE Software Installation and Configuration 4. Click Next to select additional tasks. 5. Click Next to proceed with the installation. The installer then displays a summary of the installation options.
-
Page 64: Configuring The Wireless Search Utility
OnCell G3470A-LTE Software Installation and Configuration 6. Click Install to begin the installation. The setup window will report the progress of the installation. To change the installation settings, click Back and navigate to the previous screen. 7. Click Finish to complete the installation of the Wireless Search Utility. Configuring the Wireless Search Utility The Broadcast Search function is used to locate all OnCell G3470A-LTE APs that are connected to the same LAN as your computer. - Page 65 OnCell G3470A-LTE Software Installation and Configuration 3. Click Search. 4. The “Searching” window indicates the progress of the search. When the search is complete, all devices that were located will be displayed in the Wireless Search Utility window.
- Page 66 OnCell G3470A-LTE Software Installation and Configuration 5. Click Locate to cause the selected device to beep. 6. Make sure that your device is unlocked before using the search utility’s icons setting. The device will unlock automatically if the password is set to the default. Otherwise you must enter the new password manually.
- Page 67 OnCell G3470A-LTE Software Installation and Configuration 8. Use the scroll down list to select the MAC addresses of the devices that you want to manage, and then click Add. Key in the password for the device and then click OK to save. If you return to the search page and search for the device again, you will find that the device will unlock automatically.
- Page 68 OnCell G3470A-LTE Software Installation and Configuration Click Assign IP to change the IP setting. The three advanced options—Search, Connection, and Miscellaneous—are explained below: Search • Retry count (default=5): Indicates how many times the search will be retried automatically. Retry interval (ms): The time to wait between retries. •...
- Page 69 OnCell G3470A-LTE Software Installation and Configuration Misc. Search on start: Checkmark this box if you would like the search function to start searching for devices after you log in to the Wireless Search Utility. 4-10...
-
Page 70: Supporting Information
Supporting Information This chapter presents additional information about this product. You can also learn how to contact Moxa for technical support. The following topics are covered in this appendix: Firmware Recovery DoC (Declaration of Conformity) Federal Communication Commission Interference Statement ... -
Page 71: Firmware Recovery
OnCell G3470A-LTE Supporting Information Firmware Recovery When the Ready, FAULT, Signal Strength, 4G, 3G, 2G, and GPS LEDs turn on simultaneously and blink at one-second interval, it means the system booting has failed. It may result from some wrong operation or uncontrollable issues, such as an unexpected shutdown during firmware update. -
Page 72: Doc (Declaration Of Conformity
OnCell G3470A-LTE Supporting Information DoC (Declaration of Conformity) Federal Communication Commission Interference Statement This equipment has been tested and found to comply with the limits for a Class B digital device, pursuant to Part 15 of the FCC Rules. These limits are designed to provide reasonable protection against harmful interference in a residential installation. -
Page 73: R&Tte Compliance Statement
OnCell G3470A-LTE Supporting Information R&TTE Compliance Statement Moxa declares that the apparatus OnCell G3470A-LTE complies with the essential requirements and other relevant provisions of Directive 1999/5/EC. This equipment complies with all the requirements of DIRECTIVE 1999/5/CE OF THE EUROPEAN PARLIAMENT AND THE COUNCIL OF 9 March 1999 on radio equipment and telecommunication terminal equipment and the mutual recognition of their conformity (R&TTE). -
Page 74: Dynamic Domain Name Server
Dynamic Domain Name Server This appendix explains how to use the OnCell G3470A-LTE with DDNS. When the OnCell G3470A-LTE receives its IP address from a DHCP (Dynamic Host Configuration Protocol) server, remote servers will be unable to access it using a fixed IP address. With DDNS (Dynamic Domain Name Server), a remote server can access the OnCell G3470A-LTE using its domain name instead of its IP address. - Page 75 OnCell G3470A-LTE Dynamic Domain Name Server The above screenshot shows how DHCP can be set up to update the DNS.
-
Page 76: Well-Known Port Numbers
Well-Known Port Numbers In this appendix, we provide a list of port numbers that may cause network problems if you set the OnCell G3470A-LTE to one of these ports. Refer to RFC 1700 standards for a list of well-known port numbers or to the following introduction from the IANA: The port numbers are divided into three ranges: the Well Known Ports, the Registered Ports, and the Dynamic and/or Private Ports. - Page 77 OnCell G3470A-LTE Well-Known Port Numbers UDP Socket Application Service Reserved Management Utility Echo Discard Active Users (systat) Daytime Any private printer server Resource Location Protocol Host name server (names server) Whois (nickname) Login Host Protocol (login) Domain Name Server (domain) Trivial Transfer Protocol (TETP) Gopher Protocol Finger Protocol...
Need help?
Do you have a question about the OnCell G3470A-LTE-EU-T and is the answer not in the manual?
Questions and answers