Table of Contents
Advertisement
Advertisement
Table of Contents

Subscribe to Our Youtube Channel
Related Manuals for Bruker ultraflex Series


Summary of Contents for Bruker ultraflex Series
- Page 1 Series Cleaning Manual Revision 2 (January 2013)
-
Page 2: Legal And Regulatory Notices
Bruker Daltonik GmbH assumes no responsibility for the use or reliability of its software on equipment that is not furnished by Bruker Daltonik GmbH. Use of Trademarks The names of actual companies and products mentioned herein may be the trademarks of their respective owners. - Page 3 For Research Use Only (RUO). Not for use in diagnostic procedures. Hyperlink Disclaimer Bruker Daltonik GmbH makes no express warranty, neither written nor oral, and is neither responsible nor liable for data or content from the linked Internet resources presented in this document.
-
Page 4: Warning Symbols
Electric shock Dangerous surface tem- Heavy object (danger to Heavy object (danger to feet) peratures hands) Harmful vapors or fumes Fire Part can be ejected Explosion UV radiation Corrosive chemicals Page 4 of 44 ultraflex Series Cleaning Manual Revision 2... - Page 5 (refer to symbols on the next page). CAUTION A ‘Caution’ message is used when failure to observe instructions could result in damage to equipment. Note A ‘Note’ is used to give advice or additional information. ultraflex Series Cleaning Manual Revision 2 Page 5 of 44...
-
Page 6: Table Of Contents
Components Inside the Source 4 Cleaning the Source Cleaning Optical Components 4.1.1 Laser Mirror 4.1.2 Laser Lens 4.1.3 Mirror Plate 4.1.4 Camera Optics 4.1.5 Illumination Optics Cleaning Potential Plates Final Tasks Page 6 of 44 ultraflex Series Cleaning Manual Revision 2... - Page 7 Bruker Daltonik GmbH Table of Contents 5 Closing and Switching On the Instrument Check HV Connections Closing the Source Switching On the Instrument ultraflex Series Cleaning Manual Revision 2 Page 7 of 44...
-
Page 8: Document History
Document History Bruker Daltonik GmbH Document History Revision Date Changes Approval 03.01.2011 First Edition S. Hasemann 11.01.2013 Add laser safety information S. Hasemann Page 8 of 44 ultraflex Series Cleaning Manual Revision 2... -
Page 9: Safety Instructions
To ensure safe working and the avoidance of hazards to the customer, all maintenance work must be conducted by a Bruker Service representative or by a suitably qualified specialist who has carefully read and fully understood the Maintenance Instructions before undertaking the work. -
Page 10: Special Safety Instructions
When the protective covers are removed from the instrument and the instrument is connected to the electrical supply, there is a danger of electric shock. Take appropriate precautions when working on an unguarded instrument. Page 10 of 44 ultraflex Series Cleaning Manual Revision 2... -
Page 11: Laser Safety
Operating the instrument with opened covers can expose the user to harmful laser radiation, which may result in blindness. ultraflex Series Cleaning Manual Revision 2 Page 11 of 44... - Page 12 For further information about the smartbeam II laser system, refer to Holle, A; Haase, A; Kayser, M; & Höhndorf, J. Optimizing UV laser focus profiles for improved MALDI performance, Journal of Mass Spectrometry, Vol 41, Issue 6. doi:10.1002/jms.1041. Page 12 of 44 ultraflex Series Cleaning Manual Revision 2...
-
Page 13: Source Heater
Because the instrument will be disconnected from the power supply, there is no risk from laser light if the working steps and instructions given in this manual are followed correctly. ultraflex Series Cleaning Manual Revision 2 Page 13 of 44... - Page 14 1 Safety Instructions Bruker Daltonik GmbH Page 14 of 44 ultraflex Series Cleaning Manual Revision 2...
-
Page 15: Introduction
After 10 million shots and after a large image — Clean the laser optics using a swab (see section 4.1). Use a brush to clean the potential plates (see section 4.2) ultraflex Series Cleaning Manual Revision 2 Page 15 of 44... - Page 16 2 Introduction Bruker Daltonik GmbH Figure 2- 1 Cleaning Information Figure 2-2 Cleaning Information dialog settings (LC- dialog settings (MALDI MALDI) imaging) Page 16 of 44 ultraflex Series Cleaning Manual Revision 2...
-
Page 17: Tools And Materials Required
Brush (for cleaning Bruker # 228209 metal parts only) Nitrile gloves For example, KIMBERLY- CLARK PURPLE NITRILE Exam Gloves (Bruker # (8)267458) Compressed clean gas For ventilating the system and drying (nitrogen) components ultraflex Series Cleaning Manual Revision 2 Page 17 of 44... - Page 18 2 Introduction Bruker Daltonik GmbH Page 18 of 44 ultraflex Series Cleaning Manual Revision 2...
-
Page 19: Switching Off And Opening The Instrument
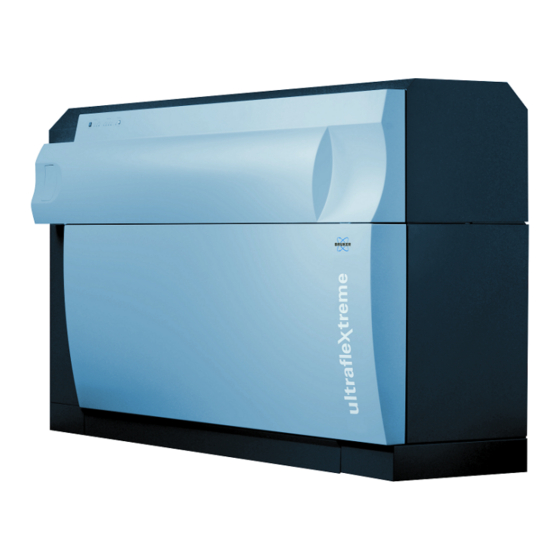
Close flexControl and flexService . The external nitrogen supply must be opened to allow ventilation of the vacuum system. Switching Off the Instrument Figure 3-1 ultrafleXtreme — front view ultraflex Series Cleaning Manual Revision 2 Page 19 of 44... - Page 20 The pumps, the high voltage, and the lasers are now switched off. Figure 3-3 Control panel — instrument switched off, key is horizontal Figure 3-4 Control panel — key removed Page 20 of 44 ultraflex Series Cleaning Manual Revision 2...
- Page 21 If the LEDs are NOT extinguished, do NOT proceed with the cleaning process. Call your local Bruker Service Department for assistance. Remove the key from the key-switch and store the key safely to ensure that the instrument cannot be switched on during maintenance.
- Page 22 Activate the top cover lift buttons with the key switch on the panel at the rear of the instrument. Turn the key to the vertical position to activate the top cover lift buttons (see 3). Page 22 of 44 ultraflex Series Cleaning Manual Revision 2...
- Page 23 Bruker Daltonik GmbH 3 Switching Off and Opening the Instrument Figure 3-8 Rear panel and (inset) top cover lift buttons and enable key switch ultraflex Series Cleaning Manual Revision 2 Page 23 of 44...
- Page 24 Now the entire instrument is disconnected from the main electrical supply and it is safe to perform maintenance work. WARNING — DANGER OF ELECTRIC SHOCK There is risk of electrical shock if the mains cable is not disconnected from the instrument. Page 24 of 44 ultraflex Series Cleaning Manual Revision 2...
-
Page 25: Opening The Source Chamber
Figure 3-11 Opening the source chamber IMPORTANT Open the door slowly and carefully to avoid damaging the P1 contact. Allow the P1-connector slip off the contact pole (see Figure 3-12). ultraflex Series Cleaning Manual Revision 2 Page 25 of 44... -
Page 26: Components Inside The Source
WARNING — DANGER OF ELECTRIC SHOCK Before proceeding, make sure that the mains connector is disconnected to avoid the risk of an electrical shock. Components Inside the Source Figure 3-13 Front view into the source Page 26 of 44 ultraflex Series Cleaning Manual Revision 2... - Page 27 Bruker Daltonik GmbH 3 Switching Off and Opening the Instrument Figure 3-14 The ion optics ultraflex Series Cleaning Manual Revision 2 Page 27 of 44...
- Page 28 3 Switching Off and Opening the Instrument Bruker Daltonik GmbH Page 28 of 44 ultraflex Series Cleaning Manual Revision 2...
-
Page 29: Cleaning The Source
The surfaces of the mirrors and lenses are easily damaged — avoid scratching them with metal tools (tip of brush or tweezers). The P2 plate is very delicate and distorts easily — do not touch the surface. ultraflex Series Cleaning Manual Revision 2 Page 29 of 44... -
Page 30: Cleaning Optical Components
(see Figure 4-1). Only use swabs to clean the optical surfaces of the mirror and lens surfaces (see Figure 4-4). 4.1.1 Laser Mirror Figure 4-1 Flushing the upper mirror Page 30 of 44 ultraflex Series Cleaning Manual Revision 2... -
Page 31: Laser Lens
Note The arrow indicates the tip of Note The arrow indicates the tip of the wash bottle spout. the wash bottle spout. ultraflex Series Cleaning Manual Revision 2 Page 31 of 44... -
Page 32: Mirror Plate
Flush the ion optics' mirrors with ethanol using the Clean the ion optics laser mirror wash bottle. See Figure 3-14 for location of the with a swab soaked in ethanol. mirror plate. Page 32 of 44 ultraflex Series Cleaning Manual Revision 2... -
Page 33: Camera Optics
Flush mirrors and lens of the camera optics with ethanol using the wash bottle. 4.1.5 Illumination Optics Figure 4-9 Mirrors and lens of the illumination optics Flush mirrors and lens of the illumination optics with ethanol using the wash bottle. ultraflex Series Cleaning Manual Revision 2 Page 33 of 44... -
Page 34: Cleaning Potential Plates
Example of a heavily contaminated P2 plate The P2 plate is very sensitive – do not touch the surface directly as this may bend the plate Use a brush (Bruker Part No. 228209) soaked in ethanol to clean the surfaces of the potential plates. Note In rare cases where it is no longer possible to remove the contamination, call your local Bruker Service Department to replace the P2 plate. - Page 35 Flushing the P2 plate from the rear Figure 4-13 View through the observation window while flushing the rear side of the P2 plate and the ground plate from both sides ultraflex Series Cleaning Manual Revision 2 Page 35 of 44...
- Page 36 Always soak cleaning materials in ethanol before starting cleaning. Do not clean parts with dry tissues, swabs, or brushes. After using the brush, all parts must be flushed with ethanol again. Clean the brush with ethanol after use. Page 36 of 44 ultraflex Series Cleaning Manual Revision 2...
-
Page 37: Final Tasks
Dry the parts inside the source using nitrogen to reduce pumping time (see Figure 4-17). Excess fluid should be mopped up using a tissue before drying with nitrogen. Figure 4-17 Drying the parts with Figure 4-18 Blowing away the ethanol nitrogen ultraflex Series Cleaning Manual Revision 2 Page 37 of 44... - Page 38 4 Cleaning the Source Bruker Daltonik GmbH Page 38 of 44 ultraflex Series Cleaning Manual Revision 2...
-
Page 39: Closing And Switching On The Instrument
(see Figure 5-1, Figure 5-2, and Figure 5-3). Figure 5-1 Connection to the Lens Figure 5-2 Connection to the P2 plate plate Figure 5-3 Connection to the P1 shield (Prim plate) ultraflex Series Cleaning Manual Revision 2 Page 39 of 44... -
Page 40: Closing The Source
Before closing the source door, check the position of the O-ring around the door. Trapping the O-ring when it is unseated can cause damage. Figure 5-4 View showing partially unseated rubber O-ring seal in source door Page 40 of 44 ultraflex Series Cleaning Manual Revision 2... - Page 41 Close the door completely and insert and tighten the source door screws. Tighten the screws on the right-hand side of the door (opposite the hinge) first (see Figure 5-6). Figure 5-6 Tightening the screws on the right-hand side of the door ultraflex Series Cleaning Manual Revision 2 Page 41 of 44...
-
Page 42: Switching On The Instrument
(see Figure 5-9). The person responsible for the instrument should store the key to avoid unauthorized access to the instrument. Page 42 of 44 ultraflex Series Cleaning Manual Revision 2... - Page 43 Control panel switched on — key is vertical Start flexControl and click Vacuum (see Figure 5-11) to open the Check Pressures window to monitor the vacuum (see Figure 5-12). Figure 5-11 The flexControl Status page ultraflex Series Cleaning Manual Revision 2 Page 43 of 44...
- Page 44 Figure 5-12 The Vacuum Check Pressure window Note After the cleaning procedure, it takes approximately 4 hours to restore the vacuum and for the system to be ready for use. Page 44 of 44 ultraflex Series Cleaning Manual Revision 2...
Need help?
Do you have a question about the ultraflex Series and is the answer not in the manual?
Questions and answers