
Related Manuals for Cleco 1700 Series


Summary of Contents for Cleco 1700 Series
- Page 1 Instruction Manual 823136EN 08/20/2012 1700 and 1900 Series Horizontal Grinders For additional product information visit our website at http://www.apextoolgroup.com...
- Page 2 • provides information on optional equipment. Identification text: 1700 represents all models of the 1700 series horizontal grinders as described in this manual 1900 represents all models of the 1900 series horizontal grinders as described in this manual Ú indicates a required action •...
- Page 3 823136EN Cleco ® 08/20/2012 Nomenclature Tool Series 17 = 1700 Series 19 = 1900 Series Free Speed (RPM) 45 = 4500 60 = 6000 80 = 8000 Tool Configuration H = Horizontal Throttle Type --- = Quick Release L = Lever (Lock Off)
-
Page 4: Table Of Contents
823136EN Cleco ® 08/20/2012 Contents Safety Warning and notes ....................6 Basic requirements for safe working practices ............6 Operator training ....................7 Personal protective equipment ................7 Designated use ...................... 8 Codes and standards .................... 8 Noise and vibration ....................8 Scope of supply, transport and storage Items supplied ....................... - Page 5 823136EN Cleco ® 08/20/2012 Contents Spare parts 10.1 Handle - Lock off lever ..................22 10.2 Handle - Thumb lever ..................24 10.3 Handle - Spade ....................26 10.4 Motor and housing assembly ................28 10.5 Governor assembly ..................... 30 10.6...
-
Page 6: Safety
823136EN Cleco ® 08/20/2012 Safety Safety Warnings and notes Warning notes are identified by a signal word and a pictogram. • The signal word indicates the severity and probability of the impending danger. • The pictogram indicates the type of danger. -
Page 7: Operator Training
823136EN Cleco ® 08/20/2012 Safety Guards: Always use prescribed guards properly mounted for the cutting device being used. If the guard has been damaged, it must be discarded and replaced. Do not modify any guard unless approved, in writing, by Apex Tool Group, LLC. -
Page 8: Designated Use
823136EN Cleco ® 08/20/2012 Safety Designated use The 1700/1900 horizontal grinders are designed exclusively for material removal by using appropriate abrasive devices. • Do not modify the 1700/1900 horizontal grinders, any guard or accessory. • Use only with accessory parts which are approved by the manufacturer. -
Page 9: Scope Of Supply, Transport And Storage
Disconnect the air supply from the 1700/1900 Object Time Period Storage Temperature 1700 series without air supply No guideline -13°F to 104°F (-25°C to 40°C) 1900 series without air supply No guideline -13°F to 104°F (-25°C to 40°C) Page 9... -
Page 10: Product Description
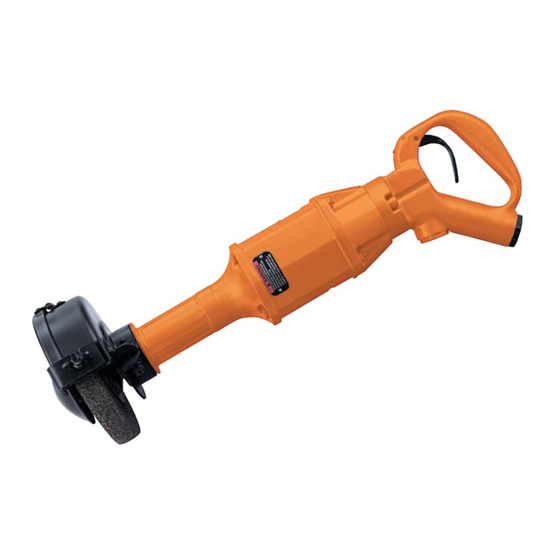
823136EN Cleco ® 08/20/2012 Product Description Product description General description • Horizontal pneumatic powered grinder • 1700HSL or 1900HSL: Lock off lever • 1700HS or 1900 HS: Self closing thumb lever • 1700H or 1900H: Quick release thumb lever •... -
Page 11: Accessories
823136EN Cleco ® 08/20/2012 Accessories Accessories Page 11... -
Page 12: Before Initial Operation
823136EN Cleco ® 08/20/2012 Before Initial Operation Before initial operation Ambient conditions Ambient temperature: 41°F (5°C) to a maximum of 104°F (40°C) Acceptable relative humidity: 25% to 90%, non-condensing Air supply Parameter Description Minimum inside diameter: 1/2" (12,7 mm) Air Hose Maximum length: 16.4' (5 m) -
Page 13: Tool Set Up
823136EN Cleco ® 08/20/2012 Before Initial Operation Tool set up Grinding wheels and guards must be properly installed on the 1700/1900 before operating. 867799 - 2” relieved driving flange 6000 RPM 843846 Spindle Nut 6” Radial Wheel Grinding Wheel Size: 6 x 1 x 5/8... -
Page 14: First Operation
823136EN Cleco ® 08/20/2012 First Operation First operation Putting into use Connect the tool to an airline with a maximum pressure of 90 psig (6.2 bar). Adjust the airline lubrication to a minimum to reduce possible contamination of the environment by the exhaust air. The work area must be well ventilated. -
Page 15: Troubleshooting
823136EN Cleco ® 08/20/2012 Troubleshooting Troubleshooting Malfunction Possible causes Remedy Make sure there is adequate air pressure at Tool does not No or low air pressure Ú start the tool air inlet Disassemble throttle valve; clean all parts Throttle valve malfunction Ú... -
Page 16: Maintenance
823136EN Cleco ® 08/20/2012 Maintenance Maintenance --------------------------------------------------------------------------------------------------------------------------------------- Danger of injury from accidental start up. Turn off the compressed air before performing any maintenance. --------------------------------------------------------------------------------------------------------------------------------------- Service schedule Only qualified and trained personnel are permitted to perform maintenance on these tools. Regular maintenance reduces operating faults, repair costs and downtime. In addition to the following service schedule, implement a safety related maintenance program that takes the local regulations for repair and maintenance for all operating phases of the tool into account. -
Page 17: Lubricants
823136EN Cleco ® 08/20/2012 Maintenance Lubricants For proper function and long service life, use of the correct lubricant is essential. Lubricants recommended for this tool. Part No. Packaged Designation Vendor 540397 1 Quart (0.94 liter) Airlube 10W/NR-420LB DR Fuchs Lubricants Co. -
Page 18: Repair Instructions
823136EN Cleco ® 08/20/2012 Repair Instructions Repair instructions Excessive vibration The primary source of vibration when using a portable grinder is an abrasive wheel that is out of balance, out of round, untrue, or possibly a combination of all three. The use of quality abrasive wheels that are well balanced, round and true is highly recommended to significantly reduce tool vibration. -
Page 19: General Assembly
823136EN Cleco ® 08/20/2012 Repair Instructions General assembly Reassemble the tool in the reverse order of disassembly. Clean all parts thoroughly and inspect for excessive wear or damage. Make sure bearings are not damaged or pitted and roll freely. Rotor blades that are worn or chipped can cause the motor to lock up and result in grinding wheel spin- off. - Page 20 823136EN Cleco ® 08/20/2012 Repair Instructions Motor unit assembly (continued) Install the rotor key into the keyway in the shaft. This will allow the rotor, rotor blades (4) and cylinder to be installed on the shaft. Refer to the following illustration for the correct installation of the rotor and rotor blades.
-
Page 21: Governor Assembly
823136EN Cleco ® 08/20/2012 Repair Instructions Governor assembly Clean and inspect all governor parts. Replace all parts that show excessive wear or damage with parts recommended or manufactured by Apex Tool Group, LLC. IMPORTANT: it is imperative that all governor parts be clean and free of foreign material before assembly. -
Page 22: Spare Parts
823136EN Cleco ® 08/20/2012 Spare Parts 10.1 Handle - Lock Off Lever Models 1745HSL 1760HSL 1945HSL 1960HSL Page 22 Page 22... - Page 23 823136EN Cleco ® 08/20/2012 Spare Parts 10.1 Handle - Lock Off Lever Number Description 861896 Lever Throttle Handle Assembly (includes Ref. 1-19) 869839 Throttle Handle (includes Ref. 2) 867756 Throttle Pin Bushing 867758 Inlet Adapter 867732 O-Ring (1-1/8 x 1-5/16)
-
Page 24: Handle - Thumb Lever
823136EN Cleco ® 08/20/2012 Spare Parts 10.2 Handle - Thumb Lever Models 1745H 1745HS 1760H 1760HS 1945H 1945HS 1960H 1960HS Page 24... - Page 25 823136EN Cleco ® 08/20/2012 Spare Parts 10.2 Handle - Thumb Number Description 861898 Thumb Throttle Handle Assembly - Self Closing (includes Ref. 1-17) 861897 Thumb Throttle Handle Assembly - Quick Release (includes Ref. 1-17) 869838 Throttle Handle (includes Ref. 2)
-
Page 26: Handle - Spade
823136EN Cleco ® 08/20/2012 Spare Parts 10.3 Handle - Spade Models 1745HG 1760HG 1945HG 1960HG 1980HG Page 26... - Page 27 823136EN Cleco ® 08/20/2012 Spare Parts 10.3 Handle - Spade Number Description 861566 Spade Handle Assembly (includes Ref. 1-17) 867803 Throttle Handle (includes Ref. 2) 867756 Throttle Pin Bushing 867758 Inlet Adapter 867732 O-Ring (1-1/8 x 1-5/16) 813041 Socket Head Cap Screw (5/16-18 x 1)
-
Page 28: Motor And Housing Assembly
823136EN Cleco ® 08/20/2012 Spare Parts 10.4 Motor and Housing Assembly * Note: Refer to Section 10.5 ** Note: Refer to Section 10.6 Page 28... - Page 29 3" O.D. Outer Flange (8" Wheel Size) 843846 Spindle Nut (5/8-11 NC) (#) Quantity (X) Recommended Spare Parts (quantity shown based on 1-5 tools in operation) Table 10.4 Ref. Description 1700 Series 1900 Series 10 Cylinder 867776 867825 12 Rotor 867742 867826...
-
Page 30: Governor Assembly
823136EN Cleco ® 08/20/2012 Spare Parts 10.5 Governor Assembly Page 30... - Page 31 823136EN Cleco ® 08/20/2012 Spare Parts 10.5 Governor Assembly Number Description Table 10.5 Governor Assembly (Includes Ref. 1-xx) 413048 Governor Cone 413047 Governor Cone Pin 869099 Governor Spider 413050 Governor Weight Pin Table 10.5 Governor Weight 204187 Washer 867770 Governor Pin Retainer Table 10.5...
-
Page 32: Overspeed Shut Off Disc
823136EN Cleco ® 08/20/2012 Spare Parts 10.6 Overspeed Shut Off Disc 10.7 Muffler (Optional Equipment) Page 32... - Page 33 Disc Seal Plate (#) Quantity (X) Recommended Spare Parts (quantity shown based on 1-5 tools in operation) 10.7 Muffler (Optional Equipment) Number Description 1700 Series Grinders 861996 Muffler Assembly (includes Ref. 1-4) 202113 Muffler (includes Ref. 2) 867947 Muffler Gasket...
-
Page 34: Technical Data
823136EN Cleco ® 08/20/2012 Technical Data Technical data 11.1 1700 and 1900 Series Specifications Free Arbor/ Length Weight Rated Air Inlet Model Number Throttle Type Housing Speed Abrasives Capacity Spindle Size (rpm) Size 1745HSL Lock Off Lever Steel 4500 8" x 1" x 5/8" (8" wheel guard 19.6 15.4... -
Page 35: Service
Service 12.1 Replacement parts Use only original Cleco replacement parts. Failure to comply can result in reduced power and increased service requirements. The tool warranty may be voided if replacement parts are not manufactured or approved by Apex Tool Group. -
Page 36: Disposal
823136EN Cleco ® 08/20/2012 Disposal Disposal --------------------------------------------------------------------------------------------------------------------------------------- Injuries and environmental damage from improper disposal. Components and auxiliary materials of the tool pose risks to health and the environment. Ú Capture auxiliary materials (oils, greases) when drained and dispose of them properly. - Page 37 823136EN 08/20/2012 Page 37...
- Page 40 Sales & Service Centers Note: All locations may not service all products. Please contact the nearest Sales & Service Center for the appropriate facility to handle your service requirements. Detroit, MI Houston, TX Lexington, SC Los Angeles, CA Apex Tool Group Apex Tool Group Apex Tool Group Apex Tool Group...
Need help?
Do you have a question about the 1700 Series and is the answer not in the manual?
Questions and answers