Table of Contents
Advertisement
Quick Links
Advertisement
Table of Contents

Related Manuals for DMP Electronics XTLplus


Summary of Contents for DMP Electronics XTLplus
-
Page 2: Silencing An Alarm
Silencing an Alarm When the alarm siren is sounding, enter your user code or present your card to a keypad or reader during the Status List display. IS THIS A FALSE ALARM? YES NO or CANCEL VERIFY displays. • If a burglar alarm is valid, press NO or VERIFY to send a verification message to the Central Station. -
Page 3: Table Of Contents
Section Page Section Page Introduction ..............1 User Menu ...............20 XTLplus Systems ............. 1 Accessing the User Menu ..........20 About Your Security System ..........1 User Menu Options ............20 Emergency Evacuation Plans ..........2 User Check-in ..............21 Keypads .................3 Zone Activity Check ............ - Page 4 Entering User Names ............. 50 Appendix D ..............51 Cell Phone Message User’s Guide ........51 MyAccess™ Text Messaging Commands ......51 Subscribe to Text Messages ........... 54 Common Keypad Displays ..........55 Quick Reference Wallet Cards .........59 XTLplus User Guide...
-
Page 5: Introduction
XTLplus Systems A Note About False Alarms One of the most important concerns facing the security industry This Guide covers operation of the XTLplus systems. About Your Security System today is false alarms. The accidental dispatching of police and fire agencies places others in jeopardy by limiting the response Your system is designed with your safety and comfort in mind. -
Page 6: Emergency Evacuation Plans
The best way to survive a fire or other emergency is to get out early. A fire alarm system installation, with smoke and carbon monoxide detectors in each room, can greatly decrease your risk of loss or injury. XTLplus User Guide Introduction... -
Page 7: Keypads
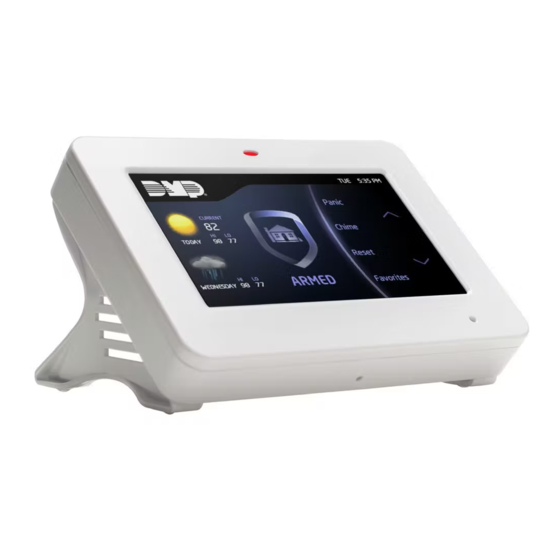
Logo 9862 Graphic Touchscreen Keypad. Micro SD Card Slot Note: For the purposes of this guide when using Graphic Touchscreen Keypads, when instructed to press the first select Carousel key, touch select area 1; the second select key touch select area Local Weather Menu Conditions 2; third select key touch select area 3; and the fourth select key touch select area 4. 9800 Series Graphic Touchscreen Keypad Introduction XTLplus User Guide... -
Page 8: Power/Armed Logo
Panel Disarmed, AC Power Fault, Battery OK POLICE EMERGENCY FIRE Red Steady Panel Armed, AC Power OK, Battery OK Red/Blue Alternate Panel Armed, AC Power OK, Battery Fault Red Blinking Panel Armed, AC Power Fault, Battery OK Graphic Touchscreen Panic Icons XTLplus User Guide Introduction... -
Page 9: Keypad Common Keys
Select key or area. A dash now appears in the lower. Use the right select key or area to make the tone higher. keypad display. The table below shows the character locations for DMP keypads. Introduction XTLplus User Guide... -
Page 10: Special Keypad Tones
The drawing shows the button layout for all models for your silenced. This is in addition to the separate siren output operated reference. Each button on the key fob is programmed to perform by the alarm panel. a specific action. The button names are listed for your reference. XTLplus User Guide Introduction... -
Page 11: Special Wireless Displays
Also, your system may Button Button be pre-programmed at installation to send an Abort signal to the Key Fob Examples and Button Names Central Station. Refer to the Introduction section. Introduction XTLplus User Guide... -
Page 12: Myaccess™ Text Messaging Commands
A zone refers to a protected opening or pro tection device assigned The system is currently being tested by an installation or service to a zone number. Each door or window, motion detec tor, smoke technician. detector, or other device has a zone number and a name. XTLplus User Guide Introduction... - Page 13 Operators at the central station can then dispatch the appropriate authorities or contact you with the specific event information. PERIMETER ON perimeter armed All/Perimeter system. ALL SYSTEM ON All areas are on. SLEEP SYSTEM ON The perimeter and interior areas are on but the bedroom area is off. Introduction XTLplus User Guide...
- Page 14 If the open condition is not corrected, an alarm and exit error is reported to the central station. The Exit Error feature allows the central station to acknowledge the arming error without dispatching the police on a false alarm. XTLplus User Guide Introduction...
-
Page 15: Arming And Disarming
Throughout this guide, any differences between the systems are area in the system is armed, followed by the area numbers that noted for your convenience. were armed. The keypad displays ALL SYSTEM ON if all areas in the system are armed. Arming and Disarming XTLplus User Guide... -
Page 16: Key Fob Arming
If you choose to arm selected areas, the system prompts you to choose the areas you want to arm. XTLplus User Guide Arming and Disarming... -
Page 17: Area System Disarming
7d. Select STOP to stop the system from arming. Correct during the armed period. All burglary zones are then disarmed and the zone problem(s) and return to step 1. any bypassed zones are automatically reset. Arming and Disarming XTLplus User Guide... -
Page 18: All/Perimeter System Arming
The keypad displays ENTER CODE: . Enter your user code and press CMD. The keypad displays ALL? NO YES. Select YES to disarm all areas authorized for your user code. 4a. Select NO to disarm only certain areas individually. XTLplus User Guide Arming and Disarming... -
Page 19: All/Perimeter System Disarming
Alarm Display: After disarming, the keypad dis plays any zones 5a. If a problem exists on any zones, the zone name and that tripped or any transmission problems that occurred dur ing problem display followed by: OKAY BYPASS STOP. Arming and Disarming XTLplus User Guide... -
Page 20: Home/Away System Arming
The keypad next displays ALL SYSTEM OFF to Press ARM INSTANT while the exit delay displays. This immediately confirm the system is disarmed. XTLplus User Guide Arming and Disarming... -
Page 21: Home/Away System Disarming
The keypad next displays EXIT: ## INSTNT and begins to sta tion and/or to your cell phone. count down the number of seconds remaining for you to Arming and Disarming XTLplus User Guide... -
Page 22: Keypad Shortcut Keys
Easy Exit (Monitor) If the alarm is valid, select NO or VERIFY to send a verify Sleep Perimeter message to the Central Station. The system will remain armed. Keypad Shortcut Keys XTLplus User Guide Arming and Disarming... - Page 23 You can also press the Easy Exit, shortcut key 8 again, to cancel Perimeter systems. the exit delay countdown. For example, the telephone rings before you retrieve the newspaper so you press shortcut key 8 to rearm the system. Arming and Disarming XTLplus User Guide...
-
Page 24: User Menu
Central Station requesting service on described in the System Setup section of the alarm system. this guide. The following pages detail each User Menu item and provide instructions on when and how to use them properly. XTLplus User Guide User Menu... -
Page 25: User Check-In
Activity Check Enabled message to the central station. When NO is selected, the keypad displays CHECK DISABLED for four seconds and then sends the Activity Check Disabled message to the central station. User Menu XTLplus User Guide... -
Page 26: Sensor Reset
2. Enter a Favorite number from 1-20. Pressing CMD activates The system output names and numbers are located in the System the Favorite. Setup section at the back of this guide. XTLplus User Guide User Menu... -
Page 27: Z-Wave Setup
Note: A maximum of 140 Z-Wave devices can be added to the system. When the maximum number of devices have been added, the keypad displays ZWAVE TABLE FULL and no additional Z-Wave devices may be added without removing some existing devices. User Menu XTLplus User Guide... - Page 28 2. Press CMD until ZWAVE SETUP? displays. the program button on the Z-Wave device, the device 3. Press any select key or area. The keypad displays ADD LIST name and REMOVED is displayed to indicate the Z-Wave REMOVE. XTLplus User Guide User Menu...
- Page 29 If the Favorite is already assigned, you may change the name or press the back arrow and enter a new number. 6. Press any select key or area and a cursor displays. Enter a User Menu XTLplus User Guide...
- Page 30 6. Press any select key or area and the keypad displays CMD key. FAN SETTING:. Note: Z-Wave devices are displayed by device type; Lights first, 7. Press any select key or area and ON AUTO displays. Press the select key or area under the desired new setting to change. XTLplus User Guide User Menu...
- Page 31 (device type and number). A 16-character name may be assigned to the Z-Wave devices after the transfer is complete. When the transfer is complete the screen will display ZWAVE SETUP?. User Menu XTLplus User Guide...
- Page 32 YES and the panel will search for the Wi-Fi network router attempting to pair. Press NO and WPS LIST MANUAL displays. List Access the User Menu. Press CMD until WIFI SETUP? displays. Press any select key or area. The keypad displays WPS LIST MANUAL. XTLplus User Guide User Menu...
-
Page 33: Bypass Zones
User Code Level: Master or Standard. Introduction or Entering User Names in Appendix C. Function: Allows you to bypass a zone prior to arming the system. Note: When an SSID (Wi-Fi Network name) is entered for the first Bypassing is usually done when a zone cannot be restored to normal User Menu XTLplus User Guide... -
Page 34: Zone Monitor (Chime)
This initiates the Zone Monitor operation for all Exit zones in an Area system or all zones assigned to the perimeter in a Home/ Sleep/Away or All/Perimeter system. The keypad displays MONITOR ON and chimes or displays MONITOR OFF and no tone is sounded. XTLplus User Guide User Menu... -
Page 35: Using The Zone Monitor Function
Zone Monitor mode. This allows you to open and then close each protected door and window while listening for the keypad to beep confirming its operation. See Zone Monitor. User Menu XTLplus User Guide... -
Page 36: User Codes
User Name John Smith Bypass Zones Authority Level Master Zone Monitor User Number - The XTLplus Series panel supports 99 users. Each System Test user is numbered from 1 to 99. This number identifies them to the User Codes system and can be transmitted to the central station (if your system Schedules is monitored) when they arm or disarm the system. - Page 37 The Arm Only user code can bypass zones not in a normal next displays MASTER? NO YES condition at the time of arming. Refer to steps 9 and 10 in the Adding User Codes section User Menu XTLplus User Guide...
-
Page 38: Schedules
Favorite schedules allow a user to set up schedules for their existing Z-Wave favorites. Note: This option is only availble for XTL+Z and XTL+WZ panels. Sunrise/Sunset schedules use local weather information to stay XTLplus User Guide User Menu... -
Page 39: Extending Schedules
Function: This option allows users to extend today's programmed The keypad displays PRM EXT OUT FAV. Select FAV. closing time schedule. Enter the favorite number and press CMD. Extending a Closing Schedule The screen displays SUN MON TUE WED. Press the CMD key User Menu XTLplus User Guide... -
Page 40: Output Schedules
6 AM you would enter a 0 + 6 + 0 + 0 and Select AM. For 11 PM you would enter a 1 + 1 + 0 + 0 and Select PM. XTLplus User Guide User Menu... -
Page 41: Time And Date
11. Select SUNRISE or SUNSET and then use the select keys or areas below the - and + to set an offset time. Choose from 5, 10, 15, 30, 45, or 60 minutes before or after sunrise or sunset. 12. Press CMD to save the schedule. User Menu XTLplus User Guide... -
Page 42: Display Events
REQUEST SERVICE? displays. After the Request for Service report is sent, the keypad displays REQUEST MADE for four seconds. If there is a problem with the telephone line connected to the system, you must contact our service department directly for assistance. XTLplus User Guide User Menu... -
Page 43: System Setup
This System Setup section is provided to allow you to track the Your system may be divided into six separate areas, each area can current status of programmable options on your XTLplus Series have a name or description that displays at the keypad. This can help system. -
Page 44: Z-Wave Device Name
29 ___________________________________________________ ___________________________________________________ ___________________________________________________ 30 ___________________________________________________ 31 ___________________________________________________ ___________________________________________________ ___________________________________________________ 32 ___________________________________________________ 33 ___________________________________________________ ___________________________________________________ ___________________________________________________ 34 ___________________________________________________ 35 ___________________________________________________ ___________________________________________________ ___________________________________________________ 36 ___________________________________________________ 37 ___________________________________________________ ___________________________________________________ ___________________________________________________ 38 ___________________________________________________ 39 ___________________________________________________ ___________________________________________________ ___________________________________________________ 40 ___________________________________________________ XTLplus User Guide System Setup... -
Page 45: Favorite List
_________________ _________________________________________________________________________________ ___________ _________________ _________________________________________________________________________________ ___________ _________________ _________________________________________________________________________________ ___________ _________________ _________________________________________________________________________________ ___________ _________________ _________________________________________________________________________________ ___________ _________________ _________________________________________________________________________________ ___________ _________________ _________________________________________________________________________________ ___________ _________________ _________________________________________________________________________________ ___________ _________________ _________________________________________________________________________________ ___________ _________________ _________________________________________________________________________________ ___________ _________________ _________________________________________________________________________________ ___________ _________________ _________________________________________________________________________________ System Setup XTLplus User Guide... -
Page 46: Key Fob Button Programming
User Codes Enter the user name assigned to each key fob and the button The XTLplus Series system provides 30 user codes you can program action programmed for each button in the table below. Refer to for individual users. As you add new users or change current user the Introduction and Appendix B for more information. - Page 47 1 2 3 4 5 6 * Master (MST) Standard (STD) 1 2 3 4 5 6 (Photocopy this page before using.) 1 2 3 4 5 6 1 2 3 4 5 6 Circle Your Selections System Setup XTLplus User Guide...
-
Page 48: About The Display Events Section
100 events are reached, any new event received clears the oldest Note: You may sometimes see the user as SWG. This is short for event from the list. Swinger Bypass which is an automatic function that allows the system to bypass a zone. XTLplus User Guide Appendix A... -
Page 49: Zone Event Displays
11:41A 10/17 US:19 BY US:12 User Code Event Types - There are three event types you may see here: ADD - User added DEL - User deleted CHG - User code or authority level was changed. Appendix A XTLplus User Guide... -
Page 50: Supervisory Event Displays
October 17. AC POWER RST - Restore System Monitor Event Types - There are two event types: TBL - Trouble RST - Restore System Monitor Event Names - There are two system monitors: AC POWER BATTERY XTLplus User Guide Appendix A... -
Page 51: 1100 Series Wireless Description
Duration Description 2.0 Seconds All System On Green 2.0 Seconds All System Off System On Green/Red 2.0 Seconds (Some Areas Armed) When a button is pressed that is not programmed, the LED does not operate. Appendix B XTLplus User Guide... -
Page 52: User's Guide
User’s Guide This section of the user’s guide provides information on using the XTLplus Series card read capability if enabled for your system. The card reader is located under the keypad logo. The keypad displays for All/Perimeter or Home/Away operation are dependent on how your keypad was programmed by your alarm dealer. - Page 53 See Arming and Disarming above and on the previous page. Using the access reader for user menu access You can also use a card read to access the User Menu when MENU? NO YES displays. Appendix C XTLplus User Guide...
-
Page 54: Entering User Names
Pressing the 9 key followed * (asterisk), and a # (pound sign). by the select key for the desired letter twice provides the lower case letters y, z, :, or ;. For example: Bob Smith XTLplus User Guide Appendix C... -
Page 55: Cell Phone Message User's Guide
After programming is completed, you will receive a welcome message text from the panel. Write down the phone number that Your XTLplus Series security system’s reporting capability can the message comes from. This will be the number you use to text be used to send reports to a cell phone number. - Page 56 8, you would text: TURN ON FRONT DIMMER 8. 3. T o turn a specific light off, text TURN OFF followed by the light name. For example, to turn Bedroom Light off, you would text: TURN OFF BEDROOM LIGHT. XTLplus User Guide Appendix D...
- Page 57 Allows you to activate a Favorite of Z-Wave compatible devices. • To activate a Favorite, text ACTIVATE followed by the Favorite name. For example, to activate the Favorite named House Lights, you would text: ACTIVATE HOUSE LIGHTS. Appendix D XTLplus User Guide...
-
Page 58: Subscribe To Text Messages
4. Text the word SUBSCRIBE to show the current subscription status and the available subscription options. XTLplus User Guide Appendix D... -
Page 59: Common Keypad Displays
Only one keypad at a time can access Z-Wave Setup. If a The user must exit Z-Wave Setup in one keypad before ZWAVE BUSY user attempts to access the menu from a second keypad accessing it in a second keypad. Z-WAVE BUSY will be displayed. Appendix D XTLplus User Guide... - Page 60 XTLplus User Guide...
- Page 61 Tones 6 Wireless Jamming 46 Changing User codes 33 Types 3 Zone Activity check 44 Check-in Report to Pager 19, 21 User Menu 1 Zone Bypass 44 COMMAND 22, 23, 24, 25, 26, 27, 28, 29, 36 Index XTLplus User Guide...
- Page 62 Resetting the Sensors 19, 22 User Check-In Event Display 45 User Codes 32 Schedules Authority Levels 32 Extending 35 Change Event Display 45 Permanent 35 Changing 33 Security Command™ Keypad 1 Deleting 33 Displays 7 Names 32, 50 XTLplus User Guide Index...
-
Page 63: Quick Reference Wallet Cards
Quick Reference Wallet Cards Quick Reference Wallet Cards Text Messaging Quick Commands MyAccess™ Text Messaging Quick Commands Panel Phone Number: ________________________ Panel Phone Number: _______________________ Text For this action Text For this action HELP List of text commands HELP List of text commands ARM, AWAY, ALL Arm all areas of your system ARM, AWAY, ALL... - Page 64 1. Call the panel phone number. The panel answers and sounds one Text For this action short tone. OFF (Output name or #) Turns the Output specified to OFF 2. Enter your code within eight seconds. One beep means the code is MOMENTARY (Output name or #) Turns the Output specified to MOMENTARY good.
- Page 68 LT-1442 1.01 17375...
Need help?
Do you have a question about the XTLplus and is the answer not in the manual?
Questions and answers