Table of Contents
Advertisement
Quick Links
Installation and Setup Guide
EMC CloudBoost 100
Version 2.0
System Installation and Setup Guide
P/N 302-002-468
REV. 01
November 2015
appliance....................................................................................... 2
documentation...........................................................................................2
needed...................................................................................... 3
information.................................................................................................. 4
system.......................................................................................5
system................................................................................................12
brackets........................................................................................ 12
bezel..................................................................................................... 19
cables........................................................................................ 20
controller................................................................................... 20
rack................................................................................. 16
(CMA)............................................................. 18
CloudBoost............................................................ 20
appliance.....................................22
sizing....................................................................... 26
Advertisement
Table of Contents

Related Manuals for EMC CloudBoost 100


Summary of Contents for EMC CloudBoost 100
-
Page 1: Table Of Contents
Installation and Setup Guide EMC CloudBoost 100 Version 2.0 System Installation and Setup Guide P/N 302-002-468 REV. 01 November 2015 CloudBoost 100 appliance..................2 Related documentation...................2 Tools and supplies needed..................3 Safety information....................4 Description of the system..................5 Unpack the system....................12... -
Page 2: Cloudboost 100 Appliance
The CloudBoost 100 appliance arrives with the operating system and all software installed and ready to deploy. After you register the CloudBoost 100 appliance, you can look for system updates in the EMC Cloud Portal. For information about updating CloudBoost, see any of the integration guides. -
Page 3: Tools And Supplies Needed
System Installation and Setup Guide Compatibility Documents, for guides that show which EMC and third-party components are compatible. Where to go for more information Table 1 Additional resources For information about: Go to https://support.emc.com/ How to configure and administer CloudBoost The integration guide appropriate for your software release and integrated system. -
Page 4: Safety Information
A faulty or failed fan module should be replaced as soon as possible. A faulty or failed power supply module must be replaced within 24 hours. EMC systems are heavy. Use two people or a mechanical lift to move any system. To comply with applicable safety, emission, and thermal requirements, covers must not be removed and all bays must be fitted with plug-in modules. -
Page 5: Description Of The System
LpAm, is 56.4 dB. (Declared noise emission per ISO 9296.) Storage capacity The table lists the capacities of the CloudBoost 100 system. EMC system internal indexes and other product components use variable amounts of storage, depending on Description of the system... -
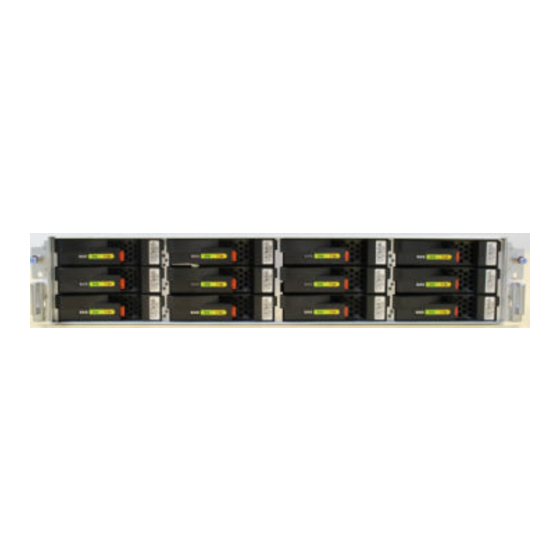
Page 6: Front Panel
Note EMC system commands compute and display amounts of disk space or data as decimal multiples of certain powers of two (2 , and so forth). For example, 7 GiB of disk space = 7 x 2 bytes = 7 x 1,073,741,824 bytes. -
Page 7: Disk Drives
System Installation and Setup Guide Figure 2 Disk and system LEDs 1. System fault LED (square shaped). 2. System power LED (square shaped). 3. Disk drive LEDs (triangular shaped). Table 4 Indicator states Part State System fault Normally unlit. Amber indicates fault. System power Steady blue indicates normal power. -
Page 8: Power Supply Units
LEDs (shown in the photo) that indicates the following states: AC LED (top): Glows green when AC input is good. DC LED (middle): Glows green when DC output is good. Symbol “!” (lower): Glows solid amber for fault or attention. EMC CloudBoost 100 2.0 Installation and Setup Guide... - Page 9 System Installation and Setup Guide Figure 5 Power supply unit LEDs Onboard interfaces and LEDs Figure 6 Onboard interfaces and LEDs 1. Serial number label. 2. SP power LED (top); SP service LED (bottom). 3. Dual-port 10GBaseT. 4. Quad-port Gigabit Ethernet. 5.
- Page 10 Internal system components The photo shows the system with the storage processor (SP) module removed from the chassis. The top of the photo shows the rear of the system. EMC CloudBoost 100 2.0 Installation and Setup Guide...
-
Page 11: Cooling Fans
DIMMs, and I/O modules. A system can run with one fan module faulted. Figure 8 Top view of SP module with air ducts removed DIMM modules CloudBoost 100 systems can contain either 4 x 8 GB or 8 x 8 GB memory DIMMs. Internal system components... -
Page 12: Unpack The System
3. Remove the controller and bezel from the shipping packages. Install the rack brackets CloudBoost 100 systems are installed into racks using the rack bracket hardware. Bracket hardware The rack-mounting kit is compatible with racks that have front-to-rear post spacing between 18 inches and 36 inches. - Page 13 Before you begin Note Do not hold the bracket assembly in a vertical position as the parts may separate. The CloudBoost 100 system is two rack units (RU) tall. Make sure the location in the rack fits the product. Procedure 1.
- Page 14 Figure 13 Remove front screw caps 2. As needed, select the bracket marked right or left. Orientation assumes you are facing the front of the rack. The rear of the bracket contains an adjustable piece. EMC CloudBoost 100 2.0 Installation and Setup Guide...
- Page 15 System Installation and Setup Guide Figure 14 Rack bracket 1. Front. 2. Back. 3. From the rear of the system, hold the bracket against the inside of the rack posts. Align the rear guide pin and slide the bracket towards the front. CAUTION If the bracket is mounted in holes that are not vertically aligned from front to back, the bracket may be damaged and mounting will not be secure.
-
Page 16: Install The System In The Rack
3. Carefully slide the chassis all the way into the rack. 4. At the front, attach the system to each installed bracket using the two captive screws on the front of the system. EMC CloudBoost 100 2.0 Installation and Setup Guide... - Page 17 System Installation and Setup Guide Figure 16 Left captive screw Install the system in the rack...
-
Page 18: Install The Cable Management Arm (Cma)
2. The blue-colored plunger button should click into place, locking the CMA bracket to the rail. 3. To adjust the CMA position up or down, pull on the orange latches and pull up or down on the arm as needed. EMC CloudBoost 100 2.0 Installation and Setup Guide... -
Page 19: Install The Bezel
System Installation and Setup Guide Figure 19 Adjusting the position of the CMA 4. Organize the cables as needed. Figure 20 Cables organized on CMA Install the bezel Procedure 1. Depress the two handhold positions. 2. Push the bezel into place on the front of the chassis, making sure the handhold locks click into place. -
Page 20: Connecting Data Cables
Register the CloudBoost hostname/IP address in DNS. The hostname/IP address must be statically registered in DNS regardless of any mappings created by DHCP. Failure to do this may result in indeterministic service unavailability and downtime. EMC CloudBoost 100 2.0 Installation and Setup Guide... - Page 21 System Installation and Setup Guide Open the necessary ports. For more information, see Firewall port requirements page 21. By default, CloudBoost uses a self-signed SSL certificate. But if you intend to use a publicly signed certificate, you should plan and prepare your SSL Certificate usage for testing and production environments.
-
Page 22: Configuring Network Settings For A Cloudboost Appliance
Amazon because of the more limited configuration options. Option Description Physical Connect to the physical appliance with a serial cable. appliance vSphere In the vSphere client, right-click VM Open Console. > client EMC CloudBoost 100 2.0 Installation and Setup Guide... - Page 23 System Installation and Setup Guide Option Description a. Log in to EC2, select the CloudBoost appliance, and then click Connect. b. In the Connect To Your Instance wizard, choose whether to connect with an SSH client or from the browser, and then follow the instructions.
- Page 24 IP address netmask netmask address For example, net config eth0 10.5.96.123 netmask 0.0.0.0 For CloudBoost 2.0: ip-address static <ip_address> netmask <netmask> gateway <gateway> 7. For CloudBoost 2.1, manually add the gateway by running these commands. EMC CloudBoost 100 2.0 Installation and Setup Guide...
- Page 25 System Installation and Setup Guide If you have multiple networks, you must also add multiple routes to the gateways. route add IP address netmask netmask address gw gateway address For example, route add 0.0.0.0 netmask 0.0.0.0 gw 10.5.96.1 8. To manually set the DNS, type these commands: dns set primary primary IP address dns set secondary secondary IP address dns set tertiary tertiary IP address...
-
Page 26: Cloudboost Appliance Cache Sizing
Results After you have verified the system's basic networking settings, you can register the appliance and then configure CloudBoost by using the EMC Cloud Portal. Note Other commands are also available from the command line. To get help, type... - Page 27 System Installation and Setup Guide Note If higher ingestion speeds occur when connecting directly to the cloud store, do not use the cache. The backups might exceed the capacity of the cache. Table 8 ESX site cache minimum requirements Work Site Memory Metadata Site...
- Page 28 FITNESS FOR A PARTICULAR PURPOSE. USE, COPYING, AND DISTRIBUTION OF ANY DELL SOFTWARE DESCRIBED IN THIS PUBLICATION REQUIRES AN APPLICABLE SOFTWARE LICENSE. Dell, EMC, and other trademarks are trademarks of Dell Inc. or its subsidiaries. Other trademarks may be the property of their respective owners. Published in the USA.
Need help?
Do you have a question about the CloudBoost 100 and is the answer not in the manual?
Questions and answers