
Subscribe to Our Youtube Channel
Related Manuals for FireClass 500


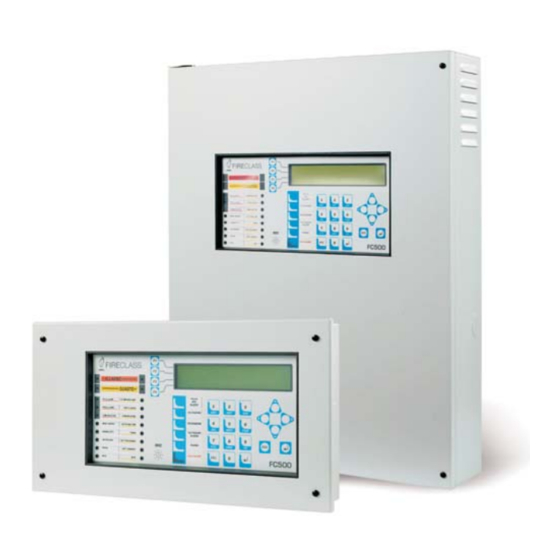
Summary of Contents for FireClass 500
- Page 1 FireClass 500 FIRECLASS Addressable Fire Control Panels Installer Manual www.fireclass.net...
- Page 2 Durability of operational reliability, humidity resistance Passed The Declaration of Performance (DoP) can be found on Performance of transmission Passed the product webpage at: www.fireclass.net. Operational reliability Passed Durability of operational reliability, Temperature resistance Passed Durability of operational reliability, Vibration resistance...
-
Page 3: Table Of Contents
TABLE of CONTENTS INTRODUCTION PC PROGRAMMING FC500 Fire Contro Panel Introduction Accessory Items Installation Description Select language Input Software window Look Outputs Control panel connections Operating Features Main window Interface Icons description Access to Signalling and Commands File Power Supply Communication Options Database... - Page 4 FC430SAB/SAM - Sounder Base Address PROGRAMMING FROM THE PANEL Modules Using the system FC430SB - Loop Low Power Sounder Base L1= First Level: this level allows the Reading 4B-I - Isolator Base Parameters ONLY: FC490ST - Loop Service Tool L2= Second Level or USER Level: access to this FC410BDM - Beam Detector Module level requires entry of the USER PIN (Access Level FC410CIM - Contact Input Module...
-
Page 5: Introduction
250 devices max every Loop In any case, FC500 Fire control panel cannot sup- port more than 2000 devices (500 devices for every 30 devices max on the conventional line couple of Loop) (up to 2000 m (Loop) with shielded cable 2x2.5). -
Page 6: Operating Features
n Operating Features During Silence status (Silence LED glowing), it is pos- sible to use the Silence key to release the Silenceable Warning The FC500 control panel can be program- outputs, and the Reset key to restore standby status. med to provide WARNINGS or PREALARMS status be- fore ALARM status. - Page 7 Switching 1 OS3 short " Switching Fault Switching 2 OS4 short " Switching 2 Fault OS5 short " he Control panel is NOT Mains fault powered from the Mains OS6 short " The Control panel batteries OS7 short " Battery charger not working properly OS8 short "...
-
Page 8: Interface
Disabled This Control panel can disable: Access Level 2 (L2) Operating the system (PIN Code the devices on the Loop (input and Output devices), entered): PIN Code Users can operate the system. the bell outputs, the software zones; (User level) the network devices (Repeaters or Slave control pa- nels). -
Page 9: Parts Identification
PARTS IDENTIFICATION The status LED ONLY the two FAULT LEDs slow blinking indi- cate a FAULT event in memory. The following section describes how the Control panel LEDs operate. During standby status, ONLY GREEN Mains LED and the Day mode LED (if the con- trol panel is in Day mode) should be On (glowing) . - Page 10 FIRE FAULT LAMP MORE ALARMS LOST DEVICE BUZZ TEST PRE-ALARM LOGIC UNIT SILENCE COMMUNICATOR COMMUNICATOR INVESTIGATE DAY MODE NAC FIRE OUTPUT DISABLED HEARTH SILENCE BUZZER SILENCE LOW BATTERY RESET TEST NO BATTERY EVACUATE FC500 MAINS MAINS Figure 1 Front view of the FC510, FC520 control panel (a), and of Repeater FC500REP (b)
- Page 11 FIRE FAULT LAMP MORE ALARMS LOST DEVICE BUZZ TEST PRE-ALARM LOGIC UNIT SILENCE COMMUNICATOR COMMUNICATOR INVESTIGATE DAY MODE NAC FIRE OUTPUT SILENCE DISABLED HEARTH BUZZER SILENCE LOW BATTERY RESET NO BATTERY TEST EVACUATE FC500 MAINS MAINS PARTS IDENTIFICATION...
- Page 12 RS485 Figure 2 Configuration of the FC510, FC520 control panel.
- Page 13 + L2 - + L2 - + L1 - + L1 - NO C NO C LEFT RIGHT LEFT RIGHT RS485 AUX-RES FIRE FAULT BAT2 BAT1 PARTS IDENTIFICATION...
-
Page 14: Description Of Parts
Description of Parts Description Flat cable: for the Display module board con- This section describes the components of the FC500 nection with User interface board serie Control panels, and FC500REP Repeater. Jack for the connection between display mo- dule and User interface board Unless otherwise stated, the numbers in boldface in this Flat cable: for the User interface board con- Manual refer to the Tables ands Diagrams in this sec-... - Page 15 Figure 4 FC500IP board connection with the motherboard via the flat cable. Description Description Jack for the connection between the User interfa- Connection FC500IP with PCLINK cable,see ce to Repeater (RS485 interface accessory item) note*(2) FC500PS Telecom Module Power FC500IP,see note*(2) Loudspeaker FC500IP board Repeater earth connection (nut 7a)
- Page 16 *(2) If you connect the FC500 IP board with the mot- Connection FC500IP with Flat cable, see herboard via flat cable (26c) (Fig. 4) the Digital Com- note*(2) municator function will be activated. If the Digital Mains indicator LED (switching power supply) Communicator function only is requested Switching-power-supply anchor hole...
-
Page 17: Leds And Keys Labels
LEDs and KEYs Labels To insert the LED and Keys Labels (supplied) in the User Interface (see Figure 2, parts 13 and 14) work through the following steps: 1) Remove the screws 2 and open the Control panel or Repeater FC500REP (see Figure 3). 2) Corresponding the A or B (in the overlay) insert the relative LED and KEYS Labels (see Figure 1, parts 3 and 4);... -
Page 18: Description Of The Control Keys
Description of the Control keys Test, Silence Buzzer and Evacuate Control keys ONLY can be activated without password (access level L1), all the others Control keys can be activa- ted with password (access level L2 and L3) Lamp/Buzz/Test See table 4 Silence See table 4 Investigate See table 4 Silence Buzzer See table 4... -
Page 19: Installation
INSTALLATION Installation of this system must be carried out 4. Pull the wires through the chased wire entry 21 then, strictly in accordance with the instructions in using the anchor screws, secure the backplate to the this section, and in compliance with the local wall. -
Page 20: Description Of The Terminals
Conventional Zone modules, Manual callpo- sion devices. ints, Output modules and Sounders). In all the control panel supports up to 500 devices with 2 Loop. +BAT2- Terminals to connect the batteries inside the FC500 control panel (see Figure2). LC Conventional Input Line - Supervised and Bypassable (Disabled) —... -
Page 21: The System Wiring
32 detectors. An insulator should be fitted at least every 32 detectors 27,6V FireClass LOAD 1N4007 SUPERVISED Figure 8 OSx Outputs connecting... -
Page 22: Connecting Conventional Devices
LEFT RIGHT LEFT RIGHT LEFT RIGHT LEFT RIGHT FireClass FireClass + L2 -+ L2 - + L1 - + L1 - + L2 - + L2 - + L1 - + L1 - Figure 9 1) Wiring diagram of a 2-wire connection - 2) Wiring diagram of a 4-wire connection: a) Insulators; b) Com- patible analogue devices (Fire detector, Input modules, Output modules, Conventional Zone modules, Manual callpo- ints);... -
Page 23: Connecting Output Devices
RS485 RS485 RS485 RS485 Connect to the earth connector FC500REP FC500REP FC500 Slave FC500 Slave Figure 11 Wiring diagram of two FC500REP Repeaters and two FC500 Slave Control panels connected to the RS485 n Connecting Repeater and Slave Control panel When several Control panels are in the system, the Re- An example of how to connect two FC500REP repea- peaters supply Load can be shared between these... -
Page 24: Connecting A Power Supply
Alarm status until In the event of Mains failure, the: the RESET button is pressed. Ø GREEN Mains LED will turn OFF Ø AMBER Mains LED will turn ON FireClass – NC NO 1N4002 1N4002 +N –L –A... -
Page 25: Thermal Probe
The Control panel will monitor the batteries at all times, DO NOT allow the power cable to cross over ot- (refer to Static Test and Dynamic Test). her wiring (see Figure 19a). The power cable must be routed as per Figure 19c and held Static Test The Static Test monitors the battery char- firmly in place by a cable tie (see Figure 19b). - Page 26 RS485 + L2 - + L2 - + L1 - + L1 - NO C NO C LEFT RIGHT LEFT RIGHT RS485 AUX-RES FIRE FAULT BAT2 BAT1 CONNECTION BETWEEN CONTROL PANEL BACKPLATE and 12V 38Ah BATTERIES BACKPLATE -Accessory Item- Figure 16 Control Panel and 38Ah Batteries metal Box connection (accessory item). Addressable Fire Control Panels FC500...
-
Page 27: Installing The 38Ah Battery Metal Box
Installing the 38Ah battery metal Box Maintenance Work carefully through the following steps (see Figure The following operations must be carried out regularly. 16). A Using a damp cloth (DO NOT USE SOLVENTS OF ANY KIND), remove dust from the Control panel case. 1. - Page 28 B– B– Figure 19 DB9 Female 7- wire cable DB9 Female Connector shield Connector DB9 Female 7- wire cable DB25 Female Connector shield Connector Figure 18 Wiring diagram for the serial link between the Control panel and PC Addressable Fire Control Panels FC500...
-
Page 29: Pc Programming
PC PROGRAMMING Control panel connections You can program this system from the Control panel or from a computer, using the FireClass 500 Console ap- If you are using the Supervisory, Management, Downlo- plication, inside the FireClass Suite. ading and Log Management functions, the control panel This section describes how to program the system from a computer. -
Page 30: Icons Description
Figure 21 New panel window(Type of control panel) munication, Options, DataBase, Mode setup and Help menus, in the top left-hand corner of Main window. n Icons description Click-on this icon under "Panel 1" the window "New panel" will open, Figure 21. Here, you can choose the Figure 23 Firmware Upgrade window type of control panel, the Firmware Release, the control panel name and the possible address if more control... -
Page 31: Communication
Click on Help option; a technical support file will be opened. This application allows you the learning and Close Click-on "Close", the selected customer will be the use of FireClass 500 Console software. closed. Exit Click-on "Exit", the FC500 software will be closed. -
Page 32: Parameters Detectors Programming
Min.Static Max.Static Typical application Max. Application Detector Response Response Temperature Temperature Class Temperature Temperature °C °C °C °C Table 6 Detector classification Temperature - Detector shall conform to one or more of the following classes: A1, A2, B, C, D, E, F o G . Manufacturers may optionally give additional information concerning the type of response exhi- bited by the detector, by adding the suffix S or R to the above classes. -
Page 33: Input Modules Programming
n Input modules programming Ø Enable: a tick [ indicates if the detector is enable. Click-on an entered Input Modules, the relative pro- Ø LED Blinking: a tick [ indicates if the LED de- gramming window will shown as per the following de- tector is enable or disable. -
Page 34: Manual Call Point Programming Parameters
see the customized Manaul), the relative programming The procedure can be triggered via software or panel window will shown. (see page 47) Click-on yellow bar to open or close the relative Click on Zone number to see which devices are ena- section of parameters programming bled on that zone. -
Page 35: General Options Programming
Ø Enable: a tick [ indicates if the zone is ena- ble. Ø Label: this is for the editable Output-label. The system will use the label as the Output identi- fier. Program as NAC FIRE If this option is ticked, the NAC1 output is transformed into a NACFIRE output (it is activated in the event of an alarm and cannot be programmed). -
Page 36: Pstn Interface
Prealarm duration: an input device programmed with The Slave control panel address can be inserted Prealarm time will generate ALARM status when the from the User interface of the same control panel; the Repeater address can be inserted from the pa- prealarm time elapses. -
Page 37: Ip Interface
IP interface Battery Calculation For an explanation of the various commands and pro- The Battery calculation window allows you to see (Figu- gramming procedures, please refer to the dedicated re 31): Ø the FireClass500 Loads FC500IP interface manual. Ø the Loop1,Loop 2 devices loads CLOCK in the condition of Normal Load and Alarm Loads (percentage of devices in alarm status), when the Ma-... - Page 38 INSER WRONG Lev. 3 INSTALLER PASSWORD PASSWORD SELECT WHAT TO PROGAM AUTO SYSTEM DEFAULT DEVICE SW ZONE OUPUT TELECOM OPTION L3 PWD ENROLL EEEE CHANGE CONFIRM INSTALLER PAGE PASSWORD CHOOSE PANEL CHOOSE LOOP DEFAULT DATA FORCED SHOW DIFFERENCES SELECT SELECT SELECT RESULT SELECT...
- Page 39 MAIN PAGE ROGRAM ANALYZE VIEW LOG DIASABLE VIEW LIST MODIFY WRONG INSERT USER Lev. 2 WRONG INSERT USER PASSWORD PASSWORD Lev. 2 PASSWORD PASSWORD SELECT WHAT TO BE DISABLED/ENABLED SELECT WHAT MODIFY LIST DEVICE SW ZONE TELECOM CONV. ZONE OUTPUT CHANGE PANEL NAME CLEAR LOG...
-
Page 40: User Mode
The wire database data is stored in the file "Wire- sList.fcw" inside the FireClass 500 Console Lan- guage folder. The database can be moved from one system to another. The Console searchs for the wire database while starting, so, if the user can- not access a moved database, simply close the software, and start it again. -
Page 41: Programming From The Panel
PROGRAMMING FROM THE PANEL n L3= Third Level or INSTALLER Level: access to Read through the following section carefully, in order to get an overall view of how to use the User interface Pro- this level requires entry of the INSTALLER PIN gramming (Main panel) of control panel. -
Page 42: Main Page - Accessing The System
Main Page - Accessing the system After this Control panel has been installed and powered from the Mains, the main page of the display shows as per Figure 33. In this phase: Alphanumeric keypad No function is related to Alphanumeric keypad. Cursor keys The UP Key: increase the brightness of LCD display;... -
Page 43: Insert Password
Insert password If a Password is wrong or missing, the following screen will appear: After the F1 Key is pressed the Figure 34 will shown; in this phase: Master Panel lev.3 : PROGRAM the default installer code is 00000: every digit will be INSTALLER hidden by *(star) symbol. -
Page 44: Programming Page
Programming Page 1 KEY- Auto Enrolling (Autolearning From Main page, use the F1 Key to select the Program- The Auto option from the PROGRAMMING menu will ming phase. Insert the password (installer code) and allow you to enrol the loop devices and the RS485 net- then the page is shown in Figure 36: work devices automatically. -
Page 45: Key - Insert-Modify Password
0 KEY - insert-Modify password In both cases: Auto OK or NOT, the Loop details will shown (see Figure 37c). In this phase (see figure 38): In this phase: Installer Code at Default is 00000; every digit will be Cursor Keys The UP key: shows information relating masked by * symbol. -
Page 46: Key- Restore Default
9 KEY- Restore Default KEY 2 -Device The Restore Default option from the PROGRAMMING The Device command in the PROGRAMMING menu menu will allow you to restore default setting. activates the screen used to select and program the de- vices on the loops; Use the 9 Key to select Restore Default, the display The Alphanumeric keypad The Alphanumeric key- will show the Figure 39:... -
Page 47: Key 3- Sw Zone
KEY 3- SW zone Detector alarm verification (Smoke delay) For each zone, you can program the delayed activation The SW zone command in the PROGRAMMING menu of smoke detectors, according to the following schedule: activates the screen used to select and program the Software zone on the loops;... -
Page 48: Key- Output
4 KEY- OUTPUT NAC active on disablements The Outputs command in the PROGRAMMING menu The programming NAC Outputs can be activated on di- sablements of any part of the system. activates the output programming screen. If KEY 4 is used to select Output programming, you will be asked to select the output you wish to program;... -
Page 49: Key- Network
5 Key- Network FC500MFI programming Procedure At default, every FC500 Control panel is a Master Con- To program the module FC500MFI, do the following trol Panel disabled in the Network. from Programming menu (Network), press 5 key. If a control panel is already configured as "Master", In the programming page "Network"... -
Page 50: Key 6-Telecom
KEY 6-TELECOM KEY 7-OPTIONS The Telecom option in the PROGRAMMING menu ac- The term OPTIONs in the PROGRAMMING menu acti- tivates the transmission device programming page. If vates the DAY-NIGHT-AUT mode programming page. Key 6 is used to select Telecom device programming, If Key 7 is used to select Functioning mode, Figure 48 you will be taken to the Voice message recording/repla- will show:... -
Page 51: Key 8-System
KEY 8-SYSTEM the display will ask to insert a new address; the display of Figure 50 will be shown; in this phase: The option SYSTEM in the programming menu activa- Alphanumeric keypad Use the alphanumeric keypad tes the system language selection page. to insert the address of 1 digit. -
Page 52: Quick Start-Up Procedure
QUICK START-UP PROCEDURE The panel will start the enrolling procedure. At the end These procedure allows the quick start-up of the of this phase will be presented the result of the enrolling FC510/520 fire detection system. in terms of loop with devices connected (OK) or not (KO) and it will be possible view the details for each acti- When the loops are wired, electrically verified and all the devices have been programmed with their related... -
Page 53: Zones
FC430SAM: NOT active FC421CP: Call-point fully active FC410CIM: inputs style=C,NO FC410DIM: standard mode FC410BDM: standard mode FC410RIM NOT active All modules activation will generate panel ALARM n Zones No zone active n Panel outputs “NAC FIRE” (output EN54-2 type C) active on alarm event “FIRE”... -
Page 54: Accessory
The 4B Universal base is for use with the appropriate response according to the type of detector FC460/FC400/600 series of detectors. configured in Fire Class 500 Console. The mode of de- The base may be fixed directly to: Ø British (fixing centres 50mm) or European (fixing tector may be: Ø... -
Page 55: Fc410Li - Line Isolator Module
The type of alarm generated by the cal- uld be lost on a conventional non-addressable fire circuit. lpoint is configured in FireClass 500 Console. The FC410MIM - Mini Input Module FC421CP callpoint meets the requirements of EN54 Pt.11. -
Page 56: I - Isolator Base
For remote siting of detector configured in Fire Class 500 Console. the FIRERAY 50 an optional BTM800 Terminal Module can be used with 4 core cable. -
Page 57: Mp69-Duct Probe Unit
Beacons are designed to be driven from an FC410MIO or FC410RIM. FC500 control panel via the addressable loop. Tone, volume and flash rates are set in FireClass Console. MP69-Duct Probe Unit The sounder has four volume settings ‘High’ (90dB ±3), ‘Mid High’... -
Page 58: Fc410Qio Quad Input Output Module
FC410QRM Quad relay module from an FC501 control panel via the addressable loop. Tone, volume and flash rates are set in FireClass Console. The module provides four potential free relay changeo- The sounder has four volume settings ‘High’ (90dB ±3), ver outputs. -
Page 59: Quick Guide
QUICK GUIDE This quick guide is for installers with knowledge of the The following table shows the technical features of the control panels, and fire control panels in general. This Repeater FC500REP. chapter holds all the necessary installation details. REPEATER FC500REP Main voltage 27,6 V... - Page 60 [12V] 13,8 — on [M] terminal è negative Table 8 Terminals description © FireClass Tyco Fire & Security GmbH Victor von Bruns-Strasse 21 8212 Neuhausen am Rheinfall Switzerland Tel.: +41 (0)52 633 02 44 Fax: +41 (0)52 633 02 59 www.fireclass.net...
Need help?
Do you have a question about the 500 and is the answer not in the manual?
Questions and answers