Kirisun PT6500 Instruction Manual
Fm handheld transceiver
Hide thumbs
Also See for PT6500:
- Service manual (47 pages) ,
- User manual (30 pages) ,
- Instruction manual (20 pages)
Table of Contents
Advertisement
Quick Links
Advertisement
Table of Contents

Related Manuals for Kirisun PT6500


Summary of Contents for Kirisun PT6500
-
Page 1: Instruction Manual
INSTRUCTION MANUAL PT6500 FM HANDHELD TRANSCEIVER... - Page 2 INSTRUCTION MANUAL PT6500 FM HANDHELD TRANSCEIVER We are very grateful for your purchasing brand two- way radios produced by Kirisun Electronics (Shenzhen) Co., Ltd. two-way radio always incorporates the latest tech- nology, The quality and function of the two-way radio can meet your demands for reliable communication.
- Page 3 the areas where the government laws prohibit radio communication. Please don't expose the radio to direct sunlight for a long time; don't place the radio near any heating devices, either. Please don't put the radio in extremely dusty, moist or dabbling places;...
-
Page 4: Fcc Notice
This radio has been tested and complies with the FCC RF exposure limits for “Occupational Use Only”. In addition, your KIRISUN radio complies with the following Standards and Guidelines with regard to RF energy and electromagnetic energy levels and evaluation of such levels for... - Page 5 ALWAYS keep the antenna at least 2.5 cm (1 inch) away from the body when transmitting and only use the KIRISUN belt-clip which is listed in instructions when attaching the radio to your belt, etc., to ensure FCC RF exposure compliance requirements are not exceeded. To provide the recipients of your transmission the best sound quality, hold the antenna at least 5 cm (2 inches) from your mouth, and slightly off to one side.
- Page 6 Exposing the inside of the transceiver to water will result in serious damage to the transceiver. FCC CAUTION: Changes or modifications to this device, not expressly approved by KIRISUN, could void your authority to operate this transceiver under FCC regulations.
-
Page 7: Table Of Contents
UNPACKING AND CHECKING EQUIPMENT CONTENTS Unpack the transceiver carefully. We recommend that you Unpacking And Checking............. identify the items listed in the following table before discarding the Supplied Accessories ............. packing material. If any damage has occurred during shipment, Preparation................... please contact the dealer immediately . -
Page 8: Preparation
Notes: * The KB-36A Ni-MH battery/KB-36C Li-Ploy battery of Kirisun is adaptable with this radio. Do not cause short-circuit or throw the battery to the fire. * When you charge the battery the first time or after long time storage... -
Page 9: Installing The Antenna
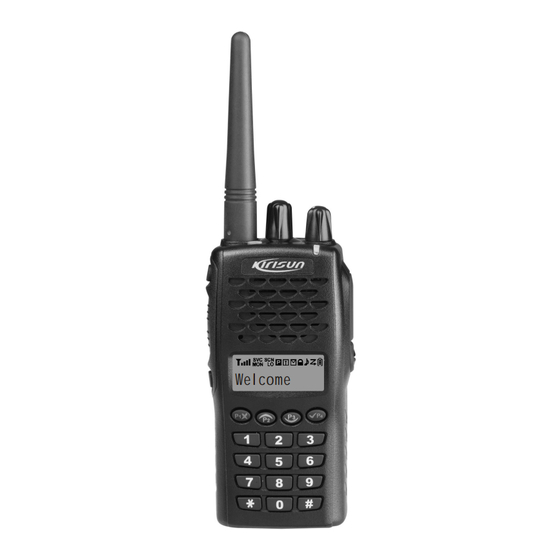
RADIO OVERVIEW INSTALLING THE ANTENNA Screw the antenna into the connector at the top of the transceiver by holding the Button of the antenna and turn it clockwise until secure. I N S T A L L I N G T H E O P T I O N A L SPEAKER/ MICROPHONE The functions of the components are as follows: A. -
Page 10: Basic Operation
BASIC OPERATION I. Button Return and delete button in the menu. J. Button 1.Switch On Select Button. Switch on the radio by turning the Power/Volume K. Button switch clockwise till a click is heard, then the radio Select Button. will be in the state of stand by and you will hear a L. - Page 11 Utilities 4. Make a Call Back Light Squelch Level Scan Power Level To make a call, press PTT , and speak in normal ON/OFF ON/OFF Level: 0~9 voice. Please keep your mouth 3~4 cm away from Key tone Scrambler Save Companding the microphone.
- Page 12 5. Change the power level with , then press The operations are as follows: confirm. Set scanning: 1. As shown: in CH 1 , press , then Utilities Set Companding is shown; 1 As shown: in CH 1 , press Utilities is shown.
- Page 13 1.As shown:in ,press Utilities is shown. Set call list 2.Press to enter select mode. 1 As shown: in CH 1 , press to enter select mode, 3.Press , and is shown. 2. Press , and Call is shown, 4.Press to select OFF or ON 3.
- Page 14 6. Key in the address code of the person you are calling, 1 As shown: in CH 1 , press to enter select mode, 7. Press to transmit the current contact list. 2. Press , and Ch Edit is shown, 3.
-
Page 15: Programmable Button Functions
5. Press to enter the wired clone, as shown Programming . Emergency Alert Back light (The two radios should be connected with each other by a clone cable.) Rptr/Talkaround Check the radio information Express select channel 1 Express select channel 2 1. - Page 16 you can select any scan list. Every scan list can scan any channels in 3. Press it a third time Zone 0 H will be shown. different zones (16 channels to the most). CHANNEL 1 Lone working Busy Channel Lockout (BCL) Press the button set as lone working to start lone working.
- Page 17 It can be set as: short press: Select squelch level, long press Battery power checking OFF. Display the battery power. 1. Press the programmable key once, Level will be shown, It can be set as: short press: battery power checking, long press OFF.
- Page 18 1. Press the key once to make a call (within the current channel), and 2. Press it again to stop the alert. will quit automatically after the call. Back light Adjust display contrast Turn on/OFF the back light. You can adjust the display contrast as per your need. It can be set as: short press: back light, long press OFF.
-
Page 19: Vox
Zone 0 TOT pre-warning: 2. Press it again to cancel channel lock, CHANNEL 1 will be shown. The pre-warning will sound before the TOT action. After the sound of the warning, the timer will take action when the Set man down transmitting time has gone beyond the limit. -
Page 20: User's Resolution
USER'S RESOLUTION Busy Channel Lockout (BCL) 2TONE signaling Busy Channel Lockout can prevent you from interfering other radios The dealer can set this function by programming. that using the same channel. There are 4 systems of which the parameters can be set, e.g.: the Press the PTT button when the channel is busy, the radio with BCL duration of the first and the second tone, the duration of the long tone function active will make warning sound and prohibit transmitting. -
Page 21: Transmit Beginning/Ending Signaling (Ptt Id)
content. transmit. B The CTCSS/DCS signaling of both users are not the If the PTT ID on the channel you select has been set with 5-Tone, same, set it with PC. 5-Tone signaling will be transmitted when making a call;or transmit C Beyond the efficient communication range. -
Page 22: Major Specifications
Major Specifications Status setting (by the dealer) Model PT6500 Model Serial No. (1) 136~174 (2) 400~470 A) Channel setting Frequency (3) 450~520 (5) 350~400 Channel Receiving Transmitting CTCSS/DCS CTCSS/DCS Power Band Scan frequency frequency decoding encoding width -ning Modulation 16K F3E/11K F3E... - Page 23 B) Optional function Side button2 2 1 Time-out timer TOT None 15~600 s 2 2 Squelch level Voice Reporting Selector Rptr/Talkaround 2 3 Battery saving Call1/2/3/4 Lone Working Auxiliary functions button setting: Man Down Side button1 Top button Scanning None None High/low Power Shift Voice Reporting Selector...
- Page 24 DECLARATION DECLARATION OF CONFORMITY OF CONFORMITY 1588 1313 We, Kirisun Electronics(Shenzhen) Co., Ltd. We, Kirisun Electronics(Shenzhen) Co., Ltd. 6/F, Bldg.H-2,East Industrial Zone Of Overseas 6/F, Bldg.H-2,East Industrial Zone Of Overseas Chinese Town,Shenzhen 518053, China Chinese Town,Shenzhen 518053, China Declare on our sole responsibility that this equipment complies with...
Need help?
Do you have a question about the PT6500 and is the answer not in the manual?
Questions and answers