Lightware MX2-8X8-HDMI20-AUDIO User Manual
Multimedia matrix switcher
Hide thumbs
Also See for MX2-8X8-HDMI20-AUDIO:
- User manual (88 pages) ,
- Quick start manual (2 pages) ,
- User manual (146 pages)
Table of Contents
Advertisement
Quick Links
Download this manual
See also:
User Manual
Advertisement
Table of Contents

Related Manuals for Lightware MX2-8X8-HDMI20-AUDIO


Summary of Contents for Lightware MX2-8X8-HDMI20-AUDIO
- Page 1 User’s Manual MX2-8X8-HDMI20-AUDIO Multimedia Matrix Switcher...
-
Page 2: Important Safety Instructions
MX2-8x8-HDMI20 series – User's Manual Important Safety Instructions Waste Electrical & Electronic Equipment Common Safety Symbols WEEE Class I Apparatus Construction. This marking shown on the product or its literature, This equipment must be used with a mains power system with a Symbol Description indicates that it should not be disposed with other... - Page 3 WARNING! Safety-related information which is highly recom- mended to read and keep in every case! Item Version Lightware Device Controller (LDC) software 1.17.1b3 ATTENTION! Useful information to perform a successful procedure; Lightware Device Updater (LDU) software 1.5.0b8 it is recommended to read.
-
Page 4: Table Of Contents
MX2-8x8-HDMI20 series – User's Manual Table of Contents 1. INTRODUCTION ...................6 6. USING LIGHTWARE DEVICE CONTROLLER ........19 7.2.7. View Crosspoint Size ..............34 7.2.8. View Router’s Health ..............34 1.1. Description ...................6 6.1. Install and Upgrade ..............19 7.2.9. Query Control Protocol (RS-232) ........... 34 1.2. Box Contents ................6... - Page 5 MX2-8x8-HDMI20 series – User's Manual 8.5.1. Query the Product Name ..............45 8.12. RS-232 Port Settings ..............52 8.5.2. Set the Device Label ............... 45 8.12.1. Protocol Setting ................52 8.5.3. Query the Serial Number ..............45 8.12.2. Baud Rate Setting ................. 52 8.5.4. Resetting the Matrix ...............
-
Page 6: Description
Dolby TrueHD, and DTS-HD Master Audio. Each input port has audio connectors for embedding analog audio into the HDMI stream. Thank You for choosing Lightware Matrix Routers. The MX2-8x8-HDMI20-Audio The matrix is compatible with the latest HDMI 2.0 Likewise, the audio connectors next to the output ports can provide is the first Lightware HDMI2.0 standalone matrix switcher that supports... -
Page 7: Introduction
Video Source Unique Front-to-Back Cooling Airflow Design 4Kx2K@60Hz 4:4:4 Audio amplifier MX2-8x8-HDMI20-Audio includes a groundbreaking new cooling design with front-to-back airflow. Inside the 4K@60 4:4:4 Signal Routing chassis, the airflow travels along guiding panes assuring that the most warm areas receive ample amount of cooling air volume. -
Page 8: Mounting Options
2. Installation MX2-8x8-HDMI20 series – User's Manual 2.1. Mounting Options INFO: The method is the same when the matrix would be mounted to a wall. The matrix can be mounted in several ways by the supplied two rack ears. -
Page 9: Installation
DESTINATIONS EDID Health O O U U T T P P U U T T L L O O C C K K MX2-8x8-HDMI20-Audio Presets CTRL RESET Compact HDMI 2.0 Matrix Switcher output port which is located next to the connected HDMI output port. -
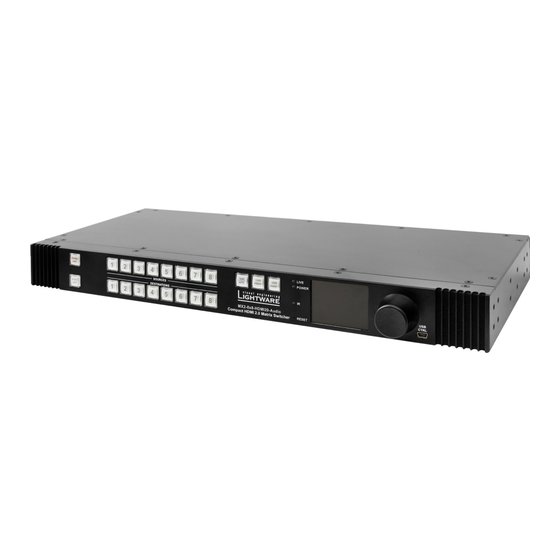
Page 10: Mx2-8X8-Hdmi20-Audio - Front View
LCD screen showing the most important settings and parameters in the front panel menu. Jog Dial Control Knob Easy setting and menu navigation by the jog dial control. Keep dial and click while getting feedback on the LCD. USB Control USB connector for local control functions (e.g. Lightware Device Controller software). -
Page 11: Product Overview
3. Product Overview MX2-8x8-HDMI20 series – User's Manual 3.2. MX2-8x8-HDMI20-Audio - Rear View RS-232 Port The 3-pole Phoenix connector is used for the local RS-232 serial connection. Compatible Plug Type Pin nr. Signal Ground Tx data Rx data Phoenix Combicon series (3.5mm pitch, 3-pole), type: MC 1.5/3-ST-3.5. - Page 12 3. Product Overview MX2-8x8-HDMI20 series – User's Manual 3.4. Port Diagram Embedder HDMI Crosspoint 8x8 De-embedder Video HDMI in HDMI out Converter Analog Analog Audio in Audio out Audio Options The outgoing HDMI signal can carry: ▪ The original audio of the HDMI input signal, or the Analog Audio signal coming from the 5-pole Phoenix input port.
-
Page 13: Operation Of Mx2-8X8-Hdmi20-Audio
4. Operation of MX2-8x8-HDMI20-Audio MX2-8x8-HDMI20 series – User's Manual 4.1. Powering on Sample drawing shows that Input 1 is currently connected to the Output 2, 3, and 5 ports. Connect the power cord to the AC input connector; the matrix is If every source, destination, and Take buttons are unlit (the unit is in immediately powered on. -
Page 14: Output Lock
ATTENTION! However, the front panel buttons allow to lock only the output ports, the input ports can also be locked by using Lightware C C O O N N T T R R O O L L... -
Page 15: Control Lock
4. Operation of MX2-8x8-HDMI20-Audio MX2-8x8-HDMI20 series – User's Manual Output Lock in Autotake Mode Saving a Preset in Take Mode Step 3. Press and release the Take button. Now the selected preset is loaded. Step 1. Press and release the required destination button. Now the Step 1. -
Page 16: Front Panel Lcd Menu Operations
Back ATTENTION! The lowest value of the brightness parameter is 1 when Presets setting via the front panel. The setting is available in Lightware Device Load Preset Controller software as well, but in that case, the lowest value is 0, Save Preset which means the display is switched off;... -
Page 17: Output Ports Menu
4. Operation of MX2-8x8-HDMI20-Audio MX2-8x8-HDMI20 series – User's Manual Hotplug Icon Icon is grey Icon is white OUTPUT PORTS The hotplug signal towards the source can be set to Auto, Forced On, Signal is not Port 1 Signal is encrypted or Forced Off. -
Page 18: Edid Menu
4. Operation of MX2-8x8-HDMI20-Audio MX2-8x8-HDMI20 series – User's Manual Scrambling View Submenu and temperature values about the motherboard. IO ports: Internal Voltage and temperature values about the HDMI 2.0 standard introduced the Scrambling to the TMDS encoding ▪... -
Page 19: Software Control - Using The Built-In Web
(factory default address is dynamic). 5.2. The Layout of the Built-in Web The built-in web page allows almost the same controlling functions which are available via the Lightware Device Controller. Select a menu item on the left side; the default screen is the Crosspoint menu with Grid view. -
Page 20: Using Lightware Device Controller
The matrix can be controlled by a computer through the LAN or USB ports using exist for all users installed for all users Lightware Device Controller (LDC). The software can be installed on a Windows Comparison of the Installation Types PC or Mac OS X. The application can be downloaded from www.lightware.eu. -
Page 21: Device Discovery Window
The Ethernet tab consists of two lists: ▪ Favorite Devices: You can add any Lightware device that is connected via Ethernet and no need to browse all the available devices. Devices can be added by pressing the Add button or marking the desired device by the symbol in the All Devices list. -
Page 22: Crosspoint Menu
6. Software Control – Using Lightware Device Controller MX2-8x8-HDMI20 series – User's Manual 6.3. Crosspoint Menu 6.3.1. Grid View Grid view is a user-friendly graphical interface displaying the crosspoint state of the matrix router. This is an Device Label The Device Discovery window can be opened by clicking easy way to change between the input sources and output sinks. -
Page 23: Tile View
6. Software Control – Using Lightware Device Controller MX2-8x8-HDMI20 series – User's Manual Crosspoint Operations Switching For making a connection click on the desired square. If there is no connection between the desired input and output (the square is dark grey), the mouse pointer becomes a hand (link pointer) before the clicking. -
Page 24: Port Properties
6. Software Control – Using Lightware Device Controller MX2-8x8-HDMI20 series – User's Manual State Indicators Switching Operations Following icons display different states of the input/output ports/ Take Mode signal: If the Autotake button is outlined with black color Take mode is active. -
Page 25: Input Port Properties Window
6. Software Control – Using Lightware Device Controller MX2-8x8-HDMI20 series – User's Manual 6.3.3. Input Port Properties Window Input Port Legend Click on a port to display its properties; Signal status information and General Tab the most important parameters are displayed. -
Page 26: Output Port Properties Window
6. Software Control – Using Lightware Device Controller MX2-8x8-HDMI20 series – User's Manual 6.3.4. Output Port Properties Window Advanced Tab Output Port Legend Click on a port to display its properties. General Tab General section The name of a port can be changed by typing the new name and clicking the Set button. - Page 27 6. Software Control – Using Lightware Device Controller MX2-8x8-HDMI20 series – User's Manual Signal information is available on this tab which can be used for cable Resetting the default values: Video settings diagnostic purpose. The following information are displayed:...
-
Page 28: Presets
6. Software Control – Using Lightware Device Controller MX2-8x8-HDMI20 series – User's Manual 6.4. Presets Saving a Preset to an Empty Slot Step 1. Arrange the desired crosspoint connections in Tile view or Grid view. The router can store presets and the followings are stored in each slot: input/output crosspoint state, muted/ Step 2. -
Page 29: Edid Menu
6. Software Control – Using Lightware Device Controller MX2-8x8-HDMI20 series – User's Manual 6.5. EDID Menu 6.5.1. Sources and Destinations The EDID memory consists of four parts: Advanced EDID Management can be accessed by selecting the EDID menu. There are two panels: left one contains Source EDIDs, right one contains Destination slots where the EDIDs can be emulated or copied. -
Page 30: Edid Summary Window
EDID file, or uploaded to the User memory. For more details about EDID Editor please visit our selected User memory. website (www.lightware.eu) and download the EDID Editor User's Manual. ATTENTION! The imported EDID overwrites the selected memory place even if it is not empty. -
Page 31: Creating An Edid
MX2-8x8-HDMI20 series – User's Manual 6.5.5. Creating an EDID 6.6. Settings Menu Since above mentioned Advanced EDID Editor needs more complex knowledge about EDID, Lightware 6.6.1. Status Tab introduced a wizard-like interface for fast and easy EDID creation. With Easy EDID Creator it is possible to General information about the product is displayed in this tab: create custom EDIDs in four simple steps. -
Page 32: Network Tab
6. Software Control – Using Lightware Device Controller MX2-8x8-HDMI20 series – User's Manual 6.6.2. Network Tab 6.6.4. Front Panel Tab Network-related settings are available on the tab. Certain settings in connection with the front panel LCD are available in the LDC as well. -
Page 33: Advanced View
6. Software Control – Using Lightware Device Controller MX2-8x8-HDMI20 series – User's Manual 6.7. Advanced View Advanced view is the surface for displaying the LW3 protocol tree. Commands and specific parameters (which are not available on the graphical user interface of the LDC) can be run and set by the controlling tools. -
Page 34: Lw2 Programmers' Reference
The device can be controlled through a reduced command set of LW2 protocol <loc> Location number in 1, 2 or 3 digit ASCII format commands to ensure the compatibility with other Lightware products. The supported LW2 commands are described in this chapter. <id>... -
Page 35: View The Installed Firmware
Example ATTENTION! The response shows only the active protocol for the interface that was used to send the Command {IS} → {is} command! Response (SL#●0●<MB_DESC>)CrLf (SL# 0 MX2-8X8-HDMI20-AUDIO V11_AAA0)CrLf ← (SL●END)CrLf (SL END) ← Explanation: The matrix reports its motherboard. -
Page 36: Crosspoint Operations
7. LW2 Programmers' Reference MX2-8x8-HDMI20 series – User's Manual 7.3. Crosspoint Operations Below example shows a command that resulted batch switching: One by one commands Batch commands 7.3.1. Switch an Input to an Output → {02@01} → {02@01}{05@04} Description: Switch input <in>... -
Page 37: View Mutes On All Outputs
7. LW2 Programmers' Reference MX2-8x8-HDMI20 series – User's Manual INFO: If an output is locked, muted, or both locked and muted, the response format changes. If outputs INFO: Muting does not change the crosspoint’s state but disables the output itself. This way the last are muted you get a letter 'M', if locked a letter 'L' and if muted and locked at the same time 'U' before the connection can be easily restored with an unmute command. -
Page 38: Commands - Quick Summary
7. LW2 Programmers' Reference MX2-8x8-HDMI20 series – User's Manual 7.4. Commands - Quick Summary Router Status Commands See in Operation Command section View Product Type 7.2.1 View Serial Number 7.2.2 View the Installed Firmware 7.2.3 View CPU Firmware Compile Time 7.2.4 {CT} View Firmware of the Controller... -
Page 39: Lw3 Programmers' Reference
MX2-8x8-HDMI20 series – User's Manual 8.1. Overview The Lightware 3 protocol (LW3) is an ASCII-based, tree-structured protocol that provides outstanding flexibility. The protocol is easy to handle and programmatically still ease to parse, which is suitable for different products with a different feature list. - Page 40 Following example presents the structure of the tree traversal: Example: The following two ones are read-only properties: node1 pr●/node1/node12.ReadOnlyProperty=value1 Path of the nodes: node11 pr●/.DeviceName=MX2-8x8-HDMI20-Audio n- /node1 The following two ones are read-write properties: node12 n- /node1/node11 pw●/node1/node12.ReadWriteProperty=value2 node2 n- /node1/node12 n- /node2 pw●/.DeviceNickName=John...
-
Page 41: Escaping
7. LW3 Programmers’ Reference MX2-8x8-HDMI20 series – User's Manual 8.1.2. Escaping 8.1.4. Prefix Summary Property values and method parameters can contain characters that are used as control characters in the The following prefixes are defined in the LW3 protocol: protocol. -
Page 42: Lw3 Commands
7. LW3 Programmers’ Reference MX2-8x8-HDMI20 series – User's Manual 8.3. LW3 commands Response format: (for properties) pX●[nodePath].[propertyName]=[parameter] 8.3.1. Get Command Legend: The ‘GET’ command can be used to get the child nodes, properties and methods of a specific node. It can also be used to get the value of a property. -
Page 43: Set Command
7. LW3 Programmers’ Reference MX2-8x8-HDMI20 series – User's Manual 8.3.3. Invocation Example: A method can be invoked with the help of the ‘CALL’ command. ˃ GET /EDID.* Command format: CALL●[nodePath]:[methodName]([parameter]) ˂ pr /EDID.EdidStatus=F49;F49;F49;F49;F49;F49;F49;F49; ˂ m- /EDID:copy Response format: ˂... -
Page 44: Manual
7. LW3 Programmers’ Reference MX2-8x8-HDMI20 series – User's Manual 8.3.4. Manual Example: For every node, property and method in the tree there is a manual. The manual is a human-readable text that ˃ 1103#GET /MEDIA/XP.* describes the syntax and provides a hint for how to use the primitives. ˂... -
Page 45: Notifications About The Changes Of The Properties
7. LW3 Programmers’ Reference MX2-8x8-HDMI20 series – User's Manual Get the active subscriptions for the current connection A short example of how to use the subscription In the following, an example is presented, how the subscriptions are working and how to use them. In the Command format: OPEN example, there are two independent users controlling the device through two independent connections... -
Page 46: System Commands
Factory Default Settings section. ˂ pr /.ProductName=MX2-8X8-HDMI20-AUDIO 8.5.6. Switch to Standby Mode 8.5.2. Set the Device Label The video transmission is disabled, the LCD is switched off, but remote connections (LAN, RS-232) remain ATTENTION! The device label can be changed to a custom text which is displayed in many windows of enabled in standby mode. -
Page 47: Switching And Crosspoint Settings
7. LW3 Programmers’ Reference MX2-8x8-HDMI20 series – User's Manual 8.6. Switching and Crosspoint Settings 8.6.4. Multiple Switching The whole crosspoint can be set by sending one command as follows. INFO: The current setting can be queried by using the Command. -
Page 48: Video Input Port Settings
7. LW3 Programmers’ Reference MX2-8x8-HDMI20 series – User's Manual 8.7. Video Input Port Settings 8.7.2. Mute an Input Port The Most Common Received Port Status Responses Command format: CALL●/MEDIA/XPVIDEO:muteSource(<In>;..;<Im>) INFO: The current setting can be queried by using the Command. -
Page 49: Hdcp Setting
7. LW3 Programmers’ Reference MX2-8x8-HDMI20 series – User's Manual 8.7.6. HDCP Setting 8.8.3. Load a Preset This setting allows to send non-encrypted content to a non-HDCP compliant display. See more information Command format: CALL●/MEDIA/PRESET/<Pres_name>:load(1) HDCP Management section. Response format: mO●/MEDIA/PRESET/My_Pres:load=Ok Command format: SET●/MEDIA/PORTS/VIDEO/<In>/SETTINGS.HdcpVersion=0|1|2|3... -
Page 50: Video Output Port Settings
7. LW3 Programmers’ Reference MX2-8x8-HDMI20 series – User's Manual 8.9.2. Analog Audio Input Level Settings 8.10. Video Output Port Settings Balance (Setting the Exact Value) INFO: The current setting can be queried by using the Command. Command format: SET●/MEDIA/PORTS/VIDEO/<In>/ANALOGAUDIO.Balance=<value>... -
Page 51: Unmute An Output
7. LW3 Programmers’ Reference MX2-8x8-HDMI20 series – User's Manual 8.10.4. Unmute an Output 8.10.7. Conversion Mode Command format: CALL●/MEDIA/XP/VIDEO:unmuteDestination(<On>;..;<Om>) ATTENTION! The signal conversion can be set on the input and output ports as well, but the desired signal is recommended to set on the output ports. -
Page 52: Hdcp Setting (Output Port)
7. LW3 Programmers’ Reference MX2-8x8-HDMI20 series – User's Manual 8.10.9. HDCP Setting (Output Port) 8.11.2. Analog Audio Output Level Settings Command format: SET●/MEDIA/PORTS/VIDEO/<On>/SETTINGS.HdcpMode=AUTO|ALWAYS Volume (Setting the Exact Value) Response format: pw●/MEDIA/PORTS/VIDEO/<On>/SETTINGS.HdcpMode=AUTO|ALWAYS Command format: SET●/MEDIA/PORTS/VIDEO/<On>/ANALOGAUDIO.VolumedB=<value> Legend: Response format: pw●/MEDIA/PORTS/VIDEO/<On>/ANALOGAUDIO.VolumedB=<value> ▪... -
Page 53: Port Settings
7. LW3 Programmers’ Reference MX2-8x8-HDMI20 series – User's Manual 8.13. Network Settings Balance (Setting by Step Value) Command format: CALL●/MEDIA/PORTS/VIDEO/<On>/ANALOGAUDIO:stepBalance(<step_value>) ATTENTION! When any parameter of the network settings is modified, always apply the new settings by using the following command: CALL /MANAGEMENT/NETWORK:applySettings() Response format: mO●/MEDIA/PORTS/VIDEO/<On>/ANALOGAUDIO:stepBalance=<step_value>... -
Page 54: Edid Management
7. LW3 Programmers’ Reference MX2-8x8-HDMI20 series – User's Manual 8.14.3. Copy an EDID into Another Slot Gateway Setting Command format: SET●/MANAGEMENT/NETWORK.StaticGatewayAddress=<Gateway_address> ATTENTION! The (User) EDID memory slot will be overwritten without notification even if it was not empty. Response format: pw●/MANAGEMENT/NETWORK.StaticGatewayAddress=<Gateway_address>... -
Page 55: Lw3 Commands - Quick Summary
7. LW3 Programmers’ Reference MX2-8x8-HDMI20 series – User's Manual 8.15. LW3 Commands – Quick Summary Video Input Port Settings System Commands Operation / Path Query the Status of Source Port Operation / Path 8.7.1 /MEDIA/XP/VIDEO.SourcePortStatus Query the Product Name 8.5.1 Mute an Input Port /.ProductName... - Page 56 7. LW3 Programmers’ Reference MX2-8x8-HDMI20 series – User's Manual Video Output Port Settings RS-232 Port Settings Operation / Path Operation / Path Query the Status of the Output Ports Protocol Setting 8.10.1 8.12.1 /MEDIA/XP/VIDEO.DestinationPortStatus /MANAGEMENT/SERIAL.Protocol=LW2|LW3|P#2 Signal Type (HDMI mode) Baud Rate Setting 8.10.2 8.12.2...
-
Page 57: Firmware Upgrade
Lightware website and shows the 9.2. Short Instructions www.lightware.eu. available version. Step 1. Get the firmware pack and the Lightware Device Updater (LDU) application. About the Firmware Package (LFP File) Ý Short Instructions Step 2. -
Page 58: Detailed Instructions
9. Firmware Upgrade MX2-8x8-HDMI20 series – User's Manual ▪ If you do not want to check for updates automatically, uncheck the Check for updates automatically Click on the Extender button on the main screen. option. Step 1. Select the package. If you want to postpone the update, a reminder can be set with different delays from the drop down list. - Page 59 9. Firmware Upgrade MX2-8x8-HDMI20 series – User's Manual Step 2. Select the device. Firmware Components The components of the installed and update firmware version for the selected devices are listed on the following screen. (Update version will be uploaded to the device.) The next step is to select the desired device(s).
- Page 60 9. Firmware Upgrade MX2-8x8-HDMI20 series – User's Manual Step 3. Upgrade the device. A warning window will pop up before upgrading the device: ▪ Do not unplug the power cable and the LAN cable while the upgrade is in progress. Click OK to continue. Click on the Start button to start the upgrade process.
- Page 61 O O U U T T P P U U T T CTRL MX2-8x8-HDMI20-Audio If the upgrade of a device is finished, the log can be opened by the View button on the right. When all the tasks L L O O C C K K RESET Compact HDMI 2.0 Matrix Switcher...
-
Page 62: Troubleshooting
8.6.1 according to their states. For more information about front and rear No picture on the panel LEDs of the matrix refer to MX2-8x8-HDMI20-Audio - Front View Not the proper If the source/display has more connectors, video output MX2-8x8-HDMI20-Audio - Rear View section. - Page 63 10. Troubleshooting MX2-8x8-HDMI20 series – User's Manual Symptom Root cause Action Refer to Symptom Root cause Action Refer to Audio signal RS-232 signal Other audio port is Check the audio crosspoint Cable connection problem Check the connectors to fit well; switched to the output settings.
-
Page 64: Technologies
(dynamic EDID emulation). information about additional Detailed Timings, audio capabilities, For example, the Lightware device can be set up to emulate a sink speaker allocation and HDMI capabilities. It is important to know that device, which is connected to one of the outputs. -
Page 65: Hdcp Management
HDCP v2.2 on the input and encrypted with HDCP v1.4 on the output disabled in the Lightware device. If HDCP is disabled, the connected of the Lightware device. A lower level of encryption may be applied source will detect that the sink is not HDCP capable, and turn off... -
Page 66: Pixel Accurate Reclocking
Data2- and Data2+). It’s caused by different wire lengths or slightly signal. Too much noise results in increased jitter. What Kind of Signal Will be on the Output of the Lightware Device? different wire construction (impedance mismatch) in DVI cable. It See below table that summarizes the possible cases: results in jitter. -
Page 67: Appendix
12. Appendix MX2-8x8-HDMI20 series – User's Manual 12.1. Specifications * with rack-mounting ears RS-232 Control Port General Serial port connector ........3-pole Phoenix connector Compliance ..................CE Available Baud rates ....9600, 19200, 38400, 57600, 115200 EMC compliance (emission) ......... EN 55032:2015 Video Input/Output Ports EMC compliance (immunity) ......... -
Page 68: Mechanical Drawings
PRESET PRESET PRESET SOURCES DESTINATIONS OUTPUT CTRL MX2-8x8-HDMI20-Audio LOCK RESET Compact HDMI 2.0 Matrix Switcher Rear View ATTENTION! The ventilators are controlled automatically according to the internal temperature of the device and cannot be adjusted manually by the user. 100-240 VAC... -
Page 69: Factory Edid List
12. Appendix MX2-8x8-HDMI20 series – User's Manual 12.3. Factory EDID List Mem. Resolution Type Mem. Resolution Type Mem. Resolution Type 640 x 480 @ 60.00 Hz 1280 x 720 @ 60.00 Hz F119 Universal HDMI EDID; 4K, all audio 848 x 480 @ 60.00 Hz 1920 x 1080i @ 50.04 Hz... -
Page 70: Factory Default Settings
12. Appendix MX2-8x8-HDMI20 series – User's Manual 12.4. Factory Default Settings Parameter Setting / Value Network Settings IP address Dynamic (DHCP is enabled) RS-232 Port Port setting 57600 BAUD, 8, N, 1 Control protocol LW3 protocol Video Input/Output Ports Crosspoint setting Input 1 on all outputs Input port: enabled (v1.4) -
Page 71: Audio Cable Wiring Guide
12. Appendix MX2-8x8-HDMI20 series – User's Manual 12.5. Audio Cable Wiring Guide From Unbalanced Output to Balanced Input From Balanced Output to Balanced Input Inputs and outputs of audio devices are symmetric or asymmetric. 2 x 6.3 (1/4") TS - Phoenix 2 x RCA - Phoenix Phoenix - 2 x 6.3 (1/4") TRS 2 x 6.3 TRS (1/4") - Phoenix... -
Page 72: Further Information
1.4. Product failures from six (6) months to the end of the warranty prog. ref. chapter period will either be repaired or replaced at the discretion of Lightware. If Lightware chooses to replace the product then the replacement will 01-09-2017 New document format Judit be warranted for the remainder of the original unit’s warranty period.
Need help?
Do you have a question about the MX2-8X8-HDMI20-AUDIO and is the answer not in the manual?
Questions and answers