Table of Contents
Advertisement
Available languages
Available languages
Quick Links
Download this manual
See also:
Operating Instructions
Installation Instructions | Installationsanleitung | Notice d'installation |
Instrucciones de instalación | Installationsanvisning
PMA.Vision
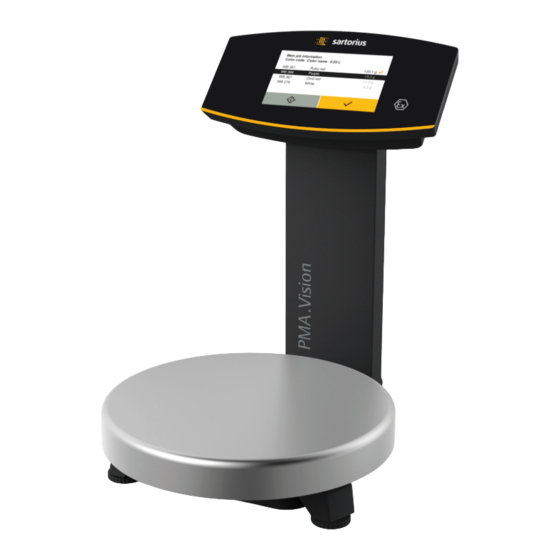
VIS1X
Paint-mixing Scales for Potentially Explosive Areas Zone 1 |
Farbmischwaagen für den Einsatz in explosionsgefährdeten Bereichen der Zone 1 |
Balances pour peintures pour atmosphères explosibles de la zone 1 |
Balanzas para la mezcla de pinturas en áreas potencialmente explosivas de la zona 1 |
Färgblandningsvågar för insats i explosionsfarliga områden i zon 1
98648-020-36
Advertisement
Chapters
Table of Contents

Related Manuals for Sartorius VIS1X


Summary of Contents for Sartorius VIS1X
- Page 1 Installation Instructions | Installationsanleitung | Notice d’installation | Instrucciones de instalación | Installationsanvisning PMA.Vision VIS1X Paint-mixing Scales for Potentially Explosive Areas Zone 1 | Farbmischwaagen für den Einsatz in explosionsgefährdeten Bereichen der Zone 1 | Balances pour peintures pour atmosphères explosibles de la zone 1 | Balanzas para la mezcla de pinturas en áreas potencialmente explosivas de la zona 1 |...
- Page 2 English – page 3 In cases involving questions of interpretation, the German-language version shall prevail. Deutsch – Seite 17 Im Auslegungsfall ist die deutsche Sprache maßgeblich. Français – page 31 En cas de questions concernant l‘interprétation, la version en langue allemande fera autorité. Español –...
-
Page 3: Table Of Contents
The figures in these instructions are based on “standard” scales. On verified scales, some displays and reports may deviate slightly from the figures. Where this is significant for operation, the differences will be explained in the text. Installation Instructions VIS1X... -
Page 4: Safety Precautions
− In accordance with Directive 2014/34/EU, the model in the potentially explosive areas in Zone 1. Appropriate containers VIS1X series is a Category 2 device, suitable for use in Zone must be used for loading each type of material. 1 potentially explosive areas. -
Page 5: Significance Of These Instructions
Work on and modifications to the electrical equipment of the understand the hazards which may arise when device may only be carried out by Sartorius Service personnel. working with the device and can avoid these The device may only be opened by Sartorius Service personnel. -
Page 6: Installation
Condensation from humidity can form on the surfaces of a cold device when it is brought into a warm area. You should therefore let a device that has been disconnected from its power source acclimatize for approximately 2 hours before reconnecting it to the supply voltage. Installation Instructions VIS1X... -
Page 7: Connecting The Grounding Cable
Lethal electric shock and equipment damage due to damage (e.g., no display, no backlighting), disconnect the scale from the power supply and contact Sartorius Service. incorrect power plug adapter! Only use the country- specific power plug adapter. Never plug the power plug... -
Page 8: Anti-Theft Locking Device
Network Power Connection/Safety Precautions Connecting to a Network with DHCP − Only use original Sartorius power supplies. The power supply has an IP rating of IP40 in accordance Usually, the IP address on a network is assigned by a DHCP with EN60529/IEC60529. -
Page 9: Connecting To A Network With A Fixed Ip Address
Open the Network and Sharing Center on your Windows Start -> Control Panel -> Network and Sharing Center Open the LAN connection (1). Select the entry “Internet Protocol Version 4“ (3) from the list. Open the properties (4). Installation Instructions VIS1X... -
Page 10: Testing The Network Connection
Go into the submenu “Ethernet.” Press the i button to call up the “Settings” menu. Go into the submenu “DHCP.” Go into the submenu “Device information.” Select “Off.” Confirm with the l button. The DHCP mode is turned off. Installation Instructions VIS1X... - Page 11 All of the important information about the scale is shown here. The device side of the scale can be called up directly in the web browser by double-clicking on [PMA.Vision “PAINT”]. If the network connection does not work, contact your administrator. Installation Instructions VIS1X...
-
Page 12: Overview Of The Connection States
Go into the submenu “Device ID.” Select “t” to enter a new device ID. Enter a new device ID in the displayed input box. Only letters, numbers, and hyphens may be used. Confirm with the l button. Installation Instructions VIS1X... -
Page 13: Cleaning And Maintenance
Maintenance To ensure the continued accuracy of your scale, we recommend scheduling regular servicing at least once a year. Sartorius Service offers different service contracts with maintenance intervals that are tailored to your needs. Cleaning A calibration certificate should always be issued as part of every maintenance session. -
Page 14: Accessories
Accessories Serial Number Coding Accessories Order number Sartorius Lab Instruments GmbH & Co. KG 37070 Goettingen, Germany Made in Germany Power supply (5 V/1500 mA) YPS07-USB USB cable, 3 m YCC01-0040M3 产品型号: Power plug adapter set for YPS07-USB YAK01 产品名称:PMA威视... -
Page 15: Technical Data
Technical Data General Data Specification Unit Value Scale Supply voltage Only via Sartorius power supply YPS07-USB Input voltage +5.0 Power consumption Further data IP40 in accordance with EN 60529/IEC 60529 Ambient conditions The technical specifications apply under the following ambient conditions: Environment For indoor use only. -
Page 16: Model-Specific Data
The attached EU Declaration of Conformity hereby confirms compliance of the device with the directives cited. For verified scales for use in the EEA, the declaration of conformity set out in the conformity assessment (calibration) shall apply. Please keep it in a safe place. Installation Instructions VIS1X... -
Page 17: Über Dieses Dokument
........− VIS1X 2.1 Bestimmungsgemäße Verwendung... -
Page 18: Sicherheitshinweise
Bereiches zu installierenden Ex-Link Konverters YCO16-Z ATEX-Richtlinie: nur durch das mitgelieferte Link-Kabel verbunden. Die Waage − Bei dem Modell der Reihe VIS1X handelt es sich gemäß kann im explosionsgefährdeten Bereich der Zone 1 eingesetzt Richtlinie 2014/34/EU um ein Gerät der Kategorie 2, das werden. -
Page 19: Bedeutung Dieser Anleitung
Arbeitsprozessen ver- Jegliche Arbeiten und Modifikationen an der elektrischen traut. Er kennt die Gefahren, die bei Arbeiten Ausrüstung des Geräts dürfen nur vom Sartorius Service mit dem Gerät auftreten können und kann diese vorgenommen werden. Das Gerät darf nur vom Sartorius Gefahren vermeiden. -
Page 20: Installation
Wenn ein kaltes Gerät in eine warme Umgebung gebracht wird kann dies zu Kondensation von Luftfeuchtigkeit führen (Betauung). Daher akklimatisieren Sie das vom Netz getrennte Gerät ca. 2 Stunden, bevor Sie es wieder an die Versorgungs- spannung anschließen. Installationsanleitung VIS1X... -
Page 21: Erdung Anschließen
Abweichungen (z. B. keine Anzeige, keine Hintergrundbe- WARNUNG Tödliche Stromschläge und Geräteschäden leuchtung), so ist die Waage vom Netz zu trennen und der Sartorius Service zu informieren. durch falsche Netzsteckeradapter! Nur den länderspezifi- schen Netzsteckeradapter verwenden. Den Netzsteckerad- Die Installation muss von einer dafür ausgebildeten Elektro- apter nie getrennt vom Netzgerät in die Steckdose stecken. -
Page 22: Diebstahlsicherung
Zugriff auf die Waage über das Netzwerk Netzanschluss / Schutzmaßnahmen Anschluss an ein Netzwerk mit DHCP − Nur Originalnetzgeräte von Sartorius verwenden. Die Schutzart des Netzgerätes entspricht IP40 gemäß Üblicherweise wird die IP-Adresse in einem Netzwerk durch EN60529 / IEC60529. -
Page 23: Anschluss An Ein Netzwerk Mit Fester Ip-Adresse
Rufen Sie die Netzwerkumgebung des Windows-PCs auf: Start -> Control Panel -> Network and Sharing Center Öffnen Sie die LAN-Verbindung (1). Wählen Sie den Eintrag „Internet Protocol Version 4“ (3) aus der Liste aus. Öffnen Sie die Eigenschaften (4). Installationsanleitung VIS1X... -
Page 24: Netzwerkverbindung Testen
Rufen Sie über die Taste i das Menü „Einstellungen“ auf. Rufen Sie das Untermenü „DHCP“ auf. Rufen Sie das Untermenü „Geräteinformationen“ auf. Wählen Sie „Aus“. Bestätigen Sie die Eingabe mit der Taste l. Der DHCP-Modus ist aus eingeschaltet. Installationsanleitung VIS1X... - Page 25 Waage angezeigt. Hier werden alle wichtige Informationen der Waage dargestellt. Falls die Netzwerkverbindung nicht funktioniert, wenden Durch ein Doppelklick auf [PMA.Vision „PAINT“] kann direkt Sie sich an Ihren Administrator. die Geräteseite der Waage im Webbrowser aufgerufen werden. Installationsanleitung VIS1X...
-
Page 26: Übersicht Der Verbindungszustände
Wählen Sie „t“ für die Eingabe einer neuen Geräte ID. Geben Sie über das angezeigte Eingabefeld eine neue Geräte ID ein. Zur Eingabe dürfen nur Buchstaben, Zahlen und der Bindestrich verwendet werden. Bestätigen Sie die Eingabe mit der Taste l. Installationsanleitung VIS1X... -
Page 27: Reinigung Und Wartung
Um die fortdauernde Messsicherheit Ihrer Waage zu gewähr- leisten, empfehlen wir die regelmäßige, mindestens jährliche Reinigen Wartung. Der Sartorius Service bietet Ihnen hierzu unter- schiedliche Wartungsverträge an, die wir individuell an Ihre Vor Reinigen des Netzgerätes, des Ex-Link Konverters oder der Bedürfnisse anpassen. -
Page 28: Zubehör
Zubehör Codierung der Seriennummer Zubehör Bestellnummer Netzgerät (5 V / 1500 mA) YPS07-USB Sartorius Lab Instruments GmbH & Co. KG USB Kabel, 3 m YCC01-0040M3 37070 Goettingen, Germany Made in Germany Netzstecker-Adapterset für YPS07-USB YAK01 产品型号: − USA und Japan −... -
Page 29: Technische Daten
Deutsch Technische Daten Allgemeine Daten Angabe Einheit Wert Waage Spannungsversorgung nur über Sartorius Netzgerät YPS07-USB Eingangsspannung +5,0 Leistungsaufnahme Weitere Daten IP40 gemäß EN 60529/IEC 60529 Umgebungsbedingungen Die technischen Daten gelten bei folgenden Umgebungsbedingungen: Umgebung Verwendung nur in Innenräumen Betriebsfähigkeit °C Gewährleistet zwischen +5 bis +40... -
Page 30: Modellspezifische Daten
* Die Summe aus Max, Einschaltnullstellbereich und Totlast darf die Nennlast des Lastaufnehmers nicht überschreiten. 10 EU-Konformitätserklärung Mit der beigefügten EU-Konformitätserklärung wird die Übereinstimmung des Geräts mit den benannten Richtlinien erklärt. Bei geeichten Waagen für den Einsatz im EWR gilt die bei der Konformitätbewertung (Eichung) ausgestellte Konformitätserklä- rung. Bitte unbedingt aufbewahren. Installationsanleitung VIS1X... -
Page 31: À Propos De Ce Manuel
« standard ». Si vous utilisez une balance approuvée pour l’usage en métrologie légale, il se peut que certains affichages à l’écran et certains rapports diffèrent légèrement des illustrations représentées. Ces différences sont expliquées si cela s’avère nécessaire pour le fonctionnement. Manuel d'installation VIS1X... -
Page 32: Consignes De Sécurité
− Conformément à la directive 2014/34/UE, les modèles de phères explosives de la zone 1. Utilisez des récipients adaptés la série VIS1X sont des appareils de la catégorie 2 adaptés pouvant contenir les matières. à une utilisation dans les atmosphères explosives de la La balance peut être commandée par l’intermédiaire de... -
Page 33: Importance De Ce Mode D'emploi
Opérateur L’opérateur connaît le fonctionnement de l’appareil et les processus de travail qui y sont Seuls des techniciens du Sartorius Service sont autorisés à associés. Il connaît les dangers potentiels lors effectuer des opérations et des modifications sur l’équipement du travail avec l’appareil et il est en mesure de électrique de l’appareil. -
Page 34: Installation
De la condensation peut se former lorsqu’un appareil froid est placé dans un environnement plus chaud. Dans ce cas, adaptez l’appareil débranché du secteur à la température de la pièce pendant environ deux heures avant de le raccorder au secteur. Manuel d'installation VIS1X... -
Page 35: Raccorder La Mise À La Terre
éventuels, avec lesquels dans votre pays, contactez votre représentant Sartorius. il faut toujours compter, puisse être détectée à temps. Ces vérifications doivent être réalisées au minimum tous les trois ans. -
Page 36: Système Antivol
Ouvrez le sous-menu « Ethernet ». au convertisseur de jonction antidéflagrant. Raccordez le câble USB au bloc d’alimentation YPS07-USB. Branchez le bloc d’alimentation dans une prise électrique Si « DHCP (On) » est affiché, tous les réglages sont corrects. (tension électrique). Manuel d'installation VIS1X... -
Page 37: Connexion À Un Réseau Avec Une Adresse Ip Fixe
Ouvrez le Voisinage réseau du PC Windows : Démarrer -> Panneau de configuration -> Centre Réseau et partage Ouvrez la Connexion réseau local (1). Sélectionnez l’entrée « Internet Protocol Version 4 » (3) dans la liste. Ouvrez les propriétés (4). Manuel d'installation VIS1X... -
Page 38: Tester La Connexion Réseau
Ouvrez le sous-menu « Ethernet ». Ouvrez le sous-menu « Infos sur l’appareil ». Ouvrez le sous-menu « DHCP». Sélectionnez « Off ». Appuyez sur la touche l pour confirmer la saisie. Le mode DHCP est désormais désactivé. Manuel d'installation VIS1X... - Page 39 Toutes les informations importantes de la balance y sont Si la connexion réseau ne fonctionne pas, veuillez vous inscrites. adresser à votre administrateur. Pour ouvrir directement la page de la balance dans le navigateur, double-cliquez sur [PMA.Vision « PAINT »]. Manuel d'installation VIS1X...
-
Page 40: Vue D'ensemble Des États De Connexion
Sélectionnez « t » pour saisir un nouvel ID pour l’appareil. Entrez un nouvel ID dans le champ de saisie affiché. Vous devez utiliser uniquement des lettres, des chiffres et le trait d’union. Appuyez sur la touche l pour confirmer la saisie. Manuel d'installation VIS1X... -
Page 41: Nettoyage Et Maintenance
Maintenance maintenance Il est conseillé d’effectuer la maintenance de votre balance au moins une fois par an pour garantir en permanence des mesures précises. À cet effet, le Sartorius Service propose différents contrats de maintenance modulables selon vos Nettoyage besoins. -
Page 42: Accessoires
Accessoires Codification du numéro de série Accessoires Référence Bloc d’alimentation (5 V / 1500 mA) YPS07-USB Sartorius Lab Instruments GmbH & Co. KG Câble USB, 3 m YCC01-0040M3 37070 Goettingen, Germany Made in Germany Jeu d’adaptateurs secteur pour YPS07-USB YAK01 产品型号:... -
Page 43: Caractéristiques Techniques
Caractéristiques techniques Caractéristiques générales Caractéristique Unité Valeur Balance Alimentation électrique Uniquement via le bloc d’alimentation Sartorius YPS07-USB Tension d’entrée +5,0 Puissance absorbée Autres caractéristiques IP40 selon EN 60529 / CEI 60529 Conditions ambiantes Les caractéristiques techniques sont valables pour les conditions ambiantes suivantes : Environnement Utilisation uniquement à... -
Page 44: Caractéristiques Techniques Spécifiques Aux Différents Modèles
10 Déclaration de conformité UE Par la déclaration de conformité UE ci-jointe, la société Sartorius atteste que l’appareil est conforme aux directives mentionnées. La déclaration de conformité établie lors de l’évaluation de la conformité (vérification) est valide pour les balances approuvées pour l’utilisation en métrologie légale dans l’Espace Économique Européen. -
Page 45: Acerca De Este Documento
En las balanzas calibradas puede haber pequeñas diferencias en la forma en que se muestran los avisos y en los protocolos de las figuras. En los casos importantes para el funciona- miento, se explicarán las diferencias en el texto. Instrucciones de instalación de VIS1X... -
Page 46: Indicaciones De Seguridad
Uso en el ámbito de la aplicación de la directiva ATEX: por medio del cable Link suministrado. La balanza puede − El modelo de la serie VIS1X es, según la directiva 2014/34/ emplearse en entornos con riesgo de explosión de la Zona 1. -
Page 47: Importancia De Estas Instrucciones De Uso
Español Encargue la reparación de daños a Sartorius Service de Grupo de Conocimientos y responsabilidades inmediato. destinata- rios Trabajos en el equipo eléctrico del Usuario El usuario está familiarizado con el uso del aparato aparato y con los procesos de trabajo ligados al mismo. -
Page 48: Instalación
Cuando un aparato frío se lleva a un entorno caluroso, esto puede causar condensación de la humedad del aire (empañamiento). Por lo tanto, es necesario aclimatar el aparato durante aproximadamente 2 horas antes de conectarlo al suministro de corriente. Instrucciones de instalación de VIS1X... -
Page 49: Puesta A Tierra
3.6.1 Ensamblaje de la fuente de alimentación red e informe a Sartorius Service. ADVERTENCIA Peligro de electrocución y de daños en La instalación debe realizarla conforme a las instrucciones un el aparato por un adaptador de red incorrecto. Utilice solo electricista formado especialmente para ello y según las reglas... -
Page 50: Protección Antirrobo
Colocación del recipiente sobre la balanza Conexión de red / Medidas de protección − Utilice solo alimentadores de red originales de Sartorius. Conexión a una red con DHCP El tipo de protección de la fuente de alimentación se corresponde con IP40 según EN60529 / IEC60529. -
Page 51: Conexión A Una Red Con Dirección Ip Fija
Abra el entorno de la red del ordenador Windows: Inicio -> Panel de control -> Centro de redes y recursos compartidos Abra la conexión LAN (1). Seleccione la entrada “Internet Protocol Version 4” (3) en la lista. Abra las propiedades (4). Instrucciones de instalación de VIS1X... -
Page 52: Prueba De La Conexión A La Red
“Info. del aparato”. Abra el menú “Ajustes” mediante la tecla i. Abra el submenú “DHCP”. Abra el submenú “Info. del aparato”. Seleccione “Off”. Confirme la entrada con la tecla l. El modo DHCP está ahora desconectado. Instrucciones de instalación de VIS1X... - Page 53 Haciendo doble clic en [PMA.Vision “PAINT”] se abre directa- Si la conexión a la red no funciona, póngase en contacto mente la página de los aparatos de la balanza en el navegador con su administrador. web. Instrucciones de instalación de VIS1X...
-
Page 54: Resumen De Los Estados De Conexión
Seleccione “t” para introducir un nuevo ID de aparato. En la casilla de introducción señalada, introduzca un nuevo ID de aparato. Para esta entrada, solo se pueden utilizar letras, números y guion. Confirme la entrada con la tecla l. Instrucciones de instalación de VIS1X... -
Page 55: Limpieza Y Mantenimiento
Mantenimiento mantenimiento Para garantizar la seguridad de medición constante de su balanza, recomendamos un mantenimiento regular, al menos una vez al año. Sartorius Service le ofrece al efecto diversos contratos de mantenimiento, que podemos adecuar a sus Limpieza necesidades. En el marco de cada mantenimiento debería extenderse Antes de la limpieza del aparato de red, del convertidor siempre un certificado de calibración. -
Page 56: Accesorios
Accesorios Codificación del número de serie Accesorios Número de pedido Sartorius Lab Instruments GmbH & Co. KG Fuente de alimentación (5 V / 1500 mA) YPS07-USB 37070 Goettingen, Germany Made in Germany Cable USB, 3 m YCC01-0040M3 产品型号: Juego de adaptadores de enchufe para... -
Page 57: Datos Técnicos
Español Datos técnicos Datos generales Especificaciones Unidad Valor Balanza Suministro de corriente Solo mediante fuente de alimentación YPS07-USB de Sartorius Tensión de entrada +5,0 Consumo (potencia) Otros datos IP40 según EN 60529/IEC 60529 Condiciones ambientales Las especificaciones técnicas son válidas para las siguientes condiciones medioambientales:... -
Page 58: Datos Específicos De Modelos
Con la declaración de conformidad UE adjunta se ratifica el cumplimiento del aparato de las directrices mencionadas. Para las balanzas verificadas que se vayan a emplear en el EEE es válido el certificado de conformidad (calibración) de la declaración de conformidad efectuada. Guárdela sin falta. Instrucciones de instalación de VIS1X... -
Page 59: Om Detta Dokument
........− VIS1X 2.3 Personalens kvalifikationer... -
Page 60: Ändamålsenlig Användning
Ex-Link-konvertern YCO16-Z som alltid ska ATEX-riktlinjen: installeras utanför explosionsfarligt område enbart genom − Vid modellen i serien VIS1X handlar det enligt 2014/34/EU medföljande Link-kabel. Vågen kan användas i explosions- om en enhet i kategori 2 som är lämpad för användning farligt område i zon 1. -
Page 61: Den Här Anvisningens Betydelse
Operatören är väl bekant med driften av den Alla arbeten eller ändringar på maskinens elektriska utrust- här enheten och med arbetsprocesserna som är ning får bara utföras av Sartorius service. Enheten får endast förenade med den. Denne känner till riskerna öppnas av Sartorius service. -
Page 62: Installation
(direktförbindelse) eller via nätverket. Acklimatisering Om en kall enhet förflyttas till en varm omgivning kan detta leda till kondensering av luftfuktighet (daggbildning). Acklimatisera då den från nätet bortkopplade enheten i ca 2 timmar innan du ansluter den till strömförsörjningen igen. Installationsanvisning VIS1X... -
Page 63: Anslut Jordningen
även kontrolleras under drift. nätenheten inte motsvarar tillämpad landstandard, Tidpunkterna för detta bör beräknas så att eventuella brister, vänligen meddela närmaste Sartorius-representant. som förr eller senare uppstår, upptäcks i god tid. Kontroller ska utföras minst vart tredje år. Under drift ska motsvarande villkor och riktlinjer uppfyllas. -
Page 64: Stöldskydd
(2) av den. Åtkomst till vågen över nätverket Nätanslutning/skyddsåtgärder Anslutning till ett nätverk med DHCP − Använd endast originalnätenheter från Sartorius. Kapslingsklassen för nätenheten motsvarar IP40 enligt Vanligtvis tilldelas IP-adressen i ett nätverk genom en EN60529/IEC60529. DHCP-server (Dynamic Host Configuration Protocol). -
Page 65: Anslutning Till Ett Nätverk Med Fast Ip-Adress
4.2.1 Ställa in nätverket på datorn Öppna nätverksmiljön på datorn: Start -> Control Panel -> Network and Sharing Center Öppna LAN-anslutningen (1). Välj posten ”Internet Protocol Version 4” (3) från listan. Öppna egenskaperna (4). Installationsanvisning VIS1X... -
Page 66: Testa Nätverksanslutningen
Testa nätverksanslutningen IP-adress och enhets-ID kan när som helst visas via undermenyn ”Enhetsinformation”. Öppna undermenyn ”Ethernet”. Öppna menyn ”Inställningar” med knappen i. Öppna undermenyn ”DHCP”. Öppna undermenyn ”Enhetsinformation”. Välj ”Av”. Bekräfta inmatningen med knappen I. DHCP-läget är avaktiverat. Installationsanvisning VIS1X... - Page 67 Bekräfta inmatningen med knappen Enter. I följande bild visas hur vågen identifieras. Här visas all viktig information om vågen. Genom att dubbelklicka på [PMA.Vision „PAINT“] kan Om nätverksanslutningen inte fungerar, vänd dig till enhetssidan för vågen visas direkt i webbläsaren. administratören. Installationsanvisning VIS1X...
-
Page 68: Översikt Av Förbindelsetillstånden
Öppna menyn ”Inställningar” med knappen i. Öppna undermenyn ”Ethernet”. Öppna undermenyn ”Enhets-ID”. Välj ”t” för att ange ett nytt enhets-ID. Ange ett nytt enhets-ID i inmatningsfältet som visas. Det går bara att mata in bokstäver, nummer och bindestreck. Bekräfta inmatningen med knappen I. Installationsanvisning VIS1X... -
Page 69: Rengöring Och Underhåll
För att garantera fortsatt mätsäkerhet hos din våg rekom- menderar vi regelbundet underhåll, minst en gång om året. Rengör Sartorius Service erbjuder dig olika underhållsavtal, som vi anpassar individuellt efter dina behov. Innan rengöring av nätenheten, Ex-Link-konvertern eller Inom ramen för varje underhåll bör alltid ett vågen: Koppla ifrån alla enheter. -
Page 70: Tillbehör
Tillbehör Kodning av serienummer Tillbehör Beställnings- Sartorius Lab Instruments GmbH & Co. KG nummer 37070 Goettingen, Germany Made in Germany Nätenhet (5 V/1500 mA) YPS07-USB 产品型号: USB-kabel, 3 m YCC01-0040M3 产品名称:PMA威视 Nätkontakt-adapterset för YPS07-USB YAK01 0°C Ta +40°C... -
Page 71: Tekniska Data
Svenska Tekniska data Allmänna uppgifter Uppgift Enhet Värde Våg Strömförsörjning endast över Sartorius nätenhet YPS07-USB Ingångsspänning +5,0 Effektupptagning Vidare uppgifter IP40 enligt EN 60529/IEC 60529 Omgivningsvillkor Tekniska data gäller vid följande omgivningsvillkor: Omgivning Användning endast inomhus Funktionsduglighet °C Garanteras mellan +5 till +40 Lagring och transport °C... -
Page 72: Modellspecifika Data
10 EU-försäkran om överensstämmelse Med bifogad EU-försäkran om överensstämmelse förklaras att enheten överensstämmer med nämnda riktlinjer. För kalibrerade vågar som ska användas inom EES gäller den försäkran om överensstämmelse som har utfärdats vid bedömningen av överensstämmelse (kalibrering). Ska ovillkorligen bevaras. Installationsanvisning VIS1X... - Page 73 Appendix 10 EU Declaration of Conformity Installation Instructions VIS1X...
- Page 74 Traduction du document original Déclaration de conformité UE Sartorius Lab Instruments GmbH & Co. KG Fabricant 37070 Goettingen, Allemagne déclare sous sa seule responsabilité que l ’ appareil Balance pour peintures / Boîte de jonction antidéflagrante Type d'appareil VIS1X... / YCO16-Z Série...
- Page 75 Appendix Traducción del original Declaración de conformidad UE Sartorius Lab Instruments GmbH & Co. KG Fabricante D-37070 Goettingen, Alemania declara bajo su sola responsabilidad que el medio de producción Tipo de aparato Balanza para la mezcla de pintura / Caja Ex-Link VIS1X...
- Page 76 Översättning av originalet EU-försäkran om överensstämmelse Sartorius Lab Instruments GmbH & Co. KG Tillverkare D-37070 Goettingen, Germany förklarar som enda ansvarig, att utrustningen Färgtillblandningsvåg/Ex-link-box Apparattyp VIS1X... / YCO16-Z Serie motsvarar alla relevanta bestämmelser i följande europeiska direktiv, inklusive de ändringar som är gällande vid tidpunkten för förklaringen, i den utgåva vi har gett ut och att den uppfyller alla gällande...
- Page 77 FM15ATEX0032X Equipment or protective system: PMA.Vision VIS1X…-… weighing unit (Type Reference and Name) Name of Applicant: Sartorius Lab Instruments GmbH & Co. KG Address of Applicant: Weender Landstrasse 94 - 108 Goettingen 37075 Germany This equipment or protective system and any acceptable variation thereto is specified in the schedule to this certificate and documents therein referred to.
- Page 78 THIS CERTIFICATE MAY ONLY BE REPRODUCED IN ITS ENTIRETY AND WITHOUT CHANGE FM Approvals Ltd. 1 Windsor Dials, Windsor, Berkshire, UK. SL4 1RS T: +44 (0) 1753 750 000 F: +44 (0) 1753 868 700 E-mail: atex@fmapprovals.com www.fmapprovals.com F ATEX 020 (Apr/14) Page 2 of 3 Installation Instructions VIS1X...
- Page 79 THIS CERTIFICATE MAY ONLY BE REPRODUCED IN ITS ENTIRETY AND WITHOUT CHANGE FM Approvals Ltd. 1 Windsor Dials, Windsor, Berkshire, UK. SL4 1RS T: +44 (0) 1753 750 000 F: +44 (0) 1753 868 700 E-mail: atex@fmapprovals.com www.fmapprovals.com F ATEX 020 (Apr/14) Page 3 of 3 Installation Instructions VIS1X...
- Page 80 FM15ATEX0034X Equipment or protective system: YCO16-Z Ex-Link Converter (Type Reference and Name) Name of Applicant: Sartorius Lab Instruments GmbH & Co. KG Address of Applicant: Weender Landstrasse 94 - 108 Goettingen 37075 Germany This equipment or protective system and any acceptable variation thereto is specified in the schedule to this certificate and documents therein referred to.
-
Page 81: Vis1X
Description of Equipment or Protective System: The YCO16-Z Ex-Link Converter is a dedicated device providing power and data to the PMA.Vision VIS1X…-… weighing platforms (FM15ATEX0032X). All signal outputs to the PMA.Vision are available in RS232 communications. The YCO16-Z Ex-Link Converter is housed within non-metallic enclosure. - Page 82 4 mm 3. The CAT6 cable used between the PMA.Vision and the YCO16-Z Ex-Link Converter shall be obtained from Sartorius. 4. The enclosure of the PMA.Vision is non-conducting and may generate an ignition-capable level of electrostatic charges under certain extreme conditions.
- Page 83 2. The protective ground connectors on the PMA.Vision VIS1X…-… and the YCO16-Z Ex-Link Converter shall be connected together using a potential equalization conductor with a cross-sectional area of at least 4 mm 3. The CAT6 cable used between the PMA.Vision VIS1X…-… and the YCO16-Z Ex-Link Converter shall be obtained from Sartorius.
- Page 84 Report Number Date FM Approvals LLC 29 February 2016 J.E. Marquedant Date Manager of Electrical Systems To verify the availability of the Approved product, please refer to www.approvalguide.com FM Approvals HLC 5/13 3055566C Page 3 of 3 Installation Instructions VIS1X...
- Page 85 4 mm 3. The CAT6 cable used between the PMA.Vision and the YCO16-Z Ex-Link Converter shall be obtained from Sartorius. 4. The enclosure of the PMA.Vision is non-conducting and may generate an ignition-capable level of electrostatic charges under certain extreme conditions.
- Page 86 2. The protective ground connectors on the PMA.Vision VIS1X…-… and the YCO16-Z Ex-Link Converter shall be connected together using a potential equalization conductor with a cross-sectional area of at least 4 mm 3. The CAT6 cable used between the PMA.Vision VIS1X…-… and the YCO16-Z Ex-Link Converter shall be obtained from Sartorius.
- Page 87 Report Number Date FM Approvals LLC 29 February 2016 J.E. Marquedant Date Manager of Electrical Systems To verify the availability of the Approved product, please refer to www.approvalguide.com FM Approvals HLC 5/13 3055566 Page 3 of 3 Installation Instructions VIS1X...
- Page 88 Issue No. 0 (2016-03-09) Status: Current Page 1 of 3 Date of Issue: 2016-03-09 Applicant: Sartorius Lab Instruments GmbH & Co. KG Weender Landstrasse 94 - 108 Goettingen 37075 Germany Electrical Apparatus: PMA.Vision VIS1X...-... & YCO16-Z Link Converter Optional accessory:...
- Page 89 Issue No. 0 (2016-03-09) Status: Current Page 1 of 3 Date of Issue: 2016-03-09 Applicant: Sartorius Lab Instruments GmbH & Co. KG Weender Landstrasse 94 - 108 Goettingen 37075 Germany Electrical Apparatus: PMA.Vision VIS1X...-... & YCO16-Z Link Converter Optional accessory:...
- Page 90 IECEx FME 15.0007X Issue No: 0 Page 2 of 3 Date of Issue: 2016-03-09 Manufacturer: Sartorius Lab Instruments GmbH & Co. KG Weender Landstrasse 94 - 108 Goettingen 37075 Germany Additional Manufacturing location(s): This certificate is issued as verification that a sample(s), representative of production, was assessed and tested and found to comply with the IEC Standard list below and that the manufacturer's quality system, relating to the Ex products covered by this certificate, was assessed and found to comply with the IECEx Quality system requirements.
- Page 91 = Up to five letters and/or numbers or blank (not critical to safety) The YCO16-Z Ex-Link Converter is a dedicated device providing power and data to the PMA.Vision VIS1X…-… weighing platforms. The YCO16-Z Ex-Link Converter is housed within non-metallic enclosure.
- Page 92 Sartorius Lab Instruments GmbH & Co. KG Otto-Brenner-Strasse 20 37079 Goettingen, Germany Phone: +49.551.308.0 Fax: +49.551.308.3289 www.sartorius.com The information and figures contained in these instructions correspond to the version date specified below. Sartorius reserves the right to make changes to the technology, features, specifications and design of the equipment without notice.
Need help?
Do you have a question about the VIS1X and is the answer not in the manual?
Questions and answers