
Related Manuals for SICK NAV350


Summary of Contents for SICK NAV350
- Page 1 Initial commissioning Laser Positioning Sensor Navigating the Route to improved productivity...
- Page 2 Device specific software module V 1.000 or higher for SOPAS ET SOPAS ET Configuration software V 02.38 or higher Software access to the NAV350 is password protected. The default factory setting for the password is as follows: User level Password Authorised client client The NAV350 laser positioning sensor is intended for use in industrial environments.
-
Page 3: Table Of Contents
In the event of fault ....................60 Monitoring error and malfunction indications ............60 Troubleshooting and rectification ................61 Detailed error analysis ....................61 SICK support ......................62 8013889/ZML0/2017-06-09 © SICK AG · Germany · All rights reserved · Subject to change without notice... - Page 4 Annex ..........................66 10.1 Overview of the annexes ..................66 10.2 Ordering information ....................66 10.3 Glossary ........................67 10.4 EC declaration of conformity ..................68 8013889/ZML0/2017-06-09 © SICK AG · Germany · All rights reserved · Subject to change without notice...
- Page 5 Random Access Memory = volatile memory with direct access Read-only Memory (permanent) SOPAS ET SICK OPEN PORTAL for APPLICATION and SYSTEMS ENGINEERING TOOL = configuration software for the configuration of the NAV350 8013889/ZML0/2017-06-09 © SICK AG · Germany · All rights reserved · Subject to change without notice...
- Page 6 Tab. 14: SOPAS ET default setting ..................51 Tab. 15: Password NAV350 ....................56 Tab. 16: Troubleshooting and rectification .................61 Tab. 17: Data sheet NAV350 ....................63 Tab. 18: Consumables ......................66 8013889/ZML0/2017-06-09 © SICK AG · Germany · All rights reserved · Subject to change without notice...
- Page 7 Beam diameter and distance between measured points at 0 to 100 m ..22 Fig. 9: Landmark detection ....................23 Fig. 10: Determination of the position by the NAV350 by means of the detection of reflec- tor placements ....................... 24 Fig. 11: Identification of reflectors in the operational status “continuous positioning” 25 Fig.
-
Page 8: About This Document
NAV350. Further information on the NAV350 is available from SICK AG, Division Auto Ident, and in the Internet at www.sick.com. -
Page 9: Symbology Used
The safety symbol beside the warning indicates the nature of the risk of accident, e.g. due to electricity. The warning category (DANGER, WARNING, CAUTION) indicates the severity of the hazard. Read carefully and follow the warning notices! 8013889/ZML0/2017-06-09 © SICK AG · Germany · All rights reserved · Subject to change without notice... -
Page 10: For Your Safety
The NAV350 must only be installed, commissioned and serviced by adequately qualified personnel. Repairs to the NAV350 are only allowed to be undertaken by trained and authorised service personnel from SICK AG. The following qualifications are necessary for the various tasks:... -
Page 11: Correct Use
The NAV350 is a sensor for use indoors. Important In case of any other usage as well as in case of modifications to the NAV350, e.g. due to opening the housing during mounting and electrical installation, or to the SICK software, any claims against SICK AG under the warranty will be rendered void. -
Page 12: General Safety Notes And Protective Measures
The operating instructions must be made available to the operator of the system where the NAV350 is used. The operator of the system is to be instructed in the use of the de- vice by specialist personnel and must be instructed to read the operating instructions. -
Page 13: Quick Stop And Quick Restart
Pay attention to the laser safety regulations as per IEC 60825-1 (valid version). Important No maintenance is necessary to ensure compliance with laser class 1. Laser output aperture The laser output aperture is the view window on the scanner head of the NAV350. Laser output aperture Rotating scanner head Fig. 1:... -
Page 14: Environmental Protection
Operating Instructions NAV350 Laser positioning sensor Environmental protection The NAV350 has been designed to minimise environmental impact. It uses only a minimum of power. While working, always act in an environmentally responsible manner. For this reason please note the following information on disposal. -
Page 15: Product Description
Chapter 3 NAV350 Product description This chapter provides information on the special features and properties of the NAV350. It describes the construction and the operating principle of the device, in particular the different operating modes. Please read this chapter before mounting, installing and commissioning the device. -
Page 16: Construction Of The Nav350
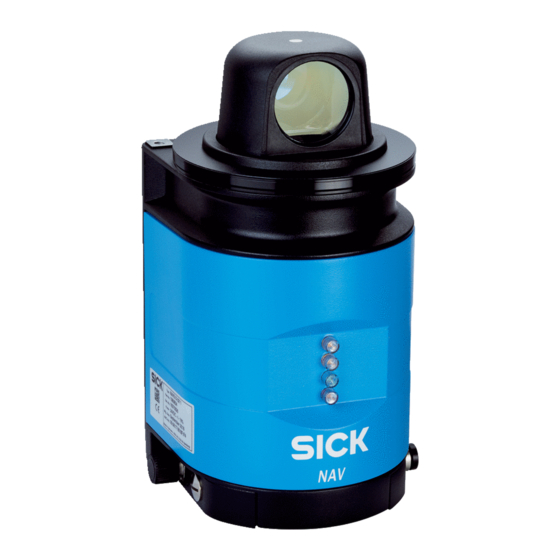
Device connections Alignment hole for (M12 plug connectors) locating pin Yellow Yellow Green Ethernet Supply voltage Bottom Fastening thread M6×12 Fig. 2: Views of device 8013889/ZML0/2017-06-09 © SICK AG · Germany · All rights reserved · Subject to change without notice... -
Page 17: Tab. 4: Meaning Of The Led Status Indicators
The LEDs signal the operational status of the NAV350. The NAV350 has four LEDs. These visually signal the actual operational status and the sta-- tus of the continuous self-check. The LEDs are on the front of the device on the NAV350. tab. 4 shows the function of the LEDs. -
Page 18: Special Features Of The Nav350
Supply voltage DC 24 V • Data interfaces: Ethernet, RS-232 serial • 1 x output signal switching device for synchronisation Tab. 5: Special features of the NAV350 8013889/ZML0/2017-06-09 © SICK AG · Germany · All rights reserved · Subject to change without notice... -
Page 19: Applications
Operating principle of the NAV350 The NAV350 has an opto-electronic laser measurement system that electro-sensitively scans the contour of its surroundings in a plane with the aid of laser beams. The NAV350 measures its surroundings in two-dimensional polar coordinates. If a measurement beam is incident on an object, the position is determined in the form of distance, direction and remission. -
Page 20: Fig. 4: Principle Of Operation Of The Nav350
Principle of operation of the NAV350 In addition to navigation and landmark detection, the NAV350 can output the surrounding contour measured to the vehicle computer connected (mixed mode). 8013889/ZML0/2017-06-09 © SICK AG · Germany · All rights reserved · Subject to change without notice... -
Page 21: Fig. 5: Diffuse Reflection From Objects
The incident radiation is not reflected diffusely in all directions by reflectors, but direction-- ally. As a result a large portion of the energy emitted can be received by the NAV350. The NAV350 makes use of this situation to be able to exactly measure the positions of reflec-- tors. -
Page 22: Tab. 6: Typical Remissions And Scanning Ranges
3.5.3 Scanning range of the NAV350 The scanning range of the NAV350 is dependent on the remission of the objects to be de-- tected. The better a surface reflects the incident radiation, the greater the scanning range of the NAV350. -
Page 23: Landmark Detection
Operating Instructions Chapter 3 NAV350 Important In particular on the usage of the NAV350 for the output of measured values, it is necessary for a reliable measurement that the beam is incident on the object several times. Landmark detection In the... -
Page 24: Navigation
40). These reflector are either measured and their coordinates saved in the NAV350 or they are taught-in by the NAV350 (mapping). The NAV350 passes the position data to the AGV’s vehicle computer on request. The vehicle computer steers the AGV along the programmed and therefore pre-defined route and cor- rects any course deviations that occur with the aid of the NAV350. -
Page 25: Fig. 11: Identification Of Reflectors In The Operational Status "Continuous Positioning
The vehicle is not moving. • There are at least three reflectors in the field of view of the NAV350. Depending on the number of measured reflectors and number of reflectors in the current layer, initial positioning can take several seconds. -
Page 26: Fig. 12: Radius Of The Detection Window As A Function Of The Distance
The radius of the detection window can also be configured as a function of the distance be- tween the NAV350 and the reflector. For this purpose the start and end point of a linear function and the size of the detection window at the start and end point are transferred to the NAV350. -
Page 27: Fig. 13: Restricted Action Radius
NAV350. The influence of the position data from the NAV350 on the correction is application-specific and depends on the quality of the odometry and the positioning tolerances allowed in the system. - Page 28 However, the setting cannot be saved. Important The reflector layout is to be designed such that for the NAV350 at least three reflectors are always visible in the sectors that are not muted. If this is not the case, the NAV350 determines the position using all visible reflectors (similar to the measuring accuracy, see section 3.7.2 “Measuring accuracy”...
-
Page 29: Fig. 14: Example For The Definition Of Muted Sectors
The situation of an overlapping reflector occurs if the angle between two reflectors from the point of view of the NAV350 is less than 0.6°. The reflector placement is to be selected for this case such there are at least 3 further reflectors in the field of view of the NAV350. -
Page 30: Fig. 16: Minimum Distance From Reflectors To Other Reflecting Objects
Subsequent movement of reflectors Movement of reflectors that are also still in the measurement area of the NAV350 after they have been moved, will make the result of the measurement incorrect and must be correct-... -
Page 31: Output Of Measured Values
In addition knowledge of the data exchange between a laser positioning sensor such as the NAV350 and the vehicle computer are required. We there- fore strongly recommend you make use of the training offered by SICK AG on the Hamburg site. -
Page 32: Tab. 7: Frame For The Telegrams With Ascii Coding
Tab. 7: Frame for the telegrams with ASCII coding A detailed description of the different telegrams can be found in the “NAV350 Telegram list- ing”, part no.: 8013893. 8013889/ZML0/2017-06-09 © SICK AG · Germany · All rights reserved · Subject to change without notice... -
Page 33: Fig. 19: Integration Of The Nav350 In A Navigation System
Integration of the NAV350 in a navigation system Overview of the integration of the NAV350 in the control system for an AGV The vehicle computer informs the NAV350 of the actual velocity and rate of turn of the AGV from its odometry (see fig. -
Page 34: Fig. 20: Pulse For Synchronisation
The internal time stamp in the NAV350 is added to the measured data from the NAV350. The internal time stamp in the NAV350 is a 32-bit counter that counts up by 1 every 1 ms. To synchronise the internal time in the NAV350 with the system time in the vehicle’s control system, the NAV350 provides three options. - Page 35 3.9.6 Result Port The NAV350 features a Result Port, a simplyfied telegramme with its own port. The Result Port supplies landmark data and scan data parallely to the CoLa dialect. The Result Port can be configured via the SOPAS user interface. Alternatively, the Result Port may also configured using the CoLa diagrammes.
-
Page 36: Planning
For the NAV350 the mounting kit part no. 5311055 with mounting material is available. As an alternative you can use a strong stable mounting bracket that provides adjustable alignment of the NAV350 in the X- and Y axis. The NAV350 weighs approx. 2.4 kg (5.29 lb). 8013889/ZML0/2017-06-09... -
Page 37: Tab. 8: Beam Diameter At Different Distances From The Nav350
3.10.3 Distance between NAV350 and the object/surface to be measured The measurement area on the NAV350 starts at 0.5 m (1.64 ft) in front of the optics (light output window). To prevent false measurements, in the case of the recessed installation of the NAV350 the increase in the size of the laser beam with increasing distance is to be taken into account. -
Page 38: Fig. 22: Absolute And Local Coordinate System With Angular Position Of The Nav350
In this way the origin and axes for the absolute coordinate sys- tems are defined. In this coordinate system the NAV350 determines its absolute position in the X and Y direc- tion including the angular position α of its local coordinate system in relation to the abso- lute coordinate system. -
Page 39: Fig. 23: Reflector Height As A Function Of The Distance From 0 To 70 M
The maximum scanning range of the NAV350 is 70 m (229.66 ft) onto reflectors. It is possible to deter- mine the minimum reflector heights based on the characteristics of the floor and the meas- urement distance. -
Page 40: Fig. 24: Correct, Asymmetrical Placement And Incorrect, Symmetrical Placement Of Reflectors
3.10.6 Reflector placements Reflector placements are to be planned such that the NAV350 has a clear view of at least 3 reflectors in every position. A clear view of 4 to 5 reflectors is recommended to ensure reliable positioning even in the case of the operation of several AGV. As far as possible the same number of reflectors should be fitted to both sides of the route. - Page 41 2 reflectors must not be more than 120°. • At positions at which the NAV350 is placed on the route, there must be at least 4 to 6 reflectors in the measurement area of the NAV350. Also the angle between 2 reflectors must not be more than 120°.
-
Page 42: Fig. 25: Common Usage Of The Reflectors From Two Neighbouring Layers
Division of the route into layers The reflector data saved in the NAV350 can be allocated to up to 320 layers in groups. Each layer represents a fixed defined area in the AGV’s overall route through which the AGV pass- es. -
Page 43: Mounting
– Stable mounting bracket that provides adjustable alignment of the NAV350 in the X and Y axis – 3 screws M6 for the NAV350, screw length dependent on the wall thickness of the fix- ing bracket used Mounting and adjustment of the device Risk of damage to the device! The maximum screw length in the M6 blind threaded hole is 12 mm (0.47 in). -
Page 44: Dismantling The Nav350
1. Switch off the supply voltage. 2. Remove the connection cables. 3. Undo screws for mounting the NAV350 to the fixing and remove device. 8013889/ZML0/2017-06-09 © SICK AG · Germany · All rights reserved · Subject to change without notice... -
Page 45: Electrical Installation
“Power” connection “RS232” connection M12×4, socket M12×5, plug M12×8, plug Fig. 26: Connections of the NAV350 The NAV350 has three round multi-pin M12 plug connectors. 8013889/ZML0/2017-06-09 © SICK AG · Germany · All rights reserved · Subject to change without notice... -
Page 46: Preparing The Electrical Installation
The supply of power/the external power supply for the supply of power must be able to provide at least 40 W continuous power, if the switching output is wired at least 48 W continuous power. 8013889/ZML0/2017-06-09 © SICK AG · Germany · All rights reserved · Subject to change without notice... -
Page 47: Undertaking Electrical Installation On The Nav350
(current/voltage measurement) Only connect in electrically isolated state! Ensure the power supply to which the NAV350 is connected is switched off. 8013889/ZML0/2017-06-09 © SICK AG · Germany · All rights reserved · Subject to change without notice... -
Page 48: Fig. 27: Connection Of The Voltage Supply
Pay attention to max. cable length as per section 5.3.3 “General conditions for the data interface” on page Fig. 29: Wiring the RS232 interface 8013889/ZML0/2017-06-09 © SICK AG · Germany · All rights reserved · Subject to change without notice... -
Page 49: Fig. 30: Rs232 Connection
Electrical installation Operating Instructions Chapter 5 NAV350 Pre-assembled cables are available for the configuration of the NAV350 via the RS-232 in- terface. White = RxD Brown = TxD Green = Do not use Yellow = Do not use Socket Grey = GND M12×8... -
Page 50: Commissioning And Configuration
The NAV350 must be commissioned only by adequately qualified personnel. Before you operate a machine/system equipped with the NAV350 for the first time, make sure that the system is first checked and released by qualified personnel. On this issue, ob- serve the notes in chapter 2 “For your safety”... -
Page 51: Sopas Et Configuration Software
The interactive configuration is carried out using SOPAS ET. Using this configuration soft- ware, you can configure and test the measurement properties, the analysis behaviour and the output properties of the NAV350 as required. The configuration data can be saved as a parameter set (project file) on the PC and archived. - Page 52 3. On the GENERAL tab, highlight INTERNET PROTOCOL (TCP/IP), and then click PROPER- TIES 4. Select USE THE FOLLOWING IP ADDRESS, and enter the following IP address: 192.168.1. x (e.g. 1) 5. Confirm with OK 8013889/ZML0/2017-06-09 © SICK AG · Germany · All rights reserved · Subject to change without notice...
-
Page 53: Fig. 31: Ip Communication With Fixed Ip Address
The ADD ADRESS dialog box is closed. Fig. 31: IP communication with fixed IP address 5. Click ADVANCED... button 6. Under TCP PORT(S) deactivate port 2112 and confirm with OK. 8013889/ZML0/2017-06-09 © SICK AG · Germany · All rights reserved · Subject to change without notice... -
Page 54: Fig. 32: Configuring With Autoip
IP ADDRESS under USE THE FOLLOWING IP SETTINGS = 169.192.88.121 7. Confirm the settings in the NETWORK SCAN ASSISTANT dialog box with OK. The SCAN ASSISTANT dialog box is closed. 8013889/ZML0/2017-06-09 © SICK AG · Germany · All rights reserved · Subject to change without notice... -
Page 55: Initial Commissioning
Once the configuration has been completed, the parameter set must be saved in non-vola- tile memory in the NAV350. In addition, the parameter set should be saved as a project file (spr file with configuration data) on the PC and archived. -
Page 56: Connection And Test Measurement
Important Software access to the NAV350 is password protected. using screws of the are sealed. Claims under the warranty against SICK AG will be rendered void if the seals are damaged User level Password... -
Page 57: Loading Reflector Data
Reflector data can be read from and saved in a corresponding text file on a data medium using the buttons O and S 8013889/ZML0/2017-06-09 © SICK AG · Germany · All rights reserved · Subject to change without notice... -
Page 58: Maintenance
(dust, powder, moisture). Damage to the optics in the NAV350! The window in the scanner head on the NAV350 is made of glass. The optical power is re- duced by scratches and smearing on the front screen. Do not use aggressive detergents. -
Page 59: Exchanging A Nav350
NAV350 How to clean the window in the scanner head on the NAV350: 1. Switch off the NAV350 while performing cleaning, as otherwise the scanner head will rotate. 2. Use a clean and soft brush to remove dust from the window. -
Page 60: Troubleshooting
Important Claims under the warranty rendered void! The housing screws of the NAV350 are sealed. Claims under the warranty against SICK AG will be rendered void if the seals are damaged or the device opened. The housing is only allowed to be opened by authorised service personnel. -
Page 61: Troubleshooting And Rectification
Chapter 8 NAV350 • After switching on the supply voltage the NAV350 runs through a self-test prior to initial-- isation (loading the parameter set and initialisation of the device functions); during this self-test the device checks important hardware components. •... -
Page 62: Sick Support
NAV350 Laser positioning sensor SICK support If a fault cannot be rectified with the measures stated, the NAV350 may be faulty. The NAV350 cannot be repaired or its functionality restored by the user after a failure. However, quick replacement of a NAV350 by the user is possible. On this subject see chapter 7.2 “Exchanging a NAV350”... -
Page 63: Technical Specifications
Statistical error distance 15 mm (0.59 in) at 20 … 90% reflection (1 sigma) Temperature drift typ. ±0,6 mm/K General data Tab. 17: Data sheet NAV350 8013889/ZML0/2017-06-09 © SICK AG · Germany · All rights reserved · Subject to change without notice... - Page 64 The data are typical values, condition: laser spot completely on the target, warm-up time min. 30 min. Condition: laser spot completely on the target, warm-up time min. 30 min. 8013889/ZML0/2017-06-09 © SICK AG · Germany · All rights reserved · Subject to change without notice...
-
Page 65: Dimensional Drawings
Fastening bore (M6x12) Rotational diameter Adjustment bore RS232 connection (M12x4, plug) Ethernet connection (M12x4, device socket) Power connection (12x5, plug) 8013889/ZML0/2017-06-09 © SICK AG · Germany · All rights reserved · Subject to change without notice... -
Page 66: Annex
Part number Type 4Description 4003353 Lens cloth Special cloth for correctly cleaning the window 5600006 Plastic detergent Antistatic, mild detergent solution Tab. 18: Consumables 8013889/ZML0/2017-06-09 © SICK AG · Germany · All rights reserved · Subject to change without notice... -
Page 67: Glossary
EEPROM of the NAV350. Parameter set Data set using which the functions implemented in the NAV350 are initialised and activat- ed. Is transmitted from the NAV350 to SOPAS ET and in the reverse direction using U PLOAD or D respectively. -
Page 68: Ec Declaration Of Conformity
1 of the EC declaration of conformity (size reduced). If necessary download the complete EC declaration of conformity (with list of the device var- iants and the standards met) as a PDF from the related product page on the SICK website www.sick.com. - Page 69 Annex Operating Instructions Chapter 10 NAV350 8013889/ZML0/2017-06-09 © SICK AG · Germany · All rights reserved · Subject to change without notice...
- Page 70 Phone +91 22 6119 8900 Phone +27 11 472 3733 E-Mail info@sick-india.com E-Mail info@sickautomation.co.za Further locations at www.sick.com SICK AG | Waldkirch | Germany | www.sick.com 8013889/ZML0/2017-06-09 © SICK AG · Germany · All rights reserved · Subject to change without notice...
Need help?
Do you have a question about the NAV350 and is the answer not in the manual?
Questions and answers