Sign In
Upload
Download
Table of Contents
Contents
Add to my manuals
Delete from my manuals
Share
URL of this page:
HTML Link:
Bookmark this page
Add
Manual will be automatically added to "My Manuals"
Print this page
×
Bookmark added
×
Added to my manuals
Manuals
Brands
SICK Manuals
Accessories
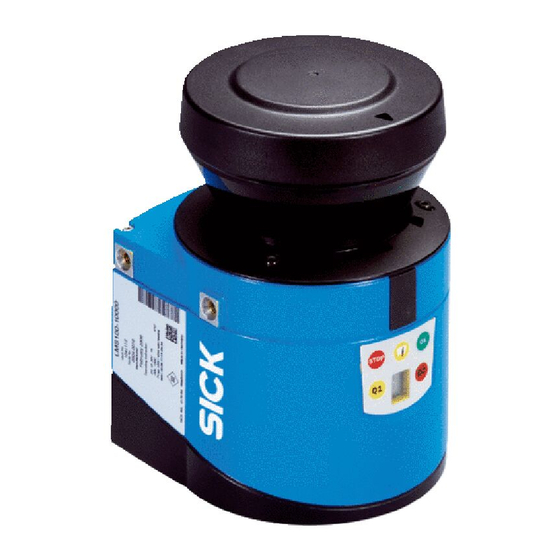
LMS100
Operating instructions manual
SICK LMS100 Operating Instructions Manual
Laser measurement sensors
Hide thumbs
1
2
Table Of Contents
3
4
5
6
7
8
9
10
11
12
13
14
15
16
17
18
19
20
21
22
23
24
25
26
27
28
29
30
31
32
33
34
35
36
37
38
39
40
41
42
43
44
45
46
47
48
49
50
51
52
53
54
55
56
57
58
59
60
61
62
63
64
65
66
67
68
69
70
71
72
73
74
75
76
77
78
79
80
81
82
83
84
85
86
87
88
89
90
91
92
93
94
95
96
97
98
99
100
101
102
103
104
105
106
107
108
109
110
page
of
110
Go
/
110
Contents
Table of Contents
Troubleshooting
Bookmarks
Table of Contents
Table of Contents
1 About this Document
Information Regarding the Operating Instructions
Scope
Depth of Information
Explanation of Symbols
Further Information
Customer Service
2 For Your Safety
Correct Use
Incorrect Use
IP Technology
Limitation of Liability
Modifications and Conversions
Requirements for Skilled Persons and Operating Personnel
Hazard Warnings and Operational Safety
Quick Stop and Quick Restart
Environmental Protection
Repair
3 Product Description
Delivery
Device Variants
Type Code
Special Features of the Lms1Xx
Controls and Status Indicators
Operating Principle of the Lms1Xx
Applications
Measurement of Objects
Field Application
Inputs and Outputs
Data Interfaces
Data Communication Using Telegrams
Planning
4 Transport and Storage
Transport
Transport Inspection
Storage
5 Mounting
Overview of the Mounting Steps
Preparations for Mounting
Mounting Steps
Dismantling the Lms1Xx
6 Electrical Installation
Overview of the Installation Steps
Connections of the Lms1Xx
Preparing the Electrical Installation
Perform Electrical Installation on the Lms1Xx
7 Commissioning and Configuration
Overview of the Commissioning Steps
SOPAS ET Configuration Software
Establish Communication with the Lms1Xx
Initial Commissioning
Connection and Test Measurement
8 Maintenance
Maintenance During Operation
Exchanging an Lms1Xx
Decommissioning
9 Troubleshooting
In the Event of Faults or Errors
Error Displays of the Leds
Indications of the 7-Segment Display
Detailed Error Analysis
SICK Support
10 Technical Specifications
Data Sheet Lms1Xx/Lmc1Xx Laser Measurement Sensor
Operating Range Diagrams
Dimensional Drawings
11 Annex
Ordering Information
EU Declaration of Conformity
Glossary
Abbreviations
Figures
Tables
Advertisement
Quick Links
1
Connections of the Lms1Xx
2
Error Displays of the Leds
3
In the Event of Faults or Errors
Download this manual
O P E R A T I N G
I N S T R U C T I O N S
LMS1xx
LASER MEASUREMENT SENSORS
Table of
Contents
Previous
Page
Next
Page
1
2
3
4
5
Advertisement
Table of Contents
Need help?
Do you have a question about the LMS100 and is the answer not in the manual?
Ask a question
Questions and answers
Related Manuals for SICK LMS100
Accessories SICK LMS151 Operating Instructions Manual
Laser measurement sensors (110 pages)
Accessories SICK LMS111 Operating Instructions Manual
Laser measurement sensors (110 pages)
Accessories SICK LMS131 Operating Instructions Manual
Laser measurement sensors (110 pages)
Accessories SICK LMS141 Operating Instructions Manual
Laser measurement sensors (110 pages)
Accessories SICK LMS1104C-111031S01 Quick Start Manual
(8 pages)
Accessories SICK LMS1104C-111031S01 Operating Instructions Manual
2d lidar sensors (58 pages)
Accessories SICK LMS1 Series Operating Instructions Manual
Laser measurement sensors of the product family (96 pages)
Accessories SICK Bulkscan LMS511 Operating Instructions Manual
Laser volume flowmeter for the throughput measurement of bulk goods (92 pages)
Accessories SICK LMS5 Series Operating Instructions Manual
2d lidar sensors (112 pages)
Accessories Sick LMS4000 Operating Instructions Manual
2d lidar sensors (58 pages)
Accessories SICK LMS4000 Operating Instructions Manual
2d lidar sensors (60 pages)
Accessories SICK LMS5 Series Operating Instructions Manual
Laser measurement sensors (122 pages)
Accessories SICK LMS5 Series Operating Instructions Manual
2d lidar sensors (94 pages)
Accessories SICK LMS400 Online Help Manual
Laser measurement sensors (44 pages)
Accessories SICK LMS4400 Operating Instructions Manual
2d lidar sensors (58 pages)
Accessories SICK LMS511 Heavy Duty Operating Instructions Manual
2d lidar sensors (112 pages)
This manual is also suitable for:
Lms151
Lms153
Lms111
Lms121
Lms122
Lms123
...
Show all
Lms173
Lms132
Lms131
Lms133
Lms141
Lms182
Lmc121
Lmc122
Lmc131
Lmc123
Lmc132
Lmc133
Table of Contents
Save PDF
Print
Rename the bookmark
Delete bookmark?
Delete from my manuals?
Login
Sign In
OR
Sign in with Facebook
Sign in with Google
Upload manual
Upload from disk
Upload from URL


Need help?
Do you have a question about the LMS100 and is the answer not in the manual?
Questions and answers