
Related Manuals for Leadshine ES-DH1208


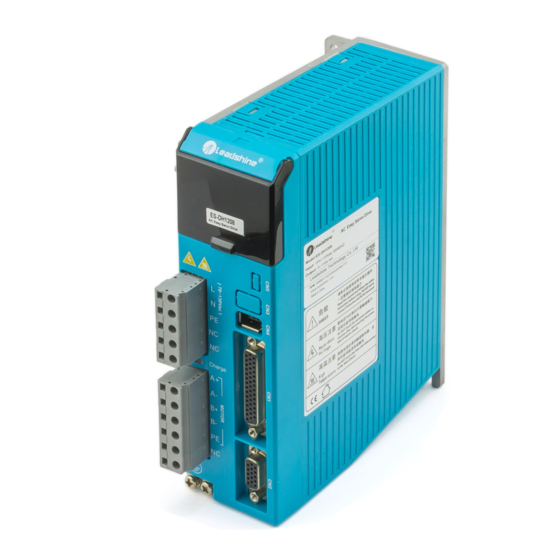
Summary of Contents for Leadshine ES-DH1208
- Page 1 Hardware Installation Manual Of the High Voltage Easy Servo Drives Version 0.0.1 www.servosystem.ru +7(495) 407-01-02...
- Page 2 Read this manual carefully before trying to install the stepper drive into your system. Uses who setup the stepper drive should have a better understanding on electronics and mechanics. Contact Leadshine technical guys when you have Notice questions on this document.
-
Page 3: Table Of Contents
Connecting Power Supply............................3 ES-DH1208............................... 3 ES-DH2306............................... 3 Connecting Motor..............................4 ES-DH1208 and the ES-MH2 series motor ...................... 4 ES-DH2306 and the ES-MH3 series motor ...................... 4 Connecting Encoder ..............................5 Connecting Control Signal ............................5 Pulse, Direction, Enable Input ........................5 Alarm Output .............................. - Page 4 Obtaining Warranty Service ..........................22 Warranty Limitations............................22 Shipping Failed Product ............................22 Contact Us ..................................23 www.servosystem.ru +7(495) 407-01-02...
-
Page 5: Introduction To Easy Servo
Hardware installation manual of the ES-DH series drives Introduction to Easy Servo The ES (Easy Servo) series close-loop stepper servos offer an alternative for applications requiring high performance and high reliability when the traditional servo was the only choice, while it remains cost-effective. -
Page 6: Wiring Diagrams
Wiring Diagrams AC Power RS232 Cable USB-232 Converter Motion Controller Encoder Cable Motor Power Cable Wiring Diagram of ES-DH1208 and ES-MH2 series motor AC Power RS232 Cable USB-232 Converter Motion Controller Encoder Cable Motor Power Cable Wiring Diagram of ES-DH2306 and ES-MH3 series motor www.servosystem.ru... -
Page 7: Connecting Power Supply
Hardware installation manual of the ES-DH series drives Connecting Power Supply ES-DH1208 The power of the ES-DH1208 can be connected as follows. AC Power Power 70-130VAC AC Power Connection of ES-DH1208 ES-DH2306 The ES-DH2306 requires two powers input as follows. The main power is used to energize the motor and the control power is used for logic circuit. -
Page 8: Connecting Motor
The ES-DH1208 is designed for 2-phase stepper motor with encoder feedback. It can work with Leadshine ES-MH2 series motor which has the A+, A-, B+ and B- lead. Just connect these leads to the corresponding terminals of the ES-DH1208 as follows. -
Page 9: Connecting Encoder
Note that the easy servo drive can not work without encoder feedback. The encoder output of the ES-MH is a HDD15 male connector. Just plug it to the ES-DH drive’s feedback (encoder) connector. ES-MH2 / ES-MH3 series motor ES-DH1208 Feedback ES-DH2306 Encoder Signals... -
Page 10: Alarm Output
Hardware installation manual of the ES-DH series drives Pulse, Direction, Enable Input (Continued) In a PNP (sinking) type output, the control signals are refer to the same ground terminal. Controller ES-DH Drive VCC = 5-24V 5V recommended Step PUL+ PUL- Direction DIR+ DIR-... -
Page 11: Connecting Pc
Hardware installation manual of the ES-DH series drives Connecting PC A built-in RS232 communication port in the easy servo drive is used for communication and configuration. Connect this port to the PC’s serial port. Then you can turn the motor in PC software. This software - ProTuner, is designed to configure the easy servo drive. -
Page 12: Typical Connections
ENA- Enable Yellow Blue ~ 70-130VAC ALM+ Alarm ALM- Motor Connector Control Signal Connector Power Connector Typical Connections of ES-DH1208 with controller of sinking output Feedback Signal Controller ES-DH2306 Connector ES-MH33480 ES-MH342120 5-24V, Encoder ES-MH342200 5V recommended Extension Cable PUL+... -
Page 13: Wiring Notes
Kp and Ki for optimizing performance. Refer to the software manual for more detail. The ES-DH1208’s Kp and Ki are calculated automatically at power-up regarding to motor and supply voltage. There is no need to tune them. -
Page 14: Configuring Es Drive By The On-Board Hmi
Hardware installation manual of the ES-DH series drives Configuring ES drive by the on-board HMI Users can configure the drive via the on-board HMI in the front panel. This HMI includes six 7-segment digits and five keys for users operation as follows: 7-segment Display Left Shift Digits Decrease or Next... -
Page 15: Display Data Mode
Hardware installation manual of the ES-DH series drives Display Data Mode This mode is active initially at drive’s power-up. In this mode, users can check the monitoring data as shown in the following table. Display Code Name Description “L “ Low order digits display. -
Page 16: Edit Parameter Mode
Hardware installation manual of the ES-DH series drives Edit Parameter Mode In this mode, the parameter is identified by the code “PA__XX” as shown in the following table. Display Code Name Default Value Range Description “PA__00” Current Loop Kp Proportional gain. Increase it make current 1000 0-65535 rise fast. - Page 17 Hardware installation manual of the ES-DH series drives “PA__14” Filter Time The higher value the smoother motion. But 25600us 0-25600 high value also leads to high delay. “PA__15” Enable Level 0----Users must apply a 5V between ENA+ 0 or 1 and ENA- to enable the drive.
-
Page 18: Configuration Example Via The On-Board Hmi
Hardware installation manual of the ES-DH series drives Configuration Example via the on-board HMI The following figure illustrates how to set the “Pulses/Revolution” via the on-board HMI. Looking up the table in the “Edit Parameter Mode” section, this parameter refers to “PA__12” item. So the setting procedure is shown as follows: Power-Up It displays the low order digits of... -
Page 19: Rotating The Motor Via The On-Board Hmi
Hardware installation manual of the ES-DH series drives Rotating the Motor via the On-board HMI User’s can rotate the motor by the on-board HMI for test purpose. A motion generator has been built inside the drive. To start the motion, first you need to setup the motion parameter such as motion velocity, motion distance, acceleration and initial direction, etc. -
Page 20: Rotating The Es Motor In Pc Software
Hardware installation manual of the ES-DH series drives Rotating the ES Motor in PC Software There is a simple emulating controller that is used for self-test in the ES drive. It is not a full functionality controller but it do eliminates the troubles to setup a real motion controller when you want to test the ES drives or verify the connection in case of problem. -
Page 21: Power Supply Selection
Hardware installation manual of the ES-DH series drives Power Supply Selection To achieve good driving performances, it is important to choose a suitable supply voltage and use a matching current value. Generally speaking, supply voltage determines the high speed performance of the motor, while output current determines the output torque of the driven motor (particularly at lower speed). -
Page 22: Recommended Supply Voltage
Hardware installation manual of the ES-DH series drives Recommended Supply Voltage Both Leadshine’s regulated and unregulated power supply has been designed specially for motion control. Motor Drive Voltage Range Typical Voltage ES-MH23480 ES-DH1208 AC(70-130)V AC 110/120V ES-MH234120 ES-DH1208 AC(70-130)V AC 110/120V... -
Page 23: Current Control Detail
However, if you want to fine tune the IES for best performance for your applications, Leadshine also offers tuning software, ProTuner, which allows you to adjust those current-loop and position-loop parameters (see software manual). -
Page 24: Over-Current Protection
Hardware installation manual of the ES-DH series drives Over-current Protection Over-current protection will be activated when continuous current exceeds the limit or in case of short circuit between motor coils or between motor coil and ground, and RED LED will blink once within each periodic time. -
Page 25: Frequently Asked Questions
Hardware installation manual of the ES-DH series drives Frequently Asked Questions In the event that your drive doesn’t operate properly, the first step is to identify whether the problem is electrical or mechanical in nature. The next step is to isolate the system component that is causing the problem. -
Page 26: Warranty
Leadshine Technology Co., Ltd. warrants its products against defects in materials and workmanship for a period of 12 months from shipment out of factory. During the warranty period, Leadshine will either, at its option, repair or replace products which proved to be defective. - Page 27 Hardware installation manual of the ES-DH series drives www.servosystem.ru +7(495) 407-01-02...
Need help?
Do you have a question about the ES-DH1208 and is the answer not in the manual?
Questions and answers