Table of Contents
Advertisement
Advertisement
Table of Contents

Related Manuals for Heatmiser neoUltra


Summary of Contents for Heatmiser neoUltra
- Page 1 Model:...
-
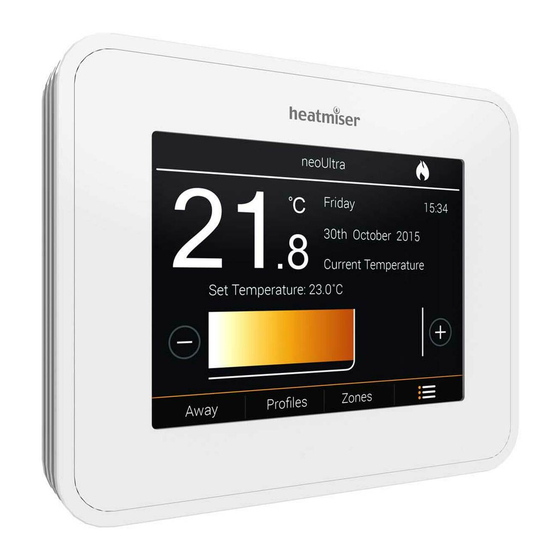
Page 2: Product Image
Model: Series... -
Page 3: Table Of Contents
Optional Features 27-29 Installation Procedure Feature Menu Options Mode Select Re-calibrating the Thermostat Pairing the neoHub Error Codes Pairing the neoUltra History What is a Mesh Network? Factory Reset Mode 1 - Thermostat Wiring Diagrams 34-36 Main Display Mode 2 - Time Clock Setting the Time &... -
Page 4: What Is A Programmable
What is a Programmable Room Thermostat? A programmable room thermostat is both a programmer and a room thermostat. A programmer allows you to set “On” and “Off” periods to suit your own lifestyle. A room thermostat works by sensing the air temperature, switching on the heating when the air temperature falls below the thermostat setting, and switching it off once this set temperature has been reached. - Page 5 The way to set and use your programmable room thermostat is to find the lowest temperature settings that you are comfortable with at the different times you have chosen, and then leave it alone to do its job. The best way to do this is to set the room thermostat to a low temperature – say 18°C , and then turn it up by 1°C each day until you are comfortable with the temperature.
-
Page 6: Installation Procedure
Do not push hard on the LCD screen as this may cause irreparable damage. The neoUltra is designed to be flush mounted and requires a back box of 35mm (minimum depth) to be sunk into the wall prior to installation. - Page 7 Model:...
-
Page 8: Mode Select
Mode Select neoUltra can either be used as a thermostat or a time clock. Thermostat mode is the default setting. To change between thermostat or time clock modes, follow these steps. • Press the menu icon ......................• Select ‘Settings’ followed by ‘Feature Set-up’ ............. -
Page 9: Pairing The Neohub
• Connect your smartphone or tablet device to the same WiFi network as your router. • Download the FREE Heatmiser neoApp from the Apple App Store, Google Play Store, Amazon App Store and register an account. • Once you have registered your account, press the Login button then press the Add Location option. -
Page 10: Pairing The Neoultra
Pairing the neoUltra The next step is to join the neoUltra to the neoHub, we recommend joining the neoUltra or neoStat located nearest to the neoHub first. To add a neoUltra, follow these steps; • Press the menu icon ...................... -
Page 11: Mode 1 - Thermostat
Thermostat Mode Sample showing network connected. Model:... -
Page 12: Main Display
Main Display Mesh Symbol - Displayed when connected to the neoHub. Temperature – Displays the current sensor temperature in Celsius or Fahrenheit. Set Temperature – Indicates current target temperature. Set Temperature Bar – Shows current and set temperature. Swipe across the bar to set a required room temperature. -
Page 13: Setting The Time & Date
Setting the Time and Date Note: When the neoUltra is paired with the neoHub, the time & date settings are automatically synchronised according to the location’s time zone setting. To set the clock, follow these steps. • Press the menu icon ..................... -
Page 14: Comfort Levels Explained
The neoUltra offers three program mode options; Weekday/Weekend programming, 7 Day programming and 24 Hour programming. You also have the option to use the neoUltra in Non-Programmable mode. This unit is supplied with comfort levels already pre-programmed, but these can be changed easily. - Page 15 • Repeatedly tap the plus and minus keys to set the desired temperature for “Wake” ..........................• Now tap the arrow keys to set Hours, Minutes and AM/PM for “Wake” ... • Press the “1, 2, 3, 4, Sleep” tabs and repeat the above steps to set time and temperature for these levels.
- Page 16 “Cancel” at any time to exit without saving ....neoUltra can be configured to support 4 ‘Comfort levels’ when paired to a neohub. Via the neo app you can select the option for 4 ‘Comfort levels’ and program them using the same method as setting ‘Wake, 1, 2, 3, 4, ‘Sleep’...
-
Page 17: Temperature Control
Temperature Control • Swipe left or right across the set temperature bar to set your desired temperature ......................• Tap on the plus and minus keys to make minor adjustments to the set value........................... Note: This new temperature is maintained only until the next programmed comfort level. At this time, the thermostat will revert back to the programmed levels. -
Page 18: Temperature Hold
Temperature Hold The temperature hold function allows you to manually override the current operating program and set a different temperature for a desired period. • To program a ‘Temperature Hold’ , press the menu icon ..........• In the main menu press ‘Hold’ ....................•... - Page 19 Locking the neoUltra The neoUltra has a screen lock facility. Once enabled the thermostat will prompt a 4-digit code entry before allowing access. To activate the lock, follow these steps. • Press the menu icon ........................• Select ‘Lock’........................... Confirm •...
-
Page 20: Locking/Unlocking The Neoultra
Unlocking the neoUltra To unlock the neoUltra re-enter the 4 digit pin number used to enable lock. • Touch any part of the display ....................Confirm • Re-enter the 4 digit pin and press “Confirm” ............Standby In time clock mode; the timed output will be turned off during ‘Standby’ , then return to the programmed settings once ‘Standby’... -
Page 21: Away
Note: ‘Away’ & ‘Standby’ modes both mean the ‘neoUltra’ is maintaining a lower temperature to give frost protection for an unlimited time. ‘Away’ would generally be used if a set number of days are applied, or the ‘neoUltra’ is used to set a global ‘Away’ to all zones on a networked system. -
Page 22: Zones
Zones The neoUltra allows you to send commands to other devices on the network, called ‘Zones’ . These include; additional neoUltra units, neostat, neoStatHW, neoStat-E, neoAir & neoPlug. To access these ‘Zones’; • On the main screen tap ‘Zones’ from the shortcut menu ........ - Page 23 • A tick symbol will appear for each zone selected ..........Options • Tap ‘Options’ ......................... • Now select one of the 4 different commands available via the pop-up menu Options for Thermostat and Time Clock For information on how to use ‘Edit, Hold, Lock & Away’ commands please refer to previous sections of this manual.
-
Page 24: Profiles
‘Winter’ and ‘Summer’ . A thermostat will run a particular profile indefinitely or until a new profile is selected. Note: Profiles are only available when the neoUltra is connected to a neoHub. To set a Profile •... -
Page 25: Profiles
• Tap on each required zone to be included in the profile. A tick will appear to indicate selection ..............Next • Tap ‘Next’ ..........................• Now input the times and temperatures using the same method as entering ‘Comfort levels’ . •... -
Page 26: Neoplug
neoPlug Access neoPlugs can be accessed via the ‘Zones’ menu in the same way as the neo Thermostats and Timeclocks. To access neo plugs on the system; Manual On/Off • On the main screen tap ‘Zones’ from the shortcut menu ........Zones The display will show as indicated. -
Page 27: Neoplug
Program Options • Select one of the neoPlugs ..................... • Further tap on individual plug zones or choose ‘Select All’ for multi-zone Select All programming ........................• A tick symbol will appear for each zone selected ........... Options • Tap ‘Options’ ......................... •... -
Page 28: Optional Features
This limit is also applicable when the thermostat is locked and so allows you to give others limited control over the heating system. Sensor Selection: On the neoUltra, you can select which sensor should be used. You can select between air temperature only, floor temperature, or both. When you enable both sensors, the floor sensor is used as a floor limiting sensor and is designed to prevent the floor from overheating. - Page 29 Rate of Change: Number of minutes for 1°C temperature rise (information only). *Temperature Format: This function is used to select between °C and °F. *Device Type: This neoultra can either be used as a thermostat or a time clock. Thermostat mode is the default setting.
- Page 30 To access the ‘Feature Set-up’ menu • From the main screen, press the menu icon followed by ‘Settings’ then ‘Feature Set-up’ ..............• Swipe Up/Down the display to scroll through the menu, then tap on the required feature ........................Save •...
-
Page 31: Feature Menu Options
Feature Menu Options Feature Setting Differential 0.5°, 1.0°, 2.0°, or 3.0° (1.0°C Default) Frost Temperature 7° - 17°C (12°C Default) Output Delay 00 – 15 minutes (00 Default) Up/Down Limit 00° – 10°C (00°C Default) Sensor Selection Built In Air Sensor Remote Air Sensor Floor Sensor Probe Built In Air &... -
Page 32: Re-Calibrating The Thermostat
• Tap save to store new settings ..................Error Codes The neoUltra will display an error code if there is a fault with the temperature sensor, these error codes are explained below. E0 = The internal sensor has developed a fault. -
Page 33: History
History neoUltra will show the total ‘Hours Run’ (heat demand) over a 24-hour period for up to 8 consecutive days. Once connected to a neoHub, neoUltra will also display run time for other neoStat’s, neoStat HW’s and neoplug’s on the network. -
Page 34: Factory Reset
Factory Reset Resetting this device will delete all custom settings and remove itself from a neo network. To reset the device to factory default settings, follow these steps: • From the main screen press the menu tab followed by ‘Settings’ ....•... - Page 35 Wiring Diagram – Volt Free Output TIMER 230V Supply In Live Volt Free Neutral Output Remote Floor Probe Remote Air Probe This product must only be installed by a qualified electrician and comply with local installation regulations. Model:...
-
Page 36: Wiring Diagrams
Wiring Diagram – Switch Live Output TIMER 230V Supply In Live Neutral Switch Live Remote Floor Probe Remote Air Probe This product must only be installed by a qualified electrician and comply with local installation regulations. Series... - Page 37 Wiring Diagram – Switch Live to UH8 TIMER 230V Supply In Remote Floor Probe Remote Air Probe This product must only be installed by a qualified electrician and comply with local installation regulations. Model:...
-
Page 38: Mode 2 - Time Clock
Time Clock Mode Series... -
Page 39: Lcd Display
Main Display Zone Indicator - Displays the zone title once paired to a network via the neo app. Timer Status – Displays the current state of the timed output. Short Cut Tabs – Bypasses the main menu for quick access to the “Away, Profiles, and Zones”... -
Page 40: Setting The Switching Times
Setting the Switching Times The neoUltra offers three program mode options; Weekday/Weekend programming, 7 Day programming and 24 Hour programming. By factory default this unit is supplied with pre-programmed On/Off periods, but these can be changed easily. The default timed settings are;... - Page 41 The ‘Edit’ screen will now show current selected with text highlighted in orange. • “On” is already highlighted ....................• Now tap the arrow keys to set Hours, Minutes and AM/PM for Time ‘1’ On ..• To set Time ‘1’ Off, first select ‘Off’ .................. •...
-
Page 42: Timer Override
Timer Override To override the timed output on, follow these steps. • From the main screen, press the menu icon ............• In the main menu press ‘Hold’ ..................• Using the Up/Down keys select the desired hours and minutes...... •... -
Page 43: Optional Features Explained
NEED NOT BE ADJUSTED *NOTE: SOME FEATURES WILL NOT BE ACCESSIBLE WHEN THIS UNIT IS PAIRED TO A NETWORK! *Device Type: This neoultra can either be used as a thermostat or a time clock. Thermostat mode is the default setting. -
Page 44: Feature Menu Options
Feature Menu Options Feature Setting *Device Type Thermostat or Time Clock (Thermostat Default) *Program Mode 24 Hours 5/2 Day 7 Day Colour Theme Black or White (Black Default) Series... -
Page 45: Wiring Diagrams
Wiring Diagram – Time Clock Mode (S Plan) TIMER End Switch Boiler Enable 230V Supply In Live Neutral Remote Floor Probe Remote Air Probe This product must only be installed by a qualified electrician and comply with local installation regulations. Model:... - Page 46 Wiring Diagram – Time Clock Mode (Mid Position Valve) TIMER Boiler Enable To Heating On 230V Supply In Mid Position Live Valve Neutral Remote Floor Probe Remote Air Probe Hot Water Stat This product must only be installed by a qualified electrician and comply with local installation regulations.
-
Page 47: Replacing The Battery
Replacing the Battery In most cases the 3 volt lithium battery does not need replacing if the thermostat has a continual power supply. Its sole purpose is to ensure correct time keeping during a power loss to the thermostat. To remove the battery use a small flat head screw driver or fingertip to push back the brass retaining bracket. - Page 48 Want More Information? Call our support team on: +44 (0)1254 669090 Or view technical specifications directly on our website: www.heatmiser.com Twitter: @heatmiseruk Facebook: facebook.com/thermostats Rev.1.2...
Need help?
Do you have a question about the neoUltra and is the answer not in the manual?
Questions and answers